
Related Manuals for Daikin RXYTQ8T7YF


Summary of Contents for Daikin RXYTQ8T7YF
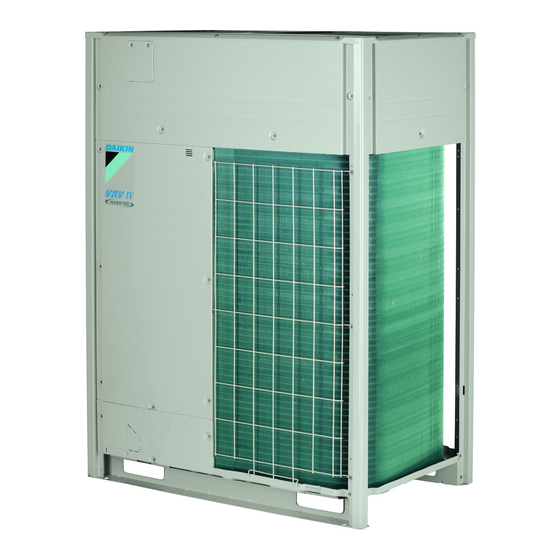
- Page 1 Installation and operation manual VRV IV system air conditioner RXYTQ8T7YF RXYTQ10T7YF RXYTQ12T7YF Installation and operation manual RXYTQ14T7YF English VRV IV system air conditioner RXYTQ16T7YF...
-
Page 2: Table Of Contents
Table of Contents 5.7.7 To connect the power supply ........17 Table of Contents 6 Configuration Making field settings..............18 6.1.1 About making field settings .......... 18 1 About the documentation 6.1.2 Field setting components ..........18 About this document..............6.1.3 To access the field setting components....... -
Page 3: About The Documentation
16 Disposal and-manuals/product-information/ Latest revisions of the supplied documentation may be available on the regional Daikin website or via your dealer. About the documentation The original documentation is written in English. All other languages are translations. About this document... -
Page 4: About The Units And Options
3 About the units and options VRV direct expansion (DX) indoor unit NOTICE User interface (dedicated depending on indoor unit type) User interface (wireless, dedicated depending on indoor If the unit is operated with the transportation stay attached, unit type) abnormal vibration or noise may be generated. -
Page 5: To Select The Piping Size
4 Preparation NOTICE Indoor unit capacity Piping outer diameter size (mm) index Gas pipe Liquid pipe The piping and other pressure-containing parts shall be suitable for refrigerant. Use phosphoric acid deoxidised 290≤x<420 28.6 12.7 seamless copper for refrigerant. 420≤x<640 15.9 ▪... -
Page 6: To Select Refrigerant Branch Kits
4 Preparation Pipe Ø (mm) Minimal thickness t (mm) INFORMATION 15.9 0.99 Reducers or T-joints are field supplied. 19.1/22.2 0.80 NOTICE 28.6 0.99 Refrigerant branch kits can only be used with R410A. 34.9 1.21 41.3 1.43 4.2.4 Multiple outdoor units: Possible layouts ▪... -
Page 7: Preparing Electrical Wiring
5 Installation Then Formula Calculate, by adding the minimum circuit amps of each used unit (according to the table above), multiply the ≤2 m result by 1.1 and select the next higher recommended fuse capacity. Example Combining the RXYTQ30 by using the RXYTQ8, RXYTQ10, and RXYTQ12. -
Page 8: Mounting The Outdoor Unit
5 Installation 8 HP ≥AB 2× (mm) 10~16 HP Minimum foundation Anchor point (4×) 10~16 1076 1302 6× ▪ Fasten the unit in place using four foundation bolts M12. It is best to screw in the foundation bolts until their length remains 20 mm above the foundation surface. -
Page 9: To Connect The Refrigerant Piping To The Outdoor Unit
5 Installation Large knockout hole Drill Points for drilling 5.3.4 Multiple outdoor units: Knockout holes NOTICE Precautions when making knockout holes: Connection Description ▪ Avoid damaging the casing. Front connection Remove the front plate knockout holes to connect. ▪ After making the knockout holes, we recommend you remove the burrs and paint the edges and areas around the edges using repair paint to prevent rusting. -
Page 10: To Remove The Pinched Pipes
5 Installation Tightening torques Stop valve Tightening torque N•m (turn clockwise to close) size (mm) Shaft Valve body Hexagonal Cap (valve Service wrench lid) port Ø9.5 5.4~6.6 4 mm 13.5~16.5 11.5~13.9 Ø12.7 8.1~9.9 18.0~22.0 Ø15.9 13.5~16.5 6 mm 23.0~27.0 Ø19.1 27.0~33.0 8 mm 22.5~27.5 Ø25.4 5.3.7... -
Page 11: Checking The Refrigerant Piping
5 Installation NOTICE Make sure that all indoor units connected to the outdoor unit are powered on. NOTICE Wait until the outdoor unit has finished the initialisation to apply setting [2‑21]. Leak test and vacuum drying Checking the refrigerant piping involves: ▪... -
Page 12: To Perform A Leak Test
5 Installation Valve State of valve To insulate the refrigerant piping Valve A Open After finishing the leak test and vacuum drying, the piping must be Valve B Open insulated. Take into account the following points: Valve C Open ▪ Make sure to insulate the connection piping and refrigerant branch Liquid line stop valve Close kits entirely. -
Page 13: About Charging Refrigerant
5 Installation NOTICE 5.6.3 To determine the additional refrigerant amount If operation is performed within 12 minutes after the indoor and outdoor units are turned on, the compressor will not NOTICE operate before the communication is established in a correct way between outdoor unit(s) and indoor units. The refrigerant charge of the system must be less than 100 ... - Page 14 5 Installation Pre-charging refrigerant Step 1 p < p > Calculate additional refrigerant charge amount: R (kg) Step 2 R410A • Open valves C and B to the liquid line • Execute pre-charging amount: Q (kg) R<Q R>Q Step 3a Refrigerant overcharge happened, recover Step 3b refrigerant to reach R=Q...
-
Page 15: To Charge Refrigerant
5 Installation p < p > 5.6.5 To charge refrigerant Follow the steps as described below. Pre-charging refrigerant 1 Calculate the additional amount of refrigerant to be added using R410A the formula mentioned in "5.6.3 To determine the additional refrigerant amount" on page 13. -
Page 16: Error Codes When Charging Refrigerant
5 Installation Remove burrs 5.6.7 Error codes when charging refrigerant If there are any possibilities that small animals enter the system through the knockout holes, plug the holes with If a malfunction occurs, close valve A immediately. Confirm the packing materials (to be prepared on-site) malfunction code and take corresponding action, "8.1 ... -
Page 17: To Connect The Transmission Wiring
5 Installation Plastic bracket Field supplied clamps 5.7.4 To connect the transmission wiring The wiring from the indoor units must be connected to the F1/F2 (In‑Out) terminals on the PCB in the outdoor unit. Tightening torque of the transmission wiring terminals: Liquid pipe Screw size Tightening torque (N•m) -
Page 18: Configuration
6 Configuration 8 HP Next to making field settings it is also possible to confirm the current operation parameters of the unit. Push buttons and DIP switches Item Description Push buttons By operating the push buttons it is possible to: ▪... -
Page 19: To Access The Field Setting Components
6 Configuration Stage Display When turning on the power supply: flashing as indicated. First checks on power supply are executed (1~2 min). DS1 DS2 BS1 BS2 When no trouble occurs: lighted as indicated X27A (8~10 min). MODE: For changing the set mode Ready for operation: blank display indication as SET: For field setting indicated. -
Page 20: Mode 1: Monitoring Settings
6 Configuration [1‑40] [1‑41] What Shows: Changing the value of the ▪ Once mode 2 is selected (push BS1 selected setting in mode 2 for more than 5 seconds) you can ▪ [1‑40]: The current cooling comfort setting. select the wanted setting. It is done ▪... -
Page 21: To Connect The Pc Configurator To The Outdoor Unit
7 Commissioning [2‑35] Description Checklist before commissioning In case the outdoor unit is installed in the After the installation of the unit, first check the following items. Once lowest position (indoor units are installed on a all below checks are fulfilled, the unit must be closed, only then can higher position than outdoor units) and the the unit be powered up. -
Page 22: About Test Run
8 Troubleshooting Additional refrigerant charge Step Description Cooling stable condition The amount of refrigerant to be added to the unit shall be written on the included "Added refrigerant" plate and Communication check attached to the rear side of the front cover. Stop valve check Installation date and field setting Pipe length check... -
Page 23: Error Codes: Overview
8 Troubleshooting Error codes: Overview Main code Sub code Cause Solution Master Slave 1 Slave 2 Earth leakage detector activated Restart the unit. If problem reoccurs, contact your dealer. High pressure switch was activated Check stop valve situation or (S1PH, S2PH) - A1P (X3A; X4A) abnormalities in (field) piping or airflow over air cooled coil. - Page 24 8 Troubleshooting Main code Sub code Cause Solution Master Slave 1 Slave 2 Liquid temperature sensor (after Check connection on PCB or actuator. subcool HE) malfunction (R5T) - A1P (X30A) Liquid temperature sensor (coil) Check connection on PCB or actuator. malfunction (R4T) - A1P (X30A) Gas temperature sensor (after subcool Check connection on PCB or actuator.
-
Page 25: Technical Data
9 Technical data Main code Sub code Cause Solution Master Slave 1 Slave 2 Connection malfunction over indoor Check if other indoor units have units or type mismatch (R410A, malfunction and confirm indoor unit R407C, RA, Hydrobox, etc) mix is allowed. Connection malfunction over indoor Check if other indoor units have units or type mismatch (R410A,... -
Page 26: Piping Diagram: Outdoor Unit
9 Technical data ABCD Sides along the installation site with obstacles ▪ The installation space required on these drawings are for full load Sides along the installation site with obstacles heating operation without considering possible ice accumulation. If Suction side the location of the installation is in a cold climate, then all ▪... - Page 27 9 Technical data Piping diagram: RXYTQ14+16 (S1NPL) (S1NPH) (S1PH) (S2PH) R22T R21T Compressor (M1C) Compressor (M2C) Heat exchanger Fan motor (M1F, M2F) Accumulator Expansion valve, main (Y1E) Expansion valve, subcool heat exchanger (Y2E) Subcool heat exchanger Oil separator Solenoid valve, oil1 (Y3S) Solenoid valve, oil accumulator (Y2S) 4‑way valve, main (Y1S) Service port, refrigerant charge...
-
Page 28: For The User
10 About the system For the user About the system 12.2 Operating the system The indoor unit part of VRV IV heat pump system can be used for 12.2.1 About operating the system heating/cooling applications. The type of indoor unit which can be used depends on the outdoor units series. -
Page 29: To Operate The System (With Cool/Heat Changeover Remote Control Switch)
12 Operation ▪ The system does not go into operation if the room temperature is Fan only operation low (<20°C). 2 Press the ON/OFF button on the user interface. 12.3.2 To use the dry program (WITHOUT cool/ Result: The operation lamp lights up and the system starts operating. -
Page 30: Setting The Master User Interface
13 Maintenance and service Corner units Maintenance and service Ceiling suspended units NOTICE Never inspect or service the unit by yourself. Ask a Wall-mounted units qualified service person to perform this work. WARNING Never replace a fuse with a fuse of a wrong ampere ratings For the following conditions, a micro computer controls the air flow or other wires when a fuse blows out. -
Page 31: Recommended Maintenance And Inspection
14 Troubleshooting ▪ If repairs to the air conditioner are necessary within the warranty Malfunction Measure period, contact your dealer and keep the warranty card at hand. If the system does not ▪ Check if there is no power failure. Wait operate at all. -
Page 32: Symptoms That Are Not Air Conditioner Troubles
14 Troubleshooting Main code Contents Main code Contents Capacity setting malfunction (indoor) System mismatch. Wrong type of indoor units combined. Indoor unit malfunction. Transmission malfunction between main PCB and sub PCB (indoor) Connection malfunction over indoor units or type mismatch Heat exchanger thermistor malfunction (indoor;... -
Page 33: Vrv Iv System Air Conditioner 4P388987-1C - 2016.02
15 Relocation 14.2.5 Symptom: The fan direction does not 14.2.12 Symptom: Dust comes out of the unit correspond to the setting When the unit is used for the first time in a long time. This is because dust has gotten into the unit. The fan direction does not correspond with the user interface display. - Page 36 4P388987-1 C 0000000F 4P388987-1C 2016.02...
Need help?
Do you have a question about the RXYTQ8T7YF and is the answer not in the manual?
Questions and answers