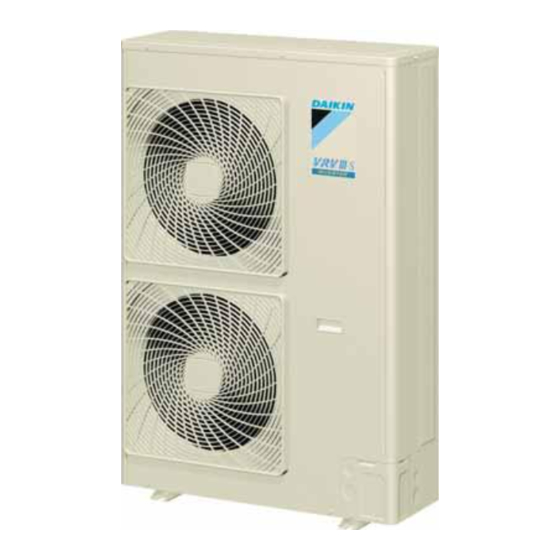
Daikin RXYMQ36PVJU Installation Manual

Daikin RXYMQ36PVJU Installation Manual

Vrv iii-s system air conditioner

Advertisement

RXYMQ36PVJU
RXYMQ48PVJU
Read these instructions carefully before installation.
Keep this manual in a handy place for future reference.
This manual should be left with the equipment owner.
Lire soigneusement ces instructions avant l'installation.
Conserver ce manuel à portée de main pour référence ultérieure.
Ce manuel doit être donné au propriétaire de l'équipement.
Lea cuidadosamente estas instrucciones antes de instalar.
Guarde este manual en un lugar a mano para leer en caso de tener alguna
duda.
Este manual debe permanecer con el propietario del equipo.

INSTALLATION MANUAL

System air conditioner
Acondicionador de aire con sistema VRVIII-S
Installation manual
VRVIII-S System air conditioner
Manuel d'installation
Conditionneur d'air VRV
III-
Manual de instalación
English
Français
S System
Español

Advertisement

Table of Contents
loading
Need help?

Need help?

Do you have a question about the RXYMQ36PVJU and is the answer not in the manual?

Questions and answers

Summary of Contents for Daikin RXYMQ36PVJU

  • Page 1: Installation Manual

    INSTALLATION MANUAL System air conditioner Installation manual English VRVIII-S System air conditioner RXYMQ36PVJU RXYMQ48PVJU Manuel d’installation Français Conditionneur d’air VRV III- S System Manual de instalación Español Acondicionador de aire con sistema VRVIII-S Read these instructions carefully before installation. Keep this manual in a handy place for future reference.
  • Page 2: Figures

    figure 1 figure 2 (in.) figure 3 figure 4 20 or more 40 or 40 or more more 20 or more 40 or more (in.) (in.) figure 5 figure 6 L > H L > H 40 or 40 or more 40 or more...
  • Page 3 40 or 40 or more more L > H (in.) figure 8 (in.) (in.) figure 9 figure 10 figure 14 15/16 (in.) figure 11 figure 12 figure 15 5 1/2 24 3/8 5 1/2 1 3/4 16 5/8 24 1/8 (in.) figure 17 figure 13...
  • Page 4 TO IN/D UNIT TO OUT/D UNIT F2 F1 F2 F1 F2 F1 F2 F1 F2 figure 19 figure 20 figure 18 figure 21 figure 22 figure 23 figure 24 figure 25 figure 26 figure 27 figure 28 figure 29 figure 30...
  • Page 5: Table Of Contents

    RXYMQ36PVJU Installation manual RXYMQ48PVJU VRVIII-S System air conditioner NOTE.....Indicates situations that may result in equipment or CONTENTS property-damage accidents only. 1. SAFETY CONSIDERATIONS..........1 2. INTRODUCTION..............2 DANGER 2-1. Combination ..............3 • Refrigerant gas is heavier than air and replaces oxygen. A mas- 2-2.
  • Page 6: Introduction

    Electromagnetic waves may disturb the operation of the fied by Daikin are used, fire or explosion may occur. control system and cause the unit to malfunction. (d) Where flammable gas may leak, where there is carbon fiber,...
  • Page 7: Figure

    Model name RXYMQ36PVJU RXYMQ48PVJU Remarks • Total capacity/quantity of indoor units 〈Outdoor unit〉 〈Total capacity of indoor units〉 〈Total quantity of indoor units〉 Phase RXYMQ36PVJU ......18 ~ 50 6 units Frequency (Hz) 60Hz RXYMQ48PVJU ......24 ~ 62 8 units...
  • Page 8: Selecting Installation Site

    SELECTING INSTALLATION SITE (7) Space needed for installation <Precautions when installing units in series> (1) Select an installation site where the following conditions are • The direction for interunit piping is either forward or down when satisfied and that meets with your customer’s approval. installing units in series, as shown in the figure.
  • Page 9: Precautions On Installation

    Series installation (up to two units) (Refer to figure 8-[4]) (7)-5 IN CASE OF MULTIPLE-ROW INSTALLATION (FOR ROOF Relation of dimensions of H, A, and L are shown in the table below. TOP USE, ETC.) (in.) In case of installing one unit per row (Refer to figure 10-[1]) In case of installing multiple units (2 units or more) in lateral connec- tion per row (Refer to figure 10-[2]) 0 <...
  • Page 10: Field Wiring

    FIELD WIRING (Refer to figure 15) 1. Branch switch and ground fault circuit interrupter 2. Power supply CAUTION 3. Outdoor unit 4. 16V To the electrician • Do not operate until refrigerant piping work is completed. 5. 208/230V 6. Indoor unit (If operated before complete the piping work, the compressor may be broken down.) 7.
  • Page 11: How To Connect The Power Supply Wiring

    3. Caution on branches in the wiring among units Maximum Rated cur- outdoor unit Model name Frequency Voltage rent for fuses operating current PRECAUTIONS ON REFRIGERANT PIPING RXYMQ36PVJU ~60Hz 208/230V 27.0A CAUTION RXYMQ48PVJU ~60Hz 208/230V 27.0A To the pipe-layer CAUTION •...
  • Page 12: Selecting Piping Material

    Vacuum pump CAUTION • Use extreme caution to prevent pump oil from flowing backwards through the system when the pump is stopped. Do not use a flux when brazing the refrigerant pipe joints. • Use a vacuum pump which can evacuate to –14.6PSI. Use phosphor copper brazing (BCuP-2/B-Cu93P-710/795) which does not require flux.
  • Page 13: Heat Insulation Of Piping

    Refrigerant oil • If a torque wrench is not available, there is a place where the tight- ening torque will suddenly increase if a normal wrench is used to tighten the flare nut. From that position, further tighten the flare nut the angle shown below.
  • Page 14: Example Of Connection

    7-7 Example of connection English...
  • Page 15: Air Tight Test And Vacuum Drying

    7-8 Air tight test and vacuum drying • Since the side boards may be deformed if only a torque wrench is used when loosening or tightening flare nuts, always lock the shutoff After doing the piping, perform the following inspections. valve with a wrench and then use a torque wrench.
  • Page 16: Additional Refrigerant Charge

    ADDITIONAL REFRIGERANT CHARGE 8-2 Checking the refrigerant tank • Check whether the tank has a siphon pipe before charging and place WARNING the tank so that the refrigerant is charged in liquid form. (See the fig- ure below.) • When leaving the unit with the power on, be sure to switch with another person doing the installation or close Tank with siphon pipe Other tanks...
  • Page 17: 10-2.Temperature Control Operation Checklist

    • During the operation, monitor the outdoor unit operation status and 10-2 Temperature control operation checklist check for any incorrect wiring. [Set the master unit (the indoor unit with rights of selection cooling or heating)] 1. Close the outdoor unit’s front panel. Be sure to turn the power on at least Caution Turn the power on for the outdoor...
  • Page 18: Caution For Refrigerant Leaks

    11. CAUTION FOR REFRIGERANT LEAKS [Remote controller displays malfunction code] (Check on a remote controller connected to the indoor unit.) (Points to note in connection with refrigerant leaks) Malfunc- Installation error Remedial action Introduction tion code The installer and system specialist shall secure safety against The shutoff valve of an outdoor Open the gas-side shutoff valve and the leakage according to local regulations or standards.
  • Page 19 4. Dealing with the situations where the result exceeds the maximum concentration level. Where the installation of a facility results in a concentration in excess of the maximum concentration level then it will be necessary to revise the system. Please consult your Daikin supplier. English...
  • Page 20 1645 Wallace Drive, Suite 110 Carrollton, TX 75006 info@daikinac.com www.daikinac.com 3PN07193-6F EM09A020 (0910) HT...

This manual is also suitable for:

Rxymq48pvju

Table of Contents

Save PDF