Advertisement
Advertisement
Table of Contents

Related Manuals for Room essentials 6 drawer dresser


Summary of Contents for Room essentials 6 drawer dresser
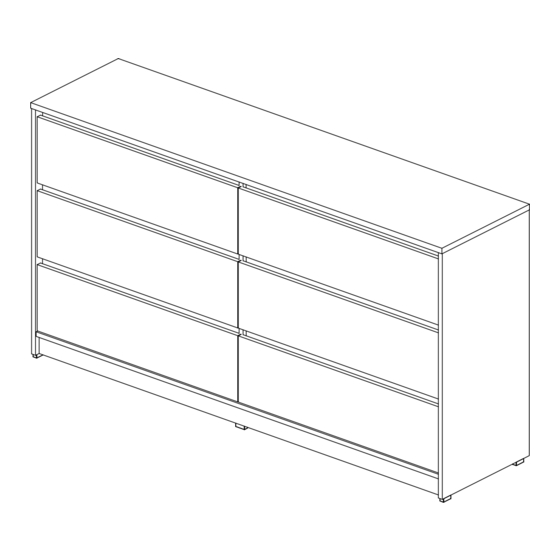
- Page 1 6 drawer dresser DPCI # 249 - 05 - 0102 (Black Woodgrain) DPCI # 249 - 05 - 0105 (Espresso) >> assembly instructions 92336 G...
-
Page 2: Customer Service Information
FREE! Do not go back to your store! wE will hElp you! Missing or Damage parts? have Questions about Assembly? The store where you made this purchase does not stock parts for this item. If you needs parts (damaged or missing) or have questions about assembly, please call our toll free support line. -
Page 3: Introduction
Congratulations on your latest Target purchase Don't start sweating over this box of parts. This will be easy. We did the hard work for you. All you need to do is follow our simple instructions and you'll be on your way to transforming your room in no time. -
Page 4: Table Of Contents
table of contents customer service information introduction parts list hardware 6 - 7 how to use the cam lock system assembly 9 - 31 specification sheet information sheet products available QUESTIONS? Just call 1-855-MYTGTHOME (855-698-4846) for parts and service. For faster service, have the style number and DPCI number ready when calling. -
Page 5: Parts List
ITEM DESCRIPTION QUANTITY 00470 right drawer side 00471 left drawer side 03077 drawer back 08848 07531 drawer bottom 08848 back panel drawer front 08848 bottom panel base rail top panel top rail rail left end panel right end panel divider panel 00471 03077 07531... -
Page 6: Hardware
hardware 12754 20209 13414 20228 10401 21812 drawer fastener corner bracket dowel pin Rectangular foot panel clips spacer 25266 25233 25241 25610 26020 26027 short 1/4" screw flat head screw short flat head screw long flat head screw connector bolt long 1/4"... -
Page 7: Hardware
hardware 88060 94073 97642 31570 41407 cam bolt allen wrench wall attachment strip Drawer Tip Warning Label drawer glide... -
Page 8: How To Use The Cam Lock System
how to use the cam lock system CORRECT CORRECT 180°... -
Page 9: Assembly
step 1 drawer assembly - attach drawer bottom to back 03077 nish side up 07531 paper Press the drawer bottom (with the finished side up) into the grooves on the drawer back. Paper overlays the slot, but it has a slit so drawer bottom inserts well. -
Page 10: Assembly
step 2 drawer assembly - attach drawer side 00470 03077 07531 20228 00471 drawer fastener Align holes at back of the drawer sides, with the holes on the drawer back. Tap drawer fasteners into place with a hammer. - Page 11 step 3 drawer assembly - insert cam bolts 31570 cam bolt Screw cam bolts into the drawer front. Cam bolts must be screwed down flush.
-
Page 12: Drawer Back 6
step 4 drawer assembly - attach drawer front and insert drawer cams 88060 00470 CORRECT CORRECT 03077 nish side up 88060 31685 07531 00471 small cam Drawer Tip Warning Label Place cams in large holes so that the arrow on cam faces the edge of the drawer sides. Make sure the drawer bottom is completely inserted into the grooves in the drawer front and drawer back, then tighten the cams. -
Page 13: Back Panel
step 5 drawer assembly - attach panel clips 00470 07531 03077 10401 00471 panel clips Place back panel clips as shown and press the thin tabs between the back panel and the groove. Tighten the screws but be careful not to over tighten. - Page 14 step 6 case assembly - insert dowel pins 20209 dowel pin Press dowel pins into the holes at the end of the 4 rails (PD) and on the top side of the 2 rails (PC) as shown on the picture.
- Page 15 step 7 case assembly - insert dowel pins and cams CORRECT CORRECT 13414 20209 25233 31686 large cam corner bracket dowel pin short flat head screw Tap the dowel pins into the larger holes at the ends of edges of the bottom panel and base rail. Place the large cam into the holes on the bottom panel.
- Page 16 step 8 case assembly - insert cams and dowel pins CORRECT CORRECT 31570 31686 20209 large cam cam bolt dowel pin Tap the dowel pins into the larger holes at the top and bottom edges of the left end panel. Place the large cam into the holes on the left end panel.
- Page 17 step 9 case assembly - attach drawer glides. front of glide back screw location front screw location back 21812 26027 41407 front (finished edge) bottom spacer 1/4" screw Fully extend drawer glides to the front. Place 1/4" screws through the correct holes for the back and middle screws of the drawer slide, then through the spacers and into the holes on the panel.
- Page 18 step 10 case assembly - insert cams and dowel pins CORRECT CORRECT 31570 31686 20209 large cam cam bolt dowel pin Tap the dowel pins into the larger holes at the top and bottom edges of the right end panel. Place the large cam into the holes on the right end panel.
- Page 19 step 11 case assembly - attach drawer glides front of glide back screw location front screw location front (finished edge) 21812 26027 41407 back bottom spacer 1/4" screw Fully extend drawer glides to the front. Place 1/4" screws through the correct holes for the back and middle screws of the drawer slide, then through the spacers and into the holes on the panel.
- Page 20 step 12 case assembly - insert cams and dowel pins CORRECT CORRECT 20209 31686 large cam dowel pin Tap the dowel pins into the larger holes at the top and bottom edges of the divider panel. Place the large cam into the holes on the divider panel. Make sure the arrow on the cam is toward the edge of the panel.
- Page 21 step 13 case assembly - divider panel front of glide back screw location front screw location back front (finished edge) 26020 41407 bottom short 1/4" screw Fully extend drawer glides to the front of the divider panel. Place 1/4" screws through the correct holes for the back and middle screws of the drawer slide. Tighten screws but do not over tighten.
- Page 22 step 14 case assembly - attach top rail finished front edge 31570 25266 cam bolt long flat head screw Screw the cam bolts into the top panel. Cam bolts must be screwed down flush. Place long flat head screws through holes on top rail. Make sure the finished side of the rail is facing the front. Line up dowel pins with the holes in the top panel, then tighten screws.
- Page 23 step 15 case assembly - attach divider panel to bottom panel finished front edge 97642 25610 allen wrench connector bolt Place the divider panel end over the bottom pannel. Use the allen wrech to install connector bolts.
- Page 24 step 16 case assembly - attach rail and panel finished front edge Two people are needed for this assembly step. Place the cam bolts from the left panel into the holes on the bottom panel and tighten the cams. Place the ends of the two rails into the holes and hold in place.
- Page 25 step 17 case assembly - attach rail and panel Two people are needed for this assembly step. Place the cam bolts from the right panel into the holes on the bottom panel and tighten the cams. Place the ends of the two rails and base rail into the holes and hold in place.
- Page 26 step 18 case assembly - attach back panel and top panel 08848 08848 08848 Attach the back panel by sliding it into the grooves in the side and bottom panel. Attach the top panel by pressing in onto the back panel and by inserting dowel pins and cam bolts into the holes. Make sure dowel pins and cam bolts are completely inserted and then tighten the cams.
- Page 27 step 19 case assembly - attach rectangular feet IMPORTANT: When placing this unit on thick carpet, the addition of 5 rectangular feet is required to improve stability. back For floors with a hard surface or low edge pile carpeting, the additional feet are not necessary.
- Page 28 step 20 case assembly - attach back panel clips and brackets 3" 90° 4" 08848 10401 25233 08848 short flat head screw panel clips Place back panel clips as shown and press the thin tabs between the back panel and the groove. Tighten the screws but be careful not to over tighten.
- Page 29 step 21 case assembly - attach corner bracket 08848 08848 25233 short flat head screw Fasten the middle rail (with corner brackets) to the panels with the short flat head screw.
- Page 30 step 22 case assembly - mount wall attachment strips IMPORTANT. The screw supplied together with the wall attachment strip is to be used only for fixing the wall attachment strip to the furniture. In addition to this, you will need to choose a screw or fitting which is suitable for securing the bracket to the kind of walls you have.
- Page 31 step 23 case assembly - install drawers into case 26214 machine screw Slide groove on drawer sides over the drawer glide. Pull the slide forward until the threaded hole on the glide aligns with the hole in the drawer side. Attach glide screw from inside the drawer box into the drawer glide.
-
Page 32: Specification Sheet
specification sheet 3 YEAR WARRANTY: All Tvilum furniture is warranted to the original purchaser at the time of purchase and for 3 years after the purchase date. We warrant to you, the original purchaser, that our furniture and all furniture parts and components are free of defects in material or workmanship. -
Page 33: Information Sheet
Read more at www.tvilum.com THIS�PRODUCT NOUS�VOUS�GA que ce produit: will ensure you A product tested for harmful substances A été évalué pour toute substance da Helps to maintain healthy indoor climate pour garder un environnement sain à de votre maison Wood from sustainable forestry Est fabriqué... -
Page 34: Products Available
4 drawer dresser 6 drawer dresser...
Need help?
Do you have a question about the 6 drawer dresser and is the answer not in the manual?
Questions and answers