Table of Contents
Advertisement
Quick Links
- 1 Single-Use & Reusable Systems
- 2 Cleaning & Disinfecting
- 3 Procedure 1. Clean a Blade, Video Cable, or Smart Cable
- 4 Procedure 2. Disinfect a Blade, Video Cable, or Smart Cable
- 5 Procedure 3. Sterilize a Blade, Video Cable, or Smart Cable (Optional)
- 6 Procedure 4. Clean & Disinfect the Gliderite Rigid Stylet
- Download this manual
Advertisement
Table of Contents

Related Manuals for GlideScope Titanium


Summary of Contents for GlideScope Titanium
- Page 1 GLIDESCOPE SYSTEM TITANIUM Operations & Maintenance Manual...
- Page 2 0900-4391-09-60...
- Page 3 GLIDESCOPE SYSTEM TITANIUM Operations & Maintenance Manual Effective: May 29, 2015 Caution: Federal (United States) law restricts this device to sale by or on the order of a physician. For customers with Titanium Systems utilizing the GlideScope Video Monitor (Version 0570-0338).
- Page 4 Verathon Inc. GlideRite, GlideScope, the GlideScope symbol, Reveal, Verathon, and the Verathon Torch symbol are trademarks of Verathon Inc. All other brand and product names are trademarks or registered trademarks of their respective owners.
-
Page 5: Table Of Contents
USING THE DEVICE ..............................25 Procedure 1. Prepare the GlideScope System ....................26 Procedure 2. Intubate Using the GlideScope 4-Step Technique ................27 Procedure 3. Use the Record & Snapshot Features (Optional) ................29 Procedure 4. Use the Playback Feature (Optional) ...................31 Operations & Maintenance Manual: Table of Contents... - Page 6 Procedure 3. Sterilize a Blade, Video Cable, or Smart Cable (Optional) ............42 Procedure 4. Clean & Disinfect the GlideRite Rigid Stylet .................43 Procedure 5. Clean the GlideScope Video Monitor ..................46 Procedure 6. Clean the GlideScope Premium Cart ...................46 MAINTENANCE & SAFETY ............................47 Periodic Inspections ..............................47...
-
Page 7: Important Information
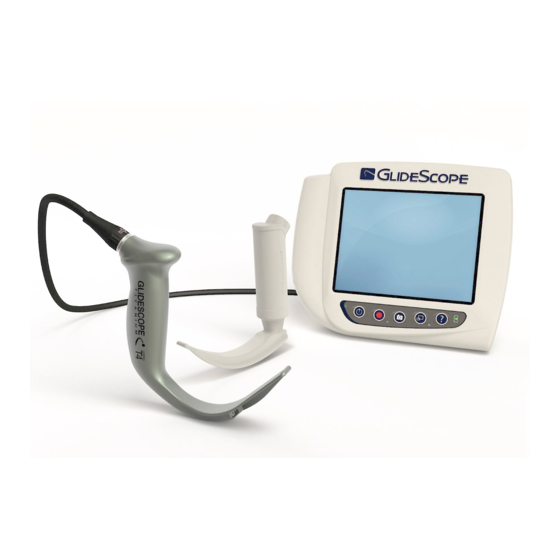
Titanium video laryngoscopes combine innovative blade options, angles, and construction in order ® to enable rapid intubations for more patients in more settings. The GlideScope Titanium system is designed with low profile blades, and the slimmer design allows for more working space in the airway and accommodates smaller mouth openings. -
Page 8: Precautions & Warnings
The GlideScope Titanium system should not be used adjacent to or stacked with other equipment. If adjacent or stacked use is necessary, the GlideScope Titanium system should be observed to verify normal operation in the configuration in which it will be used. - Page 9 Titanium video laryngoscopes to temperatures above 60°C (140°F). Do not use autoclaves or pasteurizers for video cables or reusable Titanium video laryngoscopes. Use of such methods to clean, disinfect, or sterilize the components will cause permanent device damage and void the warranty.
- Page 10 WARNING Because the product will likely be contaminated with human blood or body fluids capable of transmitting pathogens, all cleaning facilities must be in compliance with (U.S.) OSHA Standard 29 CFR 1910.1030 “Bloodborne Pathogens” or an equivalent standard. For more information, visit www.osha.gov.
- Page 11 Note: Typical intubations are less than 1 minute in duration. WARNING The reusable Titanium video laryngoscope is considered a semi-critical device intended to contact the airway. It must be thoroughly cleaned and undergo high-level disinfection after each use. WARNING When you are guiding the endotracheal tube to the distal tip of the video laryngoscope, ensure that you are looking in the patient’s mouth, not at the video monitor screen.
- Page 12 WARNING In order to maintain electrical safety, use only the provided, medical-approved power supply. WARNING To reduce the risk of electrical shock, use only the accessories and peripherals recommended by Verathon ® WARNING No modification of this equipment is allowed. WARNING Electric shock hazard.
-
Page 13: Introduction
This manual details both single-use and reusable system information and notes where the systems differ. In this document, unless otherwise noted, the term video cable describes both the GlideScope Smart Cable for the single-use system and the video cable for the reusable system. -
Page 14: System Parts & Accessories
SYSTEM PARTS & ACCESSORIES Table 1. Required System Components REQUIRED PARTS & ACCESSORIES GlideScope Video Monitor Video cable GlideScope Smart Cable (for reusable system) (for single-use system) Note: Cable shortened for Note: Cable shortened for illustration purposes. illustration purposes. One or more of the following reusable or single-use video laryngoscopes:... - Page 15 Rigid Stylet ® Note: For use with AVL portable stand The monitor is also compatible with GlideScope AVL system blades. For more information, contact Verathon ® Customer Care or see the GlideScope AVL System Operations & Maintenance Manual. TRAINING & INFORMATION PACK The GlideScope Titanium Training and Information Pack contains recommended accessories for the system and reference materials that provide instructions for use.
-
Page 16: Video Laryngoscope Components
(S) or reusable (T) configurations. The LoPro S3 and S4 single-use blades feature the signature GlideScope curve in an easy-to-use, disposable format. The LoPro T3 and T4 reusable blades combine the performance of a GlideScope blade with the strength of titanium, and the MAC blades incorporate the look and feel of traditional Macintosh blades. -
Page 17: Video Monitor Buttons, Icons, & Connections
VIDEO MONITOR BUTTONS, ICONS, & CONNECTIONS The digital, full-color GlideScope Video Monitor clearly displays the images transmitted from the camera in the video laryngoscope. The front of the monitor includes the screen and a keypad with the buttons you use to operate the system. - Page 18 Table 5. On-Screen Icons ICON FUNCTION Battery Status: The remaining battery power is indicated by the Battery Status icon and the percentage above the icon. If the icon is red, the battery should be charged as soon as possible. (See Charge the Monitor Battery.) While the battery is being charged, a lightning bolt will be displayed alongside the Battery Status icon.
- Page 19 Snapshot: On the Playback menu, this icon indicates that a file is a snapshot. Video: On the Playback menu, this icon indicates that a file is a video. Figure 7. GlideScope Video Monitor Back Panel Video-out port: Connect the HDMI-to-DVI cable...
-
Page 20: Setting Up
SETTING UP Before you can use the GlideScope Titanium system for the first time, you must inspect the components, set up the system, and perform a functional test as recommended by Verathon . Complete the following procedures: ® Perform Initial Inspection—Inspect the system for any obvious physical damage that may have occurred... -
Page 21: Procedure 2. Mount The System (Optional)
IV pole mount ATTACH THE MONITOR TO THE CART OR IV POLE 1. If you are using the GlideScope premium cart or AVL portable stand, assemble it according to the instructions included with the component. 2. If you are using an IV pole mount, place the mounting bracket on the IV pole, and then tighten the bracket attachment knob until the IV pole mount is secure. - Page 22 3. On the cart mount or the IV pole mount, ensure that the locking pin and quick-release lever are in the unlocked (horizontal) position. Quick-release lever in unlocked position Locking pin in unlocked position 4. Using the orientation shown in the following images, screw the quick-release locking plate to the back panel of the monitor.
- Page 23 7. Adjust the locking pin to the locked (down) position. This secures the quick-release lever in the locked position. Locking pin in locked position ADJUST THE MONITOR ANGLE Before you start using the video monitor, adjust the angle of the monitor for optimal viewing. The ideal angle minimizes glare and maximizes visibility.
-
Page 24: Procedure 3. Charge The Monitor Battery
CHARGE THE MONITOR BATTERY WARNING In order to maintain electrical safety, use only the provided, medical-approved power supply. The GlideScope Video Monitor includes an internal lithium battery. Verathon recommends that you charge the ® battery fully prior to first use. -
Page 25: Procedure 4. Attach The Video Cable & Blade
ATTACH THE VIDEO CABLE & BLADE The video cable attaches the video laryngoscope to the GlideScope Video Monitor, supplying power to the blade and transmitting video data from the camera to the monitor. This procedure provides options for single-use and reusable systems—complete the option appropriate for your configuration. - Page 26 3. Align the arrow on the Smart Cable with the dot on the single-use blade port, and then insert the connector fully into the port. 4. To disconnect the GlideScope Smart Cable from the monitor, rotate the connector ring in the direction of the release arrow, and then remove the connector from the port.
-
Page 27: Procedure 5. Connect To An External Monitor (Optional)
WARNING The external monitor must be safety-approved medical equipment. By using an HDMI-to-DVI cable, you can connect the GlideScope Video Monitor to an external monitor that is approved for medical use. For more information, please contact your Verathon Customer Care representative. -
Page 28: Procedure 6. Configure User Settings
The second page of user settings, as seen in Figure 13, displays system-use information, and it does not contain any configurable settings. Figure 12. User Settings Screen Page 1 Figure 13. User Settings Screen Page 2 GlideScope User Settings GlideScope User Settings Monitor Scope UBL Version: UBoot Version:... -
Page 29: Procedure 7. Perform A Functional Check
Customer Care representative if your GlideScope ® Titanium system does not function as described below. 1. Fully charge the monitor battery (this takes approximately 6 hours). 2. Attach the video cable and video laryngoscope to the monitor, according to the instructions in Attach the Video Cable &... - Page 30 9. Wait until the Saving File icon has disappeared from the screen, and then remove the USB flash drive from the monitor. 10. On a computer, verify that the recorded video (.avi) file can be played. Note: If you are viewing the recorded file on a Windows operating system (OS), use an application such as ®...
-
Page 31: Using The Device
Use only a passive-type USB flash drive. Do not use USB drives powered by another external source. Reusable Titanium video laryngoscopes are equipped with the Reveal™ anti-fog feature, which reduces camera fogging during the intubation procedure. To fully optimize the feature, you must allow the reusable video laryngoscope to warm up for 30-120 seconds prior to use, depending on the ambient temperature and humidity of the clinical environment. -
Page 32: Procedure 1. Prepare The Glidescope System
6. On the monitor screen, verify that the image displayed is from the video laryngoscope camera. A small portion of the blade may be visible on the upper-left corner or top of the monitor screen. 7. If you are using a reusable blade and if needed, allow the GlideScope Reveal™ anti-fog feature to warm up for 30–120 seconds. -
Page 33: Procedure 2. Intubate Using The Glidescope 4-Step Technique
Note: Typical intubations are less than 1 minute in duration. To perform an intubation, Verathon recommends using the GlideScope 4-Step Technique as outlined in this ® procedure. Each step begins with where the user should be looking to complete that action. Prior to beginning this procedure, verify that the monitor is receiving an accurate image from the video laryngoscope. - Page 34 1. Look in the Mouth: With the video laryngoscope in the left hand, introduce it into the midline of the oral pharynx. 2. Look at the Screen: Identify the epiglottis, and then manipulate the blade in order to obtain the best glottic view. Figure 14.
-
Page 35: Procedure 3. Use The Record & Snapshot Features (Optional)
The GlideScope Titanium system is equipped with video and audio recording features and the ability to save a snapshot of the live display on the monitor. The GlideScope Titanium system saves this data to a USB flash drive, and you can view the recordings or snapshots on the video monitor or a computer. - Page 36 5. If at any point you would like to save a photo of the live display to the USB flash drive, press the Snapshot button , and then wait for the Saving Snapshot icon to disappear. Note: If you remove the USB flash drive before the Saving Snapshot icon disappears, the photo will be lost. 6.
-
Page 37: Procedure 4. Use The Playback Feature (Optional)
USE THE PLAYBACK FEATURE (OPTIONAL) Recorded videos and snapshots on a USB flash drive can be viewed on the GlideScope Video Monitor. 1. On the back of the monitor, remove the USB port cap, and then insert a USB flash drive into the port. -
Page 38: Cleaning & Disinfecting
Cleaning, disinfection, and sterilization methods listed are recommended by Verathon based on efficacy or compatibility with component materials. WARNING The reusable Titanium video laryngoscope is considered a semi-critical device intended to contact the airway. It must be thoroughly cleaned and undergo high-level disinfection after each use. WARNING Ensure that you follow the manufacturer’s instructions for handling or disposing of the cleaning,... - Page 39 Cleaning and disinfecting the GlideScope Titanium system is an important part of using and maintaining the system. Prior to each use, ensure that each system component has been cleaned, disinfected, or sterilized according to the guidance provided in Table The availability and regulatory compliance of the cleaning, disinfection, and sterilization products provided in this manual vary by region;...
-
Page 40: Procedure 1. Clean A Blade, Video Cable, Or Smart Cable
Use this procedure in order to clean the GlideScope Smart Cable, video cable, or reusable Titanium video laryngoscope. By reducing as many hard-to-access areas as possible, all of the reusable GlideScope Titanium blades have been designed to be easy to clean. - Page 41 Table 8. Cleaning Methods for Video Cables, Smart Cables, and Reusable Video Laryngoscopes CHEMICAL LEVEL COMPONENT CYCLES* CONDITIONS Water temperature: 33–40°C (91–104°F) Exposure: Spray all surfaces until drenched. Allow to remain wet for 3 minutes. Brush all surfaces. Blade 3000 Rinse: Rinse for 5 minutes under running water. While rinsing, use a soft-bristled brush and a syringe to flush and brush any hard-to-reach areas.
- Page 42 Rinse: N/A. Allow the component to thoroughly air dry. Value indicates number of compatibility cycles tested on the component. Exceeding the recommended number of cycles may affect the potential life of the product. Do not use this solution to clean a GlideScope Smart Cable. †...
- Page 43 If you are cleaning a single-use system, detach the cable from the blade by holding the GlideScope Smart Cable connector in one hand and the blade handle in the other, and then pulling. Dispose of the single-use blade.
- Page 44 Note: If you are using a wipe method, allow the component to thoroughly air dry. 14. Examine the component for any signs of damage. Reusable titanium blades should not have any signs of damage other than minor surface scratches or discoloration of the metal as the result of use. If damage is present, do not use the component, and contact Verathon Customer Care.
-
Page 45: Procedure 2. Disinfect A Blade, Video Cable, Or Smart Cable
Before each use, reusable video laryngoscopes must be high-level disinfected, and video cables and Smart Cables must be low-level disinfected. Use the following instructions to disinfect the GlideScope Smart Cable, video cable, or reusable Titanium video laryngoscope. Not all chemical solutions listed in... - Page 46 DISINFECTION CHEMICAL COMPONENT CYCLES* CONDITIONS LEVEL Standard cycles in the following processors: Blade STERIS SYSTEM 1 (outside U.S.) ® ® STERIS S40™ ® Video Cable High SYSTEM 1E (in U.S.) ® or S20™ SYSTEM 1 EXPRESS (outside U.S.) Smart Cable SYSTEM 1 PLUS (outside U.S.) Conditioning: 20°C (68°F) or higher Water Temperature: 20°C (68°F) or higher...
- Page 47 Note: If you are using a wipe method, allow the component to thoroughly air dry. 6. Examine the component for any signs of damage. Reusable titanium blades should not have any signs of damage other than minor surface scratches or discoloration of the metal as the result of use. If damage is present, do not use the component, and contact Verathon Customer Care.
-
Page 48: Procedure 3. Sterilize A Blade, Video Cable, Or Smart Cable (Optional)
3. Sterilize the component according to the manufacturer’s instructions or according to the conditions stated in Table 4. Examine the component for any signs of damage. Reusable titanium blades should not have any signs of damage other than minor surface scratches or discoloration of the metal as the result of use. If damage is present, do not use the component, and contact Verathon Customer Care. -
Page 49: Procedure 4. Clean & Disinfect The Gliderite Rigid Stylet
PROCEDURE 4. CLEAN & DISINFECT THE GLIDERITE RIGID STYLET The GlideRite Rigid Stylet is a reusable device that requires cleaning and either high-level disinfection or ® sterilization prior to use. In this procedure, the term pure water refers to water that is suitable for disinfection according to local regulations and your medical facility. - Page 50 METHOD LEVEL CYCLES* CONDITIONS Conditioning: 20°C (68°F) or higher Water Temperature: 20°C (68°F) or higher ® High 3000 Exposure: Soak for 12 minutes, ensuring that all air bubbles Cidex ® are removed from the surface of the component. Rinse: (3) 1-minute immersions with agitation in pure water. Conditioning: 20°C (68°F) or higher Water Temperature: 20°C (68°F) or higher Metrex...
- Page 51 CLEAN THE STYLET 1. Using the water temperature specified in Table 11, rinse the stylet in clean tap water and scrub it with a soft-bristled brush until all visible contamination has been removed. 2. Prepare one of the approved cleaning solutions in Table 11 according to the solution manufacturer’s instructions.
-
Page 52: Procedure 5. Clean The Glidescope Video Monitor
Clean the video monitor when it is visibly soiled and on a regular basis, as per a schedule established by the medical care facility or provider. 1. Turn off the GlideScope Video Monitor, and then unplug the device. 2. Using 70% isopropyl alcohol (IPA),* Metrex CaviWipes™,* AHP... -
Page 53: Maintenance & Safety
Phone: 800.331.2313 (U.S. and Canada) +1.425.867.1348 (International) Email: customerservice@verathon.com ELUTION COMPATIBILITY For use with GlideScope Titanium reusable blades, Verathon has completed testing of compatibility with a ® 1% sodium dodecyl sulphate (SDS) solution with pH 11.0. The SDS solution is commonly utilized in Europe as an eluting solution to collect residual protein samples from medical tools or devices that are cleaned after contacting patient tissue. -
Page 54: System Software
Customer Care for all servicing needs. DEVICE DISPOSAL The GlideScope Titanium instrument and related devices may contain batteries and other environmentally hazardous materials. When the instrument has reached the end of its useful service life, it must be disposed of in accordance with WEEE requirements. -
Page 55: Warranty
WARRANTY Verathon includes a one-year warranty when you buy a GlideScope Titanium system. You may also purchase a ® Premium Customer Care warranty that extends your warranty from the date of purchase. ORIGINAL FIRST YEAR TOTAL CUSTOMER CARE WARRANTY Verathon warrants the GlideScope Titanium system against defects in material and workmanship. This warranty applies for one (1) year from the date of shipment from Verathon. - Page 56 The information, descriptions, recommendations, and safety notations in this manual are based upon Verathon experience and judgment with GlideScope systems. The contents of this manual should not be considered to be all-inclusive or to cover all contingencies.
-
Page 57: Product Specifications
PRODUCT SPECIFICATIONS SYSTEM SPECIFICATIONS, STANDARDS, & APPROVALS Table 13. Titanium System Specifications GENERAL SPECIFICATIONS Classification: Electrical Class II, Applied Part BF Line voltage: Range: 100–240 VAC, 50 and 60 Hz. Connect to a medical-grade power supply DC power supply: 12V DC, 2.5A max Fuse: Internal 2.5A hold / 5A trip, 15V max... -
Page 58: Component Specifications
Weight: 1.0 kg VIDEO CABLE (REUSABLE SYSTEM) 2190 ± 55 (cable length) Cable length: 2190 ± 55 mm Diameter: 5.4 mm 5.4 (diameter) GLIDESCOPE SMART CABLE (SINGLE-USE SYSTEM) 1540 ± 50 (cable length) Length: 1540 ± 50 mm Diameter: 5.4 mm 5.4 (diameter) GLIDERITE RIGID STYLET ®... - Page 59 GLIDESCOPE PREMIUM CART Wheelbase: 53.3 cm Min. height: 101.6 cm Max. height: 132.1 cm Weight: 8.0–8.4 kg AVL PORTABLE CART Wheelbase diameter: 61 cm Min. height: 76 cm Max. height: 122 cm Operations & Maintenance Manual: Product Specifications...
- Page 60 LOPRO T3 (REUSABLE SYSTEM) 72 (blade tip to handle) Height at handle: 10.8 mm Height at camera: 10.5 mm Blade tip to handle: 72 mm Width at camera: 20 mm 10.8 (height at handle) 10.5 (height at camera) 20 (width at camera) LOPRO T4 (REUSABLE SYSTEM) 91 (blade tip to handle) Height at handle: 11.0 mm Height at camera: 10.0 mm...
- Page 61 MAC T3 (REUSABLE SYSTEM) 107 (blade tip to handle) Height at handle: 14.5 mm Height at camera: 9.6 mm Blade tip to handle: 107 mm Width at camera: 22 mm 14.5 (height at handle) 9.6 (height at camera) 22 (width at camera) MAC T4 (REUSABLE SYSTEM) 128 (blade tip to handle) Height at handle: 13.4 mm...
- Page 62 LOPRO S3 (SINGLE-USE SYSTEM) 74 (blade tip to handle) Height at handle: 11.0 mm Height at camera: 11.0 mm Blade tip to handle: 74 mm Width at camera: 20 mm 11.0 (height at handle) 11.0 (height at camera) 20 (width at camera) LOPRO S4 (SINGLE-USE SYSTEM) 91 (blade tip to handle) Height at handle: 12.0 mm Height at camera: 11.3 mm...
- Page 63 MAC S3 (SINGLE-USE SYSTEM) 107 (blade tip to handle) Height at handle: 14.3 mm Height at camera: 11.2 mm Blade tip to handle: 107 mm Width at camera: 22 mm 14.3 (height at handle) 11.2 (height at camera) 22 (width at camera) MAC S4 (SINGLE-USE SYSTEM) 127 (blade tip to handle) Height at handle: 13.4 mm...
-
Page 64: Battery Specifications
BATTERY SPECIFICATIONS Table 15. Battery Specifications CONDITION DESCRIPTION Battery type Lithium-ion Under normal operating conditions, a fully charged battery lasts approximately Battery life 90 minutes Charging time off line will take no more than 6 hours from an empty battery to a Charging time full charge Rated capacity... -
Page 65: Electromagnetic Compatibility
Guidance and Manufacturer’s Declaration—Electromagnetic Emissions The GlideScope Titanium system is intended for use in the electromagnetic environment specified below. The customer or the user of the GlideScope Titanium system should assure that it is used in such an environment. EMISSIONS TEST COMPLIANCE ELECTROMAGNETIC ENVIRONMENT –... - Page 66 Guidance and Manufacturer’s Declaration —Electromagnetic Immunity The GlideScope Titanium system is intended for use in the electromagnetic environment specified below. The customer or the user of the GlideScope Titanium system should assure that it is used in such an environment. COMPLIANCE...
- Page 67 RF transmitters, an electromagnetic site survey should be considered. If the measured field strength in the location in which the GlideScope Titanium system is used exceeds the applicable RF compliance level above, the GlideScope Titanium system should be observed to verify normal operation.
-
Page 68: Recommended Separation Distances
The GlideScope Titanium system is intended for use in an electromagnetic environment in which radiated RF disturbances are controlled. The customer or the user of the GlideScope Titanium system can help prevent electromagnetic interference by maintaining a minimum distance between portable and mobile RF communications equipment (transmitters) and the GlideScope Titanium system as recommended below, according to the maximum output power of the communications equipment. -
Page 69: Symbol Directory
SYMBOL DIRECTORY The following table explains the symbols used with the system in order to indicate safety information, instructions for use, and compliance with standards and regulations. Table 20. Directory of Symbols SYMBOL MEANING Warnings & Cautions Warning or Caution—Consult accompanying documents. Read instructions before connecting or operating. - Page 70 SYMBOL MEANING Humidity limitation Atmospheric pressure limitation Statement of prescription USB flash drive for media storage Sterilized using ethylene oxide Non sterile Reuse is not allowed Shipping Fragile item, handle carefully Keep dry Handle with care This way up Quantity per box Stacking limit by number—Indicates that the items are not to be vertically stacked higher than the specified number of items Shipping box is made of corrugated cardboard and should be recycled accordingly...
- Page 71 SYMBOL MEANING Electrical & Power Class II equipment Type BF applied part Energy Efficiency Level IV Connector polarity mark Direct current Alternating current Standards & Certifications CE—Marked in accordance with the Medical Device Directive (MDD) CSA—Canadian Standards Association mark of certification to applicable standards for electromedical equipment EC REP—Authorized Representative in the European Community TUV—Safety approval mark for components or subassemblies...
-
Page 72: Glossary
GLOSSARY TERM DEFINITION Ampere Alternating current Automated endoscope reprocessor Celsius Code of Federal Regulations (U.S.) CISPR International Special Committee on Radio Interference Centimeter Canadian Standards Association Direct laryngoscopy Electromagnetic interference Electrostatic discharge Essential performance The system performance necessary to achieve freedom from unacceptable risk Fahrenheit Gram Gigahertz... - Page 73 TERM DEFINITION Radio frequency Relative humidity Restriction of the Use of Certain Hazardous Substances in Electrical and RoHS Electronic Equipment Sodium dodecyl sulphate Volt Vrms Voltage root mean squared Watt WEEE Waste electrical and electronic equipment Operations & Maintenance Manual: Glossary...
Need help?
Do you have a question about the Titanium and is the answer not in the manual?
Questions and answers
how doI adjusts the brightness of the screen on the new double image glidescope . The picture appears to dark. thanks