Table of Contents
Advertisement
Advertisement
Table of Contents

Related Manuals for Fisher FSAI-SU-90AE2


Summary of Contents for Fisher FSAI-SU-90AE2
-
Page 1: Service Manual
SERVICE MANUAL Room Air Conditioner Split Wall-Mounted Type FSAI-SU-90AE2 / FSOAI-SU-90AE2 FSAI-SU-120AE2 / FSOAI-SU-120AE2 NOTE: Before servicing the unit, please read this at first. Always contact with your service center if meet problem. FI_SM_FSAI-SU-90-120AE2_150903... -
Page 2: Table Of Contents
CONTENTS 1. Precaution .............................. 3 1.1 Safety Precaution .......................... 3 1.2 Warning ............................3 2. Function ..............................7 3. Dimension .............................. 8 3.1 Indoor Unit ............................. 8 3.2 Outdoor Unit ..........................10 4. Diagrams ............................... 11 4.1 Refrigerant Cycle Diagram......................11 4.2 Wiring Diagram ........................... -
Page 3: Precaution
1. Precaution 1.1 Safety Precaution To prevent injury to the user or other people and property damage, the following instructions must be followed. Incorrect operation due to ignoring instruction will cause harm or damage. Before service the unit, be sure to read this service manual at first. 1.2 Warning ... - Page 4 For installation, always contact the dealer or an authorized service center. Do not install the product on a defective installation stand. Be sure the installation area does not deteriorate with age. If the base collapses, the air conditioner could fall with it, causing property damage, product failure, and personal injury.
- Page 5 Do not open the inlet grill of the product during operation. (Do not touch the electrostatic filter, if the unit is so equipped.) There is risk of physical injury, electric shock, or product failure. When the product is soaked, contact an authorized service center. There is risk of fire or electric shock.
- Page 6 Operational Do not expose the skin directly to cool air for long time. (Do not sit in the draft). Do not use the product for special purposes, such as preserving foods, works of art etc. It is a consumer air conditioner, not a precision refrigerant system. There is risk of damage or loss of property.
-
Page 7: Function
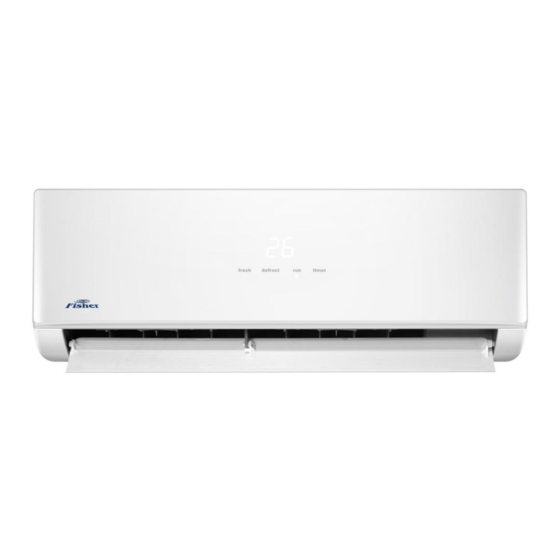
2. Function Model Names of Indoor/Outdoor Units Capacity Indoor units Outdoor units FSAI-SU-90AE2 FSOAI-SU-90AE2 Inverter FSAI-SU-120AE2 FSOAI-SU-120AE2... -
Page 8: Dimension
3. Dimension 3.1 Indoor Unit Model FSAI-SU-90AE2 FSAI-SU-120AE2... - Page 9 Dimension of installation Model L(mm) R(mm) H(mm) hole(mm) FSAI-SU-90AE2 ¢65 FSAI-SU-120AE2...
-
Page 10: Outdoor Unit
3.2 Outdoor Unit More than 30cm More than 60cm (Service space) More than 30cm More than 60cm More than 200cm Model FSOAI-SU-90AE2 FSOAI-SU-120AE2... -
Page 11: Diagrams
4. Diagrams 4.1 Refrigerant Cycle Diagram INDOOR OUTDOOR CHECK VALVE LIQUID SIDE (Heating Model only) 2-WAY VALVE T3 Condenser temp. sensor CAPILIARY TUBE HEAT EXCHANGE HEAT (EVAPORATOR) T4 Ambient T1 Room temp. EXCHANGE temp. sensor sensor (CONDENSER) T2 Evaporator temp. sensor GAS SIDE 4-WAY VALVE 3-WAY VALVE... -
Page 12: Wiring Diagram
4.2 Wiring Diagram Indoor unit FSAI-SU-90AE2 , FSAI-SU-120AE2 Outdoor unit FSOAI-SU-90AE2... - Page 13 Outdoor unit FSOAI-SU-120AE2...
-
Page 14: Installation Details
5 Installation Details 5.1 Wrench torque sheet for installation Outside diameter Torque Additional tightening torque inch N.cm N.cm Ф6.35 1500(153kgf.cm) 1600(163kgf.cm) Ф9.52 2500(255kgf.cm) 2600(265kgf.cm) 5.2 Connecting the cables The power cord of connect should be selected according to the following specifications sheet. Rated capacity kBTU/h Nominal cross-sectional area (mm²) The cable size and the current of the fuse or switch are determined by the maximum current indicated... -
Page 15: Pipe Length And The Elevation
Elevation Length refrigerant B (m) A (m) (g/m) Liquid FSAI-SU-90AE2 / FSOAI-SU-90AE2 3/8’’ 1/4’’ (Ф9.52) (Ф6.35) FSAI-SU-120AE2 / FSOAI-SU-120AE2 Caution: The capacity test is based on the standard length and the maximum permissive length is based on the system reliability. -
Page 16: Installation For The First Time
5.4 Installation for the first time Air and moisture in the refrigerant system have undesirable effects as below: ● Pressure in the system rises. ● Operating current rises. ● Cooling or heating efficiency drops. ● Moisture in the refrigerant circuit may freeze and block capillary tubing. ●... - Page 17 1) Completely tighten the flare nuts of the indoor and outdoor units, confirm that both the 2-way and 3-way valves are set to the closed position. 2) Connect the charge hose with the push pin of handle lo to the 3-way valves gas service port.. 3) Connect the charge hose of handle hi connection to the vacuum pump.
- Page 18 2. Air purging by refrigerant Procedure: 1). Confirm that both the 2-way and 3-way valves are set to the closed position. 2). Connect the charge set and a charging cylinder to the service port of the 3-way valve. 3). Air purging. Open the valves on the charging cylinder and the charge set.
- Page 19 Be sure to use a torque wrench to tighten the service port cap to a torque 18N·m. Be sure to check the gas leakage. 3. Adding the refrigerant if the pipe length >5m Electronic scale Procedure: 1). Connect the charge hose to the charging cylinder, open the 2-way valve and the 3-way valve. Connect the charge hose which you disconnected from the vacuum pump to the valve at the bottom of the cylinder.
-
Page 20: Adding The Refrigerant After Running The System For Many Years
Be sure to check for gas leakage. 5.5 Adding the refrigerant after running the system for many years Electronic scale Procedure: 1). Connect the charge hose to the 3-way service port, open the 2-way valve and the 3-way valve. Connect the charge hose to the valve at the bottom of the cylinder. If the refrigerant is R410A, make the cylinder bottom up to ensure liquid charge. -
Page 21: Re-Installation While The Indoor Unit Need To Be Repaired
Be sure to check for gas leakage. 5.6 Re-installation while the indoor unit need to be repaired 1. Collecting the refrigerant into the outdoor unit Procedure 1). Confirm that both the 2-way and 3-way valves are set to the opened position Remove the valve stem caps and confirm that the valve stems are in the opened position. - Page 22 Be sure to check for gas leakage. 2. Air purging by the refrigerant Procedure: 1). Confirm that both the 2-way and 3-way valves are set to the closed position. 2). Connect the charge set and a charging cylinder to the service port of the 3-way valve Leave the valve on the charging cylinder closed.
-
Page 23: Re-Installation While The Outdoor Unit Need To Be Repaired
Be sure to use a hexagonal wrench to operate the valve stems. 7). Mount the valve stems nuts and the service port cap Be sure to use a torque wrench to tighten the service port cap to a torque 18N.m. Be sure to check the gas leakage. - Page 24 2. Refrigerant charging Electronic scale Procedure: 1). Connect the charge hose to the charging cylinder, open the 2-way valve and the 3-way valve Connect the charge hose which you disconnected from the vacuum pump to the valve at the bottom of the cylinder.
- Page 25 Use torque wrench to tighten the service port cap to a torque of 18N.m. Be sure to check for gas leakage...
-
Page 26: Operation Characteristics
6. Operation Characteristics Temperature Cooling operation Heating operation Drying operation Mode Room temperature 17°C~ 32°C 0°C~≤30°C 10°C~32°C Outdoor temperature -15°C~50°C -15°C~30°C 0°C~50°C CAUTION: 1. If the air conditioner is used beyond the above conditions, certain safety protection features may come into operation and cause the unit to operate abnormally. 2. -
Page 27: Electronic Function
7. Electronic function 7.1 Abbreviation T1: Indoor room temperature T2: Coil temperature of evaporator T3: Coil temperature of condenser T4: Outdoor ambient temperature T5: Compressor discharge temperature 7.2 Display function 7.2.1 Icon explanation on indoor display board. It has no function on this unit fresh DEFROST indication lamp(For cooling &... -
Page 28: Main Protection
7.3 Main Protection 7.3.1 Time delay at restart for compressor Less than 1 minute delay for the 1 time start-up and 3 minutes delay for others. 7.3.2 Temperature protection of compressor top The unit will stop working when the compressor top temp. protector cut off, and will restart after the compressor top temp. - Page 29 7.3.10 Zero crossing detection error protection If AC detects time interval is not correct, the unit will stop and the LED will display the failure.
-
Page 30: Operation Modes And Functions
7.4 Operation Modes and Functions 7.4.1 Fan mode (1) Outdoor fan and compressor stop. (2) Temperature setting function is disabled, and no setting temperature is displayed. (3) Indoor fan can be set to high/med/low/auto. (4) The louver operates same as in cooling mode. (5) Auto fan: 7.4.2 Cooling Mode 7.4.2.1 Compressor running rules... - Page 31 7.4.2.3 Indoor fan running rules In cooling mode, indoor fan runs all the time and the speed can be selected as high, medium, low and auto. When the setting temp. is reached,if the compressor stop running,indoor fan motor will run in Minimum speed or setting speed.
- Page 32 7.4.3 Heating Mode 7.4.3.1 Compressor running rules When T1-Ts>ΔT, the compressor will stop, when T1-T <ΔT-1.5 the compressor will be on. ΔT is the programmed parameter of temperature compensation. When the current is more than setting value,the current protection function will be activated and the compressor will stop.
- Page 33 Setting fan T1-Td+ΔT℃ Actual fan speed speed H-(H-=H-G) H(=H) H+(H+=H+G) M-(M-=M-Z) M(M=M) M+(M+=M+Z) L-(L-=L-D) L(L=L) L+(L+=L+D) Auto fan action in heating mode: T 1 - T d + ¦ ¤ T 7.4.3.4 Defrosting mode AC will enter the defrosting mode according to the value of temp. of T3 and the value range of temp. change of T3 and also the compressor running time.
- Page 34 stop. 7.4.4 Auto-mode This mode can be chosen with remote controller and the setting temperature can be changed between 17~30℃. In auto mode, the machine will choose cooling, heating or fan-only mode according to ΔT (ΔT =T1-Ts). T1-Ts Cooling Fan only Heating* Indoor fan will run at auto fan of the relevant mode.
- Page 35 7.4.5.4 The outdoor fan operates the same as in cooling mode. 7.4.6 Forced operation function 7.4.6.1 Enter forced operation function: When the machine is off, pressing the touch button will carry the machine to forced auto mode. If pressing the button once again within 5 seconds, the machine will turn into forced cooling mode. In forced auto, forced cooling or any other operation mode, pressing touch button will turn off the machine.
- Page 36 The PCB will detect the voltage of power supply and adjust the compressor running frequency to protect the system.
- Page 37 7.4.10 Point check function Press the LED button of the remote controller three times, and then press the AIR DIRECTION or SWING button three times in ten seconds, the buzzer will keep ring for two seconds. The air conditioner will enter into the information enquiry status. You can press the LED DISPLAY or AIR DIRECTION button to check the next or front item’s information.
- Page 38 Enquiry Display value Meaning Remark information T1,T2,T3,T4, -1F,-1E,-1d,-1c,- -25,-24,-23,-22,-21,-2 1. All the displaying temperature is actual T2B,TP,TH, 1b,-1A value. Targeted 2. All the temperature is °C no matter what -19—99 -19—99 Frequency, kind of remote controller is used. A0,A1,…A9 100,101,…109 Actual 3.
-
Page 39: Troubleshooting
8. Troubleshooting 8.1 Indoor Unit Error Display Operation lamp Timer lamp Display LED STATUS ☆ 1 time Indoor unit EEPROM parameter error ☆ 2 times Indoor / outdoor units communication error ☆ 3 times Zero-crossing signal detection error ☆ 4 times Indoor fan speed has been out of control Open circuit or short circuit of indoor room temperature T1 ☆... - Page 40 8.2 Diagnosis and Solution 8.2.1 EEPROM parameter error diagnosis and solution(E0) EEPROM: a read-only memory whose contents can be erased and reprogrammed using a pulsed voltage.
- Page 41 8.2.2 Indoor unit and outdoor unit communication protection error diagnosis and solution (E1)
- Page 42 8.2.3 Zero crossing detection error diagnosis and solution(E2) 8.2.4 Fan speed has been out of control diagnosis and solution (E3/F5)
- Page 43 Index1: 1:Indoor or Outdoor DC Fan Motor(control chip is in fan motor) Power on and when the unit is in standby, measure the voltage of pin1-pin3, pin4-pin3 in fan motor connector. If the value of the voltage is not in the range showing in below table, the PCB must has problems and need to be replaced.
- Page 44 8.2.5 Open circuit or short circuit of temperature sensor diagnosis and solution (E4/E5/F1/F2/F3) Check the connection between temperature Correct the connection sensor and PCB. Measure the resistance Repalce the sensor value of the sensor Replace indoor or outdoor main PCB...
- Page 45 8.2.6 Refrigerant Leakage Detection diagnosis and solution (EC)
- Page 46 8.2.7 IPM malfunction or IGBT over-strong current protection diagnosis and solution(P0)
- Page 47 8.2.8 Over voltage or too low voltage protection diagnosis and solution(P1)
- Page 48 8.2.9 High temperature protection of compressor top diagnosis and solution(P2)
- Page 49 8.2.10 Inverter compressor drive error diagnosis and solution(P4)
- Page 50 Safety Electricity power is still kept in capacitors even the power supply is shut off. Do not forget to discharge the electricity power in capacitor. Electrolytic Capacitors (HIGH VOLTAGE! CAUTION!) Connect discharge resistance (approx.100Ω 40W) or soldering iron (plug) between +, - terminals of the electrolytic capacitor on the contrary side of the outdoor PCB.
- Page 51 Temperature Sensors. Room temp.(T1) sensor, Indoor coil temp.(T2) sensor, Outdoor coil temp.(T3) sensor, Outdoor ambient temp.(T4) sensor, Compressor discharge temp.(T5) sensor. Measure the resistance value of each winding by using the multi-meter. Table 1: Some frequently-used R-T data for T1,T2,T3 and T4 sensor: Temperature (℃) Resistance Value (KΩ) 26.9...
- Page 52 Spec. Code 2T0032301001 2T0032500828 Model FSAI-SU-90AE2 / FSOAI-SU-90AE2 FSAI-SU-120AE2 / FSOAI-SU-120AE2 Compressor ASK89D53UEZ ASK89D53UEZ Indoor fan motor RPG20E RPG20E WZDK36-38G-W WZDK36-38G-W Outdoor fan motor (★) (★) Note: The motor marked “★”means DC fan motor with control chip in the PCB...
- Page 53 2. Compressor checking Measure the resistance value of each winding by using the tester. Position Resistance Value ASK89D53UEZ ASN108D22UEZ DA130M1C-31FZ DA150S1C-20FZ Blue - Red Blue - 2.45Ω 1.5Ω 1.77Ω 0.95Ω Black (20℃) (20℃) (20℃) (20℃) Red - Blue 3.IPM continuity check Turn off the power, let the large capacity electrolytic capacitors discharge completely, and dismount the IPM.
- Page 54 Position Resistance Value RPG20E Black - Red 430Ω±8% (20℃) 388Ω±8% (20℃) (Brand: Dayang) (Brand: Weiling) White - Black 370Ω±8% (20℃) 360Ω±8% (20℃) (Brand: Dayang) (Brand: Weiling)
Need help?
Do you have a question about the FSAI-SU-90AE2 and is the answer not in the manual?
Questions and answers