Table of Contents
Advertisement
This service information is designed for experienced repair technicians only and is not designed for use by the general public.
It does not contain warnings or cautions to advise non-techical individuals of potential dangers in attempting to service a product.
Products powered by electricity should be serviced or repaired only by experienced professional technicians. Any attempt to service
or repair the product or products dealt with in this service information by anyone else could result in serious injury or death.
CONTENTS
--------------------------------------------------------
------------------------------------------------------
------------------------------------------
-----------------------------------------------------
--------------------------------------------------
-------------------------------------------------
-----------------------------------------------
-----------------------------------
---------------------------------------------------
R
R
WARNING
Page
2
3
6
10
12
13
14
15
25
35
C
(GMAC) All rights reserved. Unauthorized copying
and distribution is violation of law.
Order No. GMAC0505043C3
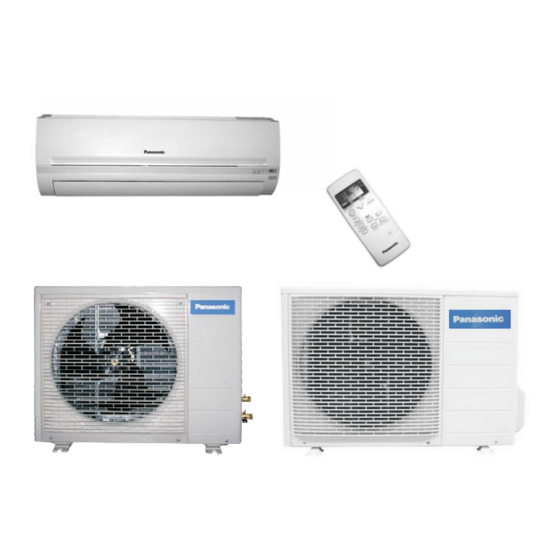
Air Conditioner
CS-PV9DKE
CU-PV9DKE
CS-PV12DKE
CU-PV12DKE
--------------------------------------
----------------------------------------
--------------------------------------------------
--------------------------------------------------
-----------------------------------------
--------------------------------------------------
-----------------------------------------
--------------------------------------------------
-----------------------------------------
--------------------------------------
Guangzhou Matsushita Air Conditioner Co., Ltd.
Page
46
49
51
52
53
54
55
56
57
58
Advertisement
Table of Contents

Related Manuals for Panasonic CS-PV9DKE


Summary of Contents for Panasonic CS-PV9DKE
-
Page 1: Table Of Contents
Order No. GMAC0505043C3 Air Conditioner CS-PV9DKE CU-PV9DKE CS-PV12DKE CU-PV12DKE WARNING This service information is designed for experienced repair technicians only and is not designed for use by the general public. It does not contain warnings or cautions to advise non-techical individuals of potential dangers in attempting to service a product. -
Page 2: Features
CS-PV9DKE / CU-PV9DKE / CS-PV12DKE / CU-PV12DKE 1 Features Enviromental Friendly (For Refrigerant : R410A Model) High Efficiency Zero ozone depleting potential and low global Air Quality Indicator warming potential by using R410A refrigerant. Auto Restart Control Automatically restart after power failure... -
Page 3: Functions
CS-PV9DKE / CU-PV9DKE / CS-PV12DKE / CU-PV12DKE 2 Functions Remote Control TEMP OFF/ON Room Temperature Setting Operation START/STOP Turn on/off the air conditionor Coolling, Soft Dry, Air Circulation Operation When stop the operation by pressing Temperature Setting(16 to 30 ) - Page 4 CS-PV9DKE / CU-PV9DKE / CS-PV12DKE / CU-PV12DKE Indoor Unit Auto Switch Button Power Switch ON/OFF 7-Minutes Time Save Control When the remote control cannot be used or 7-minutes automatic restarting at Cooling for repairing and testing ,please use this Operation button.
- Page 5 CS-PV9DKE / CU-PV9DKE / CS-PV12DKE / CU-PV12DKE Outdoor Unit (CU-PV9DKE) (CU-PV12DKE) Anti-reverse Protection 60-seconds Test Operation Control To protect the compressor from reverse Once the compressor is activated, it does not stop for 60 seconds. It stops rotation when power off suddenly.
-
Page 6: Product Specifications
CS-PV9DKE / CU-PV9DKE / CS-PV12DKE / CU-PV12DKE 3 Product Specifications Unit CS-PV9DKE CU-PV9DKE 2.65 Cooling Capacity Moisture Removal Single Phase Power Source Cycle Airflow Method OUTLET SIDE VIEW TOP VIEW INTAKE Air Circulation Indoor Air (low) m /min m /min... - Page 7 CS-PV9DKE / CU-PV9DKE / CS-PV12DKE / CU-PV12DKE Unit CS-PV9DKE CU-PV9DKE Evaporator Condenser Description Heat copper copper Tube Material Exchanger slot type Corrugation type Fin Type Rows/Stage (Plate fin configuration,forced draft) 2 x 15 1 x 24 610x252x25.4 575.8x504x12.7 Dimensions Refrigerant Control Device...
- Page 8 CS-PV9DKE / CU-PV9DKE / CS-PV12DKE / CU-PV12DKE Unit CS-PV12DKE CU-PV12DKE 3.52 Cooling Capacity Moisture Removal Single Phase Power Source Cycle Airflow Method OUTLET SIDE VIEW TOP VIEW INTAKE Air Circulation Indoor Air (low) m /min m /min Indoor Air (medium)
- Page 9 CS-PV9DKE / CU-PV9DKE / CS-PV12DKE / CU-PV12DKE Unit CS-PV12DKE CU-PV12DKE Evaporator Condenser Description Heat copper copper Tube Material Exchanger slot type Corrugation type Fin Type Rows/Stage (Plate fin configuration,forced draft) 2 x 15 1 x 24 610x252x25.4 732.1x504x12.7 Dimensions Refrigerant Control Device...
-
Page 10: Dimensions
CS-PV9DKE / CU-PV9DKE / CS-PV12DKE / CU-PV12DKE 4 Dimensions Indoor Unit CS-PV9DKE CS-PV12DKE Unit : mm Side view Front View Air intake Right Piping Hole Air outlet Left Piping Hole Gas Side <Back View> Installation Plate Hook Liquid Side (100) - Page 11 CS-PV9DKE / CU-PV9DKE / CS-PV12DKE / CU-PV12DKE Outdoor Unit CU-PV9DKE Unit : mm <Top View> 61.6 Required space for installation Air intake 10cm 10cm 100cm Air outlet <Front View> <Side View> 55.8 61.6 CU-PV12DKE <Top View> 10cm or more 10cm...
-
Page 12: Refrigeration Cycle Diagram
CS-PV9DKE / CU-PV9DKE / CS-PV12DKE / CU-PV12DKE 5 Refrigeration Cycle Diagram CS/CU-PV9DKE CS/CU-PV12DKE INTAKE AIR INTAKE AIR AIR QUALITY SENSOR SENSOR SENSOR PIPING PIPING SENSOR SENSOR... -
Page 13: Block Diagram
CS-PV9DKE / CU-PV9DKE / CS-PV12DKE / CU-PV12DKE 6 Block Diagram CS-PV9DKE/CU-PV9DKE CS-PV12DKE/CU-PV12DKE O.L.P. -
Page 14: Wiring Diagram
CS-PV9DKE / CU-PV9DKE / CS-PV12DKE / CU-PV12DKE 7 Wiring Diagram CS-PV9DKE/CU-PV9DKE CS-PV12DKE/CU-PV12DKE Wireless Remote Control Indicator ELECTRONIC CONTROLLER Complete STEPPING MOTOR FAN MOTOR POWER SUPPLY POWER SUPPLY CORD CORD AC /230V AC /230V 50Hz 50Hz SENSOR(PIPING TEMP.) AC(WHT) AUTO SWITCH... -
Page 15: Operation Details
CS-PV9DKE / CU-PV9DKE / CS-PV12DKE / CU-PV12DKE 8 Operation Details Cooling Mode Operation When selecting the Cooling Mode Operation, the unit will operate according to the setting by the Remote Controller or the control panel on the indoor unit and the operation is as the following. -
Page 16: Soft Dry Mode Operation
CS-PV9DKE / CU-PV9DKE / CS-PV12DKE / CU-PV12DKE Time Graph for Cooling Operation a b c d e f g h i j k l m n o p q r s t u v w x y z Intake air temperature... -
Page 17: Cooling Mode Operation
CS-PV9DKE / CU-PV9DKE / CS-PV12DKE / CU-PV12DKE Automatic Fan Speed During Soft Dry Operation, use remote controller to select Auto Fan Speed mode. Indoor Fan Speed is at “Lo-” Indoor Compressor Time Graph for soft dry operation a b c d e f... -
Page 18: Automatic Mode Operation
CS-PV9DKE / CU-PV9DKE / CS-PV12DKE / CU-PV12DKE 8.3. Automatic Mode Operation Standard for Determining Operation Mode First Determination: Setting Temperature (Standard) Cooling mode Intake Air Cooling mode temperature Soft Dry mode Soft Dry mode Second Determination: One hour after the above determination, the unit will operate according to the table below. - Page 19 CS-PV9DKE / CU-PV9DKE / CS-PV12DKE / CU-PV12DKE 8.5 Air Quality Sensor Control Resistance of air quality sensor: Rs(air)=10k ~50k ( The worse the air quality, the smaller the resistance.) Basic Operation Detecting and indicating of the air quality will not stop during the operation of the air conditioner.
- Page 20 CS-PV9DKE / CU-PV9DKE / CS-PV12DKE / CU-PV12DKE Detecting of air quality( When the air conditioner is on standby.) (a) After the air conditioner stops operation, it will provides power to the air quality sensor intermittently to detect the air quality and update the resistance reference (MAXR). The power of the air quality sensor will be on for 3 minutes after each 109 minutes.
- Page 21 CS-PV9DKE / CU-PV9DKE / CS-PV12DKE / CU-PV12DKE Forced Resetting Forced Resetting Time (The added operation time mentioned later not included.) (a) Air Pollution Level 2: Red: 5 minutes Orange: 8 minutes Green (B) Air Pollution Level 1: Red: 5 minutes...
- Page 22 CS-PV9DKE / CU-PV9DKE / CS-PV12DKE / CU-PV12DKE 8.6 Demo Mode ( Outdoor unit not needed) Activate the demo mode: Keep the AUTO button on the indoor Tu r n o f f t h e a i r Demo mode operation will be...
-
Page 23: Indoor Fan Motor Control
CS-PV9DKE / CU-PV9DKE / CS-PV12DKE / CU-PV12DKE About Cursor Key Which Points To “OFF” On Remote Control When the ON/OFF button on the remote control is pressed, the cursor key which points to “OFF” will appear or disappear to indicate the ON/OFF status of the air conditioner. -
Page 24: Airflow Direction Control
CS-PV9DKE / CU-PV9DKE / CS-PV12DKE / CU-PV12DKE 8.11. Airflow Direction Control Airflow Direction Auto-control When set at airflow direction auto-control with remote control,the louver swings up and down as shown in the table below. The louver does not swing when the indoor fan stops during operation. -
Page 25: Installation Instructions
CS-PV9DKE / CU-PV9DKE / CS-PV12DKE / CU-PV12DKE 9 Installation Instructions Required tools for Installation Works 1. Philips screw driver 5. Spanner 9. Gas leak detector 13. Multimeter 2. Level gauge 6. Pipe cutter 10. Measuring tape 14. Torque wrench 18 N.m (1.8 kgf.m) 42 N.m (4.2 kgf.m) - Page 26 CS-PV9DKE / CU-PV9DKE / CS-PV12DKE / CU-PV12DKE 1. The equipment must be earthed. It may cause electrical shock if grounding is not perfect. 2. Do not install the unit at place where leakage of flammable gas may occur. In case gas leaks and accumulates at surrounding of the unit, it may cause fire.
-
Page 27: Attached Accessories
CS-PV9DKE / CU-PV9DKE / CS-PV12DKE / CU- PV12DKE Indoor/Outdoor Unit Installation Diagram Attached accessories. Accessories part Qty. Installation plate Indoor/Outdoor Unit Installation Diagram Length of power supply cord Piping direction Attention not to Installation plate fixing screw (Front side) bend up drain hose Right About 1.1 m... -
Page 28: Indoor Unit Installation
CS-PV9DKE / CU-PV9DKE / CS-PV12DKE / CU-PV12DKE 9.2. INDOOR UNIT 9.2.1. SELECT THE BEST LOCATION 9.2.3. TO DRILL A HOLE IN THE WALL (Refer to “Select the best location” AND INSTALL A SLEEVE OF section) PIPING 1. Insert the piping sleeve to the hole. - Page 29 CS-PV9DKE / CU-PV9DKE / CS-PV12DKE / CU-PV12DKE...
- Page 30 CS-PV9DKE / CU-PV9DKE / CS-PV12DKE / CU-PV12DKE 9.2.5. CONNECT THE CABLE TO THE INDOOR UNIT 1. The inside and outside connecting cable can be connected without removing the front grille. 2. Connecting cable between indoor unit and outdoor unit shall...
-
Page 31: Install The Outdoor Unit
CS-PV9DKE / CU-PV9DKE / CS-PV12DKE / CU-PV12DKE 9.3. OUTDOOR UNIT HOW TO TAKE OUT FRONT GRILL E 9.3.1. SELECT THE BEST LOCATION Please follow the steps below to take out front grille if (Refer to “Select the best location” necessary such as when servicing. - Page 32 CS-PV9DKE / CU-PV9DKE / CS-PV12DKE / CU-PV12DKE CUTTING AND FLARING THE PIPING 1. Please cut using pipe cutter and then remove the burrs. 2. Remove the burrs by using reamer. If burrs is not removed, gas leakage may be caused.
-
Page 33: Connect The Cable To The Outdoor Unit
CS-PV9DKE / CU-PV9DKE / CS-PV12DKE / CU-PV12DKE 9.3.5. (b) AIR PURGING OF THE PIPING AND INDOOR UNIT The remaining air in the Refrigeration cycle which contains moisture may cause malfunction on the compressor. 1. Remove the caps from the 2-way and 3-way valves. - Page 34 CS-PV9DKE / CU-PV9DKE / CS-PV12DKE / CU-PV12DKE CHECK THE DRAINAGE CHECK ITEMS Open front panel and remove air filters. Is there any gas leakage at flare nut connections? (Drainage checking can be carried out without removing the Has the heat insulation been carried out at flare nut front grille.)
-
Page 35: Installation And Serving Air Conditioner Using R410A
CS-PV9DKE / CU-PV9DKE / CS-PV12DKE / CU-PV12DKE Installation and Serving Air Conditioner Using R410A 10.1. OUTLINE 10.1.1 About R410A Refrigerant 1. Converting air conditioners to R410A Since it was declared in1974 that chlorofluorocarbons (CFC), hydro chlorofluorocarbons (HCFC) and other substances pose a destructive danger to the ozone layer in the earth´s upper stratosphere (20 to 40 km above the earth), measures have been... - Page 36 CS-PV9DKE / CU-PV9DKE / CS-PV12DKE / CU-PV12DKE d. R410A refrigerating machine oil Conventionally, mineral oil or a synthetic oil such as alkylbenzene has been used for R22 refrigerating machine oil. Because of the poor compatibility between R410A and conventional oils like mineral oil, however, there is a tendency for the refrigerating machine oil to collect in the refrigerating cycle.
-
Page 37: R410A Tools
CS-PV9DKE / CU-PV9DKE / CS-PV12DKE / CU-PV12DKE 10.2.2. R410A Tools 1. Cooper tube gauge for clearance adjustment (used when flaring with the conventional flaring tool (clutch type)) ı ı ı ı ˇ ı ˇ ı ˇ ı ˇ ı T his gauge makes it easy to set the clearance for the copper tube to 1.0-1.5 mm from the clamp bar of the... - Page 38 CS-PV9DKE / CU-PV9DKE / CS-PV12DKE / CU-PV12DKE 5. Charging hose ı ı ı ı ˇ ı ˇ ı ˇ ı ˇ ı T he pressure resistance of the charging hose has been raised to match the higher pressure of R410A. The hose...
- Page 39 CS-PV9DKE / CU-PV9DKE / CS-PV12DKE / CU-PV12DKE 8. Electronic scale for refrigerant charging ı ı ı ı ˇ ı ˇ ı ˇ ı ˇ ı B ecause of the high pressure and fast vaporizing speed of R410A, the refrigerant cannot be held in a liquid...
-
Page 40: Refrigerant Piping Work
CS-PV9DKE / CU-PV9DKE / CS-PV12DKE / CU-PV12DKE 10.3. REFRIGERANT PIPING WORK 10.3.1. Piping Materials It is recommended that you use copper and copper alloy jointless pipes with a maximum oil adherence of 40 mg/10m. Do not used pipes that are crushed, deformed, or discolored (especially the inside surface). If these inferior pipes are used, impurities may clog the expansion valves or capillaries. - Page 41 CS-PV9DKE / CU-PV9DKE / CS-PV12DKE / CU-PV12DKE Table 11 R410A flaring dimensions Nominal Outside Wall thickness A (mm) diameter diameter (mm) R410A flaring Conventional flaring tool (in) (mm) tool, clutch type Clutch type Wing-nut type 6.35 0 - 0.5 1.0 - 1.5 1.5 - 2.0...
-
Page 42: Refrigerant Piping
CS-PV9DKE / CU-PV9DKE / CS-PV12DKE / CU-PV12DKE b. Copper pipes Use only copper pipes with the thickness given in table 10, and with minimal impurities. Because the surface of the pipe is exposed, you should take special care, and also take measures such as marking the pipes to make sure they are easily distinguished from other piping materials, to prevent mistaken use. - Page 43 CS-PV9DKE / CU-PV9DKE / CS-PV12DKE / CU-PV12DKE 10.4.2. Transferring (Using New Refrigerant Piping) 1. Removing the unit a. Collecting the refrigerant into the outdoor unit by pumping down The refrigerant can be collected into the outdoor unit (pumping down) by pressing the TEST RUN button, even when the temperature of the room is low.
- Page 44 CS-PV9DKE / CU-PV9DKE / CS-PV12DKE / CU-PV12DKE 5. Set the refrigerant cylinder onto the electronic scale, then correct the hose the cylinder and to the connection port for the electronic scale. (1)(2) Precau tion: Be sure to set up the cylinder for liquid charging. If you use a cylinder equipped with a siphon tube, you can charge the liquid without having to turn the cylinder around 6.
- Page 45 CS-PV9DKE / CU-PV9DKE / CS-PV12DKE / CU-PV12DKE <Brazing Method for Preventing Oxidation> 1. Attach a reducing valve to the nitrogen gas cylinder. 2. Attach a reducing valve to the nitrogen gas cylinder. 3. Apply a seal onto the clearance between the piping and inserted pipe for the nitrogen gas in order to prevent the nitrogen gas from flowing backward.
-
Page 46: Disassembly Of The Parts
CS-PV9DKE / CU-PV9DKE / CS-PV12DKE / CU-PV12DKE 11 Disassembly of the parts Removal Procedure For Intake Grille 1. Open the intake grille and pull it to the horizontal position. (Fig. 1) Opener Fig. 1 2. Pull up the intake grille until it falls off.(Fig. 2) Fig. - Page 47 CS-PV9DKE / CU-PV9DKE / CS-PV12DKE / CU-PV12DKE Removal Procedure For Electronic Controller 1 Remove indicador complete Afer removing the front grille, loose the screw behind the indicator, the whole indicator can be released. Indicator Complete Fig 6 2 Remove the cover of control board and holder 3 Break off the earing ,release the holder slightly.
- Page 48 CS-PV9DKE / CU-PV9DKE / CS-PV12DKE / CU-PV12DKE Removal Procedure For Cross Flow Fan fixing board Release the two fixing screws,disassembly the fixing board from evaporator on the left side of the evaporator and pull out the whole evaporator. (Fig. 12) Screw Fig.
-
Page 49: Troubleshooting Guide
CS-PV9DKE / CU-PV9DKE / CS-PV12DKE / CU-PV12DKE 12 Troubleshooting Guide 12.1. Refrigeration cycle system Normal pressure and outlet air temperature(standard) In order to diagnose malfunctions, make sure that there are no Outlet air Gas side pressure electrical problems before inspecting the refrigeration cycle. -
Page 50: Diagnosis Methods Of A Malfunction Of A Compressor
CS-PV9DKE / CU-PV9DKE / CS-PV12DKE / CU-PV12DKE 12.2. Relationship between the condition of air conditioner and pressrue and electric current Cooling mode Condition of the air Low pressure High pressure Electric current conditioner during operation Insufficient refrigerant (gas leakage) Clogged capillary... -
Page 51: Technical Data
CS-PV9DKE / CU-PV9DKE / CS-PV12DKE / CU-PV12DKE 13 Technical Data Thermostat characteristics Cooling mode Soft dry mode Cooling on Compressor on Cooling off set temperature Compressor off= Set temperature Soft Dry off(=Comp off) in difference in difference in difference 30 ( ) -
Page 52: Exploded View
CS-PV9DKE / CU-PV9DKE / CS-PV12DKE / CU-PV12DKE 14 Exploded View CS-PV9DKE CS-PV12DKE... -
Page 53: Replacement Parts List
CS-PV9DKE / CU-PV9DKE / CS-PV12DKE / CU-PV12DKE 15 Replacement Parts List CS-PV9DKE CS-PV12DKE DESCRIPTION&NAME Q'ty CS-PV9DKE CS-PV12DKE CHASSIS COMPLETE CWD50C1427 CWD50C1427 FAN MOTOR CWA921098 CWA921098 CROSS FLOW FAN COMPLETE CWH02C1036 CWH02C1036 EVAPORATOR CWB30C1736 CWB30C1738 FIXING BOARD CWD661044 CWD661044 TUBE ASS'Y... -
Page 54: Exploded View
CS-PV9DKE / CU-PV9DKE / CS-PV12DKE / CU-PV12DKE 16 Exploded View CU-PV9DKE... -
Page 55: Replacement Parts List
CS-PV9DKE / CU-PV9DKE / CS-PV12DKE / CU-PV12DKE 17 Replacement Parts List CU-PV9DKE DESCRIPTION&NAME Q'ty CU-PV9DKE BASE ASS'Y CWD52K1140A HOLDER-FAN MOTOR CWD541072 SCREW-F.M. HOLDER XTT4D10CFJ FAN MOTOR CWA951427 FIXING SCREW-FAN MOTOR CWH55406J PROPELLER FAN CWH03K1025 NUT-P.FAN CWH561036J COMPRESSOR CWB092240 MOUNT RUBBER(COMP.) CWH501022 NUT-COMP.MOUNT... -
Page 56: Exploded View
CS-PV9DKE / CU-PV9DKE / CS-PV12DKE / CU-PV12DKE 18 Exploded View CU-PV12DKE... -
Page 57: Replacement Parts List
CS-PV9DKE / CU-PV9DKE / CS-PV12DKE / CU-PV12DKE 19 Replacement Parts List CU-PV12DKE DESCRIPTION&NAME Q'ty CU-PV12DKE BASE ASS'Y CWD50K2128A HOLDER-FAN MOTOR CWD541020 SCREW-F.M. HOLDER CWH551060J FAN MOTOR CWA951440 FIXING SCREW-FAN MOTOR CWH55406J PROPELLER FAN CWH03K1010 NUT-P.FAN CWH56053J COMPRESSOR CWB092241 MOUNT RUBBER(COMP.) CWH50077 NUT-COMP.MOUNT... -
Page 58: Electronic Circuit Diagram
CS-PV9DKE / CU-PV9DKE / CS-PV12DKE / CU-PV12DKE CS/CU-PV9DKE CS/CU-PV12DKE OUTDOOR UNIT OUTDOOR UNIT TERMINAL BOARD Capacitor FAN MOTOR COMPRESSOR CAPACITOR NUMBER JUMPER JUMPER JUMPER NONE NONE NONE JUMPER NONE... - Page 59 CS-PV9DKE / CU-PV9DKE / CS-PV12DKE / CU-PV12DKE INTP2 INTP2 INTP1 INTP1 IC 1 IC 1 INTP0 INTP0 Vss1 Vss1 A52D00760648 Vss0 Vss0 Vdd0 Vdd0 RESET RESET Avrof Avrof An10 An10...
- Page 60 CS-PV9DKE / CU-PV9DKE / CS-PV12DKE / CU-PV12DKE...
Need help?
Do you have a question about the CS-PV9DKE and is the answer not in the manual?
Questions and answers