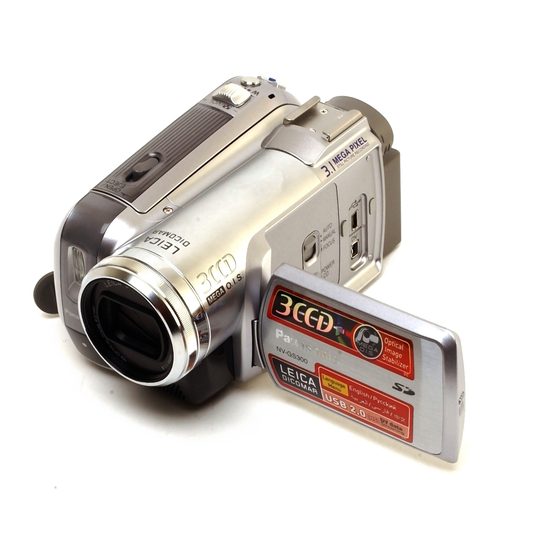
Panasonic e.cam NV-GS300 Operating Instructions Manual
Digital video camera
Hide thumbs
Also See for e.cam NV-GS300:
- Operating instructions manual (140 pages) ,
- How to use manual (12 pages) ,
- Specifications (6 pages)

Related Manuals for Panasonic e.cam NV-GS300


Summary of Contents for Panasonic e.cam NV-GS300
-
Page 1: Operating Instructions
Operating Instructions Digital Video Camera NV-GS300 Model No. Before use, please read these instructions completely. VQT0T29... -
Page 2: Information For Your Safety
Information for your safety As this equipment gets hot during use, operate it in a well-ventilated place; do not install this equipment in a confined space such as a bookcase or similar unit. To reduce the risk of fire, electric shock or product damage, do not expose this equipment to rain, moisture, dripping or splashing and ensure that no objects... - Page 3 -If you see this symbol- Information on Disposal in other Countries outside the European Union This symbol is only valid in the European Union. If you wish to discard this product, please contact your local authorities or dealer and ask for the correct method of disposal.
-
Page 4: Table Of Contents
Contents Information for your safety ... 2 Before using Accessories... 5 Optional... 5 Parts identification and handling ... 5 Fitting the lens cap (VW-LF37WE; optional) ... 8 The one-touch free-style grip belt ... 8 Power supply ... 9 Charging time and recordable time ... 10 Turning the camera on... -
Page 5: Before Using
Before using Accessories The followings are the accessories supplied with this product. VSB0484 1) AC adaptor, DC input lead, AC mains lead 2) Battery pack 3) Remote control, button-type battery 4) Free style remote control 5) Multi cable -46- 6) Shoulder strap 7) Digital video head cleaner 8) USB cable and CD-ROM Before using... - Page 6 Speaker -40- Audio-video/S-Video output terminal [A/V] -46- ≥Use the supplied Multi cable only, otherwise audio may not be played back normally. (10) Terminal for free style remote control [REMOTE] -23- Microphone terminal [MIC] ≥A compatible plug-in powered microphone can be used as an external microphone. ≥When the movie camera is connected with AC adaptor, sometimes noise may be heard depending on microphone type.
- Page 7 (36) (36) Tripod receptacle This is a hole for attaching the camera to optional tripod/VW-CT45E. (Please carefully read the operating instructions for how to attach the tripod to the camera.) ≥When the tripod is used, operate the camera from the free style remote control for convenience.
-
Page 8: Fitting The Lens Cap (Vw-Lf37We; Optional)
Fitting the lens cap (VW-LF37WE; optional) Fit the lens cap to protect the surface of the lens. The lens cap is included in the Filter Kit (VW-LF37WE; optional). If you do not use the movie camera when the MC protector or the ND filter of the Filter Kit (VW-LF37WE;... -
Page 9: Power Supply
Charge the battery before using this product. ≥Battery charging time ( -10- ≥We recommend using Panasonic batteries. ≥If you use other batteries, we cannot guarantee the quality of this product. ≥If the DC input lead is connected to the AC adaptor, then the battery will not get charged. -
Page 10: Charging Time And Recordable Time
Charging time and recordable time The times shown in the tables below are for when the temperature is 25 oC and the humidity is 60%. If the temperature is higher or lower than 25 oC, the charging time will become longer. Supplied battery/ CGA-DU12... -
Page 11: Setting Date And Time
ª How to turn the power on and off with the LCD monitor/viewfinder When the power switch is set to [ON], the power can be turned on and off with the LCD monitor and the viewfinder when the unit is in Tape Recording Mode or Card Recording Mode. -
Page 12: Using The Lcd Monitor
WARNING THE LITHIUM BATTERY IN THIS UNIT MUST ONLY BE REPLACED BY QUALIFIED PERSONNEL. IF THIS IS NECESSARY, CONTACT THE PANASONIC CUSTOMER CARE CENTRE ON 132600 FOR YOUR NEAREST AUTHORIZED SERVICE CENTRE. Using the LCD monitor You can record the image while viewing it on the opened LCD monitor. -
Page 13: Quick Start
Quick Start When quick start is ON the battery power is still being consumed, even when the LCD monitor and the viewfinder are closed. The movie camera will resume recording/pause mode about 1.7 seconds after the LCD monitor or the viewfinder is reopended. ≥Please note in quick start mode approximately half the pause recording power is being consumed. -
Page 14: Inserting/Removing A Cassette
Inserting/removing a cassette Fit the AC adaptor or the battery and turn on the power. Slide the [OPEN/EJECT] lever and open the cassette cover. ≥When the cover is fully opened, the cassette holder will come out. After the cassette holder is opened, insert/ remove the cassette. -
Page 15: Inserting/Removing A Card
Inserting/removing a card Before inserting/removing a card, set the [OFF/ ON] switch to [OFF]. ≥If the card is inserted or removed with the power turned on, this camera may malfunction or the data recorded on the card may be lost. Turn off the power 1. -
Page 16: Selecting A Mode
Selecting a mode Rotate the mode dial to select the desired mode. Rotate the mode dial. ≥Set your desired mode to 1. : TAPE RECORDING MODE Use this when you record the image on a tape. (Also, you can simultaneously record still pictures on a card while recording images on a tape.) : TAPE PLAYBACK MODE Use this to play back a tape. - Page 17 2) Tape recording mode ([AUTO/MANUAL/FOCUS] switch is set to [MANUAL]) Iris or gain value White balance Shutter speed Manual focus adjustment (When set to [FOCUS]) ≥1 is displayed while recording on a tape. ≥2 is displayed only when the [AUTO/ MANUAL/FOCUS] switch is set to [FOCUS].
-
Page 18: Help Mode
Help mode Select an icon for an explanation of the function. ≥Set to Tape/Card Recording Mode. Press the joystick to display the icon during the recording pause. Move the joystick down until icon 1 appears. Move the joystick right to select the Help mode icon [ ≥The help mode explains the operation icons displayed when the [AUTO/MANUAL/... - Page 19 Move the joystick right or press it to set the selection. Move the joystick up or down in order to select the item to be set. Press the joystick to determine the setting. ª To exit the menu screen Press the [MENU] button. ª...
-
Page 20: Adjusting Lcd Monitor/Viewfinder
Adjusting LCD monitor/viewfinder ª Adjusting the brightness and colour level Set [SETUP] >> [LCD SET] or [EVF SET] >> [YES]. Move the joystick up or down in order to select the item to be adjusted. [LCD SET] :Brightness of the LCD monitor :Colour level of the LCD monitor [EVF SET] :Brightness of the viewfinder... -
Page 21: Using The Remote Control
Using the remote control ª Remote control Using the remote control supplied will enable controlling almost all the functions of this camera to be controlled. On-screen display button [EXT DISPLAY] -42- Date/time button [DATE/TIME] Audio dubbing button [AUDIO DUB] Record button [¥REC] -47- Direction buttons [3, 2, 1, 4] Slow/frame-by-frame forward button... - Page 22 Warning Risk of fire, explosion and burns. Do not recharge, disassemble, heat above 100 xC or incinerate. Keep the Button-Type battery out of the reach of children. Never put Button-Type battery in mouth. If swallowed call your doctor. ª Remote control usable range ≥The distance between the remote control and the camera: Within approx.
-
Page 23: Free Style Remote Control
Free style remote control This controller can be used from different high and low angles. It is also handy when a tripod is used. When you do not use the controller, attach the clip to the grip belt. Left-handed users can use this camera more easily. -
Page 24: Record Mode
≥We recommend using the SP mode for important recording. ≥In order to fully exhibit the performances of the LP mode, we recommend using Panasonic cassettes marked LP mode. ≥It is not possible to dub audio onto image recorded in the LP mode. ( ≥In the LP mode, the picture quality will not be... -
Page 25: Recording On A Tape
Recording on a tape ≥Set to Tape Recording Mode. ≥The lens cover opens automatically. Press the recording start/stop button to start recording. Press the recording start/stop button again to pause recording. ≥For the recording time on a tape, refer to ≥Carry out a recording check ( the image is recorded properly. -
Page 26: Recording Check
Recording check The last image recorded is played back for 2 to 3 seconds. After checking, the camera will be set to a recording pause. ≥Set to Tape Recording Mode. Press the joystick to display the icon during the recording pause. Move the joystick down until icon 1 appears. -
Page 27: Recording Still Pictures Onto A Card (Photoshot)
Recording still pictures onto a card (Photoshot) ≥Set to Card Recording Mode. ≥The lens cover opens automatically. Press the [PHOTO SHOT] button halfway in order to adjust focusing. (For auto focusing only) ≥If you set [O.I.S.] to [ON], then the image stabilizer function will be more effective. - Page 28 ª Select the size of still pictures to be recorded on a card Set [BASIC] >> [PICTURE SIZE] >> select the desired picture size. REC ASPECT [16:9]: 2048k1152 640k360 REC ASPECT [4:3]: 2048k1512 3. 1 1600k1200 1280k960 640k480 ≥When you purchase this unit, [REC ASPECT] is set to [16:9].
-
Page 29: Zoom In/Out Function
Zoom in/out function You can zoom in up to 10k optically. ≥Set to Tape/Card Recording Mode. Wide-angle recording (zoom out): Push the [W/T] lever towards [W]. Close-up recording (zoom in): Push the [W/T] lever towards [T]. ≥When zooming in and taking a picture while holding the movie camera by hand, we recommend using the image stabilizer function. -
Page 30: Recording Yourself
Recording yourself You can record yourself while viewing the LCD monitor. You can record persons in front of the camera while presenting them the image. The image is horizontally flipped as if you see a mirror image. (The image to be recorded is the same as that recording.) ≥Extend the viewfinder to see the picture while recording. -
Page 31: Soft Skin Mode
ª To cancel the colour night view function Select the colour night view icon until the colour night view indication disappear. ≥The [0 LUX COLOUR NIGHT VIEW OFF] indication appears on the screen of the movie camera. ≥If the 0 Lux colour night view function is selected without reversing the LCD monitor, the [REVERSE THE LCD MONITOR] indication appears. -
Page 32: Wind Noise Reduction Function
Start recording. (fade in) When you start recording, the image/audio disappeared completely and the image/audio gradually appears. Pause recording. (fade out) The image/audio gradually disappears. After the image/audio completely disappears, recording stops. ª To cancel fading Select the [ ] icon again. ≥The [FADE OFF] indication appears on the screen of the movie camera. -
Page 33: Using The Built-In Video Flash
≥ The AGS function may activate and cause the movie camera to pause the recording if you are recording a subject right above or right below you. In these cases, set then continue the recording. [OFF] ≥ Use the Recording start/stop button to pause or stop the recording. -
Page 34: Self-Timer Recording
Self-timer recording You can record still pictures on a card using the timer. ≥Set to Card Recording Mode. Press the joystick to display the icon. Move the joystick down until icon 1 appears. Move the joystick left to select the self-timer recording icon [ ≥The [SELF-TIMER ON] indication appears on the screen of the movie camera. -
Page 35: Image Stabilizer Function
≥If the self-timer is set, the camera records up to 10 still pictures continuously. ≥Intervals between recording pictures may become longer depending on the card. We recommend using a Panasonic SD Memory Card. ≥When using the card formatted by other equipment or a card that was recorded and erased repeatedly, the intervals between recording pictures may become longer. -
Page 36: Recording In Various Situations (Scene Mode)
Recording in various situations (Scene mode) When you record images in different situations, this mode automatically sets optimum shutter speeds and apertures. ≥Set to Tape/Card Recording Mode. Set the [AUTO/MANUAL/FOCUS] switch to [MANUAL]. Set [BASIC] >> [SCENE MODE] >> select the desired mode. -
Page 37: Recording In Natural Colours (White Balance)
Recording in natural colours (White balance) The automatic white balance function may not reproduce natural colours depending on the scenes or lighting conditions. If so, you can adjust the white balance manually. ≥Set to Tape/Card Recording Mode. Set the [AUTO/MANUAL/FOCUS] switch to [MANUAL]. -
Page 38: Manual Focus Adjustment
Manual focus adjustment If auto focusing is difficult due to the conditions, then manual focusing is available. ≥Set to Tape/Card Recording Mode. Set the [AUTO/MANUAL/FOCUS] switch to [MANUAL]. Set the [AUTO/MANUAL/FOCUS] switch to [FOCUS]. ≥The MNL and the manual focus indication [MF] will be displayed. - Page 39 Manual shutter speed adjustment ≥Avoid recording under fluorescent light, mercury light or sodium light because the colour and brightness of the playback image may change. ≥If you increase the shutter speed manually, the sensitivity lowers and accordingly the gain value increases automatically, which may increase the noises on the screen.
-
Page 40: Playback Mode
Playback mode Playing back tape ≥Set to Tape Playback Mode. (An operation icon automatically appears on the LCD monitor.) Operate with joystick. 1/;: Playback/Pause Rewind/Review playback (Reverts to playback with the 1/; icon.) Fast forward/Cue playback (Reverts to playback with the 1/; icon.) ∫: Stop ≥The power will not turn off when the LCD... -
Page 41: Slow-Motion Playback/ Frame-By-Frame Playback
Slow-motion playback/ frame-by-frame playback ≥Set to Tape Playback Mode. (Slow-motion playback can only be performed by using the remote control.) Slow-motion playback If the image is recorded in the SP mode, then it will be played back at a speed approx. 1/5 the normal speed. -
Page 42: Playback On Tv
Playback on TV Images recorded by this camera can be played back on a TV. ≥Insert a recorded tape or card into this camera. Connect the movie camera and a TV. [AUDIO IN] ≥Connect the movie camera and a TV by using the Multi cable 1. -
Page 43: Deleting Files Recorded On A Card
≥If you attempt to play back file recorded in a different format or file data is defective, the whole display becomes bluish and the “UNPLAYABLE CARD’’ indication may appear as warning. ≥When playing back still pictures recorded in 4:3 mode ( ) on a wide-screen TV, 3. -
Page 44: Formatting A Card
ª Deleting still picture files recorded on a card by other equipment ≥A still picture file (other than JPEG) that cannot be played back on the movie camera may be erased. Formatting a card Please be aware that if a card is formatted, then all the data recorded on the card will be erased. -
Page 45: Writing The Printing Data On A Card (Dpof Setting)
Writing the printing data on a card (DPOF setting) You can write the data of pictures to be printed, number of copies, and other information (DPOF data) onto the card. ≥Set to Card Playback Mode. Set [ADVANCED] >> [DPOF SET] >> [SET]. Move the joystick to select a file to be set, and then press it. -
Page 46: Edit Mode
Edit mode Recording from a tape onto a card Still pictures can be recorded on a memory card from scenes that have already been recorded on a cassette. ≥Set to Tape Playback Mode. ≥Insert a tape which already has recorded contents and a card. -
Page 47: Using The Dv Cable For Recording (Digital Dubbing)
≥For more information, refer to the operating instructions for your TV set and recorder. ≥When you do not need functional indications or date and time indication, set [BASIC] >> [DATE/TIME] >> [OFF] in the Tape Playback Mode and press the [EXT DISPLAY] button on the remote control for no indication. -
Page 48: Audio Dubbing
≥If a picture containing a copyright protection signal (copy guard) is recorded by the movie camera, the picture is distorted by mosaic-like patterns at playback. ≥Disconnect the USB cable since input signals from the external input terminal cannot be recorded while it is connected with the USB cable. -
Page 49: Printing Pictures By Directly Connecting To The Printer (Pictbridge)
Printing pictures by directly connecting to the printer (PictBridge) To print pictures by directly connecting the movie camera to the printer, use a printer compatible with PictBridge. (Read the operating instructions for the printer.) ≥Insert a card and set to Card Playback Mode. Connect the movie camera and the printer with the supplied USB cable. -
Page 50: Menu
Menu Menu list Menu figures and illustrations are provided for easy-to-understand explanations, and so they are different from the actual menu indications. ª [TAPE RECORDING MENU] 1) [BASIC] [SCENE MODE] -36- [REC SPEED] -24- [WIND CUT] -32- [REC ASPECT] -34- [CLOCK SET] -11- 2) [ADVANCED]... - Page 51 ª [CARD RECORDING MENU] 1) [BASIC] [SCENE MODE] -36- [PICT. QUALITY] -28- [PICTURE SIZE] -28- [REC ASPECT] -34- [CLOCK SET] -11- 2) [ADVANCED] [BURST MODE] -35- [FLASH] -33- [RED EYE] -33- [FLASH LEVEL] -33- [O.I.S.] -35- [REC LAMP] -52- [SHTR EFFECT] -28- 3) [SETUP] [DISPLAY]...
-
Page 52: Menus Related To Taking Pictures
Menus related to taking pictures ª [DATE/TIME] This switches between date and time indications. ≥The movie camera automatically records the date and time of picture taking on the tape. ≥You can also show or change the date/time indication by repeatedly pressing the [DATE/ TIME] button on the remote control. -
Page 53: Other Menus
Other menus ª [JOYSTICK LED] If set to [ON], the circumference of the joystick lights up in blue during operation. ª [INITIAL SET] When there is a menu that cannot be selected depending on a combination of functions, set to [YES] for changing the menu settings back to the initial shipping condition. -
Page 54: Others Indications
Others Indications Various functions and the movie camera status are shown on the screen. Basic indications Remaining battery power 0h00m00s00f: Time code 15:30:45: Date/Time indication Recording indications R0:45: Remaining tape time ≥Remaining tape time is indicated in minutes. (When it reaches less than 3 minutes, the indication starts flashing.) Standard Play mode (Recording speed mode) -
Page 55: Warning/Alarm Indications
PictBridge: PictBridge mode 100-0001: Folder/File display No.00: File number Number of DPOF Setting Lock setting -44- [640k360] Image size [2048k1152] Image size [640k480] Image size [1280k960] Image size [1600k1200] Image size [2048k1512] Image size 3. 1 ≥For images not recorded with this unit, the number of horizontal and vertical pixels may differ so the image size is not displayed. -
Page 56: Functions Cannot Be Used Simultaneously
FILE LOCKED: You are attempting to erase protected files. CARD LOCKED: The write protection switch on the SD Memory Card is set to [LOCK]. NEED HEAD CLEANING: The video heads are dirty. CHANGE TO 0.2M/0.3M MODE: When continuous photoshot is used, set [PICTURE SIZE] to [ PUSH THE RESET SWITCH: An irregularity in the equipment has been... -
Page 57: Before Requesting Repair (Problems And Solutions)
≥Variable-speed ≥During repeat playback search ≥Deleting files ≥When the write protect switch on the card is set to [LOCK] ≥When the file is protected ≥Formatting ≥When the write protect switch on the card is set to [LOCK] ≥Audio dubbing ≥The section of a tape recorded in LP mode ≥The blank section of a tape... - Page 58 5: The movie camera cannot be operated though powered up. The movie camera does not operate normally. • The movie camera cannot be operated unless you open the LCD monitor or extend the viewfinder. • Remove the cassette and then press the [RESET] button.
- Page 59 Playback (Sound) 1: Sound is not played back from the built-in speaker of the movie camera. 0 Is the volume too low? During playback, push the [s /VOLr] lever to display the volume indication and adjust it. ( -40- 2: Different sounds are reproduced at the same time.
- Page 60 Others 1: The indication disappears, the screen is frozen, or no operation can be performed. • Turn off the power to the movie camera. If the power cannot be turned off, press the [RESET] button, or detach the battery or AC adaptor and then reattach it.
-
Page 61: Cautions For Use
Cautions for Use In the event of abnormal operation (e.g. if the unit emits smoke or an unusual smell), immediately stop operating the unit and consult the Panasonic Customer Care Centre on 132600. ª About condensation If you turn the movie camera on when... - Page 62 ª About the movie camera ≥When the movie camera is used for a long time, the camera body becomes warm, but this is not a malfunction. Keep the movie camera away from magnetized equipment such as a cellular phones, microwave ovens, TVs, and video game equipment.
- Page 63 ≥To store the battery for a long period of time, we recommend you charge it once every year and store it again after you have completely used up the charged capacity. ≥Dust and other matter attached to the battery terminals should be removed. Prepare spare batteries when going out for recording.
-
Page 64: Explanation Of Terms
ª Folder structure of the card The folder structure of the card formatted by the movie camera will be displayed on the PC as the illustration below. ≥Up to 999 pictures can be recorded on 100CDPFP folder etc. ≥Files with the DPOF settings can be recorded on MISC folder. - Page 65 ª White balance The image recorded by the movie camera may become bluish or reddish under the influence of light sources. To avoid such phenomena, adjust the white balance. White balance adjustment determines the white colour under different light sources. By recognizing which is the white colour under sunlight and which is the white colour under a fluorescent lamp, the movie camera can adjust...
-
Page 66: Specifications
Recording media: SD Memory Card (8 MB/16 MB/32 MB/64 MB/ 128 MB/256 MB/512 MB/1 GB/2 GB (Maximum)) Please confirm the latest information on the following website. http://panasonic.co.jp/pavc/global/cs (This Site is English only.) 3 (16:9)/ 3 (16:9)/ Still picture recording file format: JPEG (Design rule for Camera File system, based on Exif 2.2 standard), DPOF corresponding... - Page 67 AC adaptor VSK0651 Information for your safety Power source: AC 110 V to 240 V, 50/60 Hz Power consumption: 19 W DC output: DC 7.9 V, 1.4 A (Movie camera operation) DC 8.4 V, 0.65 A (Battery charging) Dimensions: Approx. 61 mm (W) 32 mm (H) Mass: Approx.
- Page 68 VQT0T29 Matsushita Electric Industrial Co., Ltd. S1105Nw0 ( 2500 A) Web site: http://www.panasonic.co.jp/global/...