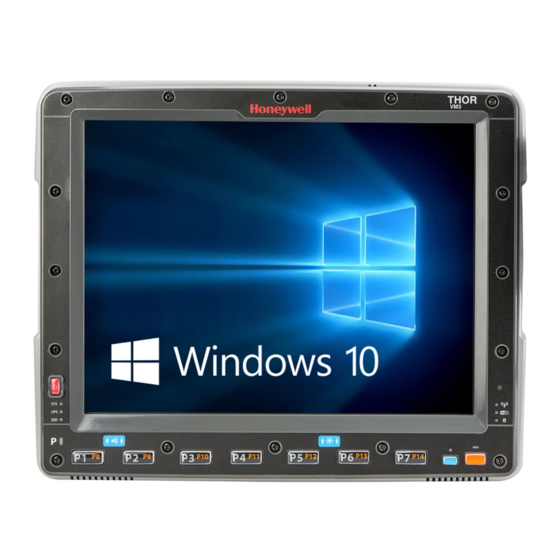
Honeywell Thor VM3 Quick Start Manual
Hide thumbs
Also See for Thor VM3:
- User manual (378 pages) ,
- Manual (270 pages) ,
- User manual (302 pages)
Table of Contents
Advertisement
Quick Links
Thor™ VM3
Vehicle-Mount Computer
Quick Start Guide
Aller à
www.honeywellaidc.com
pour le français.
Vai a
www.honeywellaidc.com
per l'italiano.
Gehe zu
www.honeywellaidc.com
für Deutsch.
Ir a
www.honeywellaidc.com
para español.
Para Português, acesse www.honeywellaidc.com.
Перейти на русскоязычный сайт www.honeywellaidc.com.
Pro češtinu jdi na www.honeywellaidc.com.
Pre slovenčinu choď na
www.honeywellaidc.com.
Türkçe için lütfen
www.honeywellaidc.com
sayfasını ziyaret ediniz.
Idź na stronę :
po quick start w języku polskim.
www.honeywellaidc.com
如要到中国 www.honeywellaidc.com(简体) 。
www.honeywellaidc.com
VM3-QS Rev B
6/15
Advertisement
Table of Contents

Summary of Contents for Honeywell Thor VM3
- Page 1 Thor™ VM3 Vehicle-Mount Computer Quick Start Guide Aller à www.honeywellaidc.com pour le français. Vai a www.honeywellaidc.com per l'italiano. Gehe zu www.honeywellaidc.com für Deutsch. Ir a www.honeywellaidc.com para español. Para Português, acesse www.honeywellaidc.com. Перейти на русскоязычный сайт www.honeywellaidc.com. Pro češtinu jdi na www.honeywellaidc.com. Pre slovenčinu choď...
-
Page 2: Components - Front
Components - Front System Power Connection LEDs Button LEDs... -
Page 3: Components - Rear
Components - Rear Ethernet USB Host I/O Connectors: CANbus/Audio COM2 Fuse Power Power Dock COM1 Switch Cable Release USB1 Connector USB2 See the Thor VM3 User’s Guide for dock fuse replacement in- structions. - Page 4 Mount to Vehicle The Thor VM3 should be secured to an area in the vehicle where it: • Does not obstruct the driver's vision or safe vehicle operation. • Will be protected from rain or inclement weather. • Will be protected from extremely high concentrations of dust or wind-blown debris.
-
Page 5: Connect Accessories
Power Cable, below. • Replace a previously installed VX6/VX7 or Thor VX8/VX9 with an adapter cable. See the Thor VM3 User’s Guide, available at www.honeywellaidc.com. • High voltage forklifts (over 60V). Refer to the Thor VM3 User’s Guide available at www.honeywellaidc.com. -
Page 6: Connecting The Power Cable
Connecting the Power Cable The following power option is for 12-48VDC vehicles (10-60VDC direct connection). CAUTION - For installation by trained service personnel only. Fuse Requirements WARNING - For proper and safe installation, the input power cable must be connected to a fused circuit on the vehicle. If the supply connection is made directly to the battery, the fuse should be installed in the positive lead within 5 inches of the battery’s positive (+) terminal. -
Page 7: Power Cable Routing
Power Cable Routing Power Cable Information Twist the red and red/white wires together and twist the black and black/white wires together before connecting to vehicle power. -
Page 8: Power Cable Installation
Power Cable Installation 1. The Thor VM3 must not be mounted in the Smart Dock. The power switch on the dock must be turned Off. The power cable must be UNPLUGGED from the dock. - Page 9 Screen Blanking box, or to the Thor VM3 User’s Guide, available at www.honeywellaidc.com for further information.) 11. Move the power switch on the back of the dock to the on position. 12. Press the power button on the front of the Thor VM3.
- Page 10 Thor VM3: • Network ID (SSID) of the Access Point • Wireless network authentication credentials 1. Connect the Thor VM3 to an external power source. 2. Press the Power button. 3. Attach a USB keyboard during the setup process.
-
Page 11: Wireless Network Configuration
8. Complete the Security tab by selecting security and encryption types. 9. Additional entries may be required based on security and encryption chosen. 10. Tap OK when completed. 11. Tap Connect to... to connect to the network. For more details see the Thor VM3 User’s Guide available at www.honeywellaidc.com. -
Page 12: Connecting To Terminal Emulation
To reboot the Thor VM3 with all other Windows operating systems: 1. Select Start > Shutdown > Restart to reboot. When the Thor VM3 is booting, there may be small delays while the wireless client connects, applications launch, remote management... - Page 13 Disclaimer Honeywell International Inc. (“HII”) reserves the right to make changes in specifications and other information contained in this document without prior notice, and the reader should in all cases consult HII to determine whether any such changes have been made. The information in this publication does not represent a commitment on the part of HII.


Need help?
Do you have a question about the Thor VM3 and is the answer not in the manual?
Questions and answers