Table of Contents
Advertisement
Installation Guide
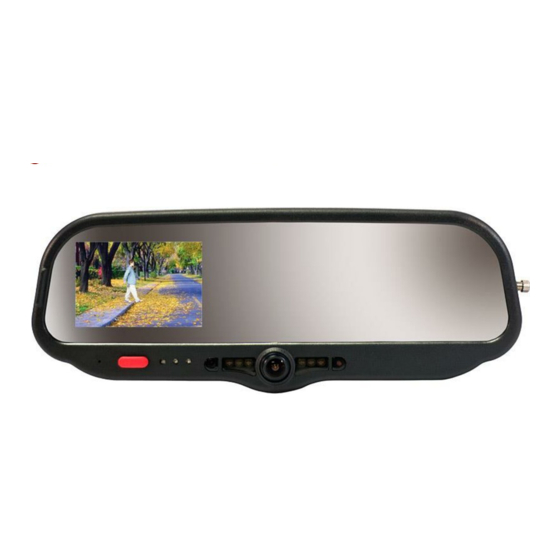
DVM-250 and DVM-250Plus
860-00129-00 Rev C
Digital In-Vehicle Event Recorder Video System
Copyright © 2010-2015, Digital Ally, Inc. All Rights Reserved. This publication may not be reproduced, stored in a retrieval
system, or transmitted in whole or part in any form or by any means electronic, mechanical, recording, photocopying, or in any
other manner without the prior written approval of Digital Ally, Inc.
Advertisement
Table of Contents

Related Manuals for Digital-Ally DVM-250


Summary of Contents for Digital-Ally DVM-250
-
Page 1: Installation Guide
Digital In-Vehicle Event Recorder Video System Copyright © 2010-2015, Digital Ally, Inc. All Rights Reserved. This publication may not be reproduced, stored in a retrieval system, or transmitted in whole or part in any form or by any means electronic, mechanical, recording, photocopying, or in any... -
Page 2: Table Of Contents
ENSOR UTPUT LARM ESTING SECTION - 5: SUPPORT ........................5-11 How to Reset the DVM-250 System ..................5-11 Basic Troubleshooting ........................ 5-12 SECTION - 6: CONTACT INFORMATION .................. 6-13 SECTION - 7: INTERFACE BOX SENSOR WORKSHEET ............7-14 Copyright © 2010-2015 Digital Ally, Inc. -
Page 3: Section - 1: Before You Begin
DVM-250/DVM-250Plus Installation Guide 860-00129-00 Rev C Section - 1: Before you Begin This document covers the installation of the DVM-250 or DVM-250Plus systems only, including the Interface Box (if required) and the cabling. Tools Needed #2 Phillips head screwdriver 1/8"... -
Page 4: Section - 2: Parts, Cables And Accessories
DVM-250/DVM-250Plus Installation Guide 860-00129-00 Rev C Section - 2: Parts, Cables and Accessories DVM-250 Parts and Accessories List The table below outlines the parts that are included with the DVM-250 and DVM-250Plus Packages. MODEL NUMBER Part Number Description x x x... - Page 5 566-00143-00 Adjustable for right or left side mounting. W/Adapter Cable Cable, IF Box to DVM 008-01386-01 4.6m (15.0ft.) Cable, IF Box to DVM 008-01386-02 6.1m (20.0ft.) Cable, IF Box to DVM 008-01386-03 8.1m (26.5ft.) Copyright © 2010-2015 Digital Ally, Inc.
-
Page 6: Optional Accessories
DVM-250/DVM-250Plus Installation Guide 860-00129-00 Rev C Optional Accessories The table below outlines optional accessories for the DVM-250 and DVM-250 Plus packages. 008-01382-00 Backup Camera 25ft Extension Cable 008-01382-01 Backup Camera 40ft Extension Cable 008-01382-02 Backup Camera 60ft Extension Cable 008-01382-03... -
Page 7: Dvm-250 Basic Wiring Diagram
DVM-250/DVM-250Plus Installation Guide 860-00129-00 Rev C DVM-250 Basic Wiring Diagram Copyright © 2010-2015 Digital Ally, Inc. -
Page 8: Dvm-250Plus Basic Wiring Diagram
DVM-250/DVM-250Plus Installation Guide 860-00129-00 Rev C DVM-250Plus Basic Wiring Diagram Interface Box Copyright © 2010-2015 Digital Ally, Inc. -
Page 9: Section - 3: Installation Instructions
2. With your left hand, grip the base of the factory mount where it meets the glass. 3. Apply a small amount of inward pressure toward the glass and rotate the base clockwise. 4. The spring loaded factory mount should release from the windshield puck. See picture below. Copyright © 2010-2015 Digital Ally, Inc. -
Page 10: Step 2: Dvm Installation
In these cases, the mounting plate included with the DVM-250 package must be glued to the windshield in a location that will allow proper adjustment. Loctite #03346 glue is recommended. Please follow instructions on their package. - Page 11 17. Clean the windshield glass with alcohol and use the supplied tape to attach the GPS module and optional WIFI assembly to the windshield. See below. 18. If external triggers are not being used, proceed to “Section - 4: Testing the Installation" Copyright © 2010-2015 Digital Ally, Inc.
-
Page 12: Step 3: Interface Box Installation
3. Secure the cable using Velcro or standard tie wraps as required. 4. Plug the remaining end of the IF Box to DVM cable into the IF Box. Copyright © 2010-2015 Digital Ally, Inc. -
Page 13: Interface Box Power Cable Installation
Record both voltage levels on the Sensor Worksheet. Refer to the vehicle manufacturer’s wiring diagram specific details for your vehicle. Sensor #1 is reserved for the Reverse Gear Signal for use with the Backup camera option on the DVM-250Plus. Copyright © 2010-2015 Digital Ally, Inc. -
Page 14: Trigger Wiring Installation
To Vehicle Battery Device Power IN +12V, (2A max.) To Pin 7 of the IF Box SENS A connector cable Fuse 2A Fast Blow (BROWN wire) Copyright © 2010-2015 Digital Ally, Inc. -
Page 15: Rj45 To Terminal Connector Adapter (Optional)
If an acceptable DC output cannot be obtained from the siren controller, the optional siren adapter interface (Digital Ally P/N 006-0050) can be used to connect the siren speaker to the interface box. Follow the diagram below to install the siren interface. -
Page 16: Step 5: Wireless Microphone Installation (Optional ) For Use With 001-00042-32 Only
Connect to BROWN wire of IF Sensor BROWN Cable (see figure 3-6) Transmit/Receive RJ45 Connect to RJ45 input jack on the BTR800 microphone charger Audio Out 3.5mm audio plug Connect to 3.5mm audio jack on the back of the DVM Copyright © 2010-2015 Digital Ally, Inc. -
Page 17: Step 6: Backup Camera Installation (Dvm-250Plus Only)
It may be illegal in your local area or state to cover up the State, County, Year, etc. on the vehicle license plate. Depending on the design of the license plate for your particular state, you may need to use the Mini Backup Camera in order to ensure compliance with your local and state laws. Copyright © 2010-2015 Digital Ally, Inc. -
Page 18: Connect The Backup Camera
2. Route the pigtail from the Backup Camera to the selected area inside the vehicle. 3. Connect the pigtail cable connector to the mating connector of the Camera Cable routed from the DVM. Copyright © 2010-2015 Digital Ally, Inc. 3-10... -
Page 19: Section - 4: Testing The Installation
6. Repeat this process above for each of the input devices. Section - 5: Support How to Reset the DVM-250 System Using a small blunt object such as a small eye-glass screwdriver or a paper clip, press the reset button on the DVM. The reset button is recessed and located on the road facing, driver’s side of the... -
Page 20: Basic Troubleshooting
The unit can be reconfigured to default settings and enable each trigger to determine which one is causing the false trigger. If the Accelerometer is causing false triggering, verify the mirror is in the normal rearview mirror orientation. Copyright © 2010-2015 Digital Ally, Inc. 5-12... -
Page 21: Section - 6: Contact Information
Website: www.digitalallyinc.com Support E-Mail: support@digitalallyinc.com Sales E-Mail: sales@digitalallyinc.com Phone: 913-814-7774 Fax: 913-814-7775 Sales/Support Toll Free: 1-800-440-4947 Hours of Operation: Monday-Friday: 8AM-5PM (Central Standard Time) excluding holidays * Specifications subject to change without notice. Copyright © 2010-2015 Digital Ally, Inc. 6-13... -
Page 22: Section - 7: Interface Box Sensor Worksheet
Standard Sensor #6 GREEN High to Low High Output #1 BROWN BLACK Sensor #1 is reserved for the Reverse Gear Signal for use with the Backup camera option on the DVM-250Plus. Copyright © 2010-2015 Digital Ally, Inc. 7-14...
Need help?
Do you have a question about the DVM-250 and is the answer not in the manual?
Questions and answers