
Related Manuals for FUNAI NB500FX4


Summary of Contents for FUNAI NB500FX4
- Page 1 NB500FX4 Blu-ray Disc™ / DVD Player Owner's Manual INSTRUCCIONES EN ESPAÑOL INCLUIDAS. © 2014 Funai Electric Co., Ltd.
-
Page 2: Table Of Contents
CONTENTS INTRODUCTION ..........3 LIST OF SETTINGS ........31 Safety Instructions..............3 SETUPS............34 Supplied Accessories............3 fun-Link (HDMI CEC)............34 FEATURES............4 HDMI Video Resolution............35 Parental .................36 Features...................4 Software Update..............38 Product Info ................5 Restore Default Settings ...........39 Symbols Used in this Owner’s Manual......5 TROUBLESHOOTING ........ -
Page 3: Introduction
Batteries (AAA, 1.5V × 2) • SETUP MANUAL FUNAI is a registered trademark of Funai Electric Co., Ltd. and may not be used in any way without the express written consent of Funai. © 2014 Funai Electric Co., Ltd. All rights reserved. No part of this manual may be reproduced, copied, transmitted, disseminated, transcribed, downloaded or stored in any storage medium, in any form or for any purpose without the express prior written consent of Funai. -
Page 4: Features
FEATURES 2.1. Features Blu-ray Disc™ Pop Menu You can enjoy Blu-ray Disc™ which is capable of storing Some BD-videos have a Pop Menu which is a navigation five times more data than a conventional DVD. menu that can be called up and be operated on the TV screen without interrupting playback. -
Page 5: Product Info
“Product Info” screen provides information about this unit’s software version. You can also download the latest software from the Funai website and update it yourself if it is newer than the version currently on your unit. The current version of software on your unit can be seen on the “Product Info” screen. -
Page 6: Functional Overview
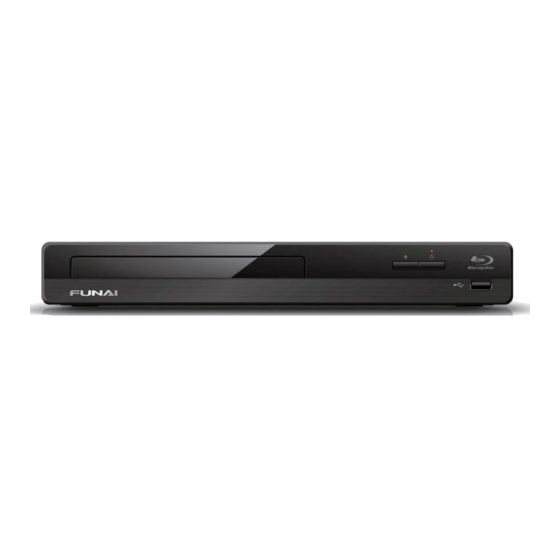
FUNCTIONAL OVERVIEW 3.1. Front Panel * The unit can also be turned on by pressing this button. 1. Disc tray 4. Power-On indicator • Flashes while unit is starting up. (OPEN/CLOSE) button* • Dims and flickers when IR remote signal is received. (POWER-ON) button 5. -
Page 7: Remote Control
3.3. Remote Control (PLAY) button* • Press to start playback or resume playback. (SKIP) button • During playback, press once to return to the beginning of the current Title, Chapter, Track or File. • During playback, press twice to return to the previous Title, Chapter, Track or File. - Page 8 23. REPEAT button Using the Remote Control Remote Control Usage Guidelines: • Press to select Repeat mode. • Make sure that there are no obstacles between the 24. DISPLAY button remote control and the infrared sensor window on the •...
-
Page 9: Guide To On-Screen Display
3.4. Guide to On-Screen Display Home Menu When you Turn On the unit, Home Menu will appear automatically. Otherwise, press [HOME]. Disc 1. “Disc”: Initiates playback of inserted disc, displays a list of Tracks / Files or the Media Filter Menu 2. -
Page 10: Connections
CONNECTIONS 4.1. Connection to a TV (*1) (*2) (*3) HDMI Connection (Supports up to 1080i , 1080p , 1080p/24 resolution.) Your TV HDMI OUT HDMI cable (not supplied) HDMI IN HDMI OUT No analog audio connection required. Outputs video data with a frame rate of 30 frames per second. (*1) 1080i: Outputs video data with a frame rate of 60 frames per second. -
Page 11: Connection To An Audio System
4.2. Connection to an Audio System • When you change the connections, all devices should be Turned Off. • When connecting the unit to an external audio system, refer to the User Manual for Setup / Configuration help. HDMI Audio Connection AV receiver / amplifier with HDMI OUT an HDMI input jack... -
Page 12: Hdmi Audio Output
4.3. HDMI Audio Output “Audio Output” “Bitstream” “LPCM” setting A “BD Audio Mode” “HD Audio Output” “Mix Audio Output” “HD Audio Output” “Mix Audio Output” setting A Media Audio Source Which audio format can be output depends on the compatibility of the connected device. ... -
Page 13: Before You Start
BEFORE YOU START 5.1. Finding a Viewing Video Source Input on Your TV After you have completed all of the connections to your TV, review the steps below. 1. Press [ (POWER-ON)] to Turn On the unit. 2. Turn On your TV. 3. - Page 14 How to Reset the OSD Language You can reset the OSD language if you selected the wrong language. 1. Press [HOME] to display the Home Menu. 2. Use [ ] to select “ ”, then press [OK]. • This item is “Settings” (English) / “Configuaraciones” (Spanish) / “Paramètres” (French). •...
-
Page 15: Information On Playback
INFORMATION ON PLAYBACK 6.1. Information on Playback Playable Discs and Files Playable discs Logos Blu-ray Disc™ - BD-video - BD-RE* (ver. 2.1) (Recorded in BDMV format) - BD-R* (ver. 1.1 / 1.2 / 1.3) (Recorded in BDMV format) (Unfinalized disc may not be played back.) DVD-video DVD-RW (finalized video mode discs only) - Page 16 Recommended Specifications AVCHD This unit cannot play back stand-alone AVCHD files (*.m2ts, *.mts or *.m2t) written to a DVD or copied to an SD Memory Card. The DVD or SD Memory Card containing AVCHD files must have a proper file and folder structure meeting AVCHD format specifications.
- Page 17 Unplayable Media and Files The following discs will not be played back on this unit. • CD-ROM • CD-I (compact disc-interactive) • DVD-RAM • VSD (video single disc) • DVD-audio • video CD • HD DVD • SVCD • SDXC Memory Card •...
-
Page 18: Guide To File List
Description for Icons ] : group (folder) icon ] : music file icon ] : photo file icon “Folders” refers to the group of files. “Track” refers to the contents recorded on the audio CD. “Files” refers to the contents on a disc which are recorded in AVCHD, JPEG (including KODAK Picture CD) file format. -
Page 19: Basic Playback
BASIC PLAYBACK 7.1. Playing Back a Disc 1. Insert a disc (refer to “How to Insert a Disc” on page 18). • For Blu-ray Disc™ / DVD / audio CD or a disc containing only one type of file, playback will start automatically. If not, press [ (PLAY)]. -
Page 20: Playing Back Contents From A Usb Memory Stick
D Note for JPEG / KODAK Picture CD Playback • Every press of [ ] will turn the image by 90 degrees when an image is displayed. • During playback, press [TOP MENU] to display thumbnail screen. • This unit conforms to ver. 7.0 of KODAK Picture CD. For details of KODAK Picture CD, contact the shop that provided the KODAK Picture CD. -
Page 21: Using The Title / Disc / Pop Menu
7.3. Using the Title / Disc / Pop Menu Some BD-videos, DVD-videos or AVCHD files may contain a Title Menu which describes the contents of the disc, or a Disc Menu which guides you through the available functions on the disc. With such discs, a Title Menu or a Disc Menu may appear automatically when you insert the disc. -
Page 22: Special Playback
SPECIAL PLAYBACK 8.1. Fast Forward / Fast Reverse 1. During playback, press [ (FORWARD)] repeatedly for Fast Forward. During playback, press [ (REVERSE)] repeatedly for Fast Reverse. 2. Press [ (PLAY)] to return to Normal playback. D Note • For Blu-ray Disc™, DVD and AVCHD, speed changes at 5 different levels. •... -
Page 23: Repeat Playback
8.4. Repeat Playback Available repeat functions vary depending on the disc. 1. During playback, press [REPEAT]. 2. Use [ ] to select the desired repeat mode. • You can also change the repeat mode by pressing [REPEAT] repeatedly. REPEAT MODE AVAILABLE MEDIA Chapter Repeat The current Chapter will be played back repeatedly. -
Page 24: Pip (Bonusview™) Setting
8.6. PiP (BONUSVIEW™) Setting Some BD-videos have the PiP function which enables you to display the Secondary Video in the Primary Video. Primary Video 1 / 8 Secondary Video 1. During playback, press [MODE] to display the Play Menu. 2. Use [ ] to select “PiP”... -
Page 25: Title / Chapter Search
8.7. Title / Chapter Search Using [ (SKIP)] / [ (SKIP)] 1. During playback, press [ (SKIP)] to Skip the current Title or Chapter and move to the next. The Title or Chapter will move forward one at a time. •... -
Page 26: Track / File Search
8.8. Track / File Search Using [ (SKIP)] / [ (SKIP)] 1. During playback, press [ (SKIP)] to Skip the current Track or File and move to the next. The Track / File will move forward one at a time. To go back to the beginning of the current Track / File, press (SKIP)]. -
Page 27: Switching Subtitles
8.10. Switching Subtitles Some video materials may have subtitles in one or more languages. For commercially available discs, the supported languages can be found on the disc case. Follow the steps below to switch the Subtitle language during playback. 1. During playback, press [SUBTITLE]. 2. -
Page 28: Switching Audio Soundtrack
8.11. Switching Audio Soundtrack When playing back video material recorded with two or more soundtracks (these are often in different audio languages or audio formats), you can switch them during playback. For Blu-ray Disc™, available audio varies depending on “BD Audio Mode”... -
Page 29: Switching Camera Angles
8.12. Switching Camera Angles Some BD-videos and DVD-videos contain scenes which have been shot simultaneously from various angles. You can change the Camera Angle when appears on the TV screen. 1. During playback, press [ANGLE]. 2. Use [ ] to select your desired angle. •... -
Page 30: Clear
8.14. CLEAR+ CLEAR+ enhances the contrast of the picture and makes edges crisp. It is effective especially for DVD's. 1. During playback, press [MODE] to display the Play Menu. 2. Use [ ] to select “CLEAR+”, then press [OK]. 3. Use [ ] to select your desired setting. -
Page 31: List Of Settings
LIST OF SETTINGS In “Settings”, you can customize various kinds of settings as you prefer. Refer to the following instructions to navigate through the Setup Menu. 1. Press [HOME] to access the Home Menu. 2. Use [ ] to select “Settings”, then press [OK]. 3. - Page 32 Category Menus / Options Playback Language Auto English Español Français Audio Original Bulgarian Italian Chinese Japanese Czech Korean Danish Norwegian Dutch Polish English Portuguese Finnish Romanian French Russian German Slovak Greek Spanish Hungarian Swedish Icelandic Turkish Irish Other Subtitle Bulgarian Italian Chinese Japanese...
- Page 33 Category Menus / Options Others Software Update Disc USB Memory Stick Quick Start Mode* Product Info Initialize Reset Settings Format USB Memory Stick (Unit) Erase Saved BD-ROM Data (USB Memory Stick) Erase Saved BD-ROM Data * When “Quick Start Mode” is set to “On”, power consumption during Standby mode will increase. EN - 33...
-
Page 34: Setups
10. SETUPS 10.1. fun-Link (HDMI CEC) A “fun-Link (HDMI CEC)” HOME “Settings” “HDMI” fun-Link (HDMI CEC) allows integrated system control over HDMI and is part of the HDMI standard. This function may not work properly depending on the device connected to the unit. When “fun-Link (HDMI CEC)” setting is set to “On” the functions listed below will be available. -
Page 35: Hdmi Video Resolution
10.2. HDMI Video Resolution HOME “Settings” “HDMI” “Video Resolution” Set the resolution of the video signal being output from the HDMI OUT jack. You can select the desired “Video Resolution” among the settings listed below: “Auto”,“480p”. Actual Output Resolution: Source Setting in the Video Resolution “... -
Page 36: Parental
10.3. Parental Some BD-videos or DVD-videos feature parental lock levels. Playback will stop if the ratings exceed the levels you set, it will require you to enter a password before the disc will play back. This feature prevents your children from viewing inappropriate material. - Page 37 DVD Rating Level HOME “Settings” “Playback” “DVD Rating Level” 1. Use [ ] to select “Settings” in the Home Menu, then press [OK]. 2. Use [ ] to select “Playback”, then press [OK]. 3. Use [ ] to select “DVD Rating Level”, then press [OK]. 4.
-
Page 38: Software Update
10.4. Software Update A “Software Update” HOME “Settings” “Others” This unit lets you update the software yourself using a software update disc, USB Memory Stick. The available discs are below: - BD-RE/-R - DVD-RW/-R - CD-RW/-R Disc / USB Memory Stick Update You can update the software by using a disc or USB Memory Stick. -
Page 39: Restore Default Settings
10.5. Restore Default Settings HOME “Settings” “Others” “Initialize” Menus to reset player settings, format a USB Memory Stick. 1. Use [ ] to select “Settings” in the Home Menu, then press [OK]. 2. Use [ ] to select “Others”, then press [OK]. 3. -
Page 40: Troubleshooting
11. TROUBLESHOOTING Problem No power. Check the AC power cord, if it is properly connected. Try another power outlet. Unplug the AC power cord, and wait for about 5-10 seconds. Plug it back in and attempt to power On the unit. No sound or picture. - Page 41 Then to change password go to “Password Change” on page 37. Error message appears when I select “Auto” Make sure that the unit is connected to a FUNAI brand fun-Link (HDMI in the “Language”. CEC) TV and the “fun-Link (HDMI CEC)” is set to “On”.
- Page 42 Problem Cannot use BD-Live. BD-Live function cannot be performed because this unit does not connect the internet. Cannot play back 3D. Some discs may not be played back because this unit does not support 3D. Cannot load a Blu-ray Disc™ (stuck in Unplug unit from AC outlet for 20 seconds.
-
Page 43: Language Code List
12. LANGUAGE CODE LIST Language Code Language Code Language Code Language Code French [FRE] 5264 Macedonian 5957 Siswat 6565 Abkhazian 4748 Frisian 5271 Malagasy 5953 Slovak [SLO] 6557 Afar 4747 Galician 5358 Malay 5965 Slovenian 6558 Afrikaans 4752 Georgian 5747 Malayalam 5958 Somali 6561 Albanian... -
Page 44: Specifications
13. SPECIFICATIONS General Signal system NTSC Color Power requirements 120 V AC, 60 Hz Power consumption 15 W (standby: 0.5 W) Dimensions (width x height x depth) 11.1 x 1.6 x 7.8 inches (280.0 x 38.5 x 196.0 mm) Weight 2.32 lbs. -
Page 45: Maintenance
14. MAINTENANCE Servicing • Please refer to relevant topics on “TROUBLESHOOTING” on page 40 before returning the product. • If this unit becomes inoperative, do not try to correct the problem by yourself. There are no user-serviceable parts inside. Eject the disc (if possible), disconnect the USB Memory Stick (if connected to the unit), place the unit into Standby mode, unplug the AC power plug, and please contact: 1-877-393-8624 or visit : www.funaiamerica.com/support ... -
Page 46: Trademark Information
15. TRADEMARK INFORMATION is a trademark of DVD Format/Logo Licensing Corporation. “Blu-ray Disc™”, “Blu-ray” and “Blu-ray Disc™” logo are trademarks of the Blu-ray Disc Association. “AVCHD” and the “AVCHD” logo are trademarks of Panasonic Corporation and Sony Corporation. “BONUSVIEW™” and “BONUSVIEW™” logo are trademarks of the Blu-ray Disc Association. - Page 47 THIS PRODUCT IS LICENSED UNDER THE AVC PATENT PORTFOLIO LICENSE FOR THE PERSONAL AND NON-COMMERCIAL USE OF A CONSUMER TO (i) ENCODE VIDEO IN COMPLIANCE WITH THE AVC STANDARD (“AVC VIDEO”) AND/OR (ii) DECODE AVC VIDEO THAT WAS ENCODED BY A CONSUMER ENGAGED IN A PERSONAL AND NON- COMMERCIAL ACTIVITY AND/OR WAS OBTAINED FROM A VIDEO PROVIDER LICENSED TO PROVIDE...
-
Page 48: Glossary
16. GLOSSARY AACS Digital Audio Advanced Access Content System (AACS) is the content An indirect representation of sound by numbers. During protection scheme used with Blu-ray discs. recording, the sound is measured at discrete intervals (44,100 times a second for CD audio) by an Analog Audio analog-to-digital converter, generating a stream of numbers. - Page 49 PCM (Pulse Code Modulation) The most common system of encoding digital audio, found on CD and DAT. Excellent quality, but requires a lot of data compared to formats such as Dolby Digital and MPEG audio. For compatibility with digital audio recorders (CD, MD and DAT) and AV amplifiers with digital Inputs, this unit can convert Dolby Digital, DTS, and MPEG audio to PCM.
-
Page 50: Español
17. ESPAÑOL 17.1. Mando a Distancia 5. Botones de ROJO / VERDE / AZUL / AMARILLO • Púlselo para activar las teclas de atajo en algunas funciones de BD-vídeo. Cuando se despliega la lista de archivos, presione para cambiar las páginas. 6. -
Page 51: Encontrar El Canal De Video En Su Televisor
22. Botón ANGLE 18. Botón (SALTAR) • Púlselo para acceder a distintos ángulos de cámara • Durante la reproducción, púlselo para saltar al del disco. siguiente capítulo, pista o archivo. 23. Botón REPEAT • Cuando la reproducción esté en modo de pausa, púlselo para avanzar la reproducción imagen a •... -
Page 52: Instalacion Inicial
17.3. Instalacion Inicial Por favor, siga las instrucciones que se exponen a continuacion para completar la configuracion inicial. 1. Utilice [ ] mientras se presenta la pantalla de bienvenida para seleccionar “Next” y pulse luego [OK]. 2. Aparece la pantalla de configuracion del idioma. Utilice [ ] para seleccionar su idioma y pulse luego [OK]. -
Page 53: Limited Warranty
LIMITED WARRANTY LIMITED WARRANTY FUNAI CORP. will repair this product, free of charge in the USA in the event of defect in materials or workmanship as follows: DURATION: PARTS: FUNAI CORP. will provide parts to replace defective parts without charge for one (1) year from the date of original retail purchase.
Need help?
Do you have a question about the NB500FX4 and is the answer not in the manual?
Questions and answers