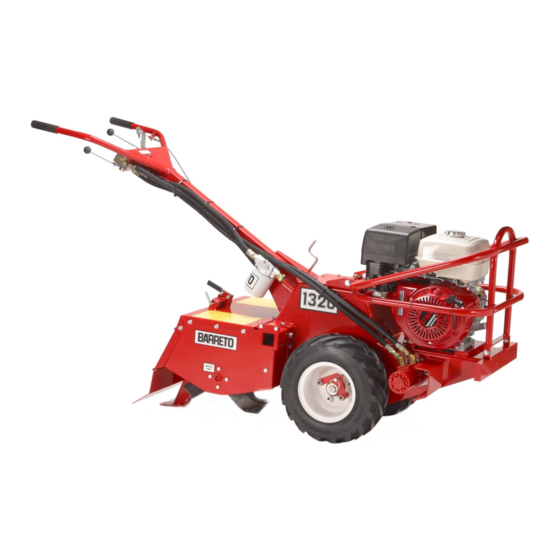
Barreto 1320H Manual
Hydraulic rear tine tillers
Source: barretomfg.com
Advertisement
THE
MODELS 1320H & 1620B
HYDRAULIC REAR TINE TILLERS
CONGRATULATIONS!
You are now the proud owner of the BARRETO Model 1320 or 1620 tiller. Please take a
moment of your time to look over the following information. Familiarize yourself with the tiller,
its characteristics, and method of operation. Pay particular attention to the safety and operating
instructions.
If you have any questions or need any replacement parts in the future, please contact us at your
convenience. Our toll-free phone number, fax and email are listed below.
THANK YOU for your patronage and confidence in BARRETO equipment.
Barreto Manufacturing, Inc.
Innovative Equipment Engineered to Last
66498 Hwy 203, La Grande, OR 97850
(800) 525-7348 (541) 963-7348
FAX (541) 963-6755
E-Mail:
info@barretomfg.com
Web Site:
http://www.barretomfg.com
1320 owners manual.doc
4/22/08
page 1 of 10
Advertisement
Table of Contents

Related Manuals for Barreto 1320H


Summary of Contents for Barreto 1320H
- Page 1 HYDRAULIC REAR TINE TILLERS CONGRATULATIONS! You are now the proud owner of the BARRETO Model 1320 or 1620 tiller. Please take a moment of your time to look over the following information. Familiarize yourself with the tiller, its characteristics, and method of operation. Pay particular attention to the safety and operating instructions.
-
Page 2: Assembly Instructions
ASSEMBLY INSTRUCTIONS 1. Remove tiller from shipping crate. 2. Screw the handle bar adjustment crank into the lower handle bar adjuster pin. 3. Fasten handle bar to tiller using the 1/2" x 3" bolt supplied. 4. Adjust clutch cable by removing all slack in lever. 5. -
Page 3: Service Information
SERVICE INFORMATION 1. Check reservoir level using sight glass on the left side of the tank. If required, add to reservoir with tractor transmission hydraulic oil (Shell DONAX TD FLUID or comparable). Recheck oil level after the tiller has been run and oil has been circulated through the wheel and tine motors. -
Page 4: Operating Instructions
OPERATING INSTRUCTIONS 1. READ SAFETY INSTRUCTIONS BEFORE OPERATING! 2. Be sure engine oil and hydraulic oil are at proper levels before starting tiller. 3. STUDY AND UNDERSTAND CONTROLS BEFORE BEGINNING OPERATION. 4. NEVER RUN MACHINE IN REVERSE WHILE TINES ARE ROTATING. 5. -
Page 5: Safety Instructions
SAFETY INSTRUCTIONS 1. READ SAFETY AND OPERATING INSTRUCTIONS BEFORE OPERATING! 2. DO NOT LEAVE TILLER UNATTENDED WITH ENGINE RUNNING. 3. Always park on level surface, never on an incline. 4. USE EXTREME CAUTION IF TRANSPORTING TILLER DOWN ANY INCLINE, ESPECIALLY IF USING RAMPS OFF A PICK-UP TRUCK. 5. -
Page 6: Equipment Warranty
BARRETO MANUFACTURING, INC. EQUIPMENT WARRANTY Barreto Manufacturing, Inc. warrants all BARRETO equipment to be free of defects in material and workmanship for a period of one (1) year, dating from delivery to the original user. This Warranty is in lieu of all other warranties, whether written or implied, and is limited to: 1. - Page 7 THE LINE OR DEAD-HEAD THE GAUGE INTO THE LINE. With the tines in forward and blocked, activate the system as before. The relief valve for the 1320H is set at 3000 pounds, and 3500 pounds for the 1620B. If the gauge reaches the specified pressure, the relief valve is OK.
- Page 8 1320H & 1620B TILLER TROUBLE SHOOTING GUIDE (CONTINUED) B. TINES FAIL TO ROTATE BUT WHEELS DRIVE. 1. Clutch cable stretched so needs Remove cable slack then adjust for 7/16” to adjustment 1/2" movement at actuator lever pin. 2. Tine motor worn.
- Page 9 1320H & 1620B TILLER TROUBLE SHOOTING GUIDE (CONTINUED) E. OIL LEAKS IN HYDRAULIC SYSTEM. 1. Fittings are loose. Tighten as required 2. Worn or broken hoses. Replace as necessary 3. Oil around tine motor shaft Inspect tine motor for leaking shaft seal.
- Page 10 REMOVAL OF TINE DRIVE HYDRAULIC MOTOR, HUB, AND MOTOR MOUNT 1. Remove tine cover #1008 (twelve 5/16 X 1 bolts). 2. Remove left bank of tines (4 tines closest to hydraulic motor). 3. Remove the 3 bolts (3/8 X 1) that hold the right side plate (#1007) in place. 4.
Need help?
Do you have a question about the 1320H and is the answer not in the manual?
Questions and answers