Newland NLS-PT30 Series User Manual
Hide thumbs
Also See for NLS-PT30 Series:
- User manual (51 pages) ,
- Service manual (32 pages) ,
- User manual (46 pages)
Table of Contents
Advertisement
Quick Links
Advertisement
Table of Contents
Troubleshooting

Subscribe to Our Youtube Channel
Related Manuals for Newland NLS-PT30 Series


Summary of Contents for Newland NLS-PT30 Series
- Page 1 NLS-PT30 Series Mobile Computer User Guide...
- Page 2 All pictures in this manual are for reference only and actual product may differ. Regarding to the product modification and update, Fujian Newland Auto-ID Tech. Co., Ltd. reserves the right to make changes to any software or hardware to improve reliability, function, or design at any time without notice.
-
Page 3: Revision History
Revision History Changes to the original manual are listed below: Version Description Date V1.0 Initial release. 2012-04-12 V1.1 Corrected improper descriptions. 2012-05-16 V1.2 Updated the figures in Chapter 6. 2012-09-24 V1.3 Updated the screenshots of the PT30. 2014-07-04 Updated the screenshots in the “Scan Engine Parameters Configuration” section V1.4 2015-05-15 of Chapter 3 and added the Admin Settings feature in the same chapter. -
Page 4: Table Of Contents
Table of Contents Chapter 1 About This Guide ................................ 1 Introduction ................................. 1 Documentation Set ..............................1 Specifications ................................2 Software Version ................................. 2 Chapter Descriptions ..............................3 More Information ................................. 3 Service Information ..............................3 Chapter 2 Getting Started ................................5 Introduction ................................. - Page 5 Backlight Settings ..............................16 Memory Storage Management ..........................17 Resetting the PT30 ..............................18 Warm Reset ..............................18 Cold Reset................................ 18 Locking the PT30 ..............................18 Barcode Settings ..............................19 Scan Engine Parameters Configuration ......................19 Reading 1D Barcode ............................24 Reading 2D Barcode ............................
- Page 6 Charging with AC Adaptor ..........................38 Charging LED ................................38 Scanning/Decoding/Communication LED ......................... 38 Communicating with PC Directly ..........................39 Communicating with PC via Cradle .......................... 39 Chapter 9 Maintenance & Troubleshooting ..........................40 Introduction ................................40 Important Safety & Handling Information ........................40 Disassembly and Retrofit ..........................
-
Page 7: Chapter 1 About This Guide
Chapter 1 About This Guide Introduction This guide provides information about using the NLS-PT30 series mobile computer (hereinafter referred to as “the terminal” or “the PT30”) and accessories. Documentation Set The documentation set for the NLS-PT30 provides information for specific user needs and includes: ... -
Page 8: Specifications
Specifications Performance Processor Marvell XScale PXA310, 806MHz CPU Operating System Microsoft Windows CE.NET 6.0 256MB RAM Memory 128MB ROM for system area 4GB flash memory for user storage Interface RS-232, USB 2.0, USB charge supported Physical Dimensions (L x W x H) 189.5 x 76 x 45 mm (7.5 x 3 x 1.7 inch) Weight 382g (Including battery) -
Page 9: Software Version
Software Version The program can be used to view the terminal’s software and hardware version information which is helpful for future updates and maintenance. The user can obtain the following device information: A. System hardware & software version and build time. B. -
Page 10: More Information
More Information For more product and support information, please visit our web site: http://www.nlscan.com Service Information Newland China Phone +86-400-608-0591 Email marketing@nlscan.com Newland Europe Phone +31(0)-345-870-033 Email Info@newland-id.com Newland Taiwan Phone +886-2-7731-5388 Email Info@newland-id.com.tw Newland North America Phone +1-510-490-3888 Email Info@newlandna.com... -
Page 11: Chapter 2 Getting Started
Chapter 2 Getting Started Introduction This chapter lists the parts and accessories for the PT30 Series and explains how to install, remove and charge the batteries, and get the PT30 up and running. Unpacking Carefully remove all protective material from the pack. Verify that you received the following: ... -
Page 12: Charging The Battery
1. Figure 1 indicates the direction to unlock the latch. 2. Figure 2 indicates the direction to take out the battery cover. 3. Follow the instructions of figure 3 and 4 to insert the battery. 4. Follow the instructions of figure 5 to close the battery cover. 5. -
Page 13: Power On, Suspend, Wake Up And Power Off
Power On, Suspend, Wake Up and Power Off Power On: Press and hold the Power key for 2-3 seconds to turn the terminal on. Suspend: When the terminal is on, holding down the Power key for 2 seconds will suspend the terminal. If no operation is performed on the terminal for some time, it will go into the suspend mode (in the case that auto suspend is already enabled). -
Page 14: Checking Battery Status
Checking Battery Status To check the battery status, tap “Start”→“Settings”→”Control Panel”→double click Figure 2.3: Power Properties - Battery Figure 2.4: Power Properties - Schemes The system has four states: running, user idle, system idle and suspend: When user operates on the keypad or taps the touch screen, the system is in the running state. ... -
Page 15: Installing Microsd Card
Installing MicroSD Card The terminal provides a MicroSD card slot for external storage. The slot is beneath the battery compartment. Follow the instructions of the card manufacturer to use the card. Insert the MicroSD card into the card slot, with its metal contacts facing down, as shown below. Note that the MicroSD card may not function in any of the following conditions: 1. -
Page 16: Installing Sim Card
Installing SIM Card The SIM card slot is beneath the battery compartment and it is available only to the PT30 with GPRS model. 1. Take out the battery. Push the cover release latch in the direction indicated in figure 1 to release the slot cover and open the cover. -
Page 17: Chapter 3 Using The Pt30 Series
Chapter 3 Using the PT30 Series Introduction This chapter provides the detailed instructions for using and setting the PT30. Figure 3.1: Desktop Icons Status Icons The status bar at the bottom of the screen can contain the following status icons. Icon Description Bluetooth management tool. -
Page 18: Programs Icons
USB connection status. Battery status. WiFi signal strength. Clock. Soft input panel. Background running program selection window. Programs Icons Icon Program Name Description Stylus Touch screen calibration tool. Light Setting Screen and keyboard backlight setting tool. Peripheral Switch Peripheral module power control. Calculator Numeric calculation. - Page 19 LockConfig Keyboard and touch screen lock/unlock tool. WiFi WiFi communication management and configuration tool. Bluetooth Device Bluetooth communication management and configuration tool. Properties Barcode Setting Barcode engine configuration tool. Set the programs and parameters which need to boot automatically at Autorun startup.
-
Page 20: Settings Icons
Settings Icons Icon Description System volume control. Internet options settings. Enable/disable connections with host PC. Memory storage management and configuration. (Use it with discretion) Power properties (battery, schemes and device status) settings. Passwords (power on password and screen saver password) settings. System date, time and time zone settings. - Page 21 Remove programs installed on the terminal. Input panel settings. Owner properties settings. GPRS connection configuration. View system information. Change your desktop background (wallpaper). View the certificates installed on the terminal.
-
Page 22: Keypad
Keypad SCAN key Scan barcode key. Pop up the Keyboard Shortcuts menu (default), or open the Admin Setting TOOL key application (when Sys Shortcut Tools is turned OFF). Turn screen backlight on or off. Backlight key *Press and hold it for 7.5s for a warm reset. ALPHA key Toggle between alphabetic and numeric keypad. -
Page 23: Alphabetic Keypad
Drag : Hold the stylus on the screen and drag across the screen to select text. Drag multiple items in a list to select them. CAUTION: To prevent damage to the screen, only use the stylus provided by Newland. -
Page 24: Volume Control
Volume Control Tap “Start”→“Settings”→“Control Panel”→ double-click and move the slider to the right or left to raise or lower the volume. Figure 3.2: Volume Figure 3.3: Sounds Peripheral Module Power control The program is for users to quickly turn GPRS/3G/Bluetooth/WiFi module on or off. Tap “Start”→“Settings”→“Control Panel”→double click to open the program. -
Page 25: Backlight Settings
Backlight Settings Tap “Start”→“Settings”→“Control Panel”→double click Screen Backlight: Normal Mode: Normal mode applies when the system is in the running state. There are 11 levels (0-10) of screen brightness for this mode. Low-power Mode: Low-power mode allows users to dim the screen to save power if no operation is performed on the screen and keyboard for a preset period of time (switch timer). -
Page 26: Resetting The Pt30
Format :Format the selected memory, the data in memory will be destroyed after memory is formatted. Dismount :Dismount the selected memory. New Partitions :Create a new partition in selected memory. Delete Partitions :Delete an existing partition in selected memory. Figure 3.6: Memory Configuration Resetting the PT30 Warm Reset... -
Page 27: Locking The Pt30
Locking the PT30 User can lock or unlock the terminal using the program Tap “Start”→“Settings”→“Control Panel”→double click to run the program. Figure 3.7: Auto Lock Lock the keyboard and touch screen: Method 1: If no operation is performed on the PT30 for some time (user programmable), the keyboard and touch screen will be locked automatically. -
Page 28: Barcode Settings
Barcode Settings Scan Engine Parameters Configuration Tap “Start”→“Settings”→“Control Panel”→double click Figure 3.9: Normal Settings Figure 3.10: Barcode Settings Figure 3.11: Test... - Page 29 Output Settings: Output via API : Use program API libraries control to get the barcode data. Output via keyboard : Output the barcode data to keyboard buffer to simulate keyboard input. Output via clipboard : Output the barcode data to clipboard. Figure 3.12: Output Settings ...
- Page 30 Figure 3.13: Scan Mode Scan Trigger: Select a key or key combination as scan trigger by checking the item. Figure 3.14: Scan Trigger Good Read Notifier: Select an indicator for good read. Figure 3.15: Good Read Notifier...
- Page 31 Prefix and Suffix: Set a prefix/suffix that you want to append to barcode data. Figure 3.16: Prefix & Suffix Symbologies: List of configurable symbologies varies by the product model. Enable/disable a barcode symbology. Set parameters of a barcode symbology. Figure 3.17: Enable/Disable Barcode Figure 3.18: Set Barcode Parameters...
- Page 32 Test Tap “Test” on the Barcode Settings screen (Figure 3.10). Scan a barcode with the terminal. Decoded data will appear in the textbox as shown in Figure 3.19 after a good read. Figure 3.19: Test 2D Image Debugger This feature only applies to the PT30 equipped with 2D scan engine.
-
Page 33: Reading 1D Barcode
Reading 1D Barcode Adjust the scan angle or the distance between the terminal and the target barcode to ensure the length of laser beam is roughly 8mm greater than that of the barcode, as shown in the following figure. Right and wrong way of reading:... -
Page 34: Reading 2D Barcode
Reading 2D Barcode Adjust the scan angle and the distance between the terminal and the target barcode to make them fall into the following ranges: A. Point the terminal’s focus lamp at the center of the barcode. B. Optimum scan distances: 5-20cm. C. -
Page 35: Admin Settings
Admin Settings To run the Admin Setting application, long press or double press the TOOL key on the terminal to open the Keyboard Shortcuts menu (default), and then double tap . Users will be asked to set the admin password when using it for the first time. -
Page 36: Chapter 4 Using Bluetooth Communication
Chapter 4 Using Bluetooth Communication Bluetooth Config in the status bar, or click this icon and then select “BT Config” to display the BT Configuration window Double click (Figure 4.2). Figure 4.1: Desktop Figure 4.2: BT Configuration (Basic) A. Set device name and pin code as per your needs. B. -
Page 37: Bluetooth Manager
C. Tap the “Service” tab and then select “Generic serial” as per your needs (Figure 4.4). Bluetooth Manager in the status bar and then select “BT Manager” to display the BT Manager window (Figure 4.5). You can search Click for Bluetooth devices and services and pair & connect with a Bluetooth device as per actual needs. For an application program using Bluetooth communication, the terminal will attempt to connect to the most recently connected Bluetooth device automatically if no Bluetooth device is connected to it currently. -
Page 38: Chapter 5 Using Wifi Communication
Chapter 5 Using WiFi Communication SCU (Summit Client Utility), a Wi-Fi configuration, monitoring and management application, allows users to search Wi-Fi networks that are available to connect to, monitor status information on Wi-Fi and configure wireless parameters such as IP address and gateway. -
Page 39: Profile Window
Down The radio is not recognized by Summit software and therefore is not associated and nor authenticated. Disabled The radio is disabled. To enable the radio, tap Enable Radio located on the SCU Main window. When the radio is disabled, it does not attempt to make a connection to an access point. - Page 40 Profile changes are not saved to the profile until you tap “Commit”. Using Scan to Create a Profile When you tap “Scan” on the Profile window, SCU displays a list of that are broadcasting their SSIDs. Figure 5.3 below is an example of a Scan window.
-
Page 41: Status Window
then SCU opens a dialog box in which you can specify WEP keys. If the AP is using EAP, then SCU opens a dialog box in which you can specify login credentials for the EAP type (which SCU assumes is LEAP). After you enter information on a dialog box, you return to the SCU Profile window, where you can view and edit profile settings. -
Page 42: Global Window
(Re)connect Initiate a reconnect of the radio: Disable and enable the radio, apply (or reapply) the current profile, attempt to associate to the wireless LAN, and attempt to authenticate to the wireless LAN. Release/Renew Obtain a new IP address through DHCP release/renew. Start Ping/Stop Ping Start a continuous ping to the address in the edit box next to the button. -
Page 43: Chapter 6 Using Gprs Communication
Chapter 6 Using GPRS Communication Ensure that an activated SIM card, from the phone service provider, is installed in the terminal. By default, a GPRS connection is already created on the PT30. You can tap “Start”→“Settings”→“Control Panel”→“Network and Dial-up Connections”, and then double click the GPRS icon to initiate GPRS communication if you are located in China. If you are not located in China, you may either modify the existing GPRS connection or create a new connection by following the instructions below. - Page 44 Figure 6.3: Modem Figure 6.4: Port Settings Tap the “Call Options” tab. Type [+cgdcont=1,“IP”,“cmnet”] in the field at the bottom of the screen. “cmnet” is an example of GPRS APN (access point name). Contact your GPRS service provider to obtain this information. Tap “OK”...
-
Page 45: Setting Up A Dial-Up Connection
Figure 6.6 Set phone number Figure 6.7: New connection created Setting Up a Dial-Up Connection To set up a dial-up connection, follow the steps below: Click “Dial Properties…” in the window as shown in Figure 6.8. Click “Edit…” in the window as shown in Figure 6.9. Figure 6.8: Dial-up connection Figure 6.9: Dialing properties C. -
Page 46: Checking Gprs Connection Status
Wait 3-5 seconds for the settings to complete. Figure 6.10 Figure 6.11 Checking GPRS Connection Status Click in the status bar at the bottom of the screen to view the GPRS connection status. Figure 6.12: GPRS status... -
Page 47: Chapter 7 Activesync
Chapter 7 ActiveSync Introduction Microsoft ActiveSync (version 4.5 or higher) is required when you want to synchronize data between the terminal and PC. Installing ActiveSync on PC Download ActiveSync (version 4.5 or higher) from the Microsoft web site at http://www.microsoft.com and install it on your Figure 7.1 ActiveSync Installation interface Synchronizing Data... -
Page 48: Chapter 8 Accessories
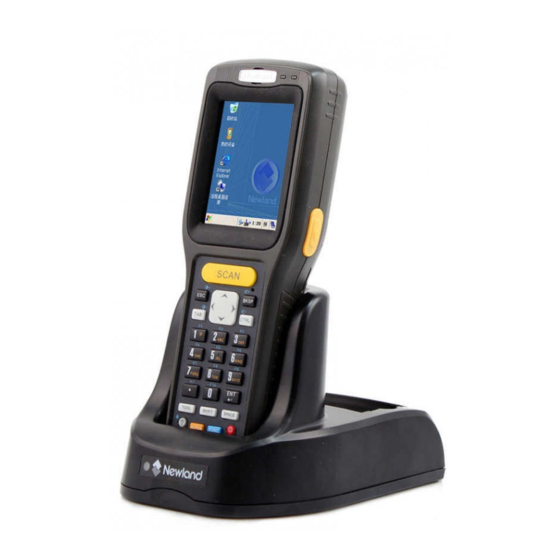
Chapter 8 Accessories Battery Low battery may result in misoperation of the terminal. Before your first use, charge the battery for at least 8 hours to ensure both the main and backup batteries are fully charged. Cradle Inserting the PT30 into Cradle Removing the PT30 from Cradle Charging the Battery Charging with Cradle... -
Page 49: Charging With Ac Adaptor
Charging with AC Adaptor Charging LED Red LED on: Charging in progress. Green LED on: Fully charged. Scanning/Decoding/Communication LED Red LED on: The terminal is scanning barcode. Green LED on: A barcode is decoded. Blue LED flashes: BT/WiFi/GPRS/3G module in the PT30 is communicating. Communicating with PC Directly Open the USB port cover located at the bottom of the PT30. -
Page 50: Communicating With Pc Via Cradle
Communicating with PC via Cradle Insert the PT30 into the dedicated cradle. Plug one end of the USB cable into the USB port on the cradle and the other end of the cable into PC. Note: Make sure Microsoft ActiveSync is already installed on the PC before performing data communication between the terminal and the PC. -
Page 51: Chapter 9 Maintenance & Troubleshooting
Keep the terminal away from fire or heat sources. If there is unusual odor, overheating or smoke, immediately cut off the power and disconnect the AC adapter, and contact your dealer or Newland customer service center. Continued use in this case may result in fire or electric shock. -
Page 52: Wireless Functionalities
Wireless Functionalities Do not use the terminal’s wireless functionalities where wireless device use is prohibited or where it may cause interference or danger, such as in aircrafts, petrol stations. Use & Maintenance If the terminal cannot be switched on after experiencing a sudden or unexpected power loss or other abnormalities, try performing a warm reset on the terminal by pushing the Reset button with a pin. -
Page 53: Troubleshooting
Keyboard failure or incorrect Unreliable cable connection between keyboard and mainboard or Keyboard response to any key entry. keyboard malfunction. Please contact Newland after-sales service. Battery indicator is OFF Ensure the AC adapter is plugged in and properly connected. when charging. - Page 54 Headquarters Fujian Newland Auto-ID Tech. Co., Ltd. 3F, Building A, No.1, Rujiang West Rd., Mawei, Fuzhou, Fujian, China 350015 TEL: +86 - (0) 591-83979222 FAX: +86 - (0) 591-83979208 E-mail: marketing@nlscan.com WEB:www.nlscan.com Newland Europe BV Rolweg 25, 4104 AV Culemborg, The Netherlands...
Need help?
Do you have a question about the NLS-PT30 Series and is the answer not in the manual?
Questions and answers