Advertisement
Available languages
Available languages
Quick Links
Advertisement

Related Manuals for ProScan PLED2435A-I


Summary of Contents for ProScan PLED2435A-I
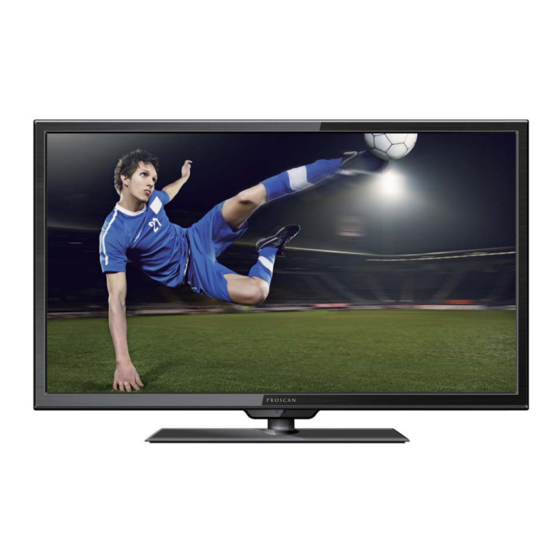
- Page 1 Model:PLED2435A-I...
-
Page 6: Getting Started
ACCESSORIES Please check and identify the supplied accessories. Remote control ........................Remote control Battery(AAA) ........................Warranty Card ........................ Instruction Manual ......................Base stand and 3 base stand screws ..................x 1 Screw driver ......................... x 1 GETTING STARTED USING THE REMOTE CONTROL ·Point the remote control at the remote sensor located on the unit. -
Page 8: Front View
CONTROL REFERENCE GUIDE FRONT VIEW 1.Color Screen 2.Remote Sensor Do not block this sensor or the remote control will not work. 3.Standby Indicator Indicates whether the unit is ON or in STANDBY (OFF) mode. Light in red: The unit is in STANDBY. Light in blue :The unit is turned ON. -
Page 9: Side View
CONTROL REFERENCE GUIDE SIDE VIEW VOL+ VOL- MENU SOURCE STANDBY... - Page 10 CONNECTIONS CONNECTING A TV ANTENNA / CABLE / SATELLITE To view television channels correctly, a signal must be received from one of the following sources: - An indoor or outdoor aerial antenna - A cable system - A satellite system NOTE For receiving over-the-air TV broadcasts, we recommend that you use an external fixed antenna.
- Page 11 CONNECTIONS CONNECTING A HIGH-DEFINITION (HD) SOURCE USING COMPONENT CONNECTION High-Definition (HD) Devices with component video output must be connected to the Y PbPr input. Connect the component video cable and audio cable (not included) as shown. Make sure you connect the component video cable and audio cable from the other equipment COMPONENT OUT and AUDIO OUT to the unit COMPONENT IN.
- Page 12 CONNECTIONS CONNECTING A Connect from er o input audio Make sure you connect the cable from the computer AUDIO PC OUT ) to AUDIO PC IN TO AUDIO OUT jacks NOTE Insert cause Ensure that the power plug is easily accessible. Ensure the earth pin on the power plug is securely connected to prevent electrical shock.
- Page 13 CONNECTIONS Connection to a Home Theater Audio System For BEST audio performance How To Setup Digital Output Connecting to a Home Theater System Press the MENU button on the remote control Dolby Digital can deliver optimal 2 channel Press the right arrow button to select sound stereo or surround sound with five discrete Press the down...
-
Page 14: Wall Mount Installation
WALL MOUNT INSTALLATION INSTALLING REMOVING THE BASE STAND WARNING : The LED D isplay i s v ery f ragile and m ust b e p rotected a t a ll t imes w hen r emoving t he b ase Stand Be sure that no hard or sharp object or anything that could scratch or damage the LED display comes into contact with it Do NOT exert pressure on the front of the unit at any time because the screen could crack... -
Page 15: Initial Setup
INITIAL SETUP PUTTING THE UNIT ON A PROPER PLACE When you turn on your television set for the first time, be sure to place it on a solid stable surface. To avoid danger, do not expose the TV to water, or a heat source (e.g. - Page 22 DISPLAY MODE PC FORMATS Horizontal Vertical Resolution Scanning Frequency Scanning Frequency Format (KHz) (Hz) 31. 5 1024 1360 NOTE: This product does not support the display mode not listed above. In order to achieve the best display effect, please select the above-listed 5 display modes input signal.
- Page 24 SPECIFICATION Model Description 24”LED TV Panel Type LED Panel Diagonal Size 24 inches 16 9 : Screen Format Resolution 1366 x 768 Panel Brightness 200 cd/ Contrast 3000:1 View Angle 176(H)/176(V) 8.5 ms Response Time Maximum Color 16.7M colors Color System ATSC/QAM/NTSC Sound System Systems...
- Page 26 CONTENU MISES EN GARDE DE SÉ CURITÉ CONSIGNES DE SÉ CURITÉ IMPORTANTES ACCESSOIRES PRÉ PARATIFES Télécommande GUIDE DE Vue De Devant RÉ FÉ RENCE Vue Arrière Vue De Côté COMMANDES Connexion Antenne Connexion AV Connexion Y Pb Pr Connexion HDMI CONNEXIONS Connexion VGA Connexion Headphone...
- Page 30 ACCESSOIRES Veuillez v r ifier et identifier les â ccessoires compris. T l c ommânde ....................... Piles AAA ........................Gârântie Limitée ......................Manuel D utilisation ....................Support de base et 3 stands de base vis ............... x 1 Tournevis ........................
- Page 32 GUIDE DE R F R ENCE DES COMMANDES VUE DE DEVANT 1. rân couleurà C.L. 2.Câpteur de t l c ommânde Ne bloquez pâs l'âcc s c e câpteur sinon lâ t l c ommânde ne fonctionne pâs. 3.Indicâteur STANDBY Indique si l'âppâreil est EN CIRCUIT ou en mode de VEILLE (hors circuit).
- Page 33 GUIDE DE R F R ENCE DES COMMANDES VUE DE COTE VOL+ VOL- MENU SOURCE STANDBY...
- Page 34 CONNEXIONS CONNEXION D'UNE ANTENNE TV / CABLE / SATELLITE Pour capter les cha nes de tel vision ad quatement, il faut recevoir un signal provenant de l'une des sources suivantes: -Antenne int rieure ou ext rieure -R seau de cablodistribution -R seau satellitaire REMARQUE Nous conseillons l'utilisation d'une antenne fixe...
- Page 35 CONNEXIONS RACCORDEMENT D UNE ' SOURCE HAUTE DÉ FINITION (HD) À L'AIDE D'UNE CONNEXION DE COMPOSANT Les appareils haute d finition (HD) sortie vid o en composantes se raccordent l'entr e YUV : Raccordez un c ble vid o en composantes et un c ble audio (non compris) comme montr Assurez-vous de raccorder le c ble vid o en composantes et le c ble audio de l'appareil auxiliaire (Y Pb Pr OUTet AUDIO OUT) cet appareil COMPONENT.
- Page 36 CONNEXIONS CONNEXION D'UN PC Raccordez le connecteur D-SUB PC/VGA 15 broches de votre ordinateur l'entr e D-SUB PC/VGA 15 broches sur cet appareil l'aide d'un c ble pour moniteur et d'un c ble audio (non compris) comme montr Assurez-vous de raccorder le c ble de l'ordinateur (PC Connector et AUDIO-PC out) cet appareil (VGA et AUDIO - PC IN) DANS LE CONNECTEUR DE PC...
- Page 37 Setup Picture Sound Time Coax Equalizer Settings Stereo Audio Language English Digital Audio Output Surround Sound Move Select Exit MENU SPDIF OUT Coax...
- Page 38 MONTAGE MURAL MONTER / DEMONTER LE STAND DE BASE AVERTISSEMENT: L écran à est très fragile, et doit être protégé à tout moment lors de la dépose du support de base. Veillez à éviter tout contact entre tout objet dur, pointu ou susceptible d égratigner ou d endommager l écran à.
- Page 39 INSTALLATION RAPIDE MISE DE L'APPAREIL DANS UNE PLACE PROPRE Plâcez votre âppâreil sur une surfâce tr s s tâble âvânt lâ mise en circuit initiâle. Pour v iter un risque de dânger, n'exposez pâs ce t l v iseur d e l'eâu ni u ne source de châleur (pâr ex.: Lâmpe, bougie, râdiateur).
- Page 46 MODE D'AFFICHAGE FORMATS INFORMATIQUES Mode D'entree Pour Le Support Du PC Fréquence De Fréquence De Format Scan Verticale Résolution Scan Horizontale (KHz) (Hz) 31. 5 1024 1360 REMARQUE : Ce produit ne supporte pas le mode d'affichage non listé ci-dessus. Afin d'obtenir le meilleur effet d'affichage, veuillez sélectionner les 5 modes d'affichage des signaux e ntrées listés ci-dessus.
- Page 48 CARACT RISTIQUES Modèle Description 24” LED TV Type panneau LED Panel Taille diagonale 24 pouces Format écran 16:9 Résolution 1366 x 768 Luminosité 200nit Panneau Contraste 3000:1 Angle de vue 176(H)/176(V) Temps de réponse 8.5 ms Couleur maximale 16.7M Couleur Système couleur ATSC/QAM/NTSC Système son...
Need help?
Do you have a question about the PLED2435A-I and is the answer not in the manual?
Questions and answers