Table of Contents
Advertisement
Available languages
Available languages
Quick Links
D
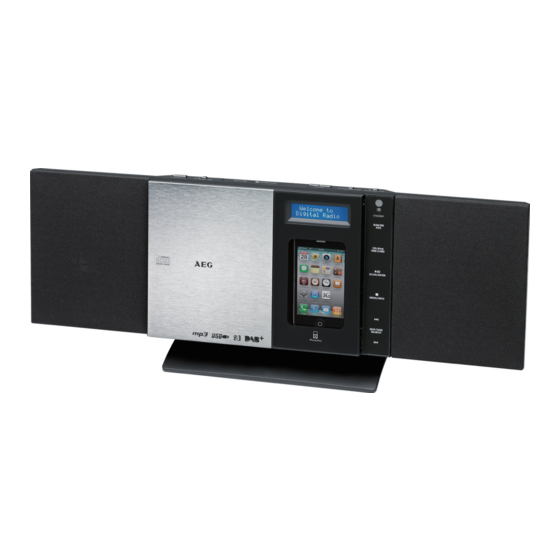
Musik-Center für iPhone/iPod
NL
Muziekcentrum voor iPhone/iPod
F
Station d'accueil pour iPhone/iPod
E
Centro de música para iPhone/iPod
I
Centro musicale per iPhone/iPod
GB
Music Center for iPhone/iPod
MUSIK-CENTER
FÜR iPHONE/iPOD
iPhone und iPod sind Schutzmarken der Apple Inc., registriert in den USA und anderen Ländern.
iPhone and iPod are trademarks of Apple Inc., registered in the USA and other countries.
MC 4456 iP
Bedienungsanleitung/Garantie
Gebruiksaanwijzing
Mode d'emploi
Instrucciones de servicio
Istruzioni per l'uso
Instruction Manual
05
16
25
34
43
52
Advertisement
Table of Contents

Subscribe to Our Youtube Channel
Related Manuals for AEG MC 4456 iP


Summary of Contents for AEG MC 4456 iP
- Page 1 Music Center for iPhone/iPod Instruction Manual MUSIK-CENTER FÜR iPHONE/iPOD MC 4456 iP iPhone und iPod sind Schutzmarken der Apple Inc., registriert in den USA und anderen Ländern. iPhone and iPod are trademarks of Apple Inc., registered in the USA and other countries.
-
Page 2: Table Of Contents
Inhalt Deutsch Español Inhalt Contenidos Übersicht der Bedienelemente ........Seite 3/4 Indicación de los elementos demanejo ....Página 3/4 Wandmontage ..............Seite Montaje en pared ............Página Bedienungsanleitung ............Seite Manual del usuario............Página 34 Technische Daten .............Seite 13 Especificaciones técnicas ..........Página 42 Garantie ................Seite 14 Eliminación ..............Página 42 Entsorgung ................Seite 15 Nederlands... -
Page 3: Übersicht Der Bedienelemente
Übersicht der Bedienelemente Overzicht van de bedieningselementen Elementi di comando Liste des différents éléments de commande Location of Controls Indicación de los elementos demanejo Abb. 1 / Fig. 1 Abb. 2 / Fig. 2... -
Page 4: Wandmontage
Übersicht der Bedienelemente Overzicht van de bedieningselementen Elementi di comando Liste des différents éléments de commande Location of Controls Indicación de los elementos demanejo Abb. 3 / Fig. 3 Wandmontage Installazione a parete Wandmontage Wall mounting Montage mural Montaje en pared Abb. - Page 5 Deutsch Bedienungsanleitung Geräte mit diesem Symbol arbeiten mit einem „Klasse 1-Laser“ zur Abtastung der CD. Die ein- Vielen Dank, dass Sie sich für unser Produkt entschieden gebauten Sicherheitsschalter sollen verhindern, haben. Wir wünschen Ihnen viel Freude mit dem Gerät. dass der Benutzer gefährlichem, für das mensch- liche Auge nicht sichtbarem Laserlicht ausgesetzt Allgemeine Sicherheitshinweise wird, wenn das CD-Fach geöffnet ist.
- Page 6 Deutsch Übersicht der Bedienelemente Inbetriebnahme des Gerätes/Einführung Vorderseite (Abb. 1) • Lesen Sie vor der Inbetriebnahme die Bedienungsanlei- tung sorgfältig durch! STANDBY/ON Taste (Standby/Betrieb) • Wählen Sie einen geeigneten Standort für das Gerät. CD OPEN/CLOSE (öffnen/schließen) CD-Fach Geeignet wäre eine trockene, ebene, rutschfeste Fläche, 3 USB Anschluss auf der Sie das Gerät gut bedienen können. SD/MMC Kartenschlitz • Achten Sie darauf, dass das Gerät ausreichend belüftet 4 VOLUME +/- (Lautstärke) Tasten wird!
- Page 7 Deutsch Wird die Fernbedienung längere Zeit nicht benutzt, entneh- HINWEIS: Bei der 12 Stunden Anzeige erscheint men Sie bitte die Batterie, um ein „Auslaufen“ von Batterie- AM = Vormittags, PM = Nachmittags. säure zu vermeiden. 3. Drücken Sie die / SKIP/TUNE SEARCH Tasten um die WARNUNG: Stunden einzustellen.
- Page 8 Deutsch STANDBY/ON (1/16) ACHTUNG: Schalten Sie das Gerät mit der STANDBY/ON Taste in den Bevor Sie das USB Speichermedium entfernen, schalten Standby-Betrieb (die Uhrzeitanzeige erscheint). Drücken Sie Sie das Gerät mit der DAB/FM/AUX Taste in den RADIO diese Taste erneut, schaltet sich das Gerät wieder ein. Betrieb. HINWEIS: • Drücken Sie im Standby-Modus eine beliebige Taste, SD/MMC-Kartenschlitz um die Uhrzeit für 10 Sekunden anzuzeigen.
- Page 9 Deutsch Radio hören DAB Zusatzinformationen anzeigen Im DAB Modus können Sie sich die folgenden Zusatzinfor- FM Sender suchen mationen anzeigen lassen, sofern vom Radiosender ausge- 1. Drücken Sie die DAB/FM/AUX Taste (12/2) so oft, bis im strahlt. Drücken Sie dazu die MENU/INFO Taste (15/13). Display „RADIO INITIALIZE PLEASE WAIT“ erscheint. • <PROGRAMME TYP> 2.
- Page 10 Deutsch Musik vom iPod/iPhone wiedergeben iPod/iPhone Ladefunktion (iPod/iPhone nicht im Lieferumfang enthalten) Haben Sie einen iPod/iPhone auf dem Dock Anschluss auf- gesteckt, so wird der Akku des iPod/iPhone geladen. Hierfür 1. Drücken Sie die CD/iPOD/USB/CARD Taste (13/1) so oft, muss das Gerät ans Stromnetz angeschlossen sein. bis im Display „NO iPOD“ erscheint. 2. Drücken Sie die iPOD OPEN/CLOSE (öffnen/schlie- HINWEIS: ßen) Taste (6 am Gerät), um das Dock-Anschluss-Fach (18) • Sofern mit Ihrem iPod mitgeliefert, verwenden Sie den zu öffnen.
- Page 11 Deutsch Halten Sie den CD-Deckel stets geschlossen. Im Radiobetrieb: Zum Abstimmen des gewünschten Radiosenders. Und in HINWEIS: Verbindung mit der zuvor gedrückten ID3/iPOD/MEM/ • Bei CDs im MP3 Format, mit Ordner, erscheint beim C-ADJ. Taste zum Anwählen der gespeicherten Radiosender. Wechsel in einen anderen Ordner 001 für das erste Lied des neuen Ordners. MENU/INFO (15/13) • Wenn eine Disk falsch herum eingelegt wird, bzw. keine Die CD bzw. das Musikstück wird angehalten. Disk eingelegt ist, leuchtet die Meldung „CD--READING“, und „NO DISC“ (keine Disk) er- Im iPOD Modus: scheint auf dem Display.
- Page 12 Deutsch Nur für MP3‘s und CD‘s im MP3-Format: • Bestätigen Sie Ihre Eingabe jeweils mit der TIMER 1 x drücken: Das aktuelle Lied wird ständig wiederholt (im Taste. Die aktuell einzustellende Anzeige blinkt im Display erscheint REP_1). Display. 2 x drücken: Die komplette CD wird ständig wiederholt HINWEIS: (im Display erscheint REP_ALL). Wird innerhalb von ca. 5 Sekunden keine Taste betätigt, 3 x drücken: Der angewählte Ordner der MP3 CD wird schaltet das Gerät in den Standby-Betrieb zurück ohne ständig wiederholt (im Display erscheint die Eingaben zu speichern.
- Page 13 Das Gerät stoppt automatisch, nachdem alle program- Technische Daten mierten Titel wiedergegeben wurden. Die programmierte Reihenfolge bleibt im Speicher enthalten bis Sie in den Modell: ................MC 4456 iP anderen Modus wechseln, oder die CD aus dem CD Fach Spannungsversorgung: ........230-240 V~ 50 Hz entnommen wird bzw. das Gerät ausgeschaltet wird. Ausgangsleistung:.............100 W PMPO Sie haben die Möglichkeit die programmierten Titel mit der...
- Page 14 Deutsch Garantie Sie können sich dort direkt anmelden und erhalten alle Infor- mationen zur weiteren Vorgehensweise Ihrer Reklamation. Garantiebedingungen Über einen persönlichen Zugangscode, der Ihnen direkt nach 1. Gegenüber Verbrauchern gewähren wir bei privater Ihrer Anmeldung per E-Mail übermittelt wird, können Sie den Nutzung des Geräts eine Garantie von 24 Monaten ab Bearbeitungsablauf Ihrer Reklamation auf unserem Service- Kaufdatum.
- Page 15 Deutsch Entsorgung Bedeutung des Symbols „Mülltonne“ Schonen Sie unsere Umwelt, Elektrogeräte gehören nicht in den Hausmüll. Nutzen Sie die für die Entsorgung von Elektrogeräten vorge- sehenen Sammelstellen und geben dort Ihre Elektrogeräte ab, die Sie nicht mehr benutzen werden. Sie helfen damit die potenziellen Auswirkungen, durch falsche Entsorgung, auf die Umwelt und die menschliche Gesundheit zu vermeiden.
-
Page 16: Gebruiksaanwijzing
Nederlands Gebruiksaanwijzing Producten die voorzien zijn van dit symbool zijn voorzien van een “Klasse 1 Laser” voor het lezen Dank u voor uw keuze van dit product. We hopen dat u er van de CD. De ingebouwde veiligheidschake- veel plezier van beleeft. laars dienen ervoor om te voorkomen dat de gebruiker wordt blootgesteld aan de gevaarlijke Algemene veiligheidsrichtlijnen... - Page 17 Nederlands Overzicht van de bedieningsorganen Installatie/Inleiding Voorzijde (Fig. 1) • Lees deze gebruiksaanwijzing aandachtig door voordat u het apparaat in gebruik neemt! STANDBY/ON toets (slaapstand/aan) • Bepaald een geschikte plek voor het apparaat. De onder- CD OPEN/CLOSE (openen/sluiten) CD-compartiment grond waarop u het apparaat plaatst dient droog, vlak en 3 USB-poort niet glad te zijn, voor een gemakkelijke bediening. SD/MMC kaartsleuf • Zorg dat het apparaat voldoende geventileerd wordt! 4 VOLUME +/- (volume) toetsen...
- Page 18 Nederlands OPMERKING: WAARSCHUWING: De 12-uursweergave resulteert in de volgende aandui- • Stel batterijen niet bloot aan hoge temperaturen of direct zonlicht. Gooi de batterijen nooit in het vuur. ding op het scherm AM = ochtend, PM = middag. Ontploffingsgevaar! • Houd de batterijen buiten bereik van kinderen. Bat- 3. Gebruik de / SKIP/TUNE SEARCH toetsen om de terijen zijn geen speelgoed. uren in te stellen.
- Page 19 Nederlands STANDBY/ON (1/16) SD/MMC kaartsleuf Druk de STANDBY/ON toets om het apparaat in de slaap- 1. Open het klepje (3) bovenop het apparaat. stand te schakelen (het scherm geeft de tijd aan). Druk deze 2. Als u bestanden af wilt spelen van een SD/MMC kaart, toets nogmaals om het apparaat in te schakelen.
- Page 20 Nederlands 3. Als de ontvangst te zwak is en er zich storing bevindt • <Ensemble Name> op het ontvangen station, kunt u de ontvangst probe- Geeft de naam van het station of de omroep weer ren te verbeteren, door aan de antenne te draaien of (bijv. DR Deutschland).
- Page 21 Nederlands 5. Plaats uw iPod/iPhone in het dock. OPMERKING: De CD houder kan niet worden geopend in iPOD LET OP: modus. Zorg ervoor dat uw iPod/iPhone rechtop in de aan- sluiting gezet wordt. Zet de iPod/iPhone niet scheef in 3. Plaats een audio CD met het label naar voren op de spin- de aansluiting.
- Page 22 Nederlands • Druk nu op de SCAN/ENTER toets om een functie te EQ (11 op de afstandsbediening) activeren of het volgende menu te openen. (Voorinstelling voor de toonregeling). Er zijn diverse standen voor de toonregeling beschikbaar (FLAT, CLASSIC, ROCK, In DAB modus: POP, JAZZ). Start het automatisch scannen naar stations (AUTOTUNE FULL SCAN). OPMERKING: Tijdens Afspelen van iPod/iPhone Muziek / SKIP/TUNE SEARCH (16/14) Wijzig de EQ instelling op uw iPod/iPhone naar wens voor...
- Page 23 Nederlands SLEEP (7 op de afstandsbediening) Voor MP3 bestanden of een CD in MP3 formaat: Als er ID-3 Tag informatie is opgeslagen, verschijnt deze Wanneer het apparaat is ingeschakeld, kunt u de tijd instel- informatie op het scherm als een ticker. Druk nogmaals op de len waarna het apparaat naar de slaapstand zal schakelen.
-
Page 24: Technische Specificaties
Er kan geen Digi- tale Radio worden ontvangen op uw locatie Technische specificaties Model: ................MC 4456 iP Voeding: ...............230-240 V~ 50 Hz Uitgangsvermogen: ..........100 W PMPO Opgenomen vermogen: ............23 W Beschermingsklasse:................II Netto gewicht: ...............2,40 kg Radio: Frequentiebereiken: ....VHF/FM 87,5 ~ 108,0 MHz ....DAB/DAB+ 174 ~ 240 MHz... -
Page 25: Français
Français Mode d’emploi Ces interrupteurs de sécurité ne doivent pas être contournés ou modifiés sous peine de créer un risque d‘exposition au Merci d’avoir choisi notre produit. Nous espérons que vous faisceau laser. saurez profiter votre appareil. Symboles utilisés dans ce manuel Indications générales de sécurité Les notes importantes de sécurité sont marquées de façon distincte. Y faire attention afin d’éviter les accidents et dom- Avant d’utiliser cet appareil, lire attentivement ce manuel et le mages sur l’appareil : conserver avec le Certificat de Garantie, la facture et, si pos-... - Page 26 Français 7 Haut-parleur Montage mural 8 Compartiment CD Vous pouvez également installer l’appareil à un mur (acces- 9 Ecran LCD soires de montage non-inclus). 10 Capteur IR pour la télécommande ATTENTION : 11 Voyant STANDBY Assurez-vous préalablement qu’il n’y a pas de câbles dans 12 Bouton DAB/FM/AUX le mur pouvant être endommagés ! 13 Bouton CD/iPOD/USB/CARD...
- Page 27 Français Compatibilité iPod/iPhone ATTENTION : Les piles ne doivent pas être jetées avec les ordures En raison de la variété importante de modèles et de géné- ménagères. Les déposer dans un centre de récupération rations d’iPod et d’iPhone sur le marché, la compatibilité compétent ou les rendre au vendeur. absolue ne peut pas être garantie. Avant de connecter un iPod/iPhone, vérifier qu’il a une interface compatible. Alimentation Une entière compatibilité des fonctions de télécommande • Branchez la fiche d‘alimentation sur une prise standard ne peut pas non plus être garantie. Utilisez normalement 230 V, 50 Hz. votre iPod/iPhone, quand il est dans sa station d’accueil. • Assurez-vous que la tension corresponde à celle indiquée NOTE : sur la plaque indicatrice.
- Page 28 Français Port USB 4. Pour les autres fonctions, veuillez consulter le manuel de l‘utilisateur de l‘appareil audio externe. Cet appareil a été conçu en conformité avec la technologie USB la plus récente. Compte tenu de la grande variété de NOTE : supports de stockages USB existant sur le marché, il n‘est Réglez le volume de l‘appareil audio externe sur un niveau pas possible de garantir une compatibilité totale avec tous audible.
- Page 29 Français 3. Vous pouvez sélectionner la station suivante ou précé- Pour les stations FM : La fréquence radio actuellement dente à l’aide des boutons / SKIP/TUNE SEARCH préréglée s’affiche sur l’écran et le numéro de l’emplace- (16/13). ment préréglé clignote. 4. Si la réception est trop faible et que la station reçue est Pour les stations DAB : “Préréglage vide”...
- Page 30 Français 8. Refermez le compartiment de port d‘accueil. Pour ce Pour un MP3 ou un CD au format MP3 : faire, appuyez à nouveau sur le bouton iPOD OPEN/ L‘écran va afficher “STOP”, le numéro du répertoire, par CLOSE. exemple F--04 et le nombre total de pistes (par ex. T--126). 9. Suivre les indications du manuel de votre iPod/iPhone Si la lecture ne commence pas automatiquement : Ap- pour l’utilisation des commandes.
- Page 31 Français Vous pouvez utiliser la touche SKIP/TUNE SEARCH de la En mode DAB : façon suivante : Maintenez le bouton enfoncé pour régler manuellement une Appuyez 1 fois = Reprend la lecture de la piste en cours, station DAB. depuis son commencement. Appuyez 2 fois = Passe à la piste précédente. REPEAT (14 sur la télécommande) Appuyez 3 fois = Lis la piste d‘avant, etc.
- Page 32 Français 1. Utilisez la touche STANDBY/ON pour passer en mode votre choix, puis appuyez à nouveau sur ID3/iPOD/MEM/ de veille (le heure va s‘afficher). C-ADJ.. L‘écran va afficher la position de mémoire P- 02. 2. Maintenez le bouton TIMER enfoncé jusqu’à ce que Pour les MP3 ou les CD au format MP3 : “ON TIME” apparaisse à l’écran. L’affichage de fichier “F-000”...
-
Page 33: Données Techniques
Aucune radio numérique ne peut être reçue dans votre région Données techniques Modèle : ................MC 4456 iP Tension d‘alimentation : ........230-240 V~ 50 Hz Puissance de sortie : ..........100 W PMPO Consommation électrique : ............23 W Classe de protection :..............II Poids net : ................2,40 kg Radio : Gamme de fréquences : ....VHF/FM 87,5 ~ 108,0 MHz... -
Page 34: Español
Español Manual del usuario Estos interruptores de seguridad no deben anularse ni alte- rarse, o se producirá riesgo de exposición al rayo láser. Le agradecemos la confianza depositada en este producto y esperamos que disfrute de su uso. Símbolos en este manual del usuario Las notas importantes para su seguridad se indicant cla- Normas generales de seguridad ramente. - Page 35 Español 9 Pantalla LCD ATENCIÓN: 10 Sensor IR para el mando a distancia Antes de comenzar la instalación, cerciórese de que no 11 Indicador de STANDBY haya ningún cable en la pared para evitar dañarlos. 12 Botón DAB/FM/AUX 13 Botón CD/iPOD/USB/CARD NOTA: ¡Compruebe el alcance del cable! 14 Botón SCAN/ENTER...
- Page 36 Español • Abra el compartimiento de CD (8) pulsando el botón AVISO: CD OPEN/CLOSE (abrir/cerrar) (2 en el dispositivo). • Si se producen fugas en una batería, no permita que el La bandeja de CD se abre hacia la derecha. fluido entre en contacto con los ojos o con la piel. Si el • Saque, si está presente, el dispositivo de asegurado para ácido entra en contacto con los ojos, lávelos con agua transporte del reproductor de CD antes de iniciar el uso. depurada y consulte con un médico si no desaparecen • Pulse el botón CD OPEN/CLOSE de nuevo para cerrar los síntomas.
-
Page 37: Escuchar La Radio
Español Toma de auriculares (22) Toma LINE IN Cuando escuche por auriculares, use auriculares con una Conexión de dispositivos de reproducción analógicos. toma estéreo de 3,5 mm, que debe conectar a la toma de Cuando conecte con esta toma también puede escuchar el auriculares. Se desactivarán los altavoces. sonido de otros dispositivos, como reproductores MP3 o CD, etc. - Page 38 Español 1. Pulse el botón DAB/FM/AUX (12/2) repetidamente hasta Guardar emisora que se muestre “WELCOME TO DIGITAL RADIO” en 1. Si ha encontrado la emisora deseada, mantenga pulsado pantalla. el botón ID3/iPOD/MEM/C-ADJ. (5/12). 2. Pulse el botón SCAN/ENTER (14/13) para iniciar la Para emisoras FM: La frecuencia de radio memorizada exploración automática. Aparecerá brevemente “AUTO- actual aparecerá...
- Page 39 Español 8. Cierre de nuevo el compartimento de puerto de aco- Para MP3 o CD en formato MP3: plamiento. Para ello, pulse de nuevo el botón iPOD La pantalla mostrará “STOP”, el número de carpeta, OPEN/CLOSE. como F--04, y el número total de pistas (como T--126). Si 9.
- Page 40 Español Puede usar el botón SKIP/TUNE SEARCH del modo SELECT/MONO/ST (3 en el mando a distancia) siguiente: En modo radio FM: Pulsar x 1 = Inicia de nuevo la pista actual desde el Cambia entre STEREO y MONO. principio. En modo DAB: Pulsar x 2 = Salta a la pista anterior. Mantenga pulsado el botón para ajustar manualmente una Pulsar x 3 = Reproduce la pista anterior, etc. Presione emisora DAB. y mantenga el botón para buscar música rápidamente.
- Page 41 Español Reproducción programada Para apagar de nuevo la función, pulse el botón SLEEP repe- tidamente hasta que no se muestre nada en la pantalla. Reproducción programada en la secuencia deseada. (Sólo en el modo CD/USB/CARD) TIMER (6 en el mando) Puede programar el dispositivo para que se apague y en- 1.
-
Page 42: Especificaciones Técnicas
Su municipalidad le proporcionará información sobre los recibir radio digital puntos de recolección. en su zona Especificaciones técnicas Modelo: ................MC 4456 iP Tensión de alimentación: ........230-240 V~ 50 Hz Potencia de salida: ............100 W PMPO Consumo: ...................23 W Clase de protección: ................II Peso neto: ................2,40 kg Radio: Rangos de frecuencia: ....VHF/FM 87,5 ~ 108,0 MHz... -
Page 43: Italiano
Italiano Manuale dell’utente I commutatori di sicurezza non devono essere bypassati o manomessi; in caso contrario sussiste il rischio di esposizione Grazie per aver scelto il nostro prodotto. Vi auguriamo un al raggio laser. buon utilizzo del dispositivo. Simboli nel manuale dell’utente Linee guida generali sulla sicurezza Note importanti per la sicurezza sono segnate in modo chiaro. - Page 44 Italiano 10 Sensore IR per il telecomando ATTENZIONE: 11 Indicatore STANDBY Accertarsi prima se ci sono cavi nella parete che possono 12 Tasto DAB/FM/AUX essere danneggiati! 13 Tasto CD/iPOD/USB/CARD 14 Tasto SCAN/ENTER NOTA: Controllare la portata del cavo! (riproduzione/pausa/Scansione/invio) Per montare il dispositivo, accertarsi che sia disponibile una 15 Tasto /MENU/INFO presa a parete facilmente accessibile vicino al cavo.
- Page 45 Italiano Caricamento dell’iPod/iPhone ATTENZIONE: Le pile non devono essere smaltite nei rifi uti. Consegnare A causa della varietà di modelli e generazioni di iPod e iPho- le pile usate presso centri di raccolta competenti o al riven- ne sul mercato, non è possibile garantire una compatibilità ditore stesso. completa.
- Page 46 Italiano Porta USB NOTA: L’apparecchio è stato progettato secondo la più moderna Impostare il volume dl dispositivo esterno a un livello tecnologia USB. In seguito alla presenza di un’ampia gamma corretto. di strumenti di memoria sul mercato, non è possibile assicu- rare compatibilità assoluta con tutti i dispositivi di memorizza- Ripristinare i valori predefiniti zione USB. In alcuni rari casi possono quindi verificarsi errori Tutte le stazioni radio preimpostate e l’ora sono eliminati.
- Page 47 Italiano Selezione di una stazione preimpostata NOTA: 1. Premere il tasto ID3/iPOD/MEM/C-ADJ.. • Per una migliore ricezione DAB, si consiglia di posizio- 2. Selezionare la posizione preimpostata desiderata con i nare l’antenna cavo verticalmente. tasti / SKIP/TUNE SEARCH. • Non è possibile selezionare Mono e Stereo durante la 3. Premere nuovamente il tasto ID3/iPOD/MEM/C-ADJ. ricezione DAB. per riprodurre la stazione radio desiderata. • Per impostare manualmente una frequenza DAB, tene- re premuto il tasto SELECT/MONO/ST.
- Page 48 Italiano Caricamento dell’iPod iPod/iPhone Tenere sempre chiuso lo sportello del CD. NOTA: La batteria dell’iPod/iPhone viene caricata non appena l’iPod/ • Per CD in formato MP3 con una cartella, 001 compare iPhone viene collegato. Per effettuare ciò, l’unità deve essere per la prima traccia della nuova cartella quando si passa connessa all’alimentazione. ad un’altra cartella. NOTA: • Se il disco non è inserito completamente oppure non • Se l’adattatore dello slot è stato fornito con l’iPod, è inserito correttamente, compare il testo “CD--REA- usarlo per assicurarsi che l‘iPod sia posizionato corretta-...
- Page 49 Italiano MENU/INFO (15/13) Premere 3 x: Viene ripetuta continuamente la cartella selezionata del CD in MP3 (il display mostra Sospende il CD o brano musicale. REP_ALBUM). Utilizzare i tasti FOLDER In modalità iPOD: (4 sul telecomando) per selezionare le single • Premere prima il tasto ID3/iPOD/MEM/C-ADJ. per attiva- cartello. re il menu iPod. iPOD MENU compare sul display. Premere 4 x: La funzione viene disattivata e il CD viene • Ora premere il tasto MENU/INFO per accedere al...
- Page 50 Italiano 3. Dopo aver selezionato il volume di accensione, premere 7. Per cancellare la memoria, premere due volte il tasto di nuovo il tasto TIMER.Le impostazioni sono visualizzate MENU/INFO. Il display MEM si spegne. una dopo un’altra sul display. L’apparecchio di porta nel L’apparecchio si spegne automaticamente dopo aver modo standby.
-
Page 51: Specifiche Tecniche
Italiano Specifiche tecniche Modello: ................MC 4456 iP Tensione di alimentazione: .......230-240 V~ 50 Hz Uscita di potenza: ............100 W PMPO Consumo di potenza: ...............23 W Classe di protezione: ...............II Peso netto: ................2,40 kg Radio: Gamme di frequenza: ....UKW/FM 87,5 ~ 108,0 MHz ....DAB/DAB+ 174 ~ 240 MHz Con riserva di apportare mofifiche tecniche! Questo dispositivo risponde a tutte le direttive della CE, come la direttiva sulla compatibilità... -
Page 52: English
English Instruction Manual Symbols in this user manual Important notes for your safety are marked distinctively. Pay Thank you for choosing our product. We hope you will enjoy absolute attention to them to avoid accidents and damage using the appliance. to the device. -
Page 53: Wall Mounting
English 11 STANDBY Indicator CAUTION: 12 DAB/FM/AUX button Make sure beforehand whether there are cables in the wall 13 CD/iPOD/USB/CARD button which could be damaged! SCAN/ENTER button (play/pause/Scan/Enter) /MENU/INFO button NOTE: Check the reach of the cable! / SKIP/TUNE SEARCH buttons To mount the device, make sure that an easily accessible (search forward/backwards) plug outlet is available within reach of the power cable. -
Page 54: General Operation
English iPod/iPhone Compatibility CAUTION: Batteries must not be disposed of in the garbage. Please Due to the large variety of iPod and iPhone models and gen- bring used batteries to competent collection centers or erations on the market, full compatibility cannot be guaran- back to the dealer. -
Page 55: Listening To The Radio
English USB port NOTE: This device has been designed in accordance with the latest Set the volume of the external device to a proper audible USB state of the art technology. Due to the large variety of level. different USB memory tools on the market it is not possible to provide complete compatibility with all USB storage devices. - Page 56 English Select a preset station NOTE: 1. Press the ID3/iPOD/MEM/C-ADJ. button. • For optimum DAB reception, we recommend that you 2. Select the desired preset location with the / SKIP/ position the wire antenna vertically. TUNE SEARCH buttons. • You cannot toggle between Mono and Stereo during 3. Press the ID3/iPOD/MEM/C-ADJ. button again to play DAB reception. the desired radio station.
- Page 57 English iPod/iPhone Charging Always keep the CD door closed. NOTE: Your iPod/iPhone battery is charged as soon as the iPod/ • For CDs in MP3 format with a folder, 001 appears for iPhone is docked. To do this, the unit must be connected to the first track of the new folder when switching to the mains.
- Page 58 English MENU/INFO (15/13) RANDOM (15 on the remote) Pauses the CD or piece of music. The display will show “RANDOM” and the number of the track that will be played first. All tracks will be played con- In iPOD Mode: secutively in random order. • First press the ID3/iPOD/MEM/C-ADJ. button to activate the iPod menu. iPOD MENU appears in the display. FOLDER (4 on the remote) • Now press the MENU/INFO button to call up the iPod/...
-
Page 59: Technical Specifications
5. Press MENU/INFO button once to stop playback. The Technical Specifications memory will be kept. 6. To play the program again press the SCAN/ENTER Model: ................MC 4456 iP button. Voltage supply: ...........230-240 V~ 50 Hz 7. To delete memory, please press MENU/INFO button Output power: ............100 W PMPO twice. -
Page 60: Disposal
English This device complies with all current CE directives, such as electromagnetic compatibility and low voltage directive and is manufactured according to the latest safety regulations. “Made for iPod” and “Made for iPhone” mean that an elec- tronic accessory has been designed to connect specifically to iPod or iPhone and has been certified by the developer to meet Apple performance standards. - Page 62 MC 4456 iP Elektro-technische Vertriebsges. mbH Industriering Ost 40 47906 Kempen...
Need help?
Do you have a question about the MC 4456 iP and is the answer not in the manual?
Questions and answers