Table of Contents
Advertisement
Quick Links
Advertisement
Chapters
Table of Contents

Related Manuals for Nikon COOLPIX P600


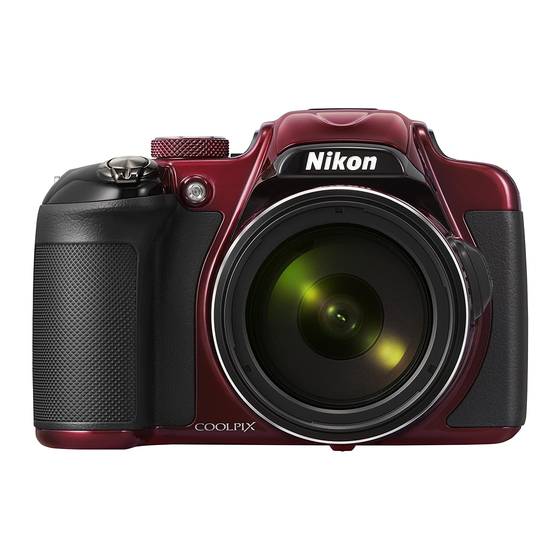
Summary of Contents for Nikon COOLPIX P600
- Page 1 DIGITAL CAMERA User's Manual For advanced use of the camera, read the Reference Manual (in pdf format) which is available in many languages including Hindi, Bengali, Tamil, Marathi and Telugu. See the reverse side for information to download the file.
- Page 3 Introduction Parts of the Camera and Main Functions The Basics of Shooting and Playback Shooting Features Playback Features Recording and Playing Back Movies General Camera Setup Using the Wi-Fi (Wireless LAN) Function Connecting the Camera to a TV, Computer, or Printer Technical Notes and Index...
-
Page 4: Introduction
Introduction Read This First Thank you for purchasing the Nikon COOLPIX P600 digital camera. Before using the camera, please read the information in “For Your Safety” (Avii-ix) and familiarize yourself with the information provided in this manual. After reading, please keep this manual handy and refer to it to enhance your enjoyment of your new camera. -
Page 5: About This Manual
“Parts of the Camera and Main Functions” (A1). Downloading the “Reference Manual” Refer to the Reference Manual (PDF format) for more detailed information. The Reference Manual can be downloaded from the Nikon website. http://nikonimglib.com/manual/ The Reference Manual can be viewed using Adobe Reader, available for free download from the Adobe website. -
Page 6: Information And Precautions
Before taking pictures on important occasions (such as at weddings or before taking the camera on a trip), take a test shot to ensure that the camera is functioning normally. Nikon will not be held liable for damages or lost profits that may result from product malfunction. - Page 7 • Nikon reserves the right to change the specifications of the hardware and software described in these manuals at any time and without prior notice. • Nikon will not be held liable for any damages resulting from the use of this product.
- Page 8 Disposing of Data Storage Devices Please note that deleting images or formatting data storage devices such as memory cards or built-in camera memory does not completely erase the original image data. Deleted files can sometimes be recovered from discarded storage devices using commercially available software, potentially resulting in the malicious use of personal image data.
-
Page 9: For Your Safety
For Your Safety To prevent damage to your Nikon product or injury to yourself or to others, read the following safety precautions in their entirety before using this equipment. Keep these safety instructions where all those who use the product will read them. - Page 10 To avoid Using a power supply other than damage to the product, be sure to those provided or sold by Nikon could remove the battery when no result in damage or malfunction. charge remains. • Discontinue use immediately...
- Page 11 Nikon for the If you are using an Eye-Fi card, remove purpose, to maintain compliance with it from the camera before boarding product regulations.
-
Page 12: Notices
15 of the FCC Rules. These limits are modifications made to this device designed to provide reasonable that are not expressly approved by protection against harmful Nikon Corporation may void the interference in a residential user’s authority to operate the installation. This equipment equipment. - Page 13 State of California to cause birth defects or other reproductive harm. DISPOSE OF USED BATTERIES Wash hands after handling. ACCORDING TO THE Nikon Inc., INSTRUCTIONS. 1300 Walt Whitman Road, This symbol indicates that Melville, New York 11747-3064 electrical and electronic...
-
Page 14: Wi-Fi (Wireless Lan Network)
EU or EFTA can be used anywhere within the EU and EFTA). Nikon does not accept liability for use in other countries. Users who are unsure as to the original country of sale should consult with their local Nikon service center or Nikon-authorized service representative. - Page 15 SAR test report that was uploaded to FCC website. Declaration of Conformity (Europe) Hereby, Nikon Corporation, declares that COOLPIX P600 is in compliance with the essential requirements and other relevant provisions of Directive 1999/5/ EC. The declaration of conformity may be consulted at http://imaging.nikon.com/support/pdf/DoC_P600.pdf.
- Page 16 Precautions when Using Radio Transmissions Always keep in mind that radio transmission or reception of data is subject to interception by third parties. Note that Nikon is not responsible for data or information leaks that may occur during data transfer.
-
Page 17: Table Of Contents
Table of Contents Introduction ........................ ii Read This First ..........................ii Confirming the Package Contents....................ii About This Manual ............................. iii Information and Precautions ....................... iv For Your Safety ........................vii WARNINGS ..............................vii Notices ............................x Wi-Fi (Wireless LAN Network)..................... xii Parts of the Camera and Main Functions............ - Page 18 Shooting Features....................39 A (Auto) Mode ........................39 Scene Mode (Shooting Suited to Scenes)..............40 Tips and Notes ............................41 Special Effects Mode (Applying Effects When Shooting)......... 50 j, k, l, m Modes (Setting the Exposure for Shooting) ......... 52 The Control Range of the Shutter Speed...................
- Page 19 General Camera Setup................... 95 Functions That Can Be Set with the d Button (Setup Menu) ......95 Using the Wi-Fi (Wireless LAN) Function ............97 Functions That Can Be Performed Using Wi-Fi ............97 Take Photos ..............................97 View Photos..............................97 Installing the Software on the Smart Device ..............
- Page 20 Editing Movies ......................... E19 Extracting Only the Desired Portion of a Movie............E19 Saving a Frame from a Movie as a Still Image..............E20 The Shooting Menu (j, k, l or m Mode) ............E21 Image Quality ............................. E21 Image Size............................. E22 Picture Control (COOLPIX Picture Control) (Changing the Settings for Image Recording)..............
- Page 21 Time Zone and Date ........................E61 Monitor Settings..........................E63 Print Date (Imprinting Date and Time on Images)............E64 Vibration Reduction........................E65 Motion Detection..........................E66 AF Assist ..............................E66 Digital Zoom ............................E67 Assign Side Zoom Control......................E68 Sound Settings ..........................E69 Auto Off ..............................
-
Page 23: Parts Of The Camera And Main Functions
Parts of the Camera and Main Functions The Camera Body Flash raised Eyelet for camera strap ....... 7 Connector cover........100 Power connector cover (for Power switch/power-on lamp ... 26 .... E82 optional AC adapter) w (function) button ......4 Shutter-release button ....4, 34 Mode dial .......... - Page 24 12 13 14 15 Charge lamp..........22 Side zoom control .......33 Flash lamp..........61 f : wide-angle......33 g : telephoto ......33 c (playback) button ...... 36 Speaker ........86, 93, 95 d (menu) button ...........12, 72, 86, 93, 95 Diopter adjustment control....9 l (delete) button ......
-
Page 25: Principle Functions Of The Controls
Principle Functions of the Controls For Shooting Control Main Function Change the shooting mode. Mode dial Move toward g (i) (telephoto) to zoom in closer to the subject, and move toward f (h) (wide-angle) to zoom out and view a larger area. - Page 26 Control Main Function When pressed halfway (i.e., if you stop pressing when you feel resistance slightly): Set focus and exposure. 34, 35 When pressed all the way (i.e., if you press the button all the way down): Release the Shutter-release button shutter.
- Page 27 For Playback Control Main Function • When the camera is turned off, press and hold this button to turn the camera on in playback mode. • Return to shooting mode. c (playback) button • Move toward g (i) to zoom in on the 84, 85 image, and move toward f (h) to display images as thumbnails or the...
- Page 28 Control Main Function Delete images. l (delete) button Switch between the monitor and viewfinder. 9 x (monitor) button Switch the information displayed in the monitor. s (display) button Shutter-release button Return to shooting mode. – b (e movie-record) button...
-
Page 29: Attaching The Camera Strap And Lens Cap
Attaching the Camera Strap and Lens Cap Attach the Lens Cap LC-CP29 to the strap, and then attach the strap to the camera. Attach the strap at two places. Lens Cap • At times when you are not shooting images, attach the lens cap to the lens to protect it. -
Page 30: Opening And Adjusting The Angle Of The Monitor
Opening and Adjusting the Angle of the Monitor The orientation and tilt of the monitor can be changed. This is useful when shooting with the camera in a high or a low position, or when taking self- portraits. For normal shooting, fold the monitor against the camera body with the screen facing out (3). -
Page 31: Switching Between The Monitor And Viewfinder (X Button)
Switching Between the Monitor and Viewfinder (x Button) You can use the viewfinder when bright Viewfinder light under the open sky makes it difficult to x (monitor) button see the monitor. Each press of the x button switches the display between the monitor and viewfinder. -
Page 32: Switching The Monitor Display (S Button)
Switching the Monitor Display (s Button) To switch the information displayed in the monitor during shooting and playback, press the s (display) button. For Shooting 25m 0s 25m 0s 25m 0s 25m 0s 25m 0s 25m 0s 1/250 1/250 1/250 F5.6 F5.6 F5.6... - Page 33 For Playback 4/132 4/132 4/132 0112. JPG 0112. JPG 15/05/2014 15:30 15/05/2014 15:30 1/250 F5.6 Show information Tone level Hide information Display the image and information* Display the image only. photo information. (except movies) Display a histogram, tone level and shooting information (A18).
-
Page 34: Using Menus (The D Button)
Using Menus (the d Button) Use the multi selector and k button to navigate the menus. Press the d button. • The menu that matches the status of the camera, such as shooting or playback menu, is displayed. Unavailable menu items are displayed in gray and cannot be selected. Shooting menu Image quality Image size... - Page 35 Switching Among Menu Tabs To display a different menu, such as the setup menu (A95), use the multi selector to switch to another tab. Tabs Shooting menu Set up Shooting menu Image quality Image quality Welcome screen Image size Image size Time zone and date Picture Control Picture Control...
-
Page 36: The Monitor
The Monitor The information that is displayed in the monitor during shooting and playback changes depending on the camera’s settings and state of use. Press the s button to show or hide the information in the monitor (A10). For Shooting HDR1 HDR1 HDR2... - Page 37 Travel destination icon ....95 Shooting mode......30, 31 Eye-Fi communication Flash mode ..........60 indicator ........96, E 75 Focus mode..........65 White balance........72 Zoom indicator......33, 66 COOLPIX Picture Control ....72 Focus indicator ........34 Active D-Lighting........73 Zoom memory ........74 Continuous shooting Movie options (normal mode ..........48, 73 speed movies)........93 Backlighting (HDR)......46...
- Page 38 1/250 1/250 F5.6 F5.6 10m 0s 10m 0s 10m 0s 10m 0s 10m 0s 10m 0s 1/250 1/250 F5.6 F5.6 9999 9999 1/250 1/250 F5.6 F5.6 9999 9999 Focus area (target finding AF) Spot metering area......73 ............73, 75, 80 Center-weighted area......73 Focus area (center/manual) View/hide histograms ........40, 50, 73, 75, 83...
- Page 39 For Playback Full-frame playback (A36) 1 2 3 4 5 6 7 8 999/ 999 999/ 999 999/ 999 999/999 999/999 999/999 9999/9999 9999/9999 9999/9999 1m 0s 1m 0s 1m 0s 1m 0s 1m 0s 1m 0s 11 12 14 15 0112.JPG 0112.JPG 0112.JPG...
- Page 40 Tone level information display (A11) 4/132 1/250 F5.6 Image quality/Image size ..... 72 Current image number/ total number of images Aperture value ........52 ISO sensitivity........73 Shutter speed........52 Exposure compensation value... 69 Shooting mode........31 White balance ........72 Tone level COOLPIX Picture Control....
-
Page 42: The Basics Of Shooting And Playback
The Basics of Shooting and Playback Preparation 1 Insert the Battery Open the battery-chamber/ memory card slot cover. Insert the battery. • Push the orange battery latch in the direction indicated by the arrow (1), and fully insert the battery (2). •... -
Page 43: Removing The Battery
Removing the Battery Turn the camera off and make sure that the power-on lamp and the monitor have turned off, and then open the battery-chamber/memory card slot cover. Move the battery latch in the direction indicated by the arrow (1) to eject the battery (2). High Temperature Caution The camera, battery, and memory card may be hot immediately after using the camera. -
Page 44: Preparation 2 Charge The Battery
Preparation 2 Charge the Battery Prepare the included charging AC adapter. If a plug adapter* is included with your camera, attach the plug adapter to the plug on the charging AC adapter. Push the plug adapter firmly until it is securely held in place. Once the two are connected, attempting to forcibly remove the plug adapter could damage the product. - Page 45 The charge lamp Description Flashes slowly The battery is charging. (green) When charging is complete, the charge lamp stops flashing green and turns off. About 3 hours are required to charge a fully exhausted battery. • The ambient temperature is not suited to charging. Charge the battery indoors with an ambient temperature of 5°C to 35°C (41°F to 95°F).
-
Page 46: Preparation 3 Insert A Memory Card
Preparation 3 Insert a Memory Card Turn off the camera and open the battery-chamber/memory card slot cover. Insert the memory card. • Slide the memory card in until it clicks into place. Memory card slot Be Careful to Insert the Memory Card in Correct Direction Inserting the memory card upside down or backwards could damage the camera and... -
Page 47: Internal Memory And Memory Cards
Removing Memory Cards Turn the camera off and make sure that the power-on lamp and the monitor have turned off, and then open the battery-chamber/ memory card slot cover. Gently push the memory card into the camera (1) to partially eject the card (2). High Temperature Caution The camera, battery, and memory card may be hot immediately after using the camera. -
Page 48: Step 1 Turn The Camera On
Step 1 Turn the Camera On Open the monitor and remove the lens cap. • See “Opening and Adjusting the Angle of the Monitor“ (A8) for more information. • See “Attaching the Camera Strap and Lens Cap“ (A7) for more information. Press the power switch. - Page 49 The Auto Off Function Flashes No operations No operations performed performed 3 min 25m 0s 25m 0s 25m 0s 1/250 1/250 F5.6 F5.6 Camera enters Camera turns off. standby mode. • The time that elapses before the camera enters standby mode is about 1 minute. The time can be changed using the Auto off setting in the setup menu (A95).
-
Page 50: Setting The Display Language, Date, And Time
Setting the Display Language, Date, and Time When the camera is turned on for the first time, the language-selection screen and the date and time setting screen for the camera clock are displayed. • If you exit without setting the date and time, O will flash when the shooting screen is displayed. - Page 51 Set the date and time, and press Date and time the k button. • Select a field: Press JK (changes between D, M, Y, h, and m). 15 05 2014 • Edit the date and time: Press HI. Date and time can also be changed by rotating the multi selector or command dial.
-
Page 52: Step 2 Select A Shooting Mode
Step 2 Select a Shooting Mode Rotate the mode dial to select a shooting mode. • A (auto) mode is used in this example. Rotate the mode dial to A. Notes About the Flash In situations where a flash is needed, such as in dark locations or when the subject is backlit, make sure to raise the flash (A60). -
Page 53: Available Shooting Modes
Available Shooting Modes A Auto mode (A39) Used for general shooting. y, X, s, c (Scene) modes (A40) Camera settings are optimized according to the scene that you select. • y : Press the d button and select a scene. When using Scene auto selector, the camera automatically selects the optimum scene mode when you frame an image, making it even easier to take images using settings that suit the scene. -
Page 54: Step 3 Frame A Picture
Step 3 Frame a Picture Hold the camera steady. • Keep fingers and other objects away from the lens, flash, AF-assist illuminator, microphone, and speaker. Frame the picture. 25m 0s 25m 0s 25m 0s 1/250 1/250 F5.6 F5.6 Viewfinder By pressing the x button, you can shoot while looking through the viewfinder (A9). -
Page 55: Using The Zoom
Using the Zoom Zoom out Zoom in When you move the zoom control, the zoom lens position changes. • To zoom in closer to the subject: Move toward g (telephoto) • To zoom out and view a larger area: Move toward f (wide-angle) •... -
Page 56: Step 4 Focus And Shoot
Step 4 Focus and Shoot Press the shutter-release button halfway. • When the subject is in focus, the focus area that includes the subject or focus indicator (A14) glows green (multiple focus areas can glow green). • When you are using digital zoom, the camera focuses on the subject in the center of the frame and the focus area is not displayed. - Page 57 The Shutter-release Button To set focus and exposure (shutter speed and aperture value), press the shutter-release button Press halfway lightly until you feel a slight resistance. Focus and exposure remain locked while the shutter-release button is pressed halfway. Press the shutter-release button all the way to release the shutter and take an image.
-
Page 58: Step 5 Play Back Images
Step 5 Play Back Images Press the c (playback) button. • If you press and hold down the c (playback) button while the camera is turned off, the camera turns on in playback mode. Use the multi selector to select Display the previous image an image to display. -
Page 59: Step 6 Delete Images
Step 6 Delete Images Press the l button to delete the image currently displayed in the monitor. Use the multi selector HI to select the desired deletion Delete method and press the k button. Current image Erase selected images • See “Operating the Erase Selected Images All images Screen”... - Page 60 Operating the Erase Selected Images Screen Use the multi selector J K to Erase selected images select an image to be deleted, and then use H to display S. • To undo the selection, press I to remove • Move the zoom control (A33) toward g Back (i) to switch to full-frame playback or f(h) to switch to thumbnail playback.
-
Page 61: Shooting Features
Shooting Features A (Auto) Mode Used for general shooting. • The camera detects the main subject and focuses on it. If a human face is detected, the camera automatically sets focus priority on it. • See "Focusing" (A80) for more information. Functions Available in A (Auto) Mode •... -
Page 62: Scene Mode (Shooting Suited To Scenes)
Scene Mode (Shooting Suited to Scenes) When a scene is selected, camera settings are automatically optimized for the selected scene. 1, 2 X Night landscape (A41) , s Night portrait 1, 2 (A42), c Landscape (A42) Rotate the mode dial to X, s or c and take images. -
Page 63: Tips And Notes
To View a Description (Help Display) of Each Scene Select a scene and move the zoom control (A1) toward g (j) to view a description of that scene. To return to the original screen, move the zoom control toward g (j) again. Tips and Notes X Night landscape •... - Page 64 s Night portrait • Press the d button to select Y Hand-held or Z Tripod in Night portrait. • One image is captured at a slow shutter speed. Compared to using Z Tripod, when Y Hand-held is selected, the camera sets a slightly faster shutter speed in accordance with the shooting conditions to prevent camera shake.
- Page 65 y M x Scene auto selector • When you point the camera at the subject, the camera automatically selects the optimum scene mode from the list below and adjusts the shooting settings accordingly. Portrait (close-up image of one to two persons) Portrait (shooting an image of three or more persons or shooting a composition with a large background area) Landscape...
- Page 66 y M f Party/indoor • To avoid the effects of camera shake, hold the camera steady. Set Vibration reduction (A95) to Off in the setup menu when using a tripod to stabilize the camera during shooting. y M k Close-up From the screen displayed after k Close-up is selected, select Noise reduction burst or Single shot.
- Page 67 y M u Food • The focus mode (A65) setting is changed to D (macro close-up) and the camera automatically zooms to the closest position at which it can focus. • You can adjust hue by using the command dial. The hue setting is saved in the camera’s memory even after the camera is turned off.
- Page 68 y M o Backlighting • From the screen displayed after o Backlighting is selected, HDR (high dynamic range) composition can be set. • Off (default setting): The flash fires to prevent the subject from being hidden in shadow. Shoot images with the flash raised. •...
- Page 69 y M p Easy panorama • From the screen displayed after p Easy panorama is selected, select the shooting range from Normal (180°) (default setting) or Wide (360°). • The zoom position is fixed at wide-angle. • Press the shutter-release button all the way down, remove your finger from the button, and then slowly pan the camera horizontally.
- Page 70 y M O Pet portrait • When you point the camera at a dog or cat, the camera detects the pet’s face and focuses on it. By default, the shutter is automatically released when a dog or cat face is detected (pet portrait auto release). •...
- Page 71 y M g Moon • You can adjust hue by using the command dial. The hue setting is saved in the camera’s memory even after the camera is turned off. • Adjust the brightness with exposure compensation (A69) according to shooting conditions such as the waxing and waning of the moon and shooting requirements.
-
Page 72: Special Effects Mode (Applying Effects When Shooting)
Special Effects Mode (Applying Effects When Shooting) Effects can be applied to images during shooting. Special effects Image quality Image size Special effects Special effects Soft Nostalgic sepia Nostalgic sepia Nostalgic sepia High-contrast monochrome High-contrast monochrome High-contrast monochrome Painting Painting Painting High key High key... - Page 73 Option Description Keeps only a selected color and makes other colors black- and-white. • Rotate the command dial to select a color that you want to retain from the slider. Selective color • Press the k button to hide the slider and end color selection.
-
Page 74: J, K, L, M Modes (Setting The Exposure For Shooting)
j, k, l, m Modes (Setting the Exposure for Shooting) Images can be shot with greater control by setting the shooting menu (A72) items in addition to setting the shutter speed or aperture value manually according to shooting conditions and requirements. •... -
Page 75: Adjusting Shutter Speed
Exposure The procedure for shooting images at the desired brightness (exposure) by adjusting the shutter speed or aperture value is called “determine exposure.” The sense of dynamism and amount of background defocus in images to be shot vary depending on the combinations of shutter speed and aperture value even if the exposure is the same. - Page 76 j (Programmed auto) Use for automatic control of the exposure by the camera. • Different combinations of shutter speed and aperture value can be selected without changing the exposure by rotating the 25m 0s 25m 0s 25m 0s 1/250 1/250 1/250 F5.6 F5.6...
- Page 77 Notes About Shooting • When zooming is performed after the exposure is set, exposure combinations or aperture value may be changed. • When the subject is too dark or too bright, it may not be possible to obtain the appropriate exposure. In such cases, the shutter speed indicator or aperture value indicator flashes when the shutter-release button is pressed halfway (except when the m mode is used).
-
Page 78: The Control Range Of The Shutter Speed
The Control Range of the Shutter Speed The control range of the shutter speed differs depending on the zoom position, aperture, or ISO sensitivity setting. Additionally, the control range changes in the following continuous shooting settings. Setting Control range - 1 s (j, k, l modes) Auto 1/4000 Fixed range auto... -
Page 79: M (User Settings) Mode
M (User Settings) Mode Setting combinations that are frequently used for shooting (User settings) can be saved in M. Shooting is possible in j (programmed auto), k (shutter- priority auto), l (aperture-priority auto) or m (manual). Rotate the mode dial to M to retrieve the settings saved in Save user settings. -
Page 80: Saving Settings In M Mode (Save User Settings)
Saving Settings in M Mode (Save User Settings) The frequently used settings for shooting can be changed and saved in M. Rotate the mode dial to the original shooting mode. • Rotate the mode dial to j, k, l or m (A52). The flexible program (when set to j), shutter speed (when set to k or m) or aperture value (when set to l or m) will also be saved. -
Page 81: Functions That Can Be Set Using The Multi Selector
Functions That Can Be Set Using the Multi Selector The functions that are available vary with the shooting mode, as shown below. j, k, l, m, M Function Flash mode (A60) Self-timer (A63) Smile timer (A64) – 3 D Focus mode (A65) Exposure compensation (A69) Availability depends on the setting. -
Page 82: Using The Flash
Using the Flash You can shoot images with a flash by raising the built-in flash. You can set the flash mode to match the shooting conditions. Press the m (flash pop-up) button to raise the flash. • When the flash is lowered, flash operation is disabled and S is displayed. -
Page 83: Available Flash Modes
The Flash Lamp The status of the flash can be confirmed by pressing the shutter-release button halfway. • On: The flash fires when you press the shutter- release button all the way down. • Flashing: The flash is charging. The camera cannot shoot images. - Page 84 The Flash Mode Setting • The available flash modes differ depending on the shooting mode. y, X, Flash mode s, c U Auto – – – – Auto with red-eye – – – – reduction w w w w Red-eye reduction –...
-
Page 85: Using The Self-Timer
Using the Self-timer The camera is equipped with a self-timer that releases the shutter about 10 seconds or 2 seconds after you press the shutter-release button. Set Vibration reduction (A95) to Off in the setup menu when using a tripod to stabilize the camera during shooting. -
Page 86: Shooting Smiling Faces Automatically (Smile Timer)
Shooting Smiling Faces Automatically (Smile Timer) When the camera detects a smiling face, you can take an image automatically without pressing the shutter-release button. • This function can be used when the shooting mode is A (auto), j, k, l, m or M, or Portrait or Night portrait scene mode. -
Page 87: Using Focus Mode
Using Focus Mode Set the focus mode according to the distance to the subject. Press the multi selector I (D). Select the desired focus mode and Autofocus press the k button. • If a setting is not applied by pressing the k button within a few seconds, the selection will be canceled. - Page 88 Available Focus Modes Autofocus The camera automatically adjusts the focus according to the distance to the subject. Use when the distance from the subject to the lens is 50 cm (1 ft 8 in.) or more, or 2.0 m (6 ft 7 in.) or more at the maximum telephoto zoom position.
-
Page 89: Taking Images With Manual Focus
Taking Images with Manual Focus Available when the shooting mode is j, k, l, m or M, special effects mode, or Sports or Bird-watching scene mode. Press the multi Manual focus selector I (D), select E (manual focus), and then press the k button. - Page 90 E (Manual Focus) • The digits displayed for the gauge on the right of the monitor in step 2 serve as a guideline for the distance to a subject that is in focus when the gauge is near the center. •...
-
Page 91: Adjusting Brightness (Exposure Compensation)
Adjusting Brightness (Exposure Compensation) You can adjust overall image brightness. Press the multi selector K (o). Select a compensation value and Exposure compensation press the k button. +2.0 +2.0 +2.0 • To brighten the image, set a positive (+) value. -0.3 -0.3 -0.3... -
Page 92: Default Settings
Default Settings The default settings for each shooting mode are described below. Flash Focus Exposure Self-timer Shooting mode mode mode compensation (A63) (A60) (A65) (A69) A (auto) u (special effects) j, k, l, m M (user settings) Scene X (night landscape) s (night portrait) c (landscape) x (scene auto... - Page 93 Flash Focus Exposure Self-timer Shooting mode mode mode compensation (A63) (A60) (A65) (A69) p (easy panorama) O (pet portrait) g (moon) L (bird-watching) Smile timer can also be selected. E (manual focus) cannot be selected. The flash is fixed at W (off) when High ISO monochrome is selected. The setting cannot be changed.
-
Page 94: Functions That Can Be Set With The D Button (Shooting Menu)
Functions That Can Be Set with the d Button (Shooting Menu) The settings listed below can be changed by pressing the d button during shooting. Shooting menu Image quality Image size Picture Control Custom Picture Control White balance 25m 0s 25m 0s 25m 0s Metering... - Page 95 Option Description Allows you to set the method that the camera uses Metering to measure the brightness of the subject. • Default setting: Matrix Allows you to select single or continuous shooting. Continuous • Default setting: Single Allows you to control the camera’s sensitivity to light. •...
- Page 96 Option Description Reset user Allows you to reset the settings saved to mode dial settings When the zoom control is moved, the zoom position (equivalent to focal length/angle of view in 35mm [135] format) is switched to the positions that have Zoom memory been selected by setting the check box to on in this menu option.
-
Page 97: Functions That Can Be Set With The Fn (Function) Button
Functions That Can Be Set with the Fn (Function) Button The following functions can be also set by pressing the w (function) button instead of displaying the corresponding menu by pressing the d button. • This function can be used when the shooting mode is j, k, l, m or M. Image quality (A72) Continuous (A73) Image size (A72) -
Page 98: Functions That Cannot Be Used Simultaneously
Functions That Cannot Be Used Simultaneously Some functions cannot be used with other menu settings. Restricted Setting Description function When B (infinity) is selected, the flash is not Focus mode available. (A65) Continuous The flash is not available (except for interval timer shooting). - Page 99 Restricted Setting Description function Continuous Continuous and Exposure bracketing are not available simultaneously. (A73)/ Exposure bracketing (A73) When self-timer is used, a single image is shot Self-timer even if Continuous H, Continuous L, Pre- (A63) shooting cache, or BSS has been set. Continuous/ Exposure When the camera detects smiling faces and...
- Page 100 Restricted Setting Description function The camera captures images using face Smile timer detection regardless of the applied AF area (A64) mode option. • When a setting other than Subject tracking is selected and B (infinity) is selected as the focus mode for shooting, Focus mode the camera focuses at infinity regardless of (A65)
- Page 101 Restricted Setting Description function Smile timer When the smile timer is selected, digital zoom is not available. (A64) Continuous When Multi-shot 16 is selected, digital zoom is not available. (A73) Digital zoom AF area mode When Subject tracking is selected, digital zoom is not available.
-
Page 102: Focusing
Focusing The focus area varies depending on the shooting mode. Using the Target Finding AF In A (auto) mode, or when AF area mode (A73) in j, k, l ,m or M mode is set to Target finding AF, the camera focuses in the manner described below when you press the shutter-release button halfway. -
Page 103: Using Face Detection
Using Face Detection In the following settings, the camera uses face detection to automatically focus on human faces. • s (night portrait), Scene auto selector or Portrait scene mode (A40) • a (smile timer) (A64) 25m 0s 25m 0s 25m 0s •... -
Page 104: Using Skin Softening
Using Skin Softening When the shutter is released while using one of the shooting modes listed below, the camera detects human faces and processes the image to soften facial skin tones (up to 3 faces). • s (night portrait), Scene auto selector or Portrait scene mode (A40) Skin softening can also be applied to saved images (A86). -
Page 105: Focus Lock
Focus Lock Use focus lock to capture creative compositions even when the focus area is set to the center of the frame. Position the subject in the center of the frame and press the shutter-release button halfway. • Confirm that the focus area glows 25m 0s 25m 0s 25m 0s... -
Page 106: Playback Features
Playback Features Playback Zoom Moving the zoom control toward g (i) in full-frame playback mode (A36) zooms in on the image. 4/132 4/132 Displayed 0112. JPG 0112. JPG area guide 15/05/2014 15:30 15/05/2014 15:30 Image is displayed Image is zoomed in. full-frame. -
Page 107: Thumbnail Display, Calendar Display
Thumbnail Display, Calendar Display Moving the zoom control toward f (h) in full- frame playback mode (A36) displays images as thumbnails. 4/132 4/132 1/132 1/132 2014 05 1 2 3 12 13 14 16 17 18 19 20 21 22 23 25 26 27 28 29 30 31... -
Page 108: Functions That Can Be Set With The D Button (Playback Menu)
Functions That Can Be Set with the d Button (Playback Menu) When viewing images in full-frame playback mode or thumbnail playback mode, you can configure the playback menu settings listed below by pressing the d button (A12). Playback menu Quick retouch D-Lighting 4 / 132 Skin softening... - Page 109 Option Description Allows you to copy images between the internal h Copy memory and a memory card. This function can also be used to copy movies. Allows you to select whether to display only the key picture for a sequence of images captured continuously or to display the sequence as C Sequence individual images.
-
Page 110: Using The Screen For Selecting Images
Using the Screen for Selecting Images When an image selection screen such as the one Erase selected images shown on the right is displayed while operating the camera, follow the procedures described below to select the images. Back Use the multi selector JK or rotate Erase selected images it to select the desired image. -
Page 111: Recording And Playing Back Movies
Recording and Playing Back Movies Recording Movies Display the shooting screen. • Check the remaining amount of movie recording time. • Press the s (display) button and display the movie frame (A10) to check the range of a movie in a frame before recording. 25m 0s 25m 0s 25m 0s... - Page 112 Maximum Movie Length Individual movie files cannot exceed 4 GB in size or 29 minutes in length, even when there is sufficient free space on the memory card for longer recording. • The maximum movie length for a single movie is displayed on the shooting screen. •...
- Page 113 Notes About Using Zoom During Movie Recording • The zoom indicator is not displayed during movie recording. • There may be some degradation in image quality when digital zoom is used. If you zoom in on the subject while recording a movie, the zoom motion temporarily stops at the position where optical zoom is changed to digital zoom.
- Page 114 Saving Still Images While Recording Movies If the shutter-release button is pressed all the way while recording a movie, one frame is saved as a still image (JPEG image). Movie recording continues while the still image is being saved. • The maximum number of still images that can be saved during a movie recording (10 7m23s 7m23s...
-
Page 115: Functions That Can Be Set With The D Button (Movie Menu)
Functions That Can Be Set with the d Button (Movie Menu) Enter shooting mode M Press the d button M e (movie) tab (A13) The settings of the menu options listed below Movie can be configured. Movie options Autofocus mode Frame rate Option Description... -
Page 116: Deleting Movies
Functions Available During Playback Rotate the multi selector or the command dial to 7m 42s 7m 42s advance or rewind. Playback controls are displayed at the bottom of the monitor. The operations listed below can be performed by using the multi selector JK to select a control and then pressing the k button. -
Page 117: General Camera Setup
General Camera Setup Functions That Can Be Set with the d Button (Setup Menu) Press the d button M z (setup) tab (A13) The settings of the menu options listed below Set up can be configured. Welcome screen Time zone and date Monitor settings Print date Vibration reduction... - Page 118 Option Description Allows you to set the amount of time that passes Auto off before the monitor turns off to save power. Format memory/ Allows you to format the internal memory or the Format card memory card. Allows you to change the camera’s display Language language.
-
Page 119: Using The Wi-Fi (Wireless Lan) Function
Using the Wi-Fi (Wireless LAN) Function Functions That Can Be Performed Using Wi-Fi You can perform the following functions if you install the dedicated software “Wireless Mobile Utility” on your smart device that runs on Android OS or iOS, and connect it to the camera. Take Photos You can use a smart device to remotely release the camera shutter and save images to the smart device. -
Page 120: Connecting The Smart Device To The Camera
Connecting the Smart Device to the Camera Press the d button M q (Wi-Fi options) tab M k button Use the multi selector HI to Wi-Fi options select Connect to smart device Connect to smart device Options and press the k button. Current settings Restore default settings •... - Page 121 To Terminate the Wi-Fi Connection • Turn off the camera. • Set the Wi-Fi setting on the smart device to Off. Notes About Wi-Fi Connection • Connect to smart device cannot be selected in the following situations: - When no memory card is inserted in the camera. - When an Eye-Fi card (E75) is inserted in the camera.
-
Page 122: Connecting The Camera To A Tv, Computer, Or Printer
Connecting the Camera to a TV, Computer, or Printer Connection Methods You can enhance your enjoyment of images and movies by connecting the camera to a TV, computer, or printer. Micro-USB connector HDMI micro connector (Type D) Open the connector Insert the plug straight. - Page 123 Viewing images on a TV Images and movies captured with the camera can be viewed on a TV. Connection method: Connect a commercially available HDMI cable to the TV’s HDMI input jack. A102 Viewing and organizing images on a computer You can transfer images to a computer to perform simple retouching and manage image data.
-
Page 124: Using Viewnx 2
ViewNX 2™ Your Imaging Toolbox Installing ViewNX 2 An Internet connection is required. For system requirements and other information, see the Nikon website for your region. Download the ViewNX 2 installer. Start the computer and download the installer from: http://nikonimglib.com/nvnx/ Double-click the downloaded file. -
Page 125: Transferring Images To The Computer
• SD card reader: Connect a card reader (available separately from third-party suppliers) to the computer and insert the memory card. If a message is displayed prompting you to choose a program, select Nikon Transfer 2. • When using Windows 7... -
Page 126: Viewing Images
Transfer images to the computer. • Click Start Transfer. Start Transfer • At default settings, all the images on the memory card will be copied to the computer. Terminate the connection. • If the camera is connected to the computer, turn the camera off and disconnect the USB cable. -
Page 127: Technical Notes
Technical Notes and Index Caring for the Products ........F2 The Camera.....................F2 The Battery....................F3 Charging AC Adapter................F4 Memory Cards..................F5 Caring for the Camera ........F6 Cleaning....................F6 Storage .....................F7 Troubleshooting..........F8 Specifications..........F16 Index ...............F23... -
Page 128: Caring For The Products
Caring for the Products The Camera To ensure continued enjoyment of this Nikon product, observe the precautions described below in addition to the warnings in “For Your Safety” (Avii-ix) when using or storing the device. Do Not Drop The product may malfunction if subjected to strong shock or vibration. -
Page 129: The Battery
• Images in the monitor may be difficult to see under bright lighting. • The monitor is lit by an LED backlight. Should the monitor begin to dim or flicker, contact your Nikon-authorized service representative. The Battery • Be sure to read and follow the warnings in “For Your Safety” (Avii-ix) before use. -
Page 130: Charging Ac Adapter
• If the battery will not be used for some time, insert it in the camera and completely exhaust it before removing it for storage. The battery should be stored in a cool location with an ambient temperature of 15°C to 25°C (59°F to 77°F). -
Page 131: Memory Cards
Memory Cards • Use only Secure Digital memory cards. See “Approved Memory Cards” (A25) for recommended memory cards. • Observe the precautions noted in the documentation included with your memory card. • Do not affix labels or stickers to the memory card. •... -
Page 132: Caring For The Camera
Caring for the Camera Cleaning Avoid touching glass parts with your fingers. Remove dust or lint with a blower (typically a small device with a rubber bulb attached to one end that is pumped to produce a stream of air out the other end). To Lens/ remove fingerprints or other stains that cannot be removed with a viewfinder... -
Page 133: Storage
Storage Turn the camera off when not in use. Be sure that the power-on lamp is off before putting the camera away. Remove the battery if the camera will not be used for an extended period. Do not store the camera with naphtha or camphor moth balls, or in any of the following locations: •... -
Page 134: Troubleshooting
Troubleshooting If the camera fails to function as expected, check the list of common problems below before consulting your retailer or Nikon-authorized service representative. Power, Display, Settings Issues Problem Cause/Solution • Wait for recording to end. – • If the problem persists, turn the camera off. If the... - Page 135 Problem Cause/Solution • The camera automatically turns off to save power (auto off function). Camera turns off • The camera or battery has become too cold and without cannot operate properly. warning. • The inside of the camera has become hot. Leave the –...
- Page 136 Problem Cause/Solution No information Shooting and photo information may be hidden. Press displayed in the s button until information is displayed. monitor. Print date not Time zone and date has not been set in the setup 28, 95, available. menu. Date not •...
- Page 137 Problem Cause/Solution • When the camera is in playback mode, press the c button, shutter-release button or b (e movie- record) button. No image • When menus are displayed, press the d button. captured when • The battery is exhausted. the shutter- •...
- Page 138 Problem Cause/Solution • A shooting mode where the flash cannot fire is Flash does not selected. fire. • A function that restricts the flash is enabled. • A function that restricts digital zoom is enabled. • Digital zoom is set to Off in the setup menu. Digital zoom •...
- Page 139 Problem Cause/Solution Images are too bright Adjust exposure compensation. (overexposed). When taking images with V (auto with red-eye reduction) or fill flash with red-eye reduction in Night Unexpected portrait scene mode, In-Camera Red-Eye Fix may be results when applied to areas not affected by red-eye in rare cases. flash set to V 42, 60 Use any scene mode other than Night portrait, and...
- Page 140 Problem Cause/Solution • Certain menu items are unavailable depending on Cannot select a the shooting mode. Menu items that cannot be setting/Selected selected are displayed in gray. setting is • A function that restricts the selected function is – disabled. enabled.
- Page 141 • The camera is not recognized by the computer. – connected to a • The computer is not set to start Nikon Transfer 2 computer. automatically. For more information about Nikon Transfer 2, refer to help information contained in ViewNX 2.
-
Page 142: Specifications
Specifications Nikon COOLPIX P600 Digital Camera Type Compact digital camera Number of effective 16.1 million pixels Image sensor 1/2.3-in. type CMOS; approx. 16.76 million total pixels Lens NIKKOR lens with 60× optical zoom 4.3-258 mm (angle of view equivalent to that of 24-... - Page 143 Storage Internal memory (approx. 56 MB) Media SD/SDHC/SDXC memory card File system DCF, Exif 2.3 and DPOF compliant Still pictures: JPEG Sound files (voice memo): WAV File formats Movies: MOV (Video: H.264/MPEG-4 AVC, Audio: LPCM stereo) • 16 M 4608×3456 • 8 M 3264×2448 •...
- Page 144 Built-in flash Range (approx.) [W]: 0.5 - 7.5 m (1 ft 8 in. - 24 ft) (ISO sensitivity: Auto) [T]: 1.5 - 4.0 m (5 - 13 ft) Flash control TTL auto flash with monitor preflashes Flash exposure In steps of 1/3 EV in the range between –2 and +2 EV compensation Interface Hi-Speed USB equivalent...
- Page 145 Tripod socket 1/4 (ISO 1222) Dimensions Approx. 125.0 × 85.0 × 106.5 mm (5.0 × 3.4 × 4.2 in.) (W × H × D) (excluding projections) Approx. 565 g (1 lb 4 oz) (including battery and SD Weight memory card) Operating environment Temperature 0°C - 40°C (32°F - 104°F)
- Page 146 For Argentina: Approx. 73 g (2.6 oz) For Brazil and Korea: Approx. 70 g (2.5 oz) Specifications • Nikon will not be held liable for any errors this manual may contain. • The appearance of this product and its specifications are subject to change without notice.
- Page 147 AVC Patent Portfolio License This product is licensed under the AVC Patent Portfolio License for the personal and non-commercial use of a consumer to (i) encode video in compliance with the AVC standard (“AVC video”) and/or (ii) decode AVC video that was encoded by a consumer engaged in a personal and non-commercial activity and/or was obtained from a video provider licensed to provide AVC video.
-
Page 148: Trademark Information
• Android and Google Play are trademarks or registered trademarks of Google, Inc. • All other trade names mentioned in this manual or the other documentation provided with your Nikon product are trademarks or registered trademarks of their respective holders. -
Page 149: Index
Index f (Wide-angle) ........33 Symbols .JPG............E81 l Aperture-priority auto mode .............. 52, 54 .MOV ............ E81 k Apply selection button ....5 .WAV ............ E81 A Auto mode ......30, 39 l Delete button AC adapter......100, E82 ...... - Page 150 Brightness ......95, E63 BSS..........45, E33 Easy panorama p ..... 47, E2 Button sound......... E69 Editing movies....... E19 Editing still images......E7 Exposure bracketing..73, E37 Calendar display ........85 Exposure compensation..59, 69 Charge by computer ..96, E72 Exposure mode ........
-
Page 151: Image Quality
Format memory cards .......... 24, 96, E70 Language....... 96, E70 Lens......... F6, F16 Format the internal memory ............. 96, E70 Lens cap ............7 Frame rate......93, E57 Li-ion rechargeable battery FSCN............. E81 ............20, F20 Low key............50 Full-frame playback ........ -
Page 152: Noise Reduction Filter
Museum l..........45 Quick retouch ......86, E8 Noise reduction filter ..73, E42 Rear-curtain sync ........61 Nostalgic sepia........50 Rechargeable battery......22 Red-eye reduction ....61, 62 Number of exposures remaining ............26, E21 Reset all........96, E76 Reset file numbering.. -
Page 153: Zoom Memory
Single AF... 73, 93, E41, E57 User settings mode......57 Skin softening..... 82, 86, E9 Slide show ......86, E49 Vibration reduction Slow motion movies .......... 75, 95, E65 ..........E55, E56 View grid.......... E24 Slow sync ..........61 View/hide framing grid Small picture ...... - Page 156 No reproduction in any form of this manual, in whole or in part (except for brief quotation in critical articles or reviews), may be made without written authorization from NIKON CORPORATION. Please visit the Nikon website below to download the Reference Manual in English. http://nikonimglib.com/manual/ Printed in China...
Need help?
Do you have a question about the COOLPIX P600 and is the answer not in the manual?
Questions and answers