Advertisement
Available languages
Available languages
Language TOC.fm Page i Monday, May 31, 2004 2:40 PM
English . . . . . . . . . . . . . . . . . . . . . . . . . . . . . . . . . . . . . . . . . . 1
Français . . . . . . . . . . . . . . . . . . . . . . . . . . . . . . . . . . . . . . . . . 7
Español . . . . . . . . . . . . . . . . . . . . . . . . . . . . . . . . . . . . . . . . 13
Brasileiro. . . . . . . . . . . . . . . . . . . . . . . . . . . . . . . . . . . . . . . 19
. . . . . . . . . . . . . . . . . . . . . . . . . . . . . . . . . . . . . . . 25
. . . . . . . . . . . . . . . . . . . . . . . . . . . . . . . . . . . . . . 31
. . . . . . . . . . . . . . . . . . . . . . . . . . . . . . . . . . . . . . . . 37
Türkçe . . . . . . . . . . . . . . . . . . . . . . . . . . . . . . . . . . . . . . . . 43
i
Advertisement

Subscribe to Our Youtube Channel
Related Manuals for Creative Live! Cam Chat IM VF0530


Summary of Contents for Creative Live! Cam Chat IM VF0530
-
Page 1: Table Of Contents
Language TOC.fm Page i Monday, May 31, 2004 2:40 PM English ......... . 1 Français . - Page 2 Language TOC.fm Page ii Monday, May 31, 2004 2:40 PM...
-
Page 3: English
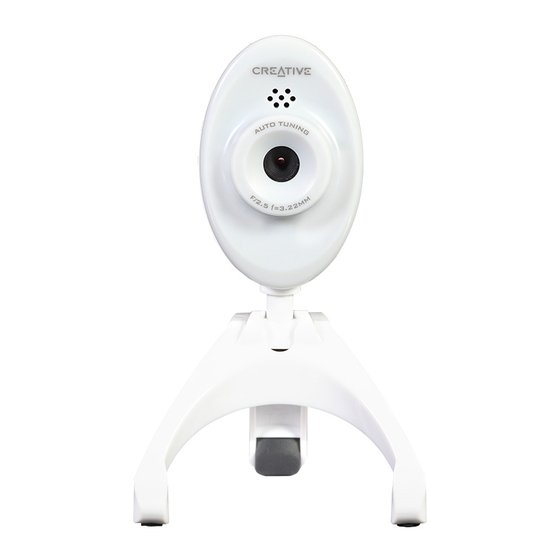
Snapshot Press it to launch WebCam Center and capture images. button USB cable Connect it to your computer's USB port. Hinged lever Use this to mount your Creative WebCam on an LCD display panel. - Page 4 Add New Hardware Wizard or Found New Hardware Wizard dialog box appears, click the Cancel button. Insert the Creative WebCam Live! Installation CD into your CD-ROM drive. If it does not run automatically, click Start → Run and type d:\setup.exe (replace d:\ with the drive letter of your CD-ROM drive).
- Page 5 Live! has been detected, click the Yes button. In Windows Me and Windows 98 SE only: If you are prompted to insert the Windows 98 SE or Windows Me CD, replace the Creative WebCam Live! Installation CD with the appropriate CD.
-
Page 6: Verifying The Installation
In Windows Me and Windows 98 SE: In the System Properties dialog box, click the Device Manager tab. Click the plus (+) sign next to the Imaging Device icon. The entry “Creative WebCam Live!” appears. Using Your Creative WebCam Taking a Photo Click Start →... -
Page 7: Recording A Video
CLI_WebCam_Live!_QSB.book Page 5 Thursday, May 27, 2004 2:22 PM Recording a Video Click Start → Programs → Creative → Creative WebCam → Creative WebCam Center. In the Creative WebCam Center window, click the Capture tab. Click the Video Resolution box and select the resolution that you want. - Page 8 <language> with the language that your document is in) Copyright © 2004 Creative Technology Ltd. All rights reserved. The Creative logo is a registered trademark of Creative Technology Ltd. in the United States and/or other countries. Microsoft and Windows are registered trademarks of Microsoft Corporation.
-
Page 9: Français
Bouton Vue Permet de lancer WebCam Center et de capturer des images. Câble USB Permet de connecter la WebCam au port USB de l'ordinateur. Levier à Utilisez-le pour monter votre Creative WebCam sur un écran d'affichage LCD. charnière... - Page 10 Sélectionnez Non tant que tous les pilotes et toutes les applications ne sont pas installés. Placez la Creative WebCam Live! sur le haut de votre moniteur ou sur toute autre surface plane. Pour les moniteurs à écran plat LCD ou les ordinateurs portables, utilisez le levier à...
- Page 11 CLI_WebCam_Live!_QSB.book Page 9 Thursday, May 27, 2004 2:22 PM Connectez le câble USB de votre Creative WebCam Live! à un port USB disponible sur votre ordinateur (voir Figure 3). Windows la détecte automatiquement. Figure 3 ® Sous Windows XP uniquement : Lorsque la boîte de dialogue Assistant Ajout de nouveau matériel détecté...
- Page 12 L'entrée « Creative WebCam Live! » apparaît. Utilisation de votre Creative WebCam Prise d'une photo Cliquez sur Démarrer → Programmes → Creative → Creative WebCam → Creative WebCam Center. Dans la boîte de dialogue Creative WebCam Center, cliquez sur l'onglet Capturer.
- Page 13 CLI_WebCam_Live!_QSB.book Page 11 Thursday, May 27, 2004 2:22 PM Enregistrement d'une vidéo Cliquez sur Démarrer → Programmes → Creative → Creative WebCam → Creative WebCam Center. Dans la boîte de dialogue Creative WebCam Center, cliquez sur l'onglet Capturer. Cliquez sur la zone de résolution Vidéo et sélectionnez la résolution souhaitée.
- Page 14 <région> par la région dans laquelle vous résidez, et <langue> par la langue de votre documentation) Copyright © 2004 Creative Technology Ltd. Tous droits réservés. Le logo Creative est une marque déposée de Creative Technology Ltd. aux Etats-Unis et/ou dans d'autres pays. Microsoft et Windows sont des marques déposées de Microsoft Corporation.
-
Page 15: Español
Botón Púlselo para iniciar WebCam Center y capturar imágenes. Instantánea Cable USB Conecte la cámara directamente al puerto USB del ordenador. Soporte Utilícelo para colocar Creative WebCam sobre una pantalla de LCD. articulado... - Page 16 Asistente para agregar nuevo hardware o Asistente para hardware nuevo encontrado, haga clic en el botón Cancelar. Inserte el CD de instalación de Creative WebCam Live! en la unidad de CD-ROM. Si no se ejecuta automáticamente, haga clic en Inicio → Ejecutar y escriba d:\setup.exe (reemplace d:\ por la letra de la unidad de CD-ROM).
- Page 17 CLI_WebCam_Live!_QSB.book Page 15 Thursday, May 27, 2004 2:22 PM Conecte el cable USB de Creative WebCam Live! a un puerto USB libre del ordenador (consulte la Figura 3). Windows detectará el dispositivo de manera automática. Figura 3 ® En Windows XP solamente: Cuando aparece el cuadro de diálogo Asistente para hardware nuevo encontrado...
- Page 18 Aparece la entrada “Creative WebCam Live!”. Utilización de Creative WebCam Cómo hacer una fotografía Haga clic en Inicio → Programas → Creative → Creative WebCam → Creative WebCam Center. En la ventana Creative WebCam Center, haga clic en la ficha Capturar.
- Page 19 CLI_WebCam_Live!_QSB.book Page 17 Thursday, May 27, 2004 2:22 PM Cómo grabar un vídeo Haga clic en Inicio → Programas → Creative → Creative WebCam → Creative WebCam Center. En la ventana Creative WebCam Center, haga clic en la ficha Capturar.
- Page 20 <idioma> por el idioma en que está el documento). Copyright © 2004 de Creative Technology Ltd. Reservados todos los derechos. El logotipo de Creative es una marca comercial registrada de Creative Technology Ltd. en los EE. UU. y en otros países. Microsoft y Windows son marcas comerciales registradas de Microsoft Corporation.
-
Page 21: Brasileiro
Botão Pressione-o para iniciar o WebCam Center e capturar imagens. Instantâneo Cabo USB Conecte-o à porta USB do computador. Base Use-a para montar Creative WebCam em um painel LCD. articulada... - Page 22 Assistente para adicionar novo hardware ou Assistente para configurar novo hardware aparecer, clique no botão Cancelar. Insira o CD de instalação da Creative WebCam Live! na unidade de CD-ROM. Se ele não for executado automaticamente, clique em Iniciar → Executar e digite d:\setup.exe (substitua d:\ pela letra correspondente à...
- Page 23 CLI_WebCam_Live!_QSB.book Page 21 Thursday, May 27, 2004 2:22 PM Conecte o cabo USB da Creative WebCam Live! a uma porta USB disponível no computador (consulte a Figura 3). O Windows detecta automaticamente o dispositivo. Figura 3 ® Apenas no Windows Quando a caixa de diálogo Assistente para configurar novo hardware encontrado for...
- Page 24 “Creative WebCam Live!” aparece. Utilizando a Creative WebCam Tirando uma foto Clique em Iniciar → Programas → Creative → Creative WebCam → Creative WebCam Center. Na janela do Creative WebCam Center clique na guia Captura. Clique na caixa Foto e selecione a resolução desejada.
- Page 25 CLI_WebCam_Live!_QSB.book Page 23 Thursday, May 27, 2004 2:22 PM Gravando um vídeo Clique em Iniciar → Programas → Creative → Creative WebCam → Creative WebCam Center. Na janela do Creative WebCam Center clique na guia Captura. Clique na caixa Vídeo e selecione a resolução desejada.
- Page 26 <language> pelo idioma em que está o seu documento). Copyright © 2004 Creative Technology Ltd. Todos os direitos reservados. O logo Creative são marcas registradas da Creative Technology Ltd. nos Estados Unidos e/ou em outros países. Microsoft e Windows são marcas registradas da Microsoft Corporation.
- Page 27 12x12 template_4ct.fm Page 1 Friday, May 28, 2004 4:28 PM 繁體中文 Creative WebCam 的組成 快門按鈕 調焦光圈 活動式兩 USB 連接線 用支架 前視圖 側視圖 圖 1 調整焦距將鏡頭對準要拍攝的物件,然後順時針或逆時針旋轉此光圈,直到圖 調焦光圈 像位於焦距中。 快門按鈕 按下即可開啟 WebCam Center 並擷取圖像。 USB 連接線 將它連接至電腦的 USB 連接埠。 活動式兩用 使用該裝置將 Creative WebCam 安裝在 LCD 顯示器上。 支架...
- Page 28 安裝 Creative WebCam 1. 安裝驅動程式前不要將 Creative WebCam Live! 接至您的電腦。如果您不巧在 連接了 Creative WebCam Live! 的情況下開始安裝,並且 “新增硬體精靈”或 “找到新硬體精靈”對話方塊出現,單按 “取消”按鈕。 2. 將 Creative WebCam Live! 安裝光碟放入您的 CD-ROM 光碟機。如果沒有自動 執行,則單按開始 -> 執行並鍵入 d:\setup.exe ( 將 d:\ 替換成代表 CD-ROM 光碟機的字母 )。 3. 單按安裝驅動程式和應用程式的選項。 4. 按照螢幕上的指示完成安裝。...
- Page 29 12x12 template_4ct.fm Page 3 Friday, May 28, 2004 4:28 PM 6. 將 Creative WebCam Live! 的 USB 連接線接至電腦的空閒 USB 連接埠 ( 見圖 3)。Windows 自動偵測該裝置。 圖 3 ® 僅在 Windows XP 下: “ ” “ ” i. 如果出現 找到新硬體精靈 對話方塊,選擇 自動安裝軟體 (推薦)...
- Page 30 標籤。 3. 單按 “圖像裝置”圖像旁邊的加號 (+)標記。"Creative WebCam Live!" 項目 出現。 使用 Creative WebCam 拍攝照片 1. 單按開始 -> 程式集 -> Creative -> Creative WebCam -> Creative WebCam Center。 2. 在 “Creative WebCam Center”視窗中,單按 “擷取標籤。 3. 單按 “照片解析度”方塊,選擇您需要的解析度。 4. 單按 “拍照”按鈕擷取一幅圖像。圖像將作為檔案儲存在預設媒體資料夾中。 要在圖像檢視器中檢視照片,請雙按 “縮圖 / 詳細資料”窗格中的圖像檔案。...
- Page 31 12x12 template_4ct.fm Page 5 Friday, May 28, 2004 4:28 PM 2. 在 “Creative WebCam Center”視窗中,單按 “擷取”標籤。 3. 單按 “影像解析度”方塊,選擇您需要的解析度。 4. 單按 “錄製”按鈕開始和停止影像錄製。當您停止錄製後,影像將作為檔案儲 存在預設媒體資料夾中。 要在影像檢視器中檢視影像,請雙按縮圖 / 詳細資料窗格中的影像檔案。 有關詳情,請參閱安裝光盤中的使用者指南。 至 d:\manual\<language>\manual.chm ( 將 d:\ 取代為代表 CD-ROM/DVD-ROM 光碟機的字母 , 將 <Language> 取代為文件使用的語言 )
- Page 32 客戶支援服務和保固資訊 您可以在安裝光碟上找到客戶支援服務、保固及其他資訊。 客戶支援服務 d:\support\<language>\support.chm 保固資訊 d:\warranty\<region>\<language>\warranty.chm 在保固期限內請務必保留一份購買憑證。 使用者指南 d:\manual\<language>\manual.chm ( 將 d:\ 取代為表示 CD-ROM/DVD-ROM 光碟機的字母,<region> 取代為您所處地 區,<language> 取代為文件所用語言 ) 版權 © 2004 Creative Technology Ltd. 版權所有。Creative 標誌是 Creative Technology Ltd. 在美國和 / 或其他國家的註冊商標。Microsoft 和 Windows 是 Microsoft Corporation 的註冊商標。所有其他品牌和產品 名稱都是其各自擁有者的商標或註冊商標。所有規格如有變更,恕不另行通知。實物可能和圖示略有不同。...
- Page 33 12x12 template_4cs.fm Page 1 Friday, May 28, 2004 4:13 PM 简体中文 关于您的 Creative WebCam 快门按钮 光圈 USB 连接线 铰接式 支架 前视图 侧视图 图 1 调整焦距。将镜头对准要拍摄的物体,顺时针或逆时针转动光圈直到图像位于 光圈 镜头中的合适位置。 快门按钮 按下即可打开 WebCam Center 并拍摄图片。 USB 连接线 将它接至电脑的 USB 接口。 铰接式支架 用该支架将 Creative WebCam 安装到液晶显示器上。...
- Page 34 12x12 template_4cs.fm Page 2 Friday, May 28, 2004 4:13 PM 使用入门 安装您的 Creative WebCam 1. 安装驱动程序前不要将 Creative WebCam Live! 连接至您的电脑。如果您在安 装驱动程序前就连接了 Creative WebCam Live!,并且添加硬件向导对话框或找 到新硬件向导对话框出现,单击取消按钮。 2. 将 Creative WebCam Live! 安装光盘放入您的 CD-ROM 光驱中。如果没有自动 运行,单击开始 → 运行并键入 d:\setup.exe ( 将 d:\ 替换成代表您的光驱的 字母 )。 3. 单击您要安装的驱动程序及应用程序选项。 4. 按照屏幕上的指示完成安装。 系统可能询问您安装完某个驱动程序后是否重新启动电脑。在安装完全部选定的...
- Page 35 12x12 template_4cs.fm Page 3 Friday, May 28, 2004 4:13 PM 6. 将 Creative WebCam Live! 的 USB 连接线接至电脑的空闲 USB 端口 ( 图 3)。 Windows 自动检测该设备。 图 3 ® 仅在 Windows XP 下: i. 当找到新硬件向导对话框出现时,选择自动安装软件 (推荐)选项,然后单击下一步 按钮。 ii. 如果硬件安装对话框出现,单击仍然继续按钮。 仅在 Windows 2000 下:...
- Page 36 针对 Windows Me 和 Windows 98 SE: 在系统属性对话框中,单击设备管理器标记。 3. 单击图像设备图标旁边的加号 (+) 标志。 “Creative WebCam Live!” 项出现。 使用 Creative WebCam 拍摄照片 1. 单击开始 → 程序 → Creative→ Creative WebCam → Creative WebCam Center。 2. 在 Creative WebCam Center 窗口,单击捕捉标记。 3. 单击照片分辨率框,选择您要的分辨率。 4. 单击拍摄照片按钮进行拍照。图象会作为文件保存于默认媒体文件夹中。...
- Page 37 12x12 template_4cs.fm Page 5 Friday, May 28, 2004 4:13 PM 3. 单击视频分辨率框,选择您要的分辨率。 4. 单击录制按钮开始并结束视频录制。停止录制时,视频会作为文件保存于默认媒 体文件夹中。 要在视频浏览器中查看视频,双击图像缩略图 / 详细内容区域的视频文件。 有关详情,请参阅安装光盘内的用户指南。 至 d:\manual\language\manual.chm ( 用 CD-ROM\DVD-ROM 光驱的驱动号替代 d:\ 并用文件 使用的语言替代 language)。...
- Page 38 客户技术支持服务和保 您可以在安装光盘上找到客户技术支持、保修和其他信息。 客户支持服务 d:\support\<language>\support.chm 保修 d:\warranty\<region>\<language>\warranty.chm 请在保修期内保留购买凭证。 用户指南 d:\manual\<language>\manual.chm ( 用 CD-ROM/DVD-ROM 光驱的盘符替代 d:\,用您所在的地区替代 region,并用文 件使用的语言替代 language) Copyright © 2004 Creative Technology Ltd. 版权所有。Creative 标志是 Creative Technology Ltd. 在美 国和 / 或其他国家的注册商标。Microsoft 和 Windows 是 Microsoft Corporation 的注册商标。本文中提及的 所有其他产品均为其各自所有者的商标或注册商标,在此谨表认同。所有技术规格如有变动,恕不另行通知。实 际内容可能与图示略有不同。...
- Page 39 12x12 template_4JP_6.fm 1 ページ 2004年5月27日 木曜日 午後5時50分 日本語 Creative WebCam Live! について スナップ ショットボタン フォーカ スリング ヒンジ レバー ケーブル 前面 側面 図 1 WebCam Live! のフォーカスを調整するには、レンズを撮影対象に向け、画 フォーカス リング 像の焦点が合うようにこのリングを時計回転、及び反時計回転、又は、その 両方に回します。 スナップ WebCam Center が起動した後、このボタンを押すと、静止画像をキャプ ショット チャ出来ます。 ボタン コンピュータの USB ポートに接続します。 ケーブル ヒンジ...
- Page 40 12x12 template_4JP_6.fm 2 ページ 2004年5月27日 木曜日 午後5時50分 Getting Started Creative WebCam のインストール 1. ドライバをインストールする前に、 Creative WebCam Live! をコンピュータに 接続しないでください。 Creative WebCam Live! を接続してしまった場合は、 [ 新しいハードウェアの追加ウィザード ] ダイアログボックスが表示されます ので、 [キャンセル ] ボタンをクリックして、コンピュータから Creative WebCam Live! を取り外して下さい。 2. ドライバ / アプリケーション CD を CD-ROM ドライブに挿入します。インス...
- Page 41 12x12 template_4JP_6.fm 3 ページ 2004年5月27日 木曜日 午後5時50分 6. Creative WebCam Live! の USB ケーブルをコンピュータの USB ポートに接 続します(図 3 を参照) 。 Windows はデバイスを自動検出します。 図 3 Windows XP の場合 [ 新しいハードウェアの検出ウィザード ] ダイアロボックスが表示されたら、 [ソフト ウェアを自動的にインストール(推奨) ] を選択し、 [次へ ] ボタンをクリックしま す。 警告のメッセージが表示されたら、 [続行 ] ボタンをクリックして下さい。...
- Page 42 3. デバイスマネージャで [ イメージングデバイス ] と書かれたツリーの + 記号を クリックします。 "Creative WebCam Live!" が見つけられない場合は、ソフト ウェアのインストールを再度行ってみて下さい。 Creative WebCam の使用 写真の撮影 1. [ スタート ] 、 [ プログラム ] 、 [Creative] 、 [Creative PC-CAM] 、 [WebCam Center] とクリックしていきます。 2. Creative WebCam Center ウィンドウで、 [ キャプチャ ] タブをクリックしま す。...
- Page 43 イルとしてデフォルトのメディアフォルダに保存されます。 イメージビューアで写真をプレビューするには、 [ サムネイル / 詳細 ] エリアで画 像ファイルをダブルクリックして下さい。 ビデオの録画 1. [ スタート ] 、 [ プログラム ] 、 [Creative] 、 [Creative PC-CAM] 、 [WebCam Center] とクリックしていきます。 2. Creative WebCam Center ウィンドウで、 [ キャプチャ ] タブをクリックしま す。 3. 動画の [ 解像度 ] ボックスをクリックして、設定したい解像度を選択します。...
- Page 44 User’s Guide d:¥manual¥<language>¥manual.chm ( d ドライブが CD-ROM ドライブの場合 region はお買い求めになった地域を、 language はお 使いの言語を選択して下さい) Copyright © 2004 Creative Technology Ltd. All rights reserved. Creative ロゴ、 Creative Technology Ltd. の 米国、およびその他の国々における登録商標です。 Microsoft 、 Windows 、および Windows ロゴは Microsoft Corp. の登録商標です。 その他の製品名や社名、ロゴマークは該当する各社の登録商標、または、商標であり、 そのように認識されます。 本書の内容は予告なく変更されることがあります。また、製品の本体、および付属...
-
Page 45: Türkçe
Odağı ayarlar. Lensi nesneye doğru tutun ve görüntü odağa yerleşinceye dek Odak halkası halkayı saat yönünde veya saatin tersi yönde çevirin. Snapshot (Enstantane) WebCam Center’ı başlatmak ve görüntü çekmek için basın. düğmesi USB kablosu Bilgisayarın USB bağlantı noktasına takın. Menteşeli Creative WebCam’ı LCD ekran paneline takmak için kullanın. manivela... - Page 46 Tüm sürücüler ve uygulamalar yükleninceye kadar Hayır'ı seçin. 5. Creative WebCam Live!’ı bilgisayar monitörünüzün üzerine ya da düz bir zemine koyun. Düz panel monitörler veya dizüstü bilgisayarlarda, Creative WebCam’i dengelemek için menteşeli manivelayı kullanın (bkz. Şekil 2).
- Page 47 Creative WebCam Live!’ın algılandığını bildiren Sayısal İmza Bulunamadı iletişim kutusu görüntülendiğinde, Evet düğmesini tıklatın. Windows Me ve Windows 98 SE sisteminde: Windows 98 SE ya da Windows Me CD'sini takmanız istenirse, Creative WebCam Live! Yükleme CD'si yerine uygun CD'yi yerleştirin. Disk Yerleştir iletişim kutusunda Tamam düğmesini tıklatın.
- Page 48 WebCam Live!" öğesi belirir. Creative WebCam’i Kullanma Fotoğraf Çekme 1. Başlat → Programlar → Creative → Creative WebCam → Creative WebCam Center öğelerini tıklatın. 2. Creative WebCam Center penceresinde, Capture sekmesini tıklatın. 3. Photo Resolution kutusunu tıklatın ve istediğiniz çözünürlüğü seçin.
- Page 49 12x12 template_4.fm Page 5 Tuesday, June 1, 2004 10:44 AM Video Kaydetme 1. Başlat → Programlar → Creative → Creative WebCam → Creative WebCam Center öğelerini tıklatın. 2. Creative WebCam Center penceresinde, Capture sekmesini tıklatın. 3. Video Resolution kutusunu tıklatın ve istediğiniz çözünürlüğü seçin.
- Page 50 (d:\ harfini CD-ROM/DVD-ROM sürücünüzün harfiyle, <region> seçeneğini bulunduğunuz bölgeyle ve <language> seçeneğini belgenizin diliyle değiştirin) Telif Hakkı © 2004 Creative Technology Ltd. Tüm hakları saklıdır. Creative logosu, Creative Technology Ltd.’in ABD ve/veya diğer ülkelerdeki kayıtlı ticari markasıdır. Microsoft ve Windows, Microsoft Corporation’un tescilli markalarıdır.
Need help?
Do you have a question about the Live! Cam Chat IM VF0530 and is the answer not in the manual?
Questions and answers