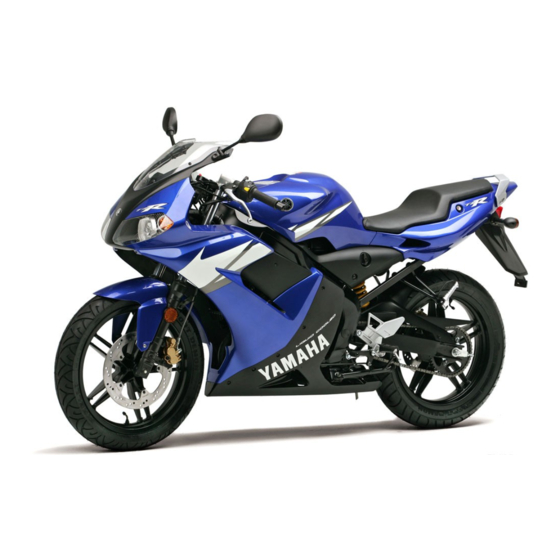
Yamaha TZR50 Owner's Manual
Hide thumbs
Also See for TZR50:
- Owner's manual (67 pages) ,
- Owner's manual (78 pages) ,
- Owner's manual (88 pages)
Table of Contents
Advertisement
Advertisement
Table of Contents
Troubleshooting

Related Manuals for Yamaha TZR50


Summary of Contents for Yamaha TZR50
- Page 1 Read this manual carefully before operating this vehicle. OWNER’S MANUAL TZR50...
- Page 2 EAU46090 Read this manual carefully before operating this vehicle. This manual should stay with this vehicle if it is sold.
- Page 3 Yamaha a reputation for dependability. Please take the time to read this manual thoroughly, so as to enjoy all advantages of your TZR50. The Owner’s Manual does not only instruct you in how to operate, inspect and maintain your motorcycle, but also in how to safeguard your- self and others from trouble and injury.
-
Page 4: Important Manual Information
IMPORTANT MANUAL INFORMATION EAU10132 Particularly important information is distinguished in this manual by the following notations: This is the safety alert symbol. It is used to alert you to potential personal injury hazards. Obey all safety messages that follow this symbol to avoid possible injury or death. - Page 5 IMPORTANT MANUAL INFORMATION EAUS1172 TZR50 OWNER’S MANUAL ©2012 by MBK INDUSTRIE ©2012 by mbk inDUSTRiE 1st edition, April 2012 1st edition, April 2012 All rights reserved. Any reprinting or unauthorized use without the written permission of MBK INDUSTRIE mbk inDUSTRiE is expressly prohibited.
-
Page 6: Table Of Contents
TABLE OF CONTENTS SAFETY INFORMATION .....1-1 Fuel ...........3-8 General maintenance and Fuel tank breather/overflow hose ..3-9 lubrication chart ......6-4 DESCRIPTION........2-1 Catalytic converter......3-9 Removing and installing cowlings 2-stroke engine oil ......3-10 and panels........6-8 Left view ...........3-1 Right view .........3-1 Fuel cock ........3-11 Checking the spark plug ....6-11 Controls and instruments ....3-1 Starter (choke) lever ......3-12... - Page 7 TABLE OF CONTENTS Checking and lubricating the Care ..........7-1 cables ..........6-28 Storage ..........7-3 Checking and lubricating the SPECIFICATIONS .......8-1 throttle grip and cable ....6-28 Adjusting the Autolube pump..6-28 CONSUMER INFORMATION .....9-1 Checking and lubricating the brake and shift pedals....6-29 Identification numbers ......9-1 Checking and lubricating the Vehicle identification number....9-1 brake and clutch levers ....6-29...
-
Page 8: Safety Information
SAFETY INFORMATION each time you use the vehicle to • Ride where other motorists can EAU10289 Be a Responsible Owner make sure it is in safe operating con- see you. Avoid riding in anot- As the vehicle’s owner, you are res- dition. - Page 9 SAFETY INFORMATION • Always obey the speed limit for off-road use. after operation and can cause and never travel faster than burns. warranted by road and traffic Protective Apparel A passenger should also observe conditions. majority fatalities from the above precautions. •...
- Page 10 Yamaha accessories, which are avai- of the motorcycle to minimize adding cargo or accessories to your lable only from a Yamaha dealer, have imbalance or instability. motorcycle. Use extra care when been designed, tested, and approved...
-
Page 11: Specifications
SAFETY INFORMATION of accessories not sold by Yamaha or before using it to make sure that her normal riding position. This modifications not specifically recom- it does not in any way reduce improper position limits the fre- mended by Yamaha, even if sold and... - Page 12 SAFETY INFORMATION Transporting the Motorcycle The suspension should be com- Be sure to observe following instruc- pressed somewhat by the tie- tions before transporting downs, if possible, so that the motorcycle in another vehicle. motorcycle will bounce Remove all loose items from the excessively during transport.
-
Page 13: Description
DESCRIPTION EAU10410 Left view 1. Air filter (page 6-17) 9. Coolant reservoir cap (page 6-14) 2. Fuel cock lever (page 3-11) 3. Seat lock (page 3-12) 4. Grab bar (page 3-12) 5. Sidestand (page 3-14) 6. Shift pedal (page 3-6) 7. -
Page 14: Right View
DESCRIPTION EAU10420 Right view 1. Anti-theft device housing (page 3-13) 9. Rear brake fluid reservoir (page 6-24) 2. Owner’s tool kit (page 6-1) 10. Rear brake pads (page 6-23) 3. Battery (page 6-32) 4. Main fuse (page 6-33) 5. 2-stroke engine oil tank cap (page 3-10) 6. -
Page 15: Controls And Instruments
DESCRIPTION EAU10430 Controls and instruments 1. Clutch lever (page 3-5) 9. Front brake lever (page 3-6) 2. Left handlebar switches (page 3-4) 10 . Fuel tank cap (page 3-7) 3. Starter (choke) lever (page 3-12) 4. Tachometer (page 3-4) 5. Main switch/steering lock (page 3-1) 6. -
Page 16: Instrument And Control Functions
INSTRUMENT AND CONTROL FUNCTIONS To lock the steering EAU10460 EAU10661 Main switch/steering lock All electrical systems are off. The key can be removed. EWA10061 WARNING Never turn the key to “ ” or “ ” while the vehicle is moving. Other- wise the electrical systems will be switched off, which may result in loss of control or an accident. -
Page 17: Indicator And Warning Lights
2-stroke engine oil tank has been refilled, have EAU11020 Turn signal indicator light “ ” an Yamaha dealer check the electrical This indicator light flashes when the circuit. turn signal switch is pushed to the left or right. -
Page 18: Coolant Temperature Warning Light
The electrical circuit of the warning monitoring the engine. If this occurs, light can be checked by turning the have a Yamaha dealer check the self- key to “ ”. The warning light should diagnosis system. -
Page 19: Tachometer
INSTRUMENT AND CONTROL FUNCTIONS The speedometer unit is equipped EAU11851 EAU12348 Tachometer Handlebar switches with a speedometer and an odometer. Left The speedometer shows riding spe- ed. The odometer shows the total dis- tance traveled. 1. Tachometer 1. Pass switch “PASS” 2. -
Page 20: Pass Switch
INSTRUMENT AND CONTROL FUNCTIONS turns or when the throttle cable is EAU12360 EAU31640 Pass switch “PASS” Clutch lever stuck. Press this switch to flash the head- light. EAU12711 Start switch “ ” Push this switch to crank the engine EAU12400 Dimmer switch “... -
Page 21: Shift Pedal
INSTRUMENT AND CONTROL FUNCTIONS EAU12871 EAU12890 EAU12941 Shift pedal Brake lever Brake pedal 1. Shift pedal 1. Brake lever 1. Brake pedal The shift pedal is located on the left The brake lever is located at the right The brake pedal is on the right side of side of the motorcycle and is used in handlebar grip. -
Page 22: Fuel Tank Cap
INSTRUMENT AND CONTROL FUNCTIONS EAU13074 EWA11091 Fuel tank cap WARNING Make sure that the fuel tank cap is properly closed after filling fuel. Leaking fuel is a fire hazard. 1. Lock To close the fuel tank cap 1. Fuel tank cap lock cover 1. -
Page 23: Fuel
Your Yamaha engine has been desig- ces or plastic parts. the pilot lights of water heaters [ECA10071] ned to use regular unleaded gasoline 4. -
Page 24: Fuel Tank Breather/Overflow Hose
INSTRUMENT AND CONTROL FUNCTIONS EAUB1300 EAU13433 ECA10701 Fuel tank breather/overflow Catalytic converter NOTICE hose This model is equipped with a cataly- Use only unleaded gasoline. The tic converter in the exhaust system. use of leaded gasoline will cause unrepairable damage to the cataly- EWA10862 tic converter. -
Page 25: 2-Stroke Engine Oil
INSTRUMENT AND CONTROL FUNCTIONS EAUS1550 2-stroke engine oil Recommended oil: Make sure that there is sufficient 2- See page 8-1 Oil quantity: stroke engine oil in the oil tank. Add 1.40 L (1.48 US qt, 1.23 Imp.qt) the recommended 2-stroke engine oil as necessary. -
Page 26: Fuel Cock
INSTRUMENT AND CONTROL FUNCTIONS This indicates reserve. If you run out EAU13561 Fuel cock of fuel while riding, move the lever to The fuel cock supplies fuel from the this position. Fill the tank at the first tank to the carburetor while filtering it opportunity. -
Page 27: Starter (Choke) Lever
INSTRUMENT AND CONTROL FUNCTIONS EAU13590 EAU13900 Starter (choke) lever “ ” Seat To remove the seat 1. Insert the key into the seat lock, and then turn it as shown. 1. Projection 2. Seat holder 1. Starter (choke) lever 2. Push the rear of the seat down to lock it in place. -
Page 28: Anti-Theft Device Housing
1. U-LOCK bar The anti-theft device housing, located in the storage compartment under the seat, is designed to hold a genuine Yamaha CYCLELOK. (See page 3-12 for seat opening and closing proce- EWA14371 dures.) When placing a CYCLELOK in WARNING... -
Page 29: Sidestand
INSTRUMENT AND CONTROL FUNCTIONS EAU15305 EWA10241 EAU15314 Sidestand Ignition circuit cut-off WARNING system The vehicle must not be ridden with The ignition circuit cut-off system the sidestand down, or if the sides- (comprising the sidestand switch, tand cannot be properly moved up clutch switch and neutral switch) has (or does not stay up), otherwise the the following functions. - Page 30 INSTRUMENT AND CONTROL FUNCTIONS WARNING With the engine turned off: 1. Move the sidestand down. If a malfunction is noted, have a Yamaha 2. Make sure that the engine stop switch is set to “ ”. dealer check the system before riding.
-
Page 31: For Your Safety - Pre-Operation Checks
Do not operate the vehicle if you find any problem. If a problem cannot be corrected by the procedures pro- vided in this manual, have the vehicle inspected by a Yamaha dealer. Before using this vehicle, check the following points:... - Page 32 • Make sure that operation is smooth. • Check throttle grip free play. Throttle grip 6-18, 6-28 • If necessary, have Yamaha dealer adjust throttle grip free play and lubricate cable and grip housing. • Make sure that operation is smooth. 6-28 Control cables •...
- Page 33 Instruments, lights, signals • Check operation. — and switches • Correct if necessary. Engine stop switch • Check operation. • Check operation of ignition circuit cut-off system. 3-14 Sidestand switch • If system is not working correctly, have Yamaha dealer check vehicle.
-
Page 34: Operation And Important Riding Points
The neutral indi- For maximum engine life, never cator light should come on. If not, accelerate hard when the engine is ask a Yamaha dealer to check the cold! electrical circuit. 4. Turn the starter (choke) on and completely close the throttle. -
Page 35: Starting A Warm Engine
OPERATION AND IMPORTANT RIDING POINTS EAU16640 EAU16671 ECA10260 Starting a warm engine Shifting NOTICE Follow the same procedure as for Even with the transmission in starting a cold engine with the excep- the neutral position, do not tion that the starter (choke) is not coast for long periods of time required when the engine is warm. -
Page 36: Tips For Reducing Fuel Consumption
Avoid prolonged operation above in period, immediately have a sings). 4000 r/min. Yamaha dealer check the vehi- After every hour of operation, cle. stop the engine, and then let it cool for five to ten minutes. -
Page 37: Parking
OPERATION AND IMPORTANT RIDING POINTS EAU17171 Parking When parking, stop the engine, remo- ve the key from the main switch, and then turn the fuel cock lever to “OFF”. EWA10311 WARNING Since the engine and exhaust system can become very hot, park in a place where pedes- trians or children are not likely to touch them and be burned. -
Page 38: Periodic Maintenance And Adjustment
To avoid possible burns, let necessary to perform certain mainte- service or while using the vehicle. If brake components cool before tou- nance work correctly. you are not familiar with vehicle ching them. service, have a Yamaha dealer per- form service. - Page 39 PERIODIC MAINTENANCE AND ADJUSTMENT If you do not have the tools or expe- rience required for a particular job, have a Yamaha dealer perform it for you.
-
Page 40: Periodic Maintenance Chart For The Emission Control System
From 30000 km (17500 mi), repeat the maintenance intervals starting from 6000 km (3500 mi). Items marked with an asterisk should be performed by a Yamaha dealer as they require special tools, data and technical skills. -
Page 41: General Maintenance And Lubrication Chart
PERIODIC MAINTENANCE AND ADJUSTMENT EAU17717 General maintenance and lubrication chart ODOMETER READING CHECK OR ANNUAL ITEM MAINTENANCE JOB CHECK 1000 km 6000 km 12000 km 18000 km 24000 km (600 mi) (3500 mi) (7000 mi) (10500 mi) (14000 mi) • Clean. √... - Page 42 PERIODIC MAINTENANCE AND ADJUSTMENT ODOMETER READING CHECK OR ANNUAL ITEM MAINTENANCE JOB CHECK 1000 km 6000 km 12000 km 18000 km 24000 km (600 mi) (3500 mi) (7000 mi) (10500 mi) (14000 mi) • Check operation and for √ √ √...
- Page 43 PERIODIC MAINTENANCE AND ADJUSTMENT ODOMETER READING CHECK OR ANNUAL ITEM MAINTENANCE JOB CHECK 1000 km 6000 km 12000 km 18000 km 24000 km (600 mi) (3500 mi) (7000 mi) (10500 mi) (14000 mi) • Check operation and for oil 19 * Front fork √...
- Page 44 PERIODIC MAINTENANCE AND ADJUSTMENT EAU18670 The air filter needs more frequent service if you are riding in unusually wet or dusty areas. Hydraulic brake service • Regularly check and, if necessary, correct the brake fluid level. • Every two years replace the internal components of the brake master cylinders and calipers, and change the bra- ke fluid.
-
Page 45: Removing And Installing Cowlings And Panels
PERIODIC MAINTENANCE AND ADJUSTMENT 2. Pull the cowling down slightly, and EAU18712 Removing and installing then pull it outward as shown. cowlings and panels The cowlings and panels shown need to be removed to perform some of the maintenance jobs described in this chapter. - Page 46 PERIODIC MAINTENANCE AND ADJUSTMENT EAUS2090 EAUS2100 Cowling B Cowling C To remove the cowling To remove the cowling 1. Remove cowling A. 1. Remove cowlings A and B. (See 2. Remove the bolt and the screws. page 6-8). 2. Remove the screw shown. 1.
- Page 47 PERIODIC MAINTENANCE AND ADJUSTMENT 2. Install the screw removed in step 2. 3. Install cowlings B and A. EAU19161 Panel A To remove the panel 1. Remove the bolt. 1. Screw 1. Panel A 2. Bolt To install the panel To install the cowling 1.
-
Page 48: Checking The Spark Plug
PERIODIC MAINTENANCE AND ADJUSTMENT EAUS2110 EAUS1580 Panel B Checking the spark plug To remove the panel The spark plug is an important engine 1. Turn the fuel cock lever to the off component, which is easy to check. position. (See page 3-11). Since heat and deposits will cause 2. -
Page 49: To Check/Install Spark Plug
PERIODIC MAINTENANCE AND ADJUSTMENT 3. Remove the spark plug as Instead, have a Yamaha dealer check Spark plug gap: shown, using the spark plug the vehicle. 0.6–0.7 mm (0.024–0.028 in) wrench, which is located in the 2. Check the spark plug for electro- 2. -
Page 50: Transmission Oil
PERIODIC MAINTENANCE AND ADJUSTMENT To change the transmission oil EAUS1591 Transmission oil Make sure that the vehicle is positio- The transmission oil level should be ned straight up when checking the oil checked before each ride. In addition, level. A slight tilt to the side can result the oil must be changed at the inter- in a false reading. -
Page 51: Coolant
PERIODIC MAINTENANCE AND ADJUSTMENT EAU20070 Tightening torque: Coolant The coolant should be between the Transmission oil drain bolt: The coolant level should be checked 17.5 Nm (1.7 m•kgf, 12.7 ft•lbf) minimum and maximum level marks. Oil check bolt: before each ride. In addition, the coo- 6 Nm (0.6 m•kgf, 4.3 ft•lbf) lant must be changed at the intervals specified in the periodic maintenance... - Page 52 2. Radiator cap added to the coolant, have a 3. Radiator cap retainer 2. Remove cowlings A, B and C and Yamaha dealer check the anti- panel A. (See page 6-8). freeze content of the coolant 5. Remove the coolant drain bolt 3.
- Page 53 PERIODIC MAINTENANCE AND ADJUSTMENT 6. Remove the coolant reservoir 8. After the coolant is completely Antifreeze/water mixture ratio: cap. drained, thoroughly flush the cooling system with clean tap Recommended antifreeze: water. High-quality ethylene glycol 9. Connect the coolant reservoir antifreeze containing corrosion hose, and then move the hose inhibitors for aluminum engines Coolant quantity:...
-
Page 54: Air Filter Element
Have a Yamaha carburetor adjustments should be left 17. Install the cowlings and panel. dealer clean or replace the air filter to a Yamaha dealer, who has the element. necessary professional knowledge and experience. The adjustment des- cribed in the following section, howe- ver, may be serviced by the owner as part of routine maintenance. -
Page 55: Adjusting The Engine Idling Speed
(b). it as follows. Yamaha dealer make the adjustment. 3. Install the panel. The engine idling speed must be correctly adjusted before checking and adjusting the throttle grip free play. -
Page 56: Tires
PERIODIC MAINTENANCE AND ADJUSTMENT 2. To increase the throttle grip free EAU21565 Tires Tire air pressure (measured on play, turn the throttle grip free cold tires): To maximize the performance, durabi- play adjusting nut in direction (a). 0–90 kg (0–198 lb): lity, and safe operation of your To decrease the throttle grip free Front:... - Page 57 The tires must be checked before this model by Yamaha Motor Co., Ltd. Ride at moderate speeds after each ride. If the center tread depth changing a tire since the tire reaches the specified limit, if the tire surface must first be “broken...
-
Page 58: Cast Wheels
Yamaha dealer check the The wheel rims should be chec- internal clutch mechanism. ked for cracks, bends, warpage or other damage before each ride. -
Page 59: Checking The Front Brake Lever Free Play
Periodically check the shift a Yamaha dealer check the brake sys- have a Yamaha dealer adjust it. pedal position and, if necessary, have tem. -
Page 60: Brake Light Switches
PERIODIC MAINTENANCE AND ADJUSTMENT disappeared, have a Yamaha dealer EAU22273 EAU22392 Brake light switches Checking the front and rear replace the brake pads as a set. brake pads EAU22480 The front and rear brake pads must Rear brake pads be checked for wear at the intervals... -
Page 61: Checking The Brake Fluid Level
PERIODIC MAINTENANCE AND ADJUSTMENT Insufficient brake fluid may allow air EAU22580 Checking the brake fluid to enter the brake system, possibly level causing it to become ineffective. Before riding, check that the brake fluid is above the minimum level mark Front brake and replenish if necessary. -
Page 62: Changing The Brake Fluid
EAU22760 Changing the brake fluid Drive chain slack enter the brake fluid reservoir Have a Yamaha dealer change the The drive chain slack should be chec- when refilling. Water will signifi- brake fluid at the intervals specified in ked before each ride and adjusted if... - Page 63 EAU22922 To adjust the drive chain slack position for proper wheel alignment. Consult a Yamaha dealer before adjusting the drive chain slack. 1. Remove the cotter pin from the axle nut, and then loosen the axle nut.
-
Page 64: Cleaning And Lubricating The Drive Chain
PERIODIC MAINTENANCE AND ADJUSTMENT they may contain substances EAU23025 Cleaning and lubricating the Make sure that two notches in the that could damage the O-rings. drive chain axle nut are aligned with the hole [ECA11111] through the wheel axle, otherwise The drive chain must be cleaned and further tighten the axle nut until they lubricated at the intervals specified in... -
Page 65: Checking And Lubricating The Cables
In addition, the cable should be lubri- periodic maintenance and lubrication and the cables and cable ends should cated by a Yamaha dealer at the inter- chart. be lubricated if necessary. If a cable is vals specified in the periodic mainte- damaged or does not move smoothly, nance chart. -
Page 66: Checking And Lubricating The Brake And Shift Pedals
PERIODIC MAINTENANCE AND ADJUSTMENT The operation of the brake and shift EAU44272 EAU23142 Checking and lubricating the Checking and lubricating the pedals should be checked before brake and shift pedals brake and clutch levers each ride, and the pedal pivots should be lubricated if necessary. -
Page 67: Checking And Lubricating The Sidestand
PERIODIC MAINTENANCE AND ADJUSTMENT The operation of the brake and clutch EAU23202 Checking and lubricating the Recommended lubricant: levers should be checked before each Lithium-soap-based grease sidestand ride, and the lever pivots should be lubricated if necessary. Recommended lubricants: Brake lever: Silicone grease Clutch lever: Lithium-soap-based grease... -
Page 68: Checking The Front Fork
NOTICE ward and backward. If any free If any damage is found or the front play can be felt, have a Yamaha fork does not operate smoothly, dealer check or repair the steering. have a Yamaha dealer check or repair it. -
Page 69: Checking The Wheel Bearings
Howe- KEEP THIS AND ALL BATTE- turn smoothly, have a Yamaha dealer ver, the battery lead connections RIES OUT OF THE REACH OF check the wheel bearings. -
Page 70: Replacing The Fuse
PERIODIC MAINTENANCE AND ADJUSTMENT connect the positive lead befo- ECA16521 EAU23482 Replacing the fuse NOTICE re connecting the negative To charge a VRLA (Valve Regulated lead. [ECA16840] Lead Acid) battery, a special (cons- 4. After installation, make sure that tant-voltage) battery charger is the battery leads are properly required. -
Page 71: Replacing The Headlight Bulb
NOTICE 4. If the fuse immediately blows Take care not to damage the follo- again, have a Yamaha dealer wing parts: check the electrical system. Headlight bulb 1. Do not touch the glass part of the bulb. -
Page 72: Replacing The Tail/Brake Light Bulb
1. Remove the tail/brake light lens ECA10670 by removing the screws. NOTICE It is advisable to have a Yamaha dealer perform this job. 1. Remove the socket (together with the bulb) by turning it coun- 1. Unhook the headlight bulb holder terclockwise for the right turn sig- 2. -
Page 73: Replacing A Rear Turn Signal Light Bulb
PERIODIC MAINTENANCE AND ADJUSTMENT EAUS1610 EAUM1461 Replacing a rear turn signal Replacing the license plate light bulb light bulb 1. Remove the turn signal lens by 1. Remove the license plate light removing the screw. cover by removing the screw. 1. -
Page 74: Troubleshooting
6. Install the license plate light motorcycle properly. cover by installing the screw. Use only genuine Yamaha replace- ment parts. Imitation parts may look like Yamaha parts, but they are often inferior, have a shorter service life and can lead to expensive repair bills. 6-37... -
Page 75: Troubleshooting Charts
Remove the spark plug and check the electrodes. The engine does not start. Have a Yamaha dealer check the vehicle. Check the battery. 4. Battery The engine turns over The battery is good. - Page 76 Start the engine. If the engine overheats again, have a The coolant level Yamaha dealer check and repair the cooling system. is OK. If coolant is not available, tap water can be temporarily used instead, provided that it is changed to the recommended coolant as soon as possible.
-
Page 77: Motorcycle Care And Storage
Some models are equipped with nerable. Rust and corrosion can matte colored finished parts. Be develop even if high-quality compo- Cleaning sure to consult a Yamaha dealer for nents are used. A rusty exhaust pipe ECA10772 advice on what products to use NOTICE may go unnoticed on a car, however, before cleaning the vehicle. - Page 78 MOTORCYCLE CARE AND STORAGE water, diluted mild detergent pounds for plastic may leave with water may be used. Be scratches on the windshield. Salt sprayed on roads in the winter sure to rinse off any detergent Test the product on a small hid- may remain well into spring.
-
Page 79: Storage
Storing the motorcycle in a EWA11131 poorly ventilated room or cove- WARNING Consult a Yamaha dealer for ring it with a tarp, while it is still Contaminants on the brakes or advice on what products to use. wet, will allow water and humi- tires can cause loss of control. - Page 80 MOTORCYCLE CARE AND STORAGE 2. Turn the fuel cock lever to “OFF”. e. Remove the spark plug cap ce [less than 0 °C (30 °F) or more 3. Drain the carburetor float cham- from the spark plug, and then than 30 °C (90 °F)]. For more ber by loosening the drain bolt;...
-
Page 81: Specifications
SPECIFICATIONS Dimensions: Engine oil: Spark plug(s): Overall length: Type: Manufacturer/model: 2202 mm (86.7 in) YAMALUBE 2S or 2-stroke engine oil NGK / BR9 ES Overall width: (JASO FC grade) or (ISO EG-C or EG-D Spark plug gap: 689 mm (27.1 in) grade) 0.6–0.7 mm (0.024–0.028 in) Overall height:... - Page 82 SPECIFICATIONS Front suspension: Caster angle: Front: 25.00 º 190 kPa (1.90 kgf/cm , 28 psi, 1.90 bar) Type: Trail: Rear: Telescopic fork 90 mm (3.5 in) 230 kPa (2.30 kgf/cm , 33 psi, 2.30 bar) Spring/shock absorber type: High-speed riding: Front tire: Coil spring/oil damper Front:...
- Page 83 SPECIFICATIONS Front turn signal light: 12 V, 16.0 W x 2 Rear turn signal light: 12 V, 10.0 W x 2 License plate light: 12 V, 5.0 W x 1 Meter lighting: Neutral indicator light: Oil level warning light: Turn signal indicator light: Coolant temperature warning light: Engine trouble warning light: Fuses:...
-
Page 84: Consumer Information
Model label Record the vehicle identification num- ber and model label information in the spaces provided below for assistance when ordering spare parts from a Yamaha dealer or for reference in case vehicle stolen. VEHICLE IDENTIFICATION NUMBER: 1. Vehicle identification number 1. - Page 85 INDEX Engine oil ..........3-10 Engine stop switch ........3-5 Air filter element ........6-17 Parking ............5-4 Engine trouble warning light ......3-3 Anti-theft device housing......3-13 Part locations ..........2-1 Engine, starting a warm ......5-2 Autolube pump, adjusting......6-28 Pass switch ..........3-5 Front and rear brake pads, checking ..6-23 Battery............6-32 Rear view mirrors ........3-13 Front brake lever free play, checking..6-22...
- Page 86 INDEX Turn signal light bulb (front), replacing ..6-35 Turn signal light bulb (rear), replacing..6-36 Turn signal switch ........3-5 Vehicle identification number.....9-1 Wheel bearings, checking......6-32 Wheels .............6-21...
- Page 92 MBK Industrie YAMAHA MOTOR ESPAÑA, S.A. Z.I. de Rouvroy 02100 Saint Quentin PRINTED IN SPAIN 2010.09 Société Anonyme au capital de 45 000 000 e PRINTED IN THE NETHERLANDS 2012-04 R.C St-Quentin B 329 035 422...
Need help?
Do you have a question about the TZR50 and is the answer not in the manual?
Questions and answers