
Related Manuals for Celestron Cosmos 44362


Summary of Contents for Celestron Cosmos 44362
- Page 1 L C D D I G I T A L M I C R O S C O P E LCD HANDHELD DIGITAL MICROSCOPE INSTRUCTION MANUAL MODEL #44362 ENGLISH ENGLISH...
- Page 2 2. INTRODUCTION Thank you for purchasing the Cosmos LCD Digital Microscope by Celestron with a 5MP sensor and 3.5” color LCD screen. Your microscope is a precision optical instrument, made of the highest quality materials to ensure durability and long life. It is designed to give you a lifetime of pleasure with a minimal amount of maintenance.
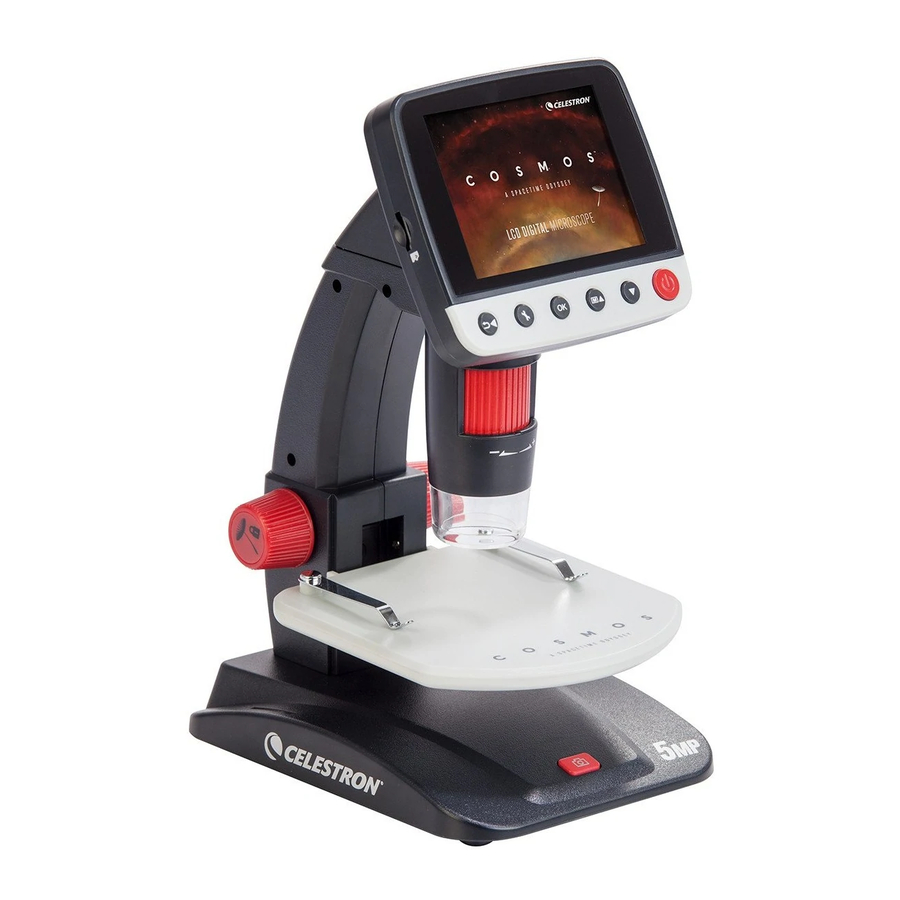
- Page 3 PARTS FUNCTION 1. 3.5” Full Color LCD display 2. MicroSD card slot 3. Focus Wheel 4. Microscope Tube 5. Stage 6. Stage Lock Wheel 7. Stage Height Adjustment Wheel 8. Capture Button 9. LED Illuminator Adjustment Wheel 10. Digital Zoom Switch (•/-) 11.
-
Page 4: Specifications
AC Adapter 44362: (multi country plug)- 100 to 240V- 50/60Hz Software On unit: Imaging software with zoom and timer features On CD (for computers): Celestron Portable CapturePro (with measuring and note-taking features) Operating Systems Supported Windows: Windows XP/Vista/7.0/8.0 Mac: OSX 10.6/10.7... -
Page 5: Install Battery
3. SETUP INSTALL BATTERY Open the Battery Compartment and insert the Lithium battery, making sure to align the connection points correctly. NOTE: Although the battery has a partial charge, if you are going to use the microscope with the battery only, be sure to charge the battery first. Refer to section 3.E below for more details on charging the battery INSERT MICRO SD CARD To capture images with your microscope while NOT connected... -
Page 6: Display Icons
DISPLAY ICONS Small Image Capture MicroSD Card Recognized Video Capture Video Capture Setting Time Lapse Capture Current Resolution Setting Battery Power Indicator Number of Images Taken/Number of Images Remaining Video Capture Time Remaining (Hours:Minutes:Seconds) NOTE: The Display Icons can be turned off by pressing the Zoom Button (10) inward. CHARGE THE BATTERY Plug the small end of the power adapter into the DC •... - Page 7 4. OBSERVING AND CAPTURING IMAGES: DIGITAL IMAGING A. Make sure your Cosmos, LCD Digital Microcope is powered ON. Put object onto the stage B. Place your specimen on the stage (5). If your object is thin C. Rotate the Stage Height Adjustment Wheel (7) to bring enough, secure it to the stage using the chrome clips.
-
Page 8: Software Features
5. SOFTWARE FEATURES REVIEW SAVED IMAGE FILES To play back video or review a still image, simply press and hold the Playback/Left button on the LCD housing. The following screen will appear with 3 choices: 1. Delete 2. Protect 3. Slide Show DELETE IMAGE FILES This choice deletes the selected image/video or ALL images. -
Page 9: Slide Show
PROTECT IMAGE FILES This choice allows you to ‘lock’ and ‘unlock’ the selected image/video file or ALL images/video files on disk for protection. SLIDE SHOW This choice creates a slide show using all the image files on the MicroSD card. Select Slide Show, and then choose the interval between each image. -
Page 10: Digital Zoom
1. Illuminator Brightness • Choose “Preview on Computer” Mode from the 2 choices on the LCD screen. 2. Focus Wheel • Open the Celestron Portable CapturePro Software on 3. Stage Adjustment Wheel your PC. 4. Stage Lock Wheel NOTE: Refer to section 5.E in this manual for instructions on installing and using... -
Page 11: Resolution Setting
CONNECT TO TV • Insert the 1/8-inch plug on the end of the supplied video cable into the Cosmos Microscope’s AV OUT port located Video-in on TV monitor on the back of the base. • Insert the yellow RCA plug on the video cable into one of your television’s yellow video input connectors. - Page 12 In video mode, choices are: • - VGA - QVGA TIME LAPSE SETTING FRAMES: In this window, you will set the number • of frames you want to take. NOTE: The number above represents 32 frames. INTERVAL: In this window the interval between •...
- Page 13 SHARPNESS Sharpness increases the differences the imaging process detects between the edges of the pixels. There are no rules when it comes to the sharpness settings. Experiment to find out which works best for your specimens. The Sharpness choices are: 1.
-
Page 14: Power Save
POWER SAVE Power Save allows you to conserve battery power by setting the unit to turn off automatically. The choices for times are: 1. OFF: Power Save feature is off; unit will not turn off automatically 2. 5 min.: Unit will turn off after 5 minutes of non-use 3. -
Page 15: System Reset
DATE/TIME Here you can set the correct Date and Time • You can also choose from the following date display options: • - YY/MM/DD - DD/MM/YY - MM/DD/YY SD CARD From this screen, you can format your MicroSD card. You should format your MicroSD before using it for the first time. -
Page 16: Care And Maintenance
7. MULTI-PLUG There are 3 interchangeable plug heads that will fit outlets in Europe, the United Kingdom, Hong Kong and China. To change the plug head: - Grasp the main plug housing with one hand and the plug head of choice with the other. - Press the small button release on the plug housing (circled in below image). -
Page 17: Troubleshooting
The battery is not charging. 10. WARRANTY Your Cosmos Digital LCD Microscope has a two year limited warranty. Please visit the Celestron website for detailed information on all Celestron microscopes: www.celestron.com FCC Statement :This equipment has been tested and found to comply with the limits for a Class B digital device, pursuant to part 15 of the FCC Rules. -
Page 18: Manuel D'instruction
M ICROSCOP E N U MÉRIQU E ACL LCD HANDHELD DIGITAL MICROSCOPE MANUEL D’INSTRUCTION MODÈLE #44362 FRANÇAIS FRANÇAIS... -
Page 19: Contenu De La Boîte
à cette fin. Voyez certains performances de qualité de votre microscope Cosmos. de nos microscopes biologiques plus adaptés à ce type de visionnement au www.celestron.com. CONTENU DE LA BOÎTE Microscope numérique ACL Adaptateur CA (1) Batterie au lithium (1) Câble USB (1) - Page 20 PIÈCES FONCTION 1. Écran ACL couleur 3,5 po 2. Fente pour carte MicroSD 3. Molette de focalisation 4. Tube de microscope 5. Platine 6. Molette de blocage de platine 7. Molette de réglage de hauteur de platine 8. Bouton de capture 9.
-
Page 21: Spécifications
44362 : (Fiche polyvalente internationale) - 100 à 240 V - 50/60 Hz Logiciel Sur l’appareil : Logiciels d’imagerie avec des fonctions de zoom et de minuterie Sur CD (pour les ordinateurs) : Celestron Windows: Windows XP/Vista/7.0/8.0 Mac: OSX 10.6/10.7 Portable CapturePro (avec des fonctions de mesure et de prise de notes) Systèmes d’exploitation pris en charge... -
Page 22: Installation De La Batterie
3. INSTALLATION INSTALLATION DE LA BATTERIE Ouvrez le compartiment de la batterie et insérez la batterie au lithium, en veillant à aligner les points de connexion correctement. REMARQUE : Bien que la batterie soit partiellement chargée, assurez-vous de charger la batterie si vous envisagez d’utiliser le microscope avec la batterie uniquement. -
Page 23: Icônes De L'écran
ICÔNES DE L’ÉCRAN Résolution en image fixe Carte MicroSD reconnue Capture vidéo Réglage de la capture vidéo Capture à intervalle Réglage de la résolution actuelle Indicateur de charge de la batterie Nombre d’images prises/nombre d’images restantes Temps de capture vidéo restant (Heure REMARQUE : Les icônes de l’écran peuvent être désactivées en appuyant sur la : Minutes : Secondes) - Page 24 4. OBSERVATION ET CAPTURE D’IMAGES A. Assurez-vous que votre microscope Cosmos est sous tension. Placez un objet sur la platine B. Placez votre échantillon sur la platine (5). Si votre objet est C. Tournez la molette de réglage de hauteur de platine (7) assez mince, fixez-le à...
-
Page 25: Caractéristiques Du Logiciel
5. CARACTÉRISTIQUES DU LOGICIEL REVOIR LES IMAGES FIXES SAUVEGARDÉES Pour la lecture d’une vidéo ou d’une image fixe, appuyez et maintenez enfoncé le bouton de Lecture/Gauche (Playback/Left) sur le boîtier ACL. Pour faire défiler les images et les vignettes, appuyez sur La dernière image (ou vignette de la dernière vidéo) les boutons HAUT (UP et/ou BAS (DOWN) - Page 26 2. PROTÉGER LES FICHIERS IMAGE : Cette sélection vous permet de « verrouiller » et « déver- rouiller » l’image/vidéo sélectionnée ou TOUS les fichiers image/vidéo sur le disque pour les protéger. 3. DIAPORAMA Ce choix crée un diaporama en utilisant tous les fichiers d’images sur la carte MicroSD.
-
Page 27: Zoom Numérique
Reportez-vous à la section 5.E dans ce manuel pour obtenir des instructions au lithium se charge. sur l’installation et l’utilisation du logiciel Celestron Portable CapturePro REMARQUE : Une fois le logiciel lancé, l’écran ACL s’éteint et vous commencer à contrôler le microscope à... -
Page 28: Menu Principal
BRANCHEMENT AU TÉLÉVISEUR : Insérez la fiche 1/8 po à l’extrémité du câble vidéo • Entrée vidéo (Video-in) sur écran de télévision fourni dans la prise SORTIE AV (AV OUT) du micro- scope Cosmos située à l’arrière de la base. Insérez la fiche RCA jaune du câble vidéo dans l’un des •... - Page 29 En mode vidéo, les choix sont les suivants : • - VGA - QVGA RÉGLAGE DE L’INTERVALLE CLICHÉS : Dans cette fenêtre, vous pourrez régler • le nombre de clichés que vous voulez prendre. REMARQUE : Le nombre ci-dessus représente 32 clichés INTERVALLE: Dans cette fenêtre, l’intervalle entre les •...
- Page 30 NETTETÉ La netteté augmente les différences que le processus d’imagerie détecte entre les bords des pixels. Il n’existe pas de règles quand il s’agit des réglages de netteté. Faites des essais pour trouver ce qui fonctionne le mieux pour vos échantillons.
-
Page 31: Économie D'énergie
ÉCONOMIE D’ÉNERGIE La fonction d’économie d’énergie vous permet d’économiser la batterie en réglant l’appareil pour qu’il s’éteigne automatiquement. Les choix de durées sont : 1. Désactivé : Le mode économie d’énergie est désactivé, l’unité ne s’éteint pas automatiquement 2. 5 min : L’appareil non utilisé s’éteint après 5 minutes 3. -
Page 32: Réinitialisation Du Système
DATE/HEURE Vous pouvez régler la date et l’heure dans ce menu • Vous pouvez également choisir parmi les options • d’affichage de la date suivantes : - AA/MM/JJ - JJ/MM/AA - MM/JJ/AA CARTE SD Depuis cet écran, vous pouvez formater votre carte MicroSD. Vous devez formater votre MicroSD avant de l’utiliser pour la première fois. -
Page 33: Entretien
7. FICHES INTERNATIONALES Il existe 3 têtes enfichables et interchangeables qui s’adapteront aux prises de courant en Europe, au Royaume- Uni, à Hong Kong et en Chine. Pour changer la tête enfichable : • - Saisissez le boîtier du connecteur principal avec une main et la tête enfichable de votre choix avec l’autre. -
Page 34: Dépannage
• Branchez l’appareil ‡ la prise secteur d’un circuit diffÈrent de celui sur lequel le rÈcepteur est branchÈ. • Demandez l’assistance de votre revendeur ou celle d’un technicien radio/TV. © 2014 Celestron. Celestron et le symbole sont des marques déposées de Celestron, LLC. Tous droits réservés. Torrance, CA 90503 • Téléphone: 1(800) 421-9649 TM &... - Page 35 D I G I TA L E S L C D - M I K R O S K O P LCD HANDHELD DIGITAL MICROSCOPE BEDIENUNGSANLEITUNG MODELL #44362 DEUTSCH DEUTSCH...
- Page 36 2. EINFÜHRUNG Vielen Dank für den Kauf des digitalen LCD-Mikroskops Cosmos von Celestron mit 5MP-Sensor und 3,5-Zoll-LCD- Farbbildschirm. Bei Ihrem Mikroskop handelt es sich um ein präzises optisches Instrument, das aus Materialen höchster Qualität gefertigt wurde, um Haltbarkeit und Langlebigkeit zu gewährleisten. Es wurde konzipiert, um Ihnen bei minimalem Wartungsaufwand ein Leben lang Freude zu bereiten.
- Page 37 TEILE FUNKTION 1. 3,5-Zoll-LCD-Farbbildschirm 2. MicroSD-Kartensteckplatz 3. FoAkoptubus 5. Tisch 6. Tischarretierung 7. Tischhöhen-Einstellrad 8. Aufnahmetaste 9. LED-Licht-Einstellrad 10. Schalter für den digitalen Zoom (•/-) 11.5 V-Gleichstromanschluss 12. TV-Ausgangsanschluss 13. USB-Port 14. Akku-Fach 15. Ladeanzeigen-LED LCD-BILDSCHIRMDETAILS LED- Einstellknopf Hineinzoomen MicroSD- Kartensteckplatz Herauszoomen Wiedergabe/...
-
Page 38: Technische Daten
Software Auf dem Gerät: Bilder-Software mit Zoom- und Timer-Funktionen Auf CD (für Computer): Mobile CapturePro Windows: Windows XP/Vista/7.0/8.0 Mac: OSX 10.6/10.7 von Celestron (mit Funktionen zum Messen und Anfügen von Anmerkungen) Unterstütztes Betriebssystem Windows: Windows XP/Vista/7.0/8.0 Mac: OSX 10.6/10.7 Software-Sprachen Auf dem Gerät: (9) englisch, deutsch, französisch, spanisch, italienisch, portugiesisch,... - Page 39 3. EINRICHTEN DEN AKKU EINSETZEN Öffnen Sie das Akku-Fach und setzen Sie einen Lithium-Ak- ku ein, wobei sichergestellt werden muss, dass die Kontakte korrekt ausgerichtet sind. ANMERKUNG: Obwohl der Akku teilweise aufgeladen ist, sollten Sie ihn zuerst aufladen, bevor Sie das Mikroskop im Akkubetrieb verwenden. Weitere Details zum Aufladen des Akkus siehe nachfolgenden Abschnitt 3.E.
-
Page 40: Den Akku Aufladen
BILDSCHIRMSYMBOLE Standbildaufnahme MicroSD-Karte erkannt Videoaufnahme Videoaufnahmeeinstellung Zeitrafferaufnahme Aktuell eingestellte Auflösung Akkustandanzeige Anzahl aufgenommener Bilder/Anzahl verbleibender Bilder Verbleibende Videoaufzeichnungszeit (Stunden:Minuten:Sekunden) ANMERKUNG: Das Bildschirmsymbol kann ausgeschaltet werden, indem die Zoomtaste (10) hineingedrückt wird. DEN AKKU AUFLADEN Schließen Sie das schmale Ende des Netzteils an den •... - Page 41 4. BILDER BETRACHTEN UND AUFNEHMEN A. Vergewissern Sie sich, dass Ihr Cosmos Mikroskop EINGESCHALTET ist. Das Objekt auf den Tisch legen B. Legen Sie Ihre Probe auf den Tisch (5). Wenn Ihr Objekt dünn C. Drehen Sie am Tischhöhen-Einstellrad (7), um Ihre Probe genüg ist, können Sie es mithilfe der Chromklammern auf näher an den Mikroskoptubus (4) heranzuführen.
- Page 42 5. SOFTWAREMERKMALE GESPEICHERTE BILDDATEIEN ANSEHEN Um ein Video wiederzugeben oder ein Standbild anzusehen, einfach die Wiedergabe-/Links-Taste auf dem LCD-Gehäuse gedrückt halten. Auf die AUF und/oder AB Taste drücken, Das letzte Bild (oder eine Miniaturansicht des letzten um durch die Bilder und Miniaturansichten zu scrollen. Videos) erscheint auf dem Bildschirm zusammen mit Auf die Einstellungstaste drücken, um ein bestimmtes einem Richtungspfeil oben im Bildschirm.
- Page 43 2. BILDDATEIEN SCHÜTZEN: Diese Auswahl ermöglicht das ‘Sperren’ und ‘Entsperren’ der ausgewählten Bild-/Videodatei oder ALLER Bilder/ Videodateien, um diese auf der Festplatte zu schützen. 3. DIASHOW: Diese Auswahl erzeugt eine Diashow mit allen Bilddatei- en auf der MicroSD-Karte. Wählen Sie Diashow aus und anschließend das Intervall zwischen jedem Bild.
-
Page 44: Digitaler Zoom
Celestron. 5. Netztaste ANMERKUNG: Anweisungen zur Installation und Verwendung der mobilen CapturePro- Software von Celestron finden Sie in diesem Handbuch im Abschnitt 5.E. ANMERKUNG: Wenn Sie per USB an einen Computer angeschlossen sind, wird der Lithium-Akku aufgeladen. ANMERKUNG: Sobald die Software gestartet wurde, erscheint ein leerer LCD-Bildschirm und Sie steuern das Mikroskop nun mithilfe Ihres Computers. -
Page 45: Einstellung Der Auflösung
AN EINEN FERNSEHER ANSCHLIESSEN Schließen Sie den 1/8-Zoll-Stecker am Ende des • Video-Eingang auf dem mitgelieferten Videokabels an den AV-AUSGANGS-Port Fernsehbildschirm an der Sockelrückseite des Cosmos Mikroskop an. Schließen Sie den gelben RCA-Stecker des Videokabels • an einen der gelben Videoeingangsanschlüsse Ihres Fernsehers an. - Page 46 Im Videomodus können Sie Folgendes wählen: • - VGA - QVGA EINSTELLUNG DES ZEITRAFFERS BILDER PRO SEKUNDE: In diesem Fenster stellen Sie die • Anzahl der Bilder pro Sekunde ein, die aufgenommen werden sollen ANMERKUNG: Die obige Nummer repräsentiert 32 Bilder pro Sekunde. •...
- Page 47 SCHÄRFE Die Schärfe erhöht die Unterschiede, die der Bildprozess zwischen den Pixelrändern erkennt. Es können für die Schär- feeinstellung keine Regeln aufgestellt werden. Finden Sie durch Ausprobieren heraus, welche Einstellung sich für Ihre Proben am besten eignet. Für die Schärfe steht Folgendes zur Auswahl. •...
- Page 48 ENERGIEEINSPRARUNG Die Energieeinsparung erlaubt Ihnen den Akku zu schonen, indem das Gerät automatisch abschaltet. Folgende Zeiten können eingestellt werden: 1. AUS: Die Energiesparfunktion ist aus; das Gerät schaltet nicht automatisch ab. 2. 5 Min.: Das Gerät schaltet nach 5 Minuten ohne Bedienung ab.
- Page 49 DATUM/UHRZEIT Hier können Sie Datum und Uhrzeit einstellen. • Sie können auch unter den folgenden Datums-Anzeigeop- • tionen wählen: - JJ/MM/TT - TT/MM/JJ - MM/TT/JJ SD-KARTE Auf diesem Bildschirm können Sie Ihre MicroSD-Karte • formatieren. Sie sollten Ihre MicroSD-Karte vor der ersten Verwendung formatieren.
- Page 50 7. MEHRFACHSTECKER Es verfügt über 3 austauschbare Steckerköpfe für Steck- dosen in Europa, Großbritannien, Hongkong und China. So wechseln Sie den Steckerkopf: • - Halten Sie mit einer Hand das Hauptsteckerge- häuse und mit der anderen Hand den Steckerkopf Ihrer Wahl. - Drücken Sie auf die kleine Entriegelungstaste auf dem Steckergehäuse (dargestellt im untenstehen- den Bild).
-
Page 51: Fehlerbehebung
• Das Gerät an eine andere Steckdose auf einem anderen Stromkreis als dem des Empf‰ngers anschlieflen. • Den Händler oder einen erfahrenen Radio- und Fernsehtechniker um Hilfe bitten. © 2014 Celestron.Celestron und Symbol sind eingetragene Warenzeichen von Celestron, LLC. Alle Rechte vorbehalten Torrance, CA 90503 • Telefon: 1(800) 421-9649 , Inc. - Page 52 M I C R O S C O P I O D I G I TA L LC D LCD HANDHELD DIGITAL MICROSCOPE MANUAL DE INSTRUCCIONES MODELO #44362 ESPAÑOL ESPAÑOL...
-
Page 53: Contenido Del Embalaje
2. INTRODUCCIÓN Gracias por adquirir el microscopio digital LCD Cosmos de Celestron con sensor de 5MP y monitor LCD a color de 3,5”. Su microscopio es un instrumento óptico de precisión, fabricado con materiales de la mejor calidad para garantizar su resistencia y larga vida útil. - Page 54 PIEZAS FUNCIÓN 1. Pantalla LCD a color de 3,5” 2. Ranura de tarjeta microSD 3. Rueda de enfoque 4. Tubo del microscopio 5. Soporte 6. Rueda de bloqueo del soporte 7. Rueda de ajuste de altura del soporte 8. Botón de captura 9.
-
Page 55: Especificaciones
44362: (toma multi país) – 100 a 240V - 50/60 Hz Software En la unidad: Software de imagen con funciones de zoom y temporizador En el CD (para ordenadores): Celestron Windows: Windows XP/Vista/7.0/8.0 Mac: OSX 10.6/10.7 Portable CapturePro (con funciones de medición y anotación) - Page 56 3. CONFIGURACIÓN INSTALACIÓN DE BATERÍA Abra el compartimiento de batería e introduzca la batería de litio, asegurándose de alinear correctamente los puntos de conexión. NOTA: Aunque la batería tiene una carga parcial, si va a usar el microscopio solamente con la batería, asegúrese de cargarla primero. Consulte la sección 3.E más adelante para obtener más detalles sobre la carga de la batería.
-
Page 57: Iconos De Pantalla
ICONOS DE PANTALLA Captura de imagen fija Tarjeta microSD reconocida Captura de video Configuración de captura de video Captura de lapso temporal Configuración de resolución actual Indicador de energía de batería Número de imágenes capturadas/ Número de imágenes restantes Tiempo restante de captura de video NOTA: Los iconos de pantalla pueden apagarse pulsando el botón de zoom (10) hacia dentro. - Page 58 4. OBSERVAR Y CAPTURAR IMÁGENES A. Asegúrese de que su Microscopio Digital LCD Cosmos esté encendido. Ponga el objeto sobre el soporte B. Ponga el espécimen sobre el soporte (5). Si el objeto es lo C. Gire la rueda de ajuste de altura del soporte (7) para suficientemente delgado, fíjelo al soporte usando los clips acercar el espécimen al tubo del microscopio (4).
-
Page 59: Funciones Del Software
5. FUNCIONES DEL SOFTWARE REVISAR ARCHIVOS DE IMAGEN GUARDADOS Para reproducir video o revisar una imagen fija, presione y mantenga el botón reproducción/izquierda en el chasis LCD. Para moverse por las imágenes y miniaturas, pulse el botón ARRIBA y/o ABAJO La última imagen (o una miniatura del último video) aparecerá... - Page 60 2. BORRAR ARCHIVOS DE IMAGEN Esta selección le permite ‘bloquear’ y ‘desbloquear’ el archivo de imagen/video seleccionado o TODOS los archivos de imagen/video del disco para protegerlos. 3. PRESENTACIÓN Esta selección crea una presentación usando todos los archivos de imagen de la tarjeta MicroSD. Seleccione Presentación y a continuación el intervalo entre cada imagen.
-
Page 61: Zoom Digital
• 2. Rueda de enfoque selecciones de la pantalla LCD. 3. Rueda de ajuste del soporte Abra el software Portable CapturePro de Celestron en el PC. • 4. Rueda de bloqueo del soporte NOTA: Consulte la sección 5.E de este manual para obtener instrucciones de instalación y uso 5. -
Page 62: Menú Principal
CONEXIÓN A TV Introduzca la toma de 1/8 de pulgada en el extremo del • cable de video incluido en el puerto de SALIDA AV del Entrada video en monitor de TV Microscopio Digital LCD Cosmos situado en la parte posterior de la base. - Page 63 En modo de video las selecciones son: • - VGA - QVGA CONFIGURACIÓN DE LAPSO DE TIEMPO FOTOGRAMAS: En esta ventana verá el número de • fotogramas que quiera capturar. NOTA: El número superior representa 32 fotogramas. INTERVALO: En esta ventana se establece el intervalo •...
- Page 64 DEFINICIÓN La definición aumenta las diferencias que detecta el procesado de imagen entre los bordes de los píxeles. No hay normas cuando se trata de la configuración de definición. Experimente para ver la que mejor funciona con sus especimenes. Las selecciones de definición son: •...
-
Page 65: Ahorro De Energía
AHORRO DE ENERGÍA El ahorro de energía le permite ahorrar la energía de la batería configurando la unidad para que se apague automáticamente. Las selecciones de tiempo son: 1. Apagado: Función de ahorro de energía apagada; la unidad no se apagará automáticamente 2. - Page 66 FECHA/HORA Aquí puede establecer la fecha y hora correctos. • También puede elegir entre las siguientes opciones • de indicación de fecha: - AA/MM/DD - DD/MM/AA - MM/DD/AA TARJETA SD Desde esta pantalla puede formatear su tarjeta MicroSD. Debería formatear la MicroSD antes de usarla por primera vez.
-
Page 67: Cuidados Y Mantenimiento
7. MULTI TOMA Tiene 3 enchufes intercambiables que se adaptan a tomas de Europa, Reino Unido, Hong Kong y China. Para cambiar el enchufe: • - Tome el cuerpo del enchufe con una mano y el cabezal del enchufe deseado con la otra. - Pulse el pequeño botón de soltado del cuerpo del enchufe (en un círculo en la imagen siguiente). -
Page 68: Resolución De Problemas
• Conecte el equipo a una toma de corriente o circuito distinto de aquèl al que estè conectado el receptor. • Consulte con el vendedor o un tècnico de radio/TV experimentado para obtener ayuda. © 2014 Celestron. Celestron y el símbolo son marcas comerciales de Celestron, LLC. Todos los derechos reservados.. Torrance, CA 90503 • Teléfono: 1(800) 421-9649 TM &... -
Page 69: Manuale Di Istruzioni
M I C R O S C O P I O DI G ITALE LCD LCD HANDHELD DIGITAL MICROSCOPE MANUALE DI ISTRUZIONI MODELLO #44362 ITALIANO ITALIANO... -
Page 70: Contenuto Della Confezione
è ideale per questa funzione. Alcuni funzioni per anni con prestazioni, uso e divertimento di dei nostri microscopi biologici disponibili sul sito www. qualità. celestron.com sono più adatti per questo tipo di impiego. CONTENUTO DELLA CONFEZIONE Microscopio digitale LCD Adattatore CA (1) - Page 71 COMPONENTI FUNZIONE 1. Schermo LCD a colori da 3,5” 2. Vano per scheda MicroSD 3. Rotella di messa a fuoco 4. Tubo del microscopio 5. Tavolino portaoggetti 6. Rotella di blocco tavolino portaoggetti 7. Rotella di regolazione altezza tavolino portaoggetti 8.
- Page 72 44362: (adattatore presa) - da 100 a 240 V- 50/60 Hz Software Sull'unità: software per acquisizione immagini con funzione zoom e timer Su CD (per computer): Celestron Portable Windows: Windows XP/Vista/7.0/8.0 Mac: OSX 10.6/10.7 CapturePro (con funzione di misurazione e...
-
Page 73: Installazione Della Batteria
3. IMPOSTAZIONI INSTALLAZIONE DELLA BATTERIA Aprire il vano batteria e inserire la batteria al litio, accertan- dosi di allineare i punti di collegamento in maniera corretta. NOTA: nonostante la batteria abbia una carica parziale, caricare la batteria se si intende utilizzare il microscopio solo con la batteria. -
Page 74: Caricamento Della Batteria
ICONE DELLO SCHERMO Acquisizione immagine Riconoscimento scheda MicroSD Acquisizione video Impostazione acquisizione video Acquisizione immagini in sequenza Impostazione risoluzione corrente Indicatore stato di carica batteria N. di immagini scattate/N. di immagini rimanenti Tempo residuo acquisizione video (Ore:Minuti:Secondi) NOTA: È possibile spegnere le icone dello schermo spingendo verso l’interno il pulsante Zoom (10). - Page 75 4. OSSERVAZIONE E ACQUISIZIONE DI IMMAGINI A. Accertarsi che Microscopio Digitale LCD Cosmos sia acceso. Posizionare l’oggetto sul tavolino portaoggetti B. Posizionare il campione sul tavolino portaoggetti (5). Se C. Ruotare la rotella di regolazione dell’altezza del tavolino (7) l’oggetto è abbastanza sottile, fissarlo al tavolino utilizzando per avvicinare il campione al tubo del microscopio (4).
- Page 76 5. CARATTERISTICHE DEL SOFTWARE RIPRODUZIONE DI FILE IMMAGINE SALVAT Per riprodurre un video o rivedere un’immagine, è sufficiente tenere premuto il pulsante Riproduci/Sinistro sullo schermo LCD. Per scorrere le immagini e le miniature, premere il pulsante SÙ e/o GIÙ Appare sullo schermo l’ultima immagine (o la miniatura Per modificare un’immagine o un video specifico utiliz- dell’ultimo video), con una freccia direzionale in cima allo zando la funzione Riproduci, premere il pulsante Im-...
- Page 77 2. PROTEGGI I FILE IMMAGINE Questa opzione consente di “bloccare” e “sbloccare” l’immagine o il video selezionato o TUTTI i file immagine/ video presenti sul disco per proteggerli. 3. PRESENTAZIONE Questa opzione crea una presentazione utilizzando tutti i file immagine sulla scheda MicroSD. Selezionare Presentazione, quindi scegliere l’intervallo di tempo tra un’immagine e l’altra.
-
Page 78: Zoom Digitale
• Rotella di messa a fuoco opzioni disponibili sullo schermo LCD. Rotella di regolazione tavolino portaoggetti Aprile il software Celestron Portable CapturePro sul computer. • Rotella di blocco tavolino portaoggetti NOTA: Consultare la sezione 5.E del presente manuale per istruzioni sull’installazione e l’utilizzo... -
Page 79: Menu Principale
COLLEGAMENTO AL TELEVISORE Inserire la spina da 1/8” del cavo video in dotazione • nell’uscita AV di Microscopio Digitale LCD Cosmos sul Ingresso video sul monitor del televisore retro della base. Inserire la spina gialla RCA del cavo video in uno dei •... - Page 80 In modalità video, le opzioni sono: • - VGA - QVGA IMPOSTAZIONE “TIME LAPSE” (IMMAGINI IN SEQUENZA) FOTOGRAMMI In questa finestra è possibile impostare il • numero di fotogrammi che si desidera scattare. INTERVALLO In questa finestra viene impostato l’intervallo tra uno scatto NOTA: •...
- Page 81 NITIDEZZA La nitidezza aumenta le differenze che il processo di creazi- one dell’immagine rileva tra i bordi dei pixel. Non esistono regole per quanto riguarda le impostazioni di nitidezza. Fare dei tentativi per individuare l’impostazione ottimale per i campioni osservati. Le opzioni per Nitidezza sono: •...
-
Page 82: Risparmio Energetico
RISPARMIO ENERGETICO La funzione di Risparmio energetico consente di risparmiare la carica della batteria impostando l’unità perché si spenga au- tomaticamente. Le opzioni tra cui scegliere sono le seguenti. 1. OFF: la funzione Risparmio energetico è disattivata; l’unità non si spegne in automatico 2. -
Page 83: Ripristino Del Sistema
DATA/ORA Qui è possibile impostare la Data e l’Ora corrette. • È inoltre possibile scegliere una delle seguenti opzioni • di visualizzazione della data. - AA/MM/GG - GG/MM/AA - MM/GG/AAY SCHEDA SD Da questa schermata, è possibile formattare la scheda •... -
Page 84: Cura E Manutenzione
La batteria non carica. 10. GARANZIA Il Microscopio Digitale LCD Cosmos presenta una garanzia limitata di due anni. Visitare il sito Web Celestron per informazioni dettagliate su tutti i microscopi celestron: www.celestron.com Nota FCC: La presente attrezzatura Ë stata testata ed Ë risultata conforme ai limiti per i dispositivi digitali di Classe B, ai sensi delle parte 15 delle Normative FCC. Tali limini sono stati ideate per fornire un’adeguata protezione nei confronti di interferenze dannose in installazioni residenziali.
Need help?
Do you have a question about the Cosmos 44362 and is the answer not in the manual?
Questions and answers