
Related Manuals for Toro 12004TC


Summary of Contents for Toro 12004TC
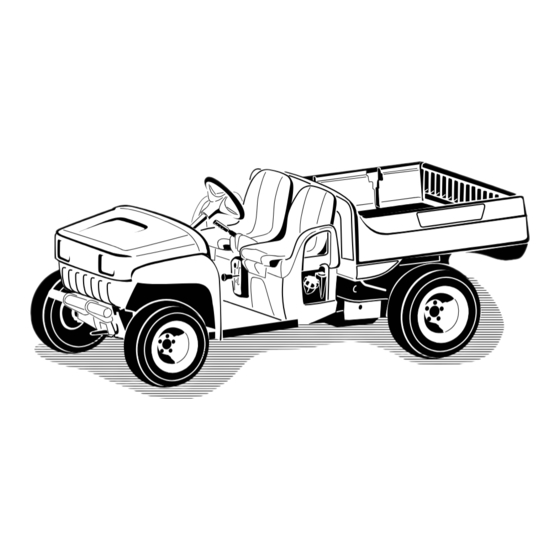
- Page 1 Form No. 3356-938 Rev A Twister ® 1600 Utility Vehicle Model No. 12004TC—Serial No. 270000001 and Up G002164 Register at www.Toro.com. Original Instructions (EN)
-
Page 2: Table Of Contents
Safety ................3 the product properly and safely. Before Operating ..........3 Operation............. 4 You may contact Toro directly at www.Toro.com for Maintenance............6 product and accessory information, help finding a Sound Pressure............. 7 dealer, or to register your product. -
Page 3: Safety
Safety Jacking the Vehicle..........27 Lubrication............. 28 Adding Grease ........... 28 Improper use or maintenance by the operator or owner Engine Maintenance..........28 can result in injury. To reduce the potential for injury, Servicing the Air Cleaner ........28 comply with these safety instructions and always pay Servicing the Engine Oil ........ -
Page 4: Operation
to drive cautiously, use the headlights, and even • Failure to operate the vehicle safely may result in an consider adding additional lights. accident, tip over of the vehicle, and serious injury or death. Drive carefully. To prevent tipping or loss •... - Page 5 Operating on Hills 2. Set the parking brake. 3. Turn the ignition key to Off. 4. Remove the ignition key. Operating the vehicle on a hill may cause Note: If the vehicle is on an incline, block the tipping or rolling of the vehicle, or the engine wheels after getting off of the vehicle.
-
Page 6: Maintenance
Operating on Rough Terrain cannot be centered. Keep loads balanced and secure to prevent them from shifting. Reduce speed and load when operating on rough terrain, • Always secure loads so that they do not shift. If a uneven ground, and near curbs, holes, and other sudden load is not secured, or you are transporting a liquid in changes in terrain. -
Page 7: Sound Pressure
, based on measurements of identical machines • To be sure of optimum performance and safety, per EN 1033. always purchase genuine Toro replacement parts and accessories. Replacement parts and accessories made This unit does not exceed a whole body vibration by other manufacturers could be dangerous. - Page 8 104–6581 1. Warning—read the Operator’s Manual. 2. Fire hazard—before fueling, stop the engine. 3. Tipping hazard—receive training before operating the machine, use caution and drive slowly while on slopes; drive slowly when turning, keep the vehicle speed under 19 MPH (31 km/h) when carrying a full or heavy load and when driving on rough terrain . 4.
- Page 9 99–7958 1. Read the Operator’s 5. 15 amp. fuse for the Manual for information on optional Electric Bed Lift fuses. 2. 10 amp. fuse for the 6. 10 amp. fuse for the low optional Road Light Kit oil light and the hour meter 3.
-
Page 10: Setup
Setup Loose Parts Use the chart below to verify that all parts have been shipped. Procedure Description Qty. Wheel assembly Install the wheels. Steering wheel Install the steering wheel. Bumper Install the bumper. Install the seats. Seat Hitch Install the hitch. Cargo box Right-hand pivot bracket Left-hand pivot bracket... -
Page 11: Installing The Wheels
Installing the Wheels Installing the Steering Wheel Parts needed for this procedure: Parts needed for this procedure: Wheel assembly Steering wheel Procedure Procedure 1. Remove the fasteners securing the wheels. 1. Remove the nut and washer from the steering shaft. 2. -
Page 12: Installing The Bumper
Installing the Bumper Installing the Seats Parts needed for this procedure: Parts needed for this procedure: Bumper Seat Procedure Procedure 1. Remove the 4 bolts and lock nuts secured to the Insert the seat bracket into the seat base opening and front of the frame. -
Page 13: Installing The Hitch
Installing the Hitch Installing the Cargo Box Parts needed for this procedure: Parts needed for this procedure: Cargo box Hitch Right-hand pivot bracket Left-hand pivot bracket Procedure Flange head screw (3/8 x 1 inch) 1. Remove the 4 bolts and nuts from the inside rear Bolt (5/16 x 3/4 inch) of the frame. -
Page 14: Activating The Battery
Note: This procedure is only needed for Model No. 07277TC. If the battery is not filled with electrolyte or activated, it must be removed from the vehicle, filled with electrolyte, and charged. Bulk electrolyte with 1.260 specific gravity must be purchased from a local battery supply outlet. 1. -
Page 15: Adjusting The Front Wheel Toe-In
Adjusting the Front Wheel Toe-in No Parts Required Procedure The toe-in should be 1/8-5/8 inch (3-16 mm) with the following parameters: Figure 11 • The tire pressure should be at 12 psi (83 kPa). 1. Tire center line-back 4. Fixture 2. -
Page 16: Reading The Manual And Viewing The Safety Video
Reading the Manual and Viewing the Safety Video Parts needed for this procedure: Operator’s Manual Engine Operator’s Manual Parts Catalog Safety Video Registration Card Predelivery Inspection Form Procedure • Read the Operator’s Manual and Engine Operator’s Manual. • View the safety video. •... -
Page 17: Product Overview
Product Overview G002180 Figure 13 1. Steering wheel 3. Parking brake 5. Cargo box 7. Cargo box release lever 2. Gear shift selector 4. Fuel cap 6. Towing tounge Controls Brakes can become worn or can be misadjusted Accelerator Pedal resulting in personal injury. -
Page 18: Hour Meter
Choke Control The choke control is located below and to the right of the operator’s seat. To start a cold engine, pull the choke control outward (Figure 16). After the engine starts, regulate the choke to keep the engine running smoothly. As soon as possible, push the control in to the Off position. - Page 19 Figure 18 1. Fuel gauge Passenger Hand Holds The passenger hand holds are located on the right side of the dash panel and at the outside of each seat (Figure 19). Figure 19 1. Passenger hand hold 2. Hip restraint...
-
Page 20: Specifications
10 inches (25.4 cm) inside Attachments/Accessories A selection of Toro approved attachments and accessories are available for use with the machine to enhance and expand its capabilities. Contact your Authorized Service Dealer or Distributor or go to www.Toro.com for a list of all approved attachments and accessories. -
Page 21: Checking The Brake Fluid Level
Adding Fuel 1. Position the machine on a level surface. 2. Clean around the oil dipstick (Figure 20) so dirt Use fresh, clean, unleaded regular gasoline suitable for cannot fall into the hole and damage the engine. automotive use (87 pump octane minimum). Leaded gasoline may be used if unleaded regular is not available. -
Page 22: Checking The Transmission Oil Level
Checking the Transmission Oil Level In certain conditions during fueling, static electricity can be released causing a spark The transaxle fluid level should be at the bottom of which can ignite the gasoline vapors. A fire the level indicator hole (Figure 22). If it is not, fill the or explosion from gasoline can burn you and reservoir with the appropriate fluid;... -
Page 23: Parking The Vehicle
Parking the Vehicle Lowering the Box 1. Engage the parking brake and rotate the ignition key to Off. 2. Remove the key from the ignition switch to prevent The weight of the box may be heavy. Hands or accidental starting. other body parts could be crushed. -
Page 24: Breaking In A New Vehicle
See the table below for load volume limits with various materials: Material Max. cargo box capacity (on level ground) Gravel, dry 3/4 full (approx.) Gravel, wet 1/2 full (approx.) Figure 26 Sand, dry 3/4 full 1. Tailgate latch Sand, wet 1/2 full Wood Full... -
Page 25: Towing A Trailer
Towing a Trailer The vehicle is capable of pulling trailers. Two types of tow hitches are available for the vehicle, depending on your application. Contact your Authorized Toro Distributor for details. When hauling cargo or towing a trailer, do not overload your vehicle or trailer. -
Page 26: Maintenance
Maintenance Note: Determine the left and right sides of the machine from the normal operating position. Recommended Maintenance Schedule(s) Maintenance Service Maintenance Procedure Interval • Change the engine oil. After the first 8 operating • Check the condition and tension of the drive belt. hours After the first 25 operating •... -
Page 27: Premaintenance Procedures
Premaintenance Procedures Maintaining the Vehicle under Special Operating Conditions If the vehicle is subjected to any of the conditions listed below, maintenance should be performed twice Figure 29 as frequently. 1. Front jacking point • Desert operation • Cold climate operation (below 50° F [10° C]) G002092 •... -
Page 28: Lubrication
Lubrication Engine Maintenance Lubricate all of the bearings and bushings every 100 Servicing the Air Cleaner hours or once a year, whichever occurs first. Grease them more frequently when using the vehicle for Check the air cleaner body for damage which could heavy-duty operations. -
Page 29: Servicing The Engine Oil
Note: Change the oil and oil filter more frequently Refer to the directions on the filter cleaner carton for complete information. when operating conditions are extremely dusty or sandy. 2. After soaking the filter for 15 minutes, rinse it Oil Type: Detergent oil (API service SF, SG, SH, SJ, or with clear water. -
Page 30: Servicing The Spark Plugs
2. Pull the spark plug wires off of the spark plugs and remove the plugs from the cylinder head. 3. Check the condition of the side electrode, center electrode, and center electrode insulator to ensure that there is no damage (Figure 36). Figure 35 1. -
Page 31: Fuel System Maintenance
Fuel System Electrical System Maintenance Maintenance Replacing the Fuses Inspecting Fuel Lines and Connections There are 3 fuses in the electrical system. They are located beneath the bed in a box on the right hand side Check the fuel lines and connections every 400 operating of the frame (Figure 38). -
Page 32: Servicing The Battery
Incorrect battery cable routing could damage the vehicle and cables, causing sparks. Sparks can cause the battery gasses to explode, resulting in personal injury. disconnect • Always the negative (black) battery cable before disconnecting the positive (red) cable. reconnect • Always the positive (red) battery cable before reconnecting the negative G002141... -
Page 33: Drive System Maintenance
Drive System to prevent battery damage when the temperature is below 32°F (0°C). Maintenance 1. Remove the battery from the chassis; refer to Removing the Battery. Checking and Adjusting 2. Connect a 3 to 4 amp battery charger to the battery posts. -
Page 34: Inspecting The Tires
2. Remove the travel limiting bolt (Figure 42). 3. Loosen the centering bolts in the front A-arm (Figure 42). 4. Remove the ride height adjustment bolt (Figure 42). Figure 41 1. Neutral bracket 4. Wrong, must tighten the 2. Pull up 5. -
Page 35: Adjusting Front Wheel Toe-In
with a light load most of the time, set the toe-in on the low side of the recommended amount. 1. Ensure that the front suspension is adjusted properly; refer to Adjusting the Front Suspension. Adjust if necessary. 2. Measure the distance between both of the front tires at the axle height at both the front and rear of the front tires (Figure 44). -
Page 36: Maintaining The Primary Drive Clutch
Wear safety goggles and a dust mask or other eye and respiratory protection when performing this procedure. 5. Lubricate the moving parts in the areas circled in Figure 47 using Toro Dry Lubricant Spray, available through your Authorized Toro Dealer or Distributor. Figure 49 1. Oil fill 4. -
Page 37: Cooling System Maintenance
Brake Maintenance Cooling System Maintenance Inspecting the Brakes Brakes are a critical safety component of the vehicle. Cleaning the Engine Cooling As with all safety components, they should be closely Areas inspected at regular intervals to ensure optimum performance and safety. The following inspections Clean the rotating screen, cooling fins, and external should be done every 100 hours: surfaces of the engine every 100 operating hours or... -
Page 38: Belt Maintenance
Belt Maintenance 2. Loosen the set screw securing the knob to the parking brake lever (Figure 51). Servicing the Drive Belt Checking the Drive Belt Check the condition and tension of the drive belt after the first day of operation and every 200 operating hours thereafter. -
Page 39: Cleaning
Cleaning Storage 1. Position the machine on a level surface, set the Washing the Vehicle parking brake, stop the engine, and remove the ignition key. The vehicle should be washed as needed. Use water 2. Clean dirt and grime from the entire machine, alone or with a mild detergent. - Page 40 9. Remove the spark plugs and check their condition; refer to Changing Spark Plugs in Engine Maintenance , page 28. 10. With the spark plugs removed from the engine, pour two tablespoons of engine oil into the spark plug hole. 11.
-
Page 41: Schematics
Schematics G006342 Electrical Schematic (Rev. A) - Page 42 Notes:...
- Page 43 Notes:...
Need help?
Do you have a question about the 12004TC and is the answer not in the manual?
Questions and answers