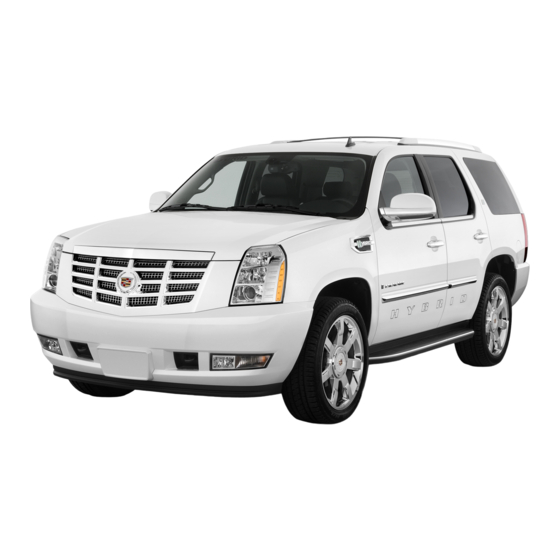
Cadillac 2010 Escalade Manual
Two-mode hybrid
Hide thumbs
Also See for 2010 Escalade:
- Owner's manual (620 pages) ,
- Brochure (1 page) ,
- Owner's manual (614 pages)
Table of Contents
Advertisement
Quick Links
Download this manual
See also:
Owner's Manual
www.carburetor-manual.com
Would you like some Free Manuals?
http://carburetor-manual.com/free-shop-manual-club-t-13.html
Also visit
http://freeshopmanual.com
for more Free Manuals
Also Visit my website for 7 FREE Download Manuals starting
with this one.
"The ABC's of Carburetion"
Click Here Now
file:///C|/Documents%20and%20Settings/Tim/Desktop/carburetor-manual-welcome/index.htm[4/25/2009 11:42:20 AM]
Advertisement
Chapters
Table of Contents

Related Manuals for Cadillac 2010 Escalade


Summary of Contents for Cadillac 2010 Escalade
- Page 1 www.carburetor-manual.com Would you like some Free Manuals? http://carburetor-manual.com/free-shop-manual-club-t-13.html Also visit http://freeshopmanual.com for more Free Manuals Also Visit my website for 7 FREE Download Manuals starting with this one. "The ABC's of Carburetion" Click Here Now file:///C|/Documents%20and%20Settings/Tim/Desktop/carburetor-manual-welcome/index.htm[4/25/2009 11:42:20 AM]...
-
Page 2: Table Of Contents
2010 Cadillac Escalade Two-mode Hybrid In Brief ..........1-1 Driving Your Vehicle . -
Page 3: Canadian Owners
GENERAL MOTORS, GM, the GM Emblem, Canadian Owners CADILLAC, the CADILLAC Crest & Wreath, and the Propriétaires Canadiens name Escalade are registered trademarks of General Motors. A French language copy of this manual can be obtained This manual describes features that may or may not be... -
Page 4: Index
Introduction Index Your hybrid SUV is designed to be more fuel efficient A good place to look for what you need is the Index in than the standard SUV, which results in reduced carbon back of this supplement. It is an alphabetical list of what dioxide emissions. - Page 5 NOTES...
-
Page 6: In Brief
Section 1 In Brief Initial Drive Information ......1-2 Automatic Engine Start/Stop Feature ... . 1-5 Transmission . -
Page 7: Initial Drive Information
Initial Drive Information Press the plus/minus buttons, located on the steering column shift lever, to select the desired range of gears for current driving conditions. See Automatic Transmission Transmission Operation in the owner manual. Cruise control can be used while the vehicle is in Range Range Selection Mode Selection Mode. - Page 8 Automatic Transfer Case 4 (Four-Wheel Drive High): Use the four-wheel high position when you need extra traction, such as on snowy or icy roads or in most off-road situations. 4 (Four-Wheel Drive Low) : This setting delivers extra torque. You might choose Four-Wheel Drive Low if you are driving off-road in deep sand, deep mud, deep snow, and while climbing or descending steep hills.
-
Page 9: Hybrid Features
Hybrid Features Fuel Economy Gage Hybrid Safety Information This vehicle has a standard 12-volt battery and a high-voltage hybrid battery. Only a trained service technician with the proper knowledge and tools should inspect, test, or replace the hybrid battery. See your dealer/retailer if the hybrid battery needs service. - Page 10 Automatic Engine Start/Stop Feature Auto Start The vehicle also has an Auto Start feature. The engine Start the engine as you would any other engine. See will remain off while in Auto Stop mode until vehicle Starting the Engine in the owner manual for more conditions require the engine to run.
-
Page 11: Performance And Maintenance
The braking system is computer controlled and blends Service the regenerative braking with the conventional hydraulic Never try to do your own service on hybrid components. disc brakes to meet any requirements for deceleration. You can be injured and the vehicle can be damaged if Because the controller applies the hydraulic brakes you try to do your own service work. -
Page 12: Seats And Restraint System
Section 2 Seats and Restraint System Restraint System Check ......2-2 Replacing Restraint System Parts After a Crash . -
Page 13: Restraint System Check
Restraint System Check See Airbag Readiness Light in the owner manual and Driver Information Center (DIC) on page 4 7 for more information. Replacing Restraint System Parts To operate the vehicle, the automatic hybrid battery After a Crash disconnect must be reconnected by a qualified service technician and sensing system parts will need to be If an airbag inflates or the vehicle has been in a crash, replaced. -
Page 14: Features And Controls
Section 3 Features and Controls Storage Areas ........3-2 Four-Wheel Drive . -
Page 15: Storage Areas
Storage Areas The indicator light does not come on when the ignition is in LOCK/OFF or if no equipment is plugged into the outlet. Power Outlet Alternating Current If equipment is connected using more than 150 watts, The vehicle may have a power outlet that can be used or a system fault is detected, a protection circuit shuts to plug in electrical equipment that uses a maximum off the power supply and the indicator light turns off. -
Page 16: Starting And Operating Your Vehicle
Starting and Operating Your Auto Stop Vehicle The vehicle has an Auto Stop feature. After a successful engine start, the engine may turn off and operate in the Auto Stop mode. Some of the vehicle Starting the Vehicle conditions that allow the engine to stop running and enter the Auto Stop mode are: WARNING: Ignition switch is in the ON/RUN position. - Page 17 If you are on an incline, the hybrid drive motor can help Auto Start keep the vehicle from rolling backwards, even if the The vehicle also has an Auto Start feature. The engine engine is in Auto Stop. will remain off while in Auto Stop mode until vehicle With your foot off the brake and the vehicle on level conditions require the engine to run.
-
Page 18: Automatic Transmission Operation
EV Mode Automatic Transmission Operation The vehicle also has an Electric Vehicle (EV) mode The vehicle has an electronic shift position indicator which uses only the electric motor to move the vehicle. within the instrument panel cluster. With light acceleration, the vehicle will drive in There are several different positions for the shift lever. - Page 19 When parked on a hill, especially when the vehicle has a heavy load, you may notice an increase in the effort to WARNING: shift out of P (Park). See Shifting Into P (Park) in the Index of vehicle's owner manual for more information. If you have Four-Wheel Drive, the vehicle will be free to roll even if the shift lever is in...
- Page 20 Downshifting the transmission in slippery road WARNING: conditions could result in skidding. See Skidding under Loss of Control in the owner manual for more information. Shifting into a drive gear while the engine is When temperatures are very cold, the transmission's running at high speed is dangerous.
- Page 21 Range Selection Mode adjusts to driving conditions. When 3 (Third) is selected, 1 (First) through 3 (Third) gears are automatically shifted by the vehicle, but 4 (Fourth) cannot be used until it is selected. The Range Selection Mode controls the vehicle and engine speed while driving down a hill or towing a trailer, by allowing you to select a desired range of gears.
-
Page 22: Front Axle
Four-Wheel Drive Automatic Transfer Case If the vehicle has four-wheel drive, you can send the The transfer case knob is engine's driving power to all four wheels for extra located to the left of the traction. Read the following before using four-wheel instrument panel cluster. - Page 23 ® The vehicle has StabiliTrak . Shifting into 2 (Two-Wheel Drive High): This setting is used for Four-Wheel-Drive Low will turn Traction Control and driving in most street and highway situations. The front ® ® StabiliTrak off. See StabiliTrak System in the index of axle is not engaged in two-wheel drive.
- Page 24 Shifting Into Four-Wheel Drive High or vehicle moving 1 to 2 mph (1.6 to 3.2 km/h). Turn the knob to the Four-Wheel Drive Low position. You must AUTO (Automatic Four-Wheel Drive) wait for the Four-Wheel Drive Low indicator light to stop Turn the knob to the Four-Wheel High or AUTO flashing and remain on before shifting the transmission position.
- Page 25 Shifting Out of Four-Wheel Drive Low If the knob is turned to the Four-Wheel Drive High, AUTO, or Two-Wheel Drive High switch position when To shift from Four-Wheel Drive Low to Four-Wheel Drive the vehicle is in gear and/or moving, the Four-Wheel High, AUTO, or Two-Wheel Drive High, the vehicle must Drive High, AUTO or Two-Wheel Drive High indicator be stopped or moving less than 3 mph (5 km/h) with the...
- Page 26 7. If the engine is running, verify that the transfer 4. Release the parking brake prior to moving the case is in N (Neutral) by shifting the transmission vehicle. to R (Reverse) for one second, then shift the Shifting the transmission into gear before transmission to D (Drive) for one second.
-
Page 27: Shifting Into Park
Shifting Into Park 2. Move the shift lever into the P (Park) position by pulling the shift lever toward you and moving it up as far as it will go. WARNING: 3. Be sure the transfer case is in a drive gear in N (Neutral). -
Page 28: Torque Lock
Leaving the Vehicle With the Engine If you have to leave the vehicle with the engine running, be sure your vehicle is in P (Park) and the parking Running brake is firmly set before you leave it. After you move the shift lever into P (Park), hold the regular brake pedal down. -
Page 29: Engine Coolant Heater
Engine Coolant Heater WARNING: The engine coolant heater can provide easier starting and better fuel economy during engine warm-up in cold weather conditions at or below 18°C (0°F). Vehicles Plugging the cord into an ungrounded outlet could with an engine heater should be plugged in at least cause an electrical shock. -
Page 30: Running The Vehicle While Parked
Regenerative Braking Running the Vehicle While Parked Regenerative braking is a hybrid technology that It is better not to park with the engine running. But if you enables the electric drive motor to operate as a ever have to, here are some things to know. generator when coasting or braking. - Page 31 NOTES 3-18...
-
Page 32: Instrument Panel
Section 4 Instrument Panel Climate Controls ........4-2 Driver Information Center (DIC) . -
Page 33: Climate Controls
Climate Controls At mild temperatures, select a warmer air conditioner temperature or turn the air conditioner off to get For more information on the vehicle's climate control maximum fuel economy. Continuous air conditioner use can cause the vehicle to Auto Start more frequently. system, see Climate Control System in the owner During hot weather, driving with the windows closed and manual. -
Page 34: Warning Lights, Gages, And Indicators
Warning Lights, Gages, and Indicators Instrument Panel Cluster United States version shown, Canada similar... -
Page 35: Tachometer
Tachometer Charging System Light This 12 V battery light comes on briefly when the ignition is turned to ON/RUN, but the engine is not running, as a check to show it is working. It should go out once the engine has been started. If it stays on, or comes on while driving, there could be a problem with the 12 V charging system. -
Page 36: Fuel Economy Gage
Fuel Economy Gage There are three zones on the drive efficiency gage. Green Zone : Fuel efficient driving behavior makes the indicator display in the green zone on the gage. White Zones : Decreased fuel efficiency driving behavior makes the indicator display in the two white zones. -
Page 37: Oil Pressure Light
Oil Pressure Light This light comes on briefly as a check it works, when the ignition is WARNING: in ON/RUN. If it does not, have the vehicle serviced. Do not keep driving if the oil pressure is low. The engine can become so hot that it catches fire. Someone could be burned. -
Page 38: Driver Information Center (Dic)
Driver Information Center (DIC) Some messages cannot be cleared from the DIC display because they are more urgent. These messages require action before they can be cleared. Trip/Fuel Menu Items You should take any messages that appear on the Press the trip/fuel button to display the Trip/Fuel Menu display seriously and remember that clearing the items. -
Page 39: Oil Pressure Low Stop Engine
OIL PRESSURE LOW STOP ENGINE SERVICE BRAKE SYSTEM If engine oil pressure is low, this message will be This message may be displayed if there is a problem displayed on the DIC. Stop the vehicle as soon as with the brake system. You will still be able to brake, but safely possible and do not operate it until the cause of it will be noticeably more difficult. -
Page 40: Audio System(S)
Audio System(s) The screen shows: Auto Stop Navigation/Radio System Battery Charging Engine Idle The vehicle has a navigation radio system. See the owner manual for more information. 2 Wheel and 4 Wheel Drive Modes for: Engine Power Battery Power Hybrid Power Press the CONFIG button on the radio to display the hybrid screen. - Page 41 NOTES 4-10...
-
Page 42: Driving Your Vehicle
Section 5 Driving Your Vehicle Your Driving, the Road, and the Vehicle ..5-2 Towing ..........5-2 Electric Power Steering . -
Page 43: Your Driving, The Road, And The Vehicle
Your Driving, the Road, and the Towing Vehicle Towing Your Vehicle Electric Power Steering Consult your dealer/retailer or a professional towing service if the disabled vehicle needs to be towed. This vehicle has On-Demand Electric-Assist Power Steering instead of conventional full-time hydraulic Recreational Vehicle Towing power steering. -
Page 44: Dinghy Towing
Here are some important things to consider before Dinghy Towing recreational vehicle towing: Two-Wheel-Drive Vehicles What is the towing capacity of the towing vehicle? Be sure to read the tow vehicle manufacturer's recommendations. What is the distance that will be travelled? Some vehicles have restrictions on how far and how long they can tow. - Page 45 Four-Wheel-Drive Vehicles WARNING: Shifting a four-wheel-drive vehicle's transfer case into N (Neutral) can cause the vehicle to roll even if the transmission is in P (Park). The driver or others could be injured. Make sure the parking brake is firmly set before the transfer case is shifted to N (Neutral).
-
Page 46: Dolly Towing
Dolly Towing Two-wheel-drive vehicles should not be towed with the rear wheels on the ground. Two-wheel-drive Front Towing (Front Wheels Off the transmissions have no provisions for internal lubrication while being towed. Ground) To dolly tow a two wheel drive vehicle, the vehicle must Two-Wheel-Drive Vehicles be towed with the rear wheels on the dolly. - Page 47 Four-Wheel-Drive Vehicles WARNING: Shifting a four-wheel-drive vehicle's transfer case into N (Neutral) can cause the vehicle to roll even if the transmission is in P (Park). The driver or others could be injured. Make sure the parking brake is firmly set before the transfer case is shifted to N (Neutral).
- Page 48 Rear Towing (Rear Wheels Off the 4. Put the transmission in P (Park). Ground) 5. Secure the vehicle to the dolly following the manufacturer's instructions. 6. Use an adequate clamping device designed for towing to ensure that the front wheels are locked into the straight position.
-
Page 49: Towing A Trailer
6. Use an adequate clamping device designed for Towing a Trailer towing to ensure that the front wheels are locked For more information, see Towing a Trailer in the into the straight position. owner manual Index. Weight of the Trailer WARNING: How heavy can a trailer safely be? Shifting a four-wheel-drive vehicle's transfer case... -
Page 50: Trailer Brakes
Vehicle Axle Ratio Maximum Trailer Weight GCWR* 2WD 6.0 L V8 3.08 5,800 lbs (2 631 kg) 12,000 lbs (5 443 kg) 4WD 6.0 L V8 3.08 5,600 lbs (2 540 kg) 12,000 lbs (5 443 kg) *The Gross Combination Weight Rating (GCWR) is the total allowable weight of the completely loaded vehicle and trailer including any passengers, cargo, equipment and conversions. - Page 51 NOTES 5-10...
-
Page 52: Service And Appearance Care
Section 6 Service and Appearance Care Service ..........6-2 Tires . -
Page 53: Service
Service WARNING: Doing Your Own Service Work You can be injured and the vehicle could be damaged if you try to do service work on a vehicle WARNING: without knowing enough about it. Be sure you have sufficient knowledge, Never try to do your own service on hybrid experience, the proper replacement parts, and components. -
Page 54: Checking Things Under The Hood
If doing some of your own service work, use the proper Checking Things Under service manual. It tells you much more about how to the Hood service the vehicle than this manual can. To order the proper service manual, see Service Publications Ordering Information in the owner manual. -
Page 55: Engine Compartment Overview
Engine Compartment Overview When you open the hood on your vehicle, you will see:... -
Page 56: Automatic Transmission Fluid
A. See Engine Air Cleaner/Filter in the owner Automatic Transmission Fluid manual. When to Check and Change Automatic B. Drive Motor/Generator Control Module (DMCM). Transmission Fluid See Drive Motor/Generator Control Module (DMCM) Cooling System on page 6 9. It is usually not necessary to check the transmission C. -
Page 57: How To Check Automatic Transmission Fluid
How to Check Automatic Transmission 6. Using the TRANS TEMP reading, determine and perform the appropriate check procedure. If the Fluid TRANS TEMP reading is not within the required temperature ranges, allow the vehicle to cool, Notice: Too much or too little fluid can damage your or operate the vehicle until the appropriate transmission. - Page 58 3. Install the dipstick by pushing it back in all the way, Hot Check Procedure wait three seconds, and then pull it back out again. Use this procedure to check the transmission fluid level 4. Check both sides of the dipstick and read the lower when the transmission fluid temperature is between level.
-
Page 59: Drive Motor/Generator Control Module (Dmcm) Coolant Surge Tank Pressure Cap
Consistency of Readings Always check the fluid level at least twice using the procedure described previously. Consistency (repeatable readings) is important to maintaining proper fluid level. If readings are still inconsistent, contact your dealer/retailer. Drive Motor/Generator Control Module (DMCM) Coolant Surge Tank Pressure Cap See Engine Compartment 5. - Page 60 When you decide it is safe to lift the hood, here is what The Drive Motor/Generator Control Module (DMCM) you will see: coolant surge tank pressure cap must be fully installed on the hybrid coolant surge tank. Notice: If the pressure cap is not tightly installed, coolant loss and possible damage to the Drive Motor/Generator Control Module (DMCM) may occur.
-
Page 61: Cooling System
If the coolant inside the DMCM coolant surge tank is How to Add Coolant to the DMCM boiling, do not do anything else until it cools down. Coolant Surge Tank The coolant level should be at or above the FULL If no problem has been found yet, check to see if COLD mark with the vehicle parked on a level surface. - Page 62 WARNING: WARNING: Steam and scalding liquids from a hot cooling You can be burned if you spill coolant on hot system can blow out and burn you badly. They are engine parts. Coolant contains ethylene glycol under pressure, and if you turn the coolant surge and it will burn if the engine parts are hot enough.
- Page 63 1. Park the vehicle on a level surface and turn the 2. Then keep turning the DMCM coolant surge tank vehicle off. Remove the DMCM coolant surge tank pressure cap slowly, and remove it. pressure cap when the DMCM cooling system, 3.
-
Page 64: Brake Fluid
If the level cannot be kept at the FULL COLD level, Brakes your vehicle may need service. See your Brake Fluid dealer/retailer. 6. Then replace the The brake master cylinder DMCM coolant surge reservoir is filled with tank pressure cap. Be DOT 3 brake fluid. -
Page 65: Checking Brake Fluid
Do not top off the brake fluid. Adding fluid does not Checking Brake Fluid correct a leak. If fluid is added when the linings are Check brake fluid by looking at the brake fluid reservoir. worn, there will be too much fluid when new brake See Engine Compartment Overview on page 6 4. - Page 66 What to Add Notice: Using the wrong fluid can badly damage Use only new DOT 3 brake fluid from a sealed brake hydraulic system parts. For example, container. See Recommended Fluids and Lubricants just a few drops of mineral-based oil, such in the owner manual.
-
Page 67: Brake Wear
Brake Wear Brake linings should always be replaced as complete axle sets. This vehicle has disc brakes. Disc brake pads have Brake Pedal Travel built-in wear indicators that make a high-pitched warning sound when the brake pads are worn and new See your dealer/retailer if the brake pedal does not pads are needed. -
Page 68: Battery
Battery Vehicle Storage This vehicle has a standard 12 volt battery and a WARNING: high voltage hybrid battery. Refer to the replacement number on the original battery label when a new standard 12 volt battery is needed. Batteries have acid that can burn you and gas Only a trained service technician with the proper that can explode. -
Page 69: Jump Starting
Jump Starting Notice: Ignoring these steps could result in costly damage to the vehicle that would not be covered by the warranty. WARNING: Trying to start the vehicle by pushing or pulling it will not work, and it could damage the vehicle. 1. - Page 70 Notice: If you leave the radio or other accessories on during the jump starting procedure, they could be damaged. The repairs would not be covered by the warranty. Always turn off the radio and other accessories when jump starting the vehicle. 3.
- Page 71 WARNING: WARNING: (Continued) Be sure the battery has enough water. You do not An electric fan can start up even when the engine need to add water to the battery installed in your is not running and can injure you. Keep hands, new vehicle.
- Page 72 7. Connect the red positive (+) cable to the WARNING: positive (+) terminal of the vehicle with the dead battery. Use a remote positive (+) if the vehicle has one. Fans or other moving engine parts can injure you 8. Do not let the other end touch metal. Connect it to badly.
- Page 73 10. Connect the other end of the negative ( ) cable to Jumper Cable Removal the remote negative ( ) terminal, on the vehicle with the dead battery. 11. Now start the vehicle with the good battery and run the engine for a while. 12.
-
Page 74: Four-Wheel Drive
To disconnect the jumper cables from both vehicles: How to Check Lubricant 1. Disconnect the black negative ( ) cable from the vehicle that had the bad battery. 2. Disconnect the black negative ( ) cable from the vehicle with the good battery. 3. -
Page 75: Electrical System
When to Change Lubricant Fuses and Circuit Breakers Refer to the Maintenance Schedule to determine how The wiring circuits in the vehicle are protected from often to change the lubricant. See Scheduled short circuits by a combination of fuses, circuit breakers Maintenance in the owner manual. - Page 76 Underhood Fuse Block Fuses Usage ACPO Hybrid Auxiliary Underhood Fuse Block BECM FAN The hybrid underhood fuse block is located in the ACCM engine compartment near the front of the vehicle. Lift CAB HTR PMP the cover for access to the fuse/relay block. See Engine Compartment Overview on page 6 4 for more EMPTY information on its location.
-
Page 77: Tires
Tires J Case Usage FAN 1 Cooling Fan 1 Inflation - Tire Pressure Auxiliary Transmission TRANS PUMP Fluid Pump Tires need the correct amount of air pressure to operate FAN 2 Cooling Fan 2 effectively. CAB HTR PMP Cab Heater Pump Do not let anyone tell you that Notice: under inflation or over inflation is all right. -
Page 78: When To Check
A vehicle specific Tire and Loading Information label is When to Check attached to your vehicle. This label shows your Check your tires once a month or more. vehicle's original equipment tires and the correct inflation pressures for your tires when they are cold. How to Check The recommended cold tire inflation pressure, shown on the label, is the minimum amount of air pressure... -
Page 79: Tire Pressure Monitor Operation
Tire Pressure Monitor Operation The low tire pressure warning light may come on in cool weather when the vehicle is first started, and then turn This vehicle may have a Tire Pressure Monitor System off as you start to drive. This could be an early indicator (TPMS). -
Page 80: Tpms Malfunction Light And Message
One or more TPMS sensors are missing or Compressor Kit (Without Selector Switch) on page 6 43 damaged. The DIC message and the TPMS or Tire Sealant and Compressor Kit (With Selector malfunction light should go off when the TPMS Switch) on page 6 43. -
Page 81: Tpms Sensor Matching Process
TPMS Sensor Matching Process You have two minutes to match the first tire/wheel position, and five minutes overall to match all four Each TPMS sensor has a unique identification code. tire/wheel positions. If it takes longer than two minutes, Any time you rotate your vehicle's tires or replace one to match the first tire and wheel, or more than or more of the TPMS sensors, the identification codes five minutes to match all four tire and wheel positions... -
Page 82: Tire Inspection And Rotation
5. Remove the valve cap from the valve cap stem. Tire Inspection and Rotation Activate the TPMS sensor by increasing or Tires should be rotated every 5,000 to 8,000 miles decreasing the tire's air pressure for five seconds, (8 000 to 13 000 km). or until a horn chirp sounds. -
Page 83: If A Tire Goes Flat
If a Tire Goes Flat The vehicle has a tire sealant and compressor kit. See Tire Sealant and Compressor Kit (Without Selector Switch) on page 6 33 or Tire Sealant and Compressor Kit (With Selector Switch) on page 6 43. There is no spare tire, no tire changing equipment, and no place to store a tire. -
Page 84: Tire Sealant And Compressor Kit
If a tire goes flat, avoid further tire and wheel damage Tire Sealant and Compressor Kit by driving slowly to a level place and stopping. Then (Without Selector Switch) do this: 1. Turn on the hazard warning flashers. See Hazard System Identification Warning Flashers in the Index of the owner manual. -
Page 85: Tire Sealant And Compressor Kit
WARNING: Idling a vehicle in an enclosed area with poor ventilation is dangerous. Engine exhaust may enter the vehicle. Engine exhaust contains Carbon Monoxide (CO) which cannot be seen or smelled. It can cause unconsciousness and even death. Never run the engine in an enclosed area that has no fresh air ventilation. - Page 86 The kit includes: WARNING: Storing the tire sealant and compressor kit or other equipment in the passenger compartment of the vehicle could cause injury. In a sudden stop or collision, loose equipment could strike someone. Store the tire sealant and compressor kit in its original location.
- Page 87 Tire Sealant Using the Tire Sealant and Compressor Kit to Temporarily Seal and Inflate a Read and follow the safe handling instructions on the Punctured Tire label adhered to the sealant canister. Check the tire sealant expiration date on the sealant Follow the directions closely for correct sealant usage.
- Page 88 Always do a safety check first. See If a Tire Goes Flat If the vehicle has an accessory power outlet, do on page 6 32. not use the cigarette lighter. 1. Remove the tire sealant and compressor kit from If the vehicle only has a cigarette lighter, use the its storage location.
- Page 89 9. Inflate the tire to the recommended inflation 11. Unplug the power plug (C) from the accessory pressure using the pressure gage (E). The power outlet in the vehicle. recommended inflation pressure can be found on 12. Turn the sealant/air hose (F) counterclockwise to the Tire and Loading Information label.
- Page 90 16. Return the equipment to its original storage 19. Wipe off any sealant from the wheel, tire or location in the vehicle. vehicle. 17. Immediately drive the vehicle 5 miles (8 km) to 20. Dispose of the used sealant canister (B) and distribute the sealant in the tire.
- Page 91 Using the Tire Sealant and Compressor 2. Unlock the air only hose (F) from the sealant canister (B) by pulling up on the lever. Kit without Sealant to Inflate a Tire 3. Pull the air only hose (F) from the sealant (Not Punctured) canister (B).
- Page 92 8. Plug the power plug (C) into the accessory power The pressure gage (E) may read higher than the outlet in the vehicle. Unplug all items from other actual tire pressure while the compressor is on. accessory power outlets. See Accessory Power Turn the compressor off to get an accurate Outlet(s) in the owner manual.
- Page 93 Removal and Installation of the Sealant Canister To remove the sealant canister: 4. Turn the sealant canister (B) so the inflator filling hose is aligned with the slot in the compressor. 1. Unlock the air only hose (F) from the sealant 5.
-
Page 94: With Selector Switch
To install a new sealant canister: Tire Sealant and Compressor Kit 1. Align the sealant/air hose (F) with the slot in the air (With Selector Switch) compressor. System Identification 2. Push the sealant canister (B) down and turn it clockwise. 3. - Page 95 WARNING: Idling a vehicle in an enclosed area with poor ventilation is dangerous. Engine exhaust may enter the vehicle. Engine exhaust contains Carbon Monoxide (CO) which cannot be seen or smelled. It can cause unconsciousness and even death. Never run the engine in an enclosed area that has no fresh air ventilation.
- Page 96 The kit includes: WARNING: Storing the tire sealant and compressor kit or other equipment in the passenger compartment of the vehicle could cause injury. In a sudden stop or collision, loose equipment could strike someone. Store the tire sealant and compressor kit in its original location.
- Page 97 Tire Sealant Using the Tire Sealant and Compressor Kit to Temporarily Seal and Inflate a Read and follow the safe handling instructions on the Punctured Tire label adhered to the sealant canister. Check the tire sealant expiration date on the sealant Follow the directions closely for correct sealant usage.
- Page 98 Always do a safety check first. See If a Tire Goes Flat If the vehicle only has a cigarette lighter, use the on page 6 32. Do not remove any objects that have cigarette lighter. penetrated the tire. Do not pinch the power plug cord in the door or 1.
- Page 99 10. Inflate the tire to the recommended inflation 12. Unplug the power plug (H) from the accessory pressure using the pressure gage (C). The power outlet in the vehicle. recommended inflation pressure can be found on 13. Turn the sealant/air hose (F) counterclockwise to the Tire and Loading Information label.
- Page 100 17. Return the equipment to its original storage 20. Wipe off any sealant from the wheel, tire, and location in the vehicle. vehicle. 18. Immediately drive the vehicle 5 miles (8 km) to 21. Dispose of the used sealant canister (E) and distribute the sealant in the tire.
- Page 101 Using the Tire Sealant and Compressor 2. Unwrap the air only hose (G) and the power plug (H). Kit without Sealant to Inflate a Tire 3. Place the kit on the ground. (Not Punctured) 4. Remove the tire valve stem cap from the flat tire by To use the air compressor to inflate a tire with air only turning it counterclockwise.
- Page 102 7. Start the vehicle. The vehicle must be running 11. Press the on/off button (B) to turn the tire sealant while using the air compressor. and compressor kit off. 8. Turn the selector switch (A) clockwise to the Air Be careful while handling the tire sealant and Only position.
- Page 103 Removal and Installation of the Sealant Canister To remove the sealant canister: 1. Unwrap the sealant hose. 2. Press the canister release button. The tire sealant and compressor kit has an accessory adapter located in a compartment on the bottom of its housing that may be used to inflate air mattresses, balls, etc.
-
Page 104: Tire Sealant And Compressor Kit Storage
Tire Sealant and Compressor Kit Storage The tire sealant and compressor kit is located under the storage tray on the driver side trim panel (over the rear wheelhouse). To access the tire sealant and compressor kit: 2. Locate the tire sealant and compressor kit. 3. -
Page 105: Appearance Care
Appearance Care Vehicle Care/Appearance Materials When scraping the windshield glass to remove ice and snow, stay clear of the hybrid decal. To have the hybrid decals removed from the vehicle, please see your dealer/retailer. Remove the sealant and compressor kit with a selector switch by lifting upward on the yellow tab to release the unit. -
Page 106: Capacities And Specifications
Capacities and Specifications Capacities Application English Metric Automatic Transmission* (Pan Removal and Filter 11.5 qt 10.9 L Replacement) Cooling System Drive Motor Generator Control Module Cooling System 2.9 qt 2.7 L 6.0L V8 Engine Cooling System 18.3 qt 17.3 L Fuel Tank 24.5 gal 92.7 L... - Page 107 NOTES 6-56...
- Page 108 Section 7 Maintenance Schedule Maintenance Schedule ......7-2 At Least Once a Year ......7-2 Recommended Fluids and Lubricants .
-
Page 109: Engine Drive Belt Routing
Maintenance Schedule Engine Drive Belt Routing At Least Once a Year Tire Sealant and Compressor Kit Check the sealant expiration date printed on the instruction label of the Tire Sealant and Compressor Kit at least once a year. See your dealer/retailer for a replacement canister. - Page 110 Alternating Current Drive Motor/Generator Control Module (DMCM) Power Outlet ........3-2 Coolant Surge Tank Pressure Cap .
- Page 111 Gages Jump Starting ........6-18 Fuel Economy .
- Page 112 Navigation/Radio System ......4-9 Radios Navigation/Radio System ......4-9 Recommended Fluids and Lubricants .
- Page 113 Tachometer ......... .4-4 Vehicle Tires Running While Parked .
Need help?
Do you have a question about the 2010 Escalade and is the answer not in the manual?
Questions and answers