Table of Contents
Advertisement
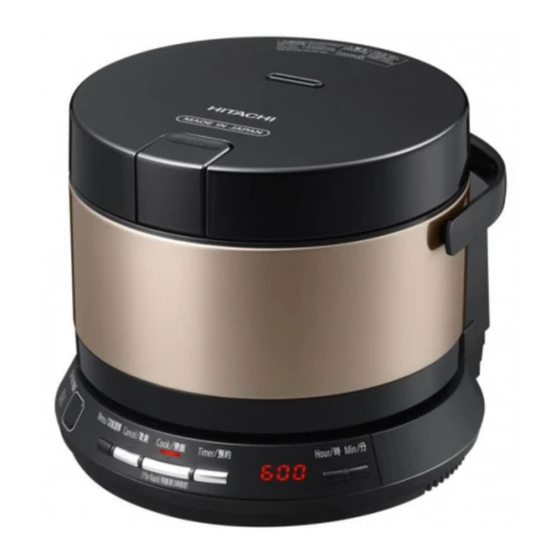
2-L9039-1
Thank you very much for purchasing the Hitachi
Thank you very much for purchasing the Hitachi
Thank you very much for purchasing the Hitachi
IH Rice Cooker.
IH Rice Cooker.
IH Rice Cooker.
After reading the Operating Instructions, keep it
After reading the Operating Instructions, keep it
After reading the Operating Instructions, keep it
well for future reference.
well for future reference.
well for future reference.
Please read the "Safety Precautions"
and then use the rice cooker correctly.
P.64
67
C6 ( CR )
P.8-11
P.36
39
RZ−WS2YH
Advertisement
Chapters
Table of Contents

Related Manuals for Hitachi RZ-WS2YH


Summary of Contents for Hitachi RZ-WS2YH
- Page 1 Thank you very much for purchasing the Hitachi Thank you very much for purchasing the Hitachi Thank you very much for purchasing the Hitachi IH Rice Cooker. IH Rice Cooker. IH Rice Cooker. After reading the Operating Instructions, keep it...
- Page 2 CAUTION About Off/On button This rice cooker has a Off/On button. ● You cannot make any operations without pressing the Off/On button. Off/On button Rice container ● If you press the Off/On button to turn on the power, all Rice Cooking Method displays will be turned on and then off and the current time will be displayed.
-
Page 3: Table Of Contents
Before Use ● Component Names, Accessories, Operation Panel, Display Part… ● Setting the Current Time …………………………………… ● Safety Precautions …………………………………………… Rice cooking ● Rice Cooking Preparation (Tips for cooking delicious rice)… ● To start cooking the rice immediately ……………………… ● Rice Cooking using the Timer (Set the timer to finish cooking when you want to eat) ……………………... -
Page 4: Component Names, Accessories, Operation Panel, Display Part
Component Names, Accessories, Operation Body Hook Inner pot P.12, 19 Water level gauge (3 locations) Inner lid Lid packing P.19 Regulator valve Vacuum valve Knob Handle Body bottom Rice container When carrying the rice cooker, do not hold the body bottom but the handle. - Page 5 Panel, Display Part The numbers of show the page containing P.OO the main explanation. When closing the lid, push Steam vent down slowly on the front of Keep your hands and face the lid (front side) until you away from the vent, as hear the latch catch.
- Page 6 Component Names, Accessories, Operation Panel, Display Part - continued Operation panel and display part For explanation, all of the displays are lit up in the figure. Hour/Min display Off/On button Cancel button Cook button Timer button Turn on and off To stop cooking or To start cooking, "3"...
-
Page 7: Setting The Current Time
Setting the Current Time At room temperature, the clock time will show an error of approximately 2 minutes after one month. Use the following procedure to adjust the current time setting. Ex: To change “19:27” to “20:30” Plug in the power plug. Press to display the time. -
Page 8: Safety Precautions
Safety Precautions This rice cooker is a home appliance. Do not use this cooker for commercial applications. Observing the following instructions will prevent injury to the user and others and damage to property. In addition, the precautions provided throughout this manual should be read carefully and the rice cooker should be used correctly. ■... - Page 9 ●This appliance is not intended for use by persons (including children) with reduced physical, sensory or mental capabilities, or lack of experience and knowledge, unless they have been given Warning supervision or instruction concerning use of the appliance by a person responsible for their safety. ●Make sure that children do not play with this appliance.
- Page 10 Safety Precautions - continued Caution Handling the Power Plug ● ● When unplugging the power plug, hold Unplug the power plug from the power the power plug and do not pull on the outlet when not using the rice cooker. cord.
- Page 11 Caution Do not use the rice cooker in these locations (continued) ● ● Unstable locations or on materials not resistant to heat. Areas where the lid cannot be opened completely. (Failure to observe this precaution could result in injury or a fire.) ●...
-
Page 12: Rice Cooking Preparation (Tips For Cooking Delicious Rice)
Rice Cooking Preparation (Tips for cooking delicious rice) Measure the rice. Use the measuring cup included to measure the rice. Do not use commercially ATTENTION Fill the cup to the brim for 1 cup. available measuring cup Fill the cup to an intermediate level for 0.5 cup. - Page 13 Wipe off any water or food stuck to the outside of the Set the inner inner pot or to the rice container in the rice cooker before pot into the setting the inner pot body of the Wipe off any water or food on the outside. in the rice cooker.
-
Page 14: To Start Cooking The Rice Immediately
To start cooking the rice immediately Use only for "Mix" or "Porridge". The time and values in the figures are examples. Ex: When cooking rice using the "Normal" course Cooking with 3"for Rapid Press to display the current time Press 3 seconds. - Page 15 Check the rice cooking method. If you mistakenly use another cooking method to cook “Porridge”, which uses a large amount of water, it is dangerous because much hot water Caution could spray out. Proper use of the cooking method (menu) Cooking time Amount to be Water level...
-
Page 16: Rice Cooking Using The Timer (Set The Timer To Finish Cooking When You Want To Eat)
Rice Cooking using the Timer (Set the timer to finish cooking when you want to eat) Use only for "Porridge". Ex: When setting the timer to finish cooking The time and values in the figures are examples. rice at "7:30" on the "Normal" course Press to display the current time. -
Page 17: Warming
Warming Automatic warming When the cooking is completed, the rice cooker automatically switches to Keep Warm. ● "Warm" lights up and the warming time elapsed is displayed in the time display in 1-hour increments. Lights Displays from 0 h to 5 h, and after 6-hour warming, displays the current time. ●... -
Page 18: Cleaning And Maintenance
Cleaning and Maintenance Warning Treat the rice cooker with caution after unplugging the power plug and waiting for the rice cooker to cool down. (Failure to observe this precaution could results in burns.) ● Do not use benzene, thinner, bleach, polishing powder, or alkaline cleaners. (Using these could damage the surface.) ATTENTION ●... - Page 19 Inner lid (Wash after each use) ● Remove the steam cap from the body lid, and use dishwashing detergent (pH-neutral) and a sponge or other soft material to wash the steam cap. Hold the two knobs of the Wash the inner lid, Insert the convex part Push down the inner lid, slightly push up,...
-
Page 20: If There Are Odors
If there are odors ● If there are odors after cooking mixed rice or keeping rice warm, you can boil water and use the steam from it to reduce the smell. Place water in the inner pot. ● The amount of water is up to the “White If the odor is still a concern Rice”... - Page 21 If This Happens Check This ❶ ● Soft Stirring the rice ● Sticky ● Stir the rice as soon as it finishes cooking. ● Hard (This prevents the excess steam from making the rice sticky or making it smelly.) ● Hard core The bottom of the inner pot or the temperature sensor is dirty P.11, 18, 19...
- Page 22 Please check the following points Troubleshooting - continued before calling for service. If This Happens Check This Adding seasoning and other ingredients ● ❶ Mixed rice does ● Add the seasoning to the water and adjust the water level and stir to prevent the not cook properly.
- Page 23 If This Happens Check This The amount of rice is so small that keeping warm for a long time (6 or more hours) ● Smells ❷ causes smell and yellowing. ● Yellows Keeping rice warm P.17 ● Also do not use the Warm menu for rice that has become cold. Washing the rice P.12 ●...
- Page 24 Please check the following points Troubleshooting - continued before calling for service. If This Happens Check This ● The cooking process is automatically adjusted to make the rice taste delicious. Suddenly ❺ For this reason, the time until cooking is completed might move up or stop changes during cooking.
- Page 25 Cook Book Contents Sushi Rice Red Bean Rice Brown Rice Sansai Rice Rice cereals Green vegetable Porridge Rice mixed with eel Chicken Porridge Beans rice ● Units used in this Cook Book ● Cups used in this Cook Book 1 kcal (kilocalorie) = 4.2 kJ (kilo joule) White Rice...1 cup = 0.18 L (about 1 Japanese cup) 1 mL (milliliter) = 1 cc (cubic centimeter) (Use the included rice measuring cup)
-
Page 26: Sushi Rice
Sushi Rice Brown rice Rice cereals MENU MENU Cooking Cooking 1 serving 1 serving Time Guideline Time Guideline Approx. Approx. Normal Normal Approx. Approx. kcal kcal ●Ingredients (2 servings) ●Ingredients (2 servings) ●Ingredients (2 servings) 1 cup ··········································2 cups Brown rice ··········································... -
Page 27: Rice Mixed With Eel
Rice mixed with eel MENU button MENU Cooking 1 serving Time Guideline ● Ingredients (2 servings) Approx. Normal Approx. kcal 2 cups White rice ................. Grilled eel .................. Source of grilled eel............. 60 g Japanese ginger ................ Green perilla ..............10 sheets Scrambled egg .............. -
Page 28: Red Bean Rice
Red Bean Rice MENU Cooking 1 serving Time Guideline ● Ingredients (2 servings) Approx. Approx. kcal White rice ................ 1/2 cup Glutinous rice ............. 1 1/2 cups Cowpeas ................30 g Salt .................. 1 pinch Sesame and salt............. to taste ●... -
Page 29: Green Vegetable Porridge
Green vegetable Porridge MENU Cooking 1 serving Time Guideline ● Ingredients (2 servings) Approx. Porridge Approx. kcal White rice ................1/2 cup Daikon (Japanese large root radish) leaves or desired greens..10 g Salt ..................to taste ● Preparation Method Wash the rice, place it in the inner pot, and add water up to "Porridge"...
Need help?
Do you have a question about the RZ-WS2YH and is the answer not in the manual?
Questions and answers