Asus vp247 series User Manual
Hide thumbs
Also See for vp247 series:
- User manual (32 pages) ,
- User manual (31 pages) ,
- User manual (29 pages)
Table of Contents
Advertisement
Advertisement
Table of Contents

Subscribe to Our Youtube Channel
Related Manuals for Asus vp247 series


Summary of Contents for Asus vp247 series
- Page 1 VP247 Series LCD Monitor User Guide...
- Page 2 INCIDENTAL, OR CONSEQUENTIAL DAMAGES (INCLUDING DAMAGES FOR LOSS OF PROFITS, LOSS OF BUSINESS, LOSS OF USE OR DATA, INTERRUPTION OF BUSINESS AND THE LIKE), EVEN IF ASUS HAS BEEN ADVISED OF THE POSSIBILITY OF SUCH DAMAGES ARISING FROM ANY DEFECT OR ERROR IN THIS MANUAL OR PRODUCT.
-
Page 3: Table Of Contents
Contents Contents....................... iii Notices......................iv Safety.information..................vi Care.&.Cleaning..................vii Takeback.Services..................viii Chapter.1:..Product.introduction 1.1. Welcome!..................1-1 1.2. Package.contents................1-1 1.3. Monitor.introduction..............1-2 1.3.1 Front view ............... 1-2 1.3.2 Back view ................ 1-4 1.3.3 QuickFit Function ............1-5 Chapter.2:..Setup 2.1. -
Page 4: Notices
Notices Federal.Communications.Commission.Statement This device complies with Part 15 of the FCC Rules. Operation is subject to the following two conditions: • This device may not cause harmful interference, and • This device must accept any interference received including interference that may cause undesired operation. - Page 5 Congratulations! This product is TCO Certified for Sustainable IT TCO Certified is an international third party sustainability certification for IT products. TCO Certified ensures that the manufacture, use and recycling of IT products reflect environmental, social and economic responsibility. Every TCO Certified product model is verified by an accredited independent test laboratory.
-
Page 6: Safety.information
Safety information • Before setting up the monitor, carefully read all the documentation that came with the package. • To prevent fire or shock hazard, never expose the monitor to rain or moisture. • Never try to open the monitor cabinet. The dangerous high voltages inside the monitor may result in serious physical injury. -
Page 7: Care.&.Cleaning
Care & Cleaning • Before you lift or reposition your monitor, it is better to disconnect the cables and power cord. Follow the correct lifting techniques when positioning the monitor. When lifting or carrying the monitor, grasp the edges of the monitor. Do not lift the display by the stand or the cord. -
Page 8: Takeback.services
These documents are not part of the standard package. Takeback Services ASUS recycling and takeback programs come from our commitment to the highest standards for protecting our environment. We believe in providing solutions for our customers to be able to responsibly recycle our products, batteries and other components as well as the packaging materials. -
Page 9: Welcome
Thank you for purchasing the ASUS LCD monitor! The latest widescreen LCD monitor from ASUS provides a broader, brighter and crystal-clear display, plus a host of features that enhance your viewing experience. With these features, you can enjoy the convenience and delightful visual... -
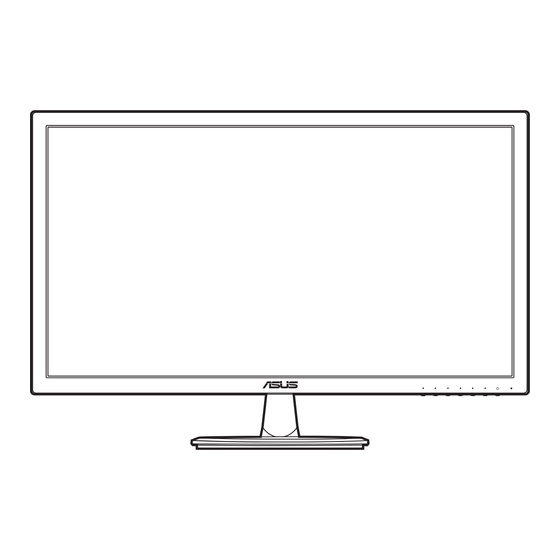
Page 10: Monitor.introduction
Monitor introduction 1.3.1. Front.view Auto VP247H/VP247HA VP247T/VP247TA Auto VP247N/VP247NA Power button/power indicator • Turns the monitor on/off. • The color definition of the power indicator is as the below table. Status Description White Amber Standby mode Menu button: • Press this button to display the OSD menu when the OSD is off. •... - Page 11 Press this button to display the OSD menu when the OSD is off. • Automatically adjusts the image to its optimized position, clock, and phase by pressing this Button for 2-4 seconds (for VGA mode only). ASUS VP247 Series LCD Monitor...
-
Page 12: Back View
1.3.2. Back.view VP247HA VP247H VP247T/VP247TA VP247N/VP247NA Kensington.lock.slot. AC-IN.port. This port connects the power cord. HDMI.port. This port is for connection with an HDMI compatible device. DVI.port. This 24-pin port is for PC (Personal Computer) DVI-D digital signal connection. VGA.port. This 15-pin port is for PC VGA connection. Audio-in.port. -
Page 13: Quickfit Function
Alignment Grid 1 Alignment Grid 2 Alignment Grid 2 Alignment Grid 1 Paper size QuickFit provides several commonly used standard paper sizes for users to view their documents in real size on the screen. Letter Letter ASUS VP247 Series LCD Monitor... - Page 14 Photo size The various real photo sizes displayed in the QuickFit function provides photographers and other users to accurately view and edit their photos in real size on the screen. Photo 4x6, 3x5, 2x2 Photo 8x10, 5x7 8x10 Chapter 1: Product introduction...
-
Page 15: Assembling.the.monitor.arm/Base
Attach the base into the arm, making sure the tab on the arm fits into the groove on the base. Fix the base to the arm by fastening the bundled screw. We recommend that you cover the table surface with soft cloth to prevent damage to the monitor. ASUS VP247 Series LCD Monitor... -
Page 16: Detaching.the.arm/Base.(For.vesa.wall.mount)
Detaching the arm/base (for VESA wall mount) The detachable arm/base of this monitor is specially designed for VESA wall mount. To detach the arm/base: Have the front of the monitor face down on a table. Remove the rubbers in the four screw holes. (Figure 1) Remove the base (Figure 2). -
Page 17: Adjusting.the.monitor
Connect the other end of the VGA/DVI/HDMI cable to your computer's VGA/DVI/HDMI jack. Tighten the two screws to secure the VGA/DVI connector. •. To.connect.the.audio.cable:.connect one end of the audio cable to the monitor’s Audio-in port, the other end to the computer’s audio-out port. ASUS VP247 Series LCD Monitor... -
Page 18: Turning.on.the.monitor
When these cables are connected, you can choose the desired signal from the Input Select item in the OSD menu. Turning on the monitor Press the power button . See page 1-2 for the location of the power button. The power indicator lights up in white to show that the monitor is ON. -
Page 19: Osd.(On-Screen.display).Menu
Highlight the desired sub-menu function and press to activate it. Press to change the settings of the selected function. To exit and save the OSD menu, press repeatedly until the OSD menu disappears. To adjust other functions, repeat steps 1-4. ASUS VP247 Series LCD Monitor... -
Page 20: Osd Function Introduction
This function contains 8 sub-functions you can select for your preference. Each mode has the Reset selection, allowing you to maintain your setting or return to the preset mode. ASUS VP247 Splendid Standard Mode VGA 1920 x 1080 @ 60Hz... - Page 21 Saturation: The adjusting range is from 0 to 100. •. Color.Temp.: Contains 4 modes including Cool, Normal, Warm and User Mode. •. Skin.Tone: contains three color modes including Reddish, Natural, and Yellowish. •. Smart.View: provides better display quality under big viewing angle. ASUS VP247 Series LCD Monitor...
- Page 22 VividPixel: Enhances the outline of the displayed picture and generates high-quality images on screen. •. ASCR: Turns on/off the ASCR (ASUS Smart Contrast Ratio) function. •. Position.(Only.available.for.VGA.input): adjusts the horizontal position (H-Position) and the vertical position (V-Position) of the image. The adjusting range is from 0 to 100.
- Page 23 Select ON to enter the GamePlus main menu. Press to select between Crosshair and Timer function. Press to confirm the function you choose, and to go back. Press to go off, and exit. ASUS VP247 Series LCD Monitor...
- Page 24 GamePlus Main Menu GamePlus — Crosshair GamePlus — Timer GamePlus — Timer — Position • ECO Mode: reduces power consumption. • OSD Setup: Adjusts the OSD timeout from 10 to 120 seconds. Enables or disables the DDC/CI function. Adjusts the OSD background from opaque to transparent. •...
- Page 25 Shortcut.1/Shortcut.2: selects a function for Shortcut 1 and 2 buttons. When a certain function is selected or activated, your shortcut key may not support. Available function choices for shortcut: Blue Light Filter, Splendid, Brightness, Auto Adjust (only for VP247H/VP247HA), Contrast, Color Temp., Volume. ASUS VP247 Series LCD Monitor...
-
Page 26: Specifications.summary
Specifications summary Panel.Type TFT LCD Panel.size 23.6” (16:9, 59.94 cm) wide screen Max..Resolution 1920 x 1080 Pixel.pitch 0.2715 mm Brightness.(Typ.) 250 cd/m Contrast.Ratio.(Typ.) 3000:1 Contrast.Ratio.(Max.) 100,000,000:1 (with ASCR on) Viewing.angle.(H/V).CR>10 178˚/178˚ Display.colors 16.7 M Response.time < 5 ms SplendidPlus.Video.Enhancement SplendidPlus.selection 8 video preset modes Auto.adjustment Color.temperature.selection... - Page 27 Energy Star 7.0, UL/cUL, CB, CE, ErP, FCC, CCC, CU, RCM, BSMI, VCCI, PSB, RoHS, J-MOSS, MEPS, WEEE, TCO7.0, PSE,Windows 7 & 8.1&10 WHQL, CEL, TUV-Flicker free, TUV-Low Blue Light, ISO9241- 307, EPEAT gold (optional), PC-Recycle, KC, KCC, e-Standby, UkrSEPRO *Specifications.are.subject.to.change.without.notice. **.Based.on.Energy.Star.7.0.standard. ASUS VP247 Series LCD Monitor...
-
Page 28: Troubleshooting.(Faq)
Troubleshooting (FAQ) Problem Possible.Solution Power LED is not ON • Press the button to check if the monitor is in the ON mode. • Check if the power cord is properly connected to the monitor and the power outlet. • Check if the power switch is ON. The power LED lights amber and there is •... -
Page 29: Supported.operating.modes
75Hz 79.976kHz 1440x900 60Hz 55.935kHz 1440x900 75Hz 70.635kHz 1680x1050 60Hz 65.29kHz 1920x1080 60Hz 67.5kHz IBM.Modes,.Factory.Preset.Timing Resolution Refresh.Rate Horizontal.Frequency 640x350 70Hz 31.469kHz 720x400 70Hz 31.469kHz MAC.Modes,.Factory.Preset.Timing Resolution Refresh.Rate Horizontal.Frequency 640x480 67Hz 35kHz 832x624 75Hz 49.725kHz ASUS VP247 Series LCD Monitor 3-11... - Page 30 VESA.Modes,.User.Available.Timing Resolution Refresh.Rate Horizontal.Frequency 848x480 60Hz 31.02kHz 1280x720(RB) 60Hz 44.444kHz 1280x720 60Hz 44.772kHz 1280x720 75Hz 56.456kHz 1280x768(RB) 60Hz 47.396kHz 1280x800(RB) 60Hz 49.306kHz 1280x800 60Hz 49.702kHz 1280x800 75Hz 62.795kHz 1366x768 60Hz 47.712kHz 1440x900(RB) 60Hz 55.469kHz 1440x900 75Hz 70.635kHz 1680x1050(RB) 60Hz 64.674kHz 1920x1080 60Hz 66.587kHz...
Need help?
Do you have a question about the vp247 series and is the answer not in the manual?
Questions and answers