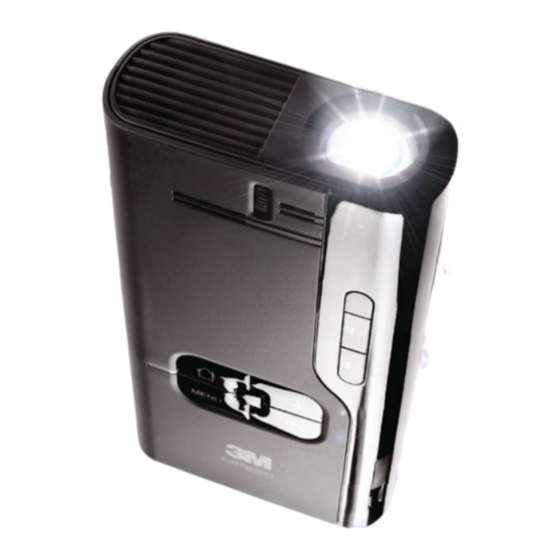
3M mp220 Operator's Manual
Pocket projector
Hide thumbs
Also See for mp220:
- Operator's manual (150 pages) ,
- Quick start manual (15 pages) ,
- Safety manual (20 pages)
Table of Contents
Advertisement
Quick Links
Advertisement
Table of Contents

Related Manuals for 3M mp220


Summary of Contents for 3M mp220
- Page 1 operator's guide...
-
Page 2: Table Of Contents
Video Player ......................71 Clock ........................74 Documents To Go ....................78 Word To Go™....................86 Sheet To Go® ....................97 Slideshow To Go® ...................120 PDF to Go ......................130 Fun Pack ......................133 Cannon Ball Pro ....................137 Settings ......................138 Limited Warranty ....................144 © 2012 3M. All Rights Reserved. -
Page 3: Important Notice
Technical Support For technical support, call 1-866-631-1656 or email meetings@mmm.com. Intended Use Statement The 3M Mobile Projector MP220 is designed to operate with the 3M specified battery and 3M power adapter in normal office or home environments. • 0˚–30˚C (32˚–86˚F) •... -
Page 4: Safety Information
Indicates a potentially hazardous situation, which, if not avoided, could result in death or serious injury and/or property damage. m Caution: Indicates a potentially hazardous situation, which, if not avoided, may result in minor or moderate injury and/or property damage. Warning: Hazardous voltage © 2012 3M. All Rights Reserved. - Page 5 ™ m Warning To reduce the risk associated with hazardous voltage: • Do not modify this product in any way. Use only 3M approved replacement components. • Do not attempt to service this projector other than battery replacement. There are no user-serviceable parts other than the battery. Service to be performed only by a 3M authorized service provider using 3M approved system components.
- Page 6 • Do not reverse the positive(+) and negative(-) terminals. • Do not connect the battery directly to a wall outlet. Use only the 3M specified wall charger or automobile charger. • Do not strike, throw or subject the battery to physical shock.
- Page 7 • Do not stare directly into the projector lens. To reduce the risks associated with tripping and falling: • Position the charging cord and data cables so that they are not a tripping hazard. SAVE THESE INSTRUCTIONS © 2012 3M. All Rights Reserved.
-
Page 8: Safety Labels
• Do not short-circuit the battery terminals. • Do not disassemble the battery. Charging Specification Standard Charge 11.1V/1.3A Cut Off Voltage 8.5V Max Charge 12.3V/1.3A LED Light Output IEC60825-1 :1993+A1 Maximum Radiant CLASS 1 LED PRODUCT :1997+A2:2001 Power: 1.693 mW © 2012 3M. All Rights Reserved. -
Page 9: Introduction
Overview Product Features The 3M™ Mobile Projector MP220 makes it easy to project information almost anywhere you go, instantly — all with 65 lumens of brightness. It is perfect for presenting to small groups. The 3M MP220 projector includes these features: + Battery or plug-in for super mobility + 2-hour battery life ensures that it’s ready when you are... -
Page 10: Package Contents
Pocket Projector MP220 ™ Package Contents 3M MP220 Projector Power Adapter Outlet Adapters (4) USB Cable Product Warranty and Safety Guide Quick Start Guide © 2012 3M. All Rights Reserved. -
Page 11: Parts Of Projector
Volume down – Turns down speaker or audio out output. Volume up – Turns up speaker or audio out output. Infrared sensor – Accepts commands from 3M remote control. Remote control sold separately. Air vents – Do not block fans or vents while projector is operating or cooling down. - Page 12 Battery compartment Battery cover securing screw Speakers DC power in – Powers the projector or charges the battery using the 3M power supply. microUSB – Transfer files back and forth from your computer to the projector. Attach a USB computer mouse, or keyboard. Access files on USB memory stick.
-
Page 13: Getting Started
Power Adapter The power adapter is used to charge the battery or power the projector. There are four outlet adapters to give you the flexibility to power the 3M MP220 in most countries. When the power adapter is first shipped, it is fitted with a blank outlet adapter. This must be removed before installing an outlet adapter. -
Page 14: Replacing The Battery
Pocket Projector MP220 ™ Battery The 3M projector comes with a rechargeable battery. When the projector is shipped, there is a protective film between the battery and the battery contacts on the projector. Battery Maintenance Tips: • Remove the battery when the projector will not be used for one week or longer. - Page 15 Orient the battery so that its contacts line up with the battery contacts inside the projector. Place the battery into the battery compartment. Slide the battery cover on. Replace the battery cover securing the screw using a Phillips-head ("crosshead") screwdriver. © 2012 3M. All Rights Reserved.
-
Page 16: Charging The Battery
™ Charging the battery The 3M MP220 rechargeable battery gives you up to two hours of battery life. When the battery needs to be charged, the status indicator LED starts flashing red. The battery should be fully charged before using the 3M MP220 projector. -
Page 17: Power Button
Important Note: When the lamp is off, the projector continues to use power. Do not place projector in a bag in this state as it can easily be turned back on. © 2012 3M. All Rights Reserved. -
Page 18: Status Indicator Lights
Projector has overheated Flashes red The battery power is low. Adjusting Image Size The 3M MP220 projector can project a diagonal image of 10 to 70 inches (254– 1778 mm). Refer to the chart for associated dimensions. Image Size Diagonal... -
Page 19: Adjusting The Focus
Rotate the focus wheel to sharpen the image. Attaching the Tripod (Optional Accessory) The bottom of the projector includes a tripod socket that fits most standard camera tripods, including the optional 3M tripod (78-6972-0073-7). © 2012 3M. All Rights Reserved. - Page 20 Quickly Increase or Decrease Volume: Press and hold the volume up button to quickly increase the audio volume or press and hold the volume down to quickly decrease or mute the audio volume. © 2012 3M. All Rights Reserved.
-
Page 21: Menu Button
Opening options and context menus. Press and hold to display the on-screen keyboard Back Button Returning to the previous screen Search Button The Search button opens the Search app or the Touch Sensor Mode dialog. © 2012 3M. All Rights Reserved. - Page 22 There are two ways to switch between the two modes: Use the Search Button or Settings Menu. Switch the modes using the Search Button: Press and hold the Search button and the “Touch Sensor Mode switch” dialog will appear. Press OK to switch from the mode. © 2012 3M. All Rights Reserved.
-
Page 23: Mouse Mode
Click and Hold: Use the Touch Sensor to activate additional features by pressing down and holding. You can add a new shortcut or widget to the Home screen by clicking and holding down the Touch Sensor until the dialog appears. © 2012 3M. All Rights Reserved. - Page 24 Click and Hold: Press and hold the Touch Sensor down while an app or widget on the Home screen is selected and the choose your action dialog will appear. © 2012 3M. All Rights Reserved.
-
Page 25: Initial Setup
Pocket Projector MP220 ™ Initial Setup The first time you switch on your MP220, you will need to set up your locale and the date & time. Setting your Locale To set the locale, click Locale. This chooses the language that the projector's interface and menus display. -
Page 26: Setting The Date And Time
Pocket Projector MP220 ™ Setting the Date and Time To set the date and time, click Date & Time. The following screen will appear. Setting the Time Click on Set time. © 2012 3M. All Rights Reserved. -
Page 27: Setting The Date
To change from AM to PM, click on AM. Once finished, click Set. Note: Clicking and holding + or - will cycle through the hours or minutes. Setting the Date Click on Set date. © 2012 3M. All Rights Reserved. - Page 28 To return to the Home screen, press the Home key on the navigation panel. Note: You can change the language and date or time at any time by going into Settings and choosing Language or Date & Time. For more infomation, see “Settings” on page 138. © 2012 3M. All Rights Reserved.
-
Page 29: Home Screen
Status bar - Provides information about the projector such as connectivity, battery power and time. Pane Tabs – Use customizable tabs to provide a way to organize applications and widgets on the HOME SCREEN © 2012 3M. All Rights Reserved. -
Page 30: Status Bar
The Status icons provide information about the projector such as battery level and projector brightness. Below is a list and their descriptions. Battery is very low Battery is partially drained Battery is full Battery is charging Brightness at maximum Brightness at minimum Alarm is set © 2012 3M. All Rights Reserved. - Page 31 Highlight the tab and press the Touch Sensor to select it. The tab will turn red and the shortcuts and widgets in the tab will appear. © 2012 3M. All Rights Reserved.
- Page 32 Wallpaper and Launcher Settings. Customize the Wallpaper From the Home screen, press the Menu key. Select Wallpaper from the options. Browse to the location of the image you wish to use as wallpaper. Click on the image. © 2012 3M. All Rights Reserved.
- Page 33 Select the tab name you want to rename. The Rename dialog will appear. Select the text entry box to display the onscreen keyboard. Enter the new name. For more information on entering text, see “Onscreen Keyboard” on page 37. © 2012 3M. All Rights Reserved.
- Page 34 Select Appearance Settings. The table below shows you how each setting affects the icons on the Home screen. Setting Hide Icon Labels With Labels Without Labels Show Icon Showdows Without Shadow With Shadow Enlarge Icons Small Icon Large Icon © 2012 3M. All Rights Reserved.
- Page 35 Select Restore Defaults. Select OK when the Restore Defaults dialog appears. About 3M Launcher This opens the About 3M Launcher screen which displays the software version and copyright information. App Launcher The App Launcher is located at the bottom-center of the Home screen. When opened, the App Launcher screen opens and displays all of the applications installed on the projector.
- Page 36 Open the Notification panel. Select the notification and the Notification panel closes and depending on the application – a new screen or dialog may appear. Clearing Notifications This will clear all inactive notifications. Open the Notifications panel. © 2012 3M. All Rights Reserved.
-
Page 37: Onscreen Keyboard
If you select a text field in a dialog or app, the suggestion will come from the dictionary. Whether the word you type is in the dictionary or not, the onscreen keyboard will try to make suggestions. © 2012 3M. All Rights Reserved. - Page 38 Move the mouse pointer over the word in the suggestions area. Press and hold the Touch Sensor until the text is no longer underlined. The next time you type, the word will show up as a suggestion. © 2012 3M. All Rights Reserved.
- Page 39 Move the mouse pointer over the letter and press and hold the Touch Sensor. A context menu will display the accented or alternate letter available. Type the letter by moving the mouse pointer over the letter and pressing the Touch Sensor. © 2012 3M. All Rights Reserved.
- Page 40 Press down and slide your finger across the Touch Sensor. You will see the new language coming from the left or the right. Make sure the new language is centered on the space bar before releasing the button. © 2012 3M. All Rights Reserved.
-
Page 41: Remote Control (Optional Accessory)
™ Remote Control (Optional Accessory) The Remote Control for the 3M MP220 projector controls the projector's screens as well as volume level on the projector, and video and audio playback. Note: The remote control cannot be used for some operations such as typing on the onscreen keyboard. - Page 42 Place the new battery into the tray and orientating the battery positive size (+) as indicated on the tray. Finally Slide the tray into the remote Control. © 2012 3M. All Rights Reserved.
-
Page 43: Search
Your search results will contain applications or files. When you select an item from the list of results, it is saved as a shortcut. The shortcut will be displayed in the bar below the text entry box. © 2012 3M. All Rights Reserved. -
Page 44: Opening And Switching Applications
Switching to a recently used application: Press and hold the Home button. A window will appear showing all recently used applications. Use the Touch Sensor to select the application or press the Back button to return to the current screen. © 2012 3M. All Rights Reserved. -
Page 45: Transferring Files To The Projector
The MP220 has both built-in memory and a removable microSD™ card where you can place files. You can put files on the 3M MP220 projector using a USB connection, or you can transfer files to a microSD card prior to inserting it into the MP220. - Page 46 SD card is ready for removal. See Ejecting the microSD Card for instructions. Ejecting the microSD Card Open the microSD slot door. Push the microSD card into the microSD slot until it “clicks”. Release the microSD card and the card will eject. © 2012 3M. All Rights Reserved.
- Page 47 ™ Using the USB Port The MP220 has a USB connection located at the rear of the projector. You can connect the MP220 projector to a computer and the computer can open both the MP220 internal memory and microSD card like a disk drive.
- Page 48 Eject a drive on computers running Microsoft Windows: Open Windows Explorer, right-click the drive, and click Eject from the context menu. Eject a drive on a computer running Apple Mac OS 10: Open finder, choose the drive, and then choose File>Eject. © 2012 3M. All Rights Reserved.
-
Page 49: Video/Vga Pass Through
UnFreezing the Image: Press Menu and then select Live. Mute Audio You can mute the audio using Mute in the options menu. Muting the Audio: Press Menu and then select Mute. Unmuting the Audio: Press Menu and then select Unmute. © 2012 3M. All Rights Reserved. -
Page 50: Image Capture
16:9 – Scales the image to a 16:9 aspect ratio • Native – Aspect Ratio scales the image to the projector native Aspect ratio, 17:10 Letterbox Cropping Crops or cuts the image down to the specified aspect ratio. Edge Cropping © 2012 3M. All Rights Reserved. -
Page 51: Making Connections
The 3M MP220 projector will display informational icons depending on the input device and signal being detected. If no devices or input cables are connected to the projector, the Home screen will display. The 3M MP220 was designed to operate with 3M VGA and AV cables only. - Page 52 Connecting to a Component Video Device (requires optional accessory) For component video input, you must purchase the optional 3M MP220 Component AV Cable. This cable sends a higher quality video signal for the best possible image. Connect the component AV cable to the projector’s VGA-AV input.
- Page 53 Connecting to a Computer (requires optional accessory) For VGA-audio input, you must purchase the optional 3M MP220 VGA-audio Cable. Use the VGA-audio cable to connect the projector to home screen computers, laptop computers, ultra-portable computers and some personal digital assistants (PDAs).
- Page 54 1366 x 768 60 Hz 1024 x 600 60 Hz 1280 x 960 60 Hz 1440 x 900 60 Hz 640 x 480 67 Hz 832 x 624 75 Hz 1152 x 870 75 Hz © 2012 3M. All Rights Reserved.
-
Page 55: Gallery
SD card. Gallery may take seconds to a few minutes to display your entire album depending on the amount of photos. Picture Albums Albums are folders containing pictures that are located on the projector’s internal memory and SD card. © 2012 3M. All Rights Reserved. - Page 56 The Album name will appear at the top of the screen. Select the photo you want to view. Name of Album Picture Thumbnails Highlighted Picture Grid/Stack View switch © 2012 3M. All Rights Reserved.
- Page 57 Mode. Getting Details about an Album Press the Menu button twice. Place a checkmark on the albums you want details about. Select More and a menu appears. Select Details and a dialog will appear. © 2012 3M. All Rights Reserved.
- Page 58 Use the Gallery to view picture(s) on the internal memory and the SD card. You can view, edit, or delete these pictures. Viewing and Browsing Pictures Open Gallery. Open an album. Select a picture. Album Location © 2012 3M. All Rights Reserved.
- Page 59 Rotate clockwise or counterclockwise, • Set as wallpaper or • Crop. To select the album(s) or picture(s) you want to work with: Open the album to view the pictures you want to work with © 2012 3M. All Rights Reserved.
- Page 60 Touch Sensor twice (also known as a double click). Double click again to zoom out. • Trackball Mode: Press the Touch Sensor to zoom in and press the Touch Sensor again to zoom back out. © 2012 3M. All Rights Reserved.
- Page 61 You can crop pictures and save the cropped portion of the picture to a file. You can only crop using Mouse Mode. Press the Touch Sensor on a picture to open the controls. Select More. © 2012 3M. All Rights Reserved.
- Page 62 Select Save. The projector will save a copy of the cropped picture. Delete a Picture You can delete a picture from the projector’s internal memory or the SD card. Open the controls Press the Menu button Select Delete and OK in the confirm delete dialog. © 2012 3M. All Rights Reserved.
-
Page 63: Music
After you have copied your music to the projector, you can open Music and see your library of music files. You can view your music files sorted either by Artist, Albums, Songs, or in Playlist. The main screen for Music is called the Library. © 2012 3M. All Rights Reserved. - Page 64 Mouse Mode: Select the sorted list you want to search. • Track Mode: Highlight the sorted list you want to search and then move the highlighter down into the list. Press and hold the Menu button. © 2012 3M. All Rights Reserved.
- Page 65 Press the Menu button. Select Delete and then select OK in the delete confirmation dialog. Playing Music The MP220 has built-in speakers and headphone jack for listening to music. You can use the Volume + and Volume – buttons to control the audio level (or volume) for both. Music can play: •...
- Page 66 Pocket Projector MP220 ™ Now Playing Album artwork Now Playing List Shuffle All Repeat Current or Repeat All Songs Artist Album Song Play time Playback Progress Slider Previous Song Play/Pause Next Song Song Time © 2012 3M. All Rights Reserved.
- Page 67 Repeat only the Current Song Repeat is off Shuffle Currently Playing Playlist or Album Select the Shuffle button to turn it on or off. Shuffle plays the current playlist or album in random order. © 2012 3M. All Rights Reserved.
- Page 68 Playlist helps you organize your favorite music into sets song, which you can play in the order you set or in a shuffle. Creating a Playlist To create a playlist: Add songs to a new playlist. © 2012 3M. All Rights Reserved.
- Page 69 Touch Sensor and the song context menu will appear. Select Remove from Playlist. • Trackball Mode: Select a song. Press and hold the Touch Sensor and the song dialog will appear. Select Remove from Playlist. © 2012 3M. All Rights Reserved.
- Page 70 You can create a playlist using a text editor program using the following guidelines: • Enter each song file name that you want in the playlist. • Save the file with a M3U extension. For example, myplaylist.m3u. © 2012 3M. All Rights Reserved.
-
Page 71: Video Player
Audio Codec Support: MP3, ACC(LC, LTP, HEv1, HEv2), AMR-NB, AMR-WB, MSADPCM, PCM, Vorbis *The MP220 may not support a specific file, although it is listed, because the video or audio stream embedded into the file is not supported. List of videos This screen shows all of the folders or directory where video files are located. -
Page 72: Playing Videos
Select one of the video files and the video will start to play. When the play controls disappear, you can press the Touch Sensor to display them again. Play time Aspect Ratio Options Progress bar Rewind video Play/Pause Fast forward Repeat Total time © 2012 3M. All Rights Reserved. -
Page 73: Compatible Video Formats
Audio Codec Support: MP3, ACC(LC, LTP, HEv1, HEv2), AMR-NB, AMR-WB, MSADPCM, PCM, Vorbis *The MP220 may not support a specific file, although it is listed, because the video or audio stream embedded into the file is not supported. © 2012 3M. All Rights Reserved. -
Page 74: Clock
Photo SlideShow – Opens gallery and allow you to start a photo slideshow. Music – Open music and allows you to play a song, album or playlist. Home – Returns you to the Home screen © 2012 3M. All Rights Reserved. -
Page 75: Playing A Slideshow
Select the song, album or playlist. After the music begins, return to the Clock by pressing the Back button, pressing and holding the Home button and then selecting Clock. For more about music, see “Music” on page 63. © 2012 3M. All Rights Reserved. - Page 76 Select Alarm button at the bottom of the clock screen. • Press the Menu button and select Alarms from the options menu. Add alarm Alarms Alarm on/off indicator Return to main Clock screen. Current Time. © 2012 3M. All Rights Reserved.
- Page 77 While in the Set alarm screen, you can change the time of the alarm; define how often the alarm goes off; select a ringtone for the alarm; and finally you can label the alarm. © 2012 3M. All Rights Reserved.
-
Page 78: Documents To Go
Registering Documents To Go and Upgrading to the Full Version The MP220 does not have a network connection such as Wi-Fi or mobile network. Therefore, you cannot register or upgrade Documents To Go. When you come to the registration screen, select Later. - Page 79 Check for Updates and Give Us Feedback selections are not supported in the standard version. Only Remember Last Location is supported under Advanced Options. Remember Last Location brings you back to the last file location you were in when you last closed Documents To Go. © 2012 3M. All Rights Reserved.
- Page 80 – Deletes all files or folders selected for deletion. Information – Displays the selected files or folders properties. Send Via Email – Not supported in the standard version. Sort – Not supported in the standard version. © 2012 3M. All Rights Reserved.
- Page 81 • Trackball Mode: Highlight the file or folder you want to delete. Choose Select. Click Delete. When the Delete confirmation dialog appears, click Yes. The file or folder is deleted. © 2012 3M. All Rights Reserved.
- Page 82 Pocket Projector MP220 ™ Select the file or folder you want to delete. Click Select and then click Delete. Click Yes to confirm the deletion. © 2012 3M. All Rights Reserved.
- Page 83 When you star a file or files, the files appear in the Starred Files screen. Starring makes it quick and easy to access files no matter where they are located. You can also unstar files. Starring a File Select the file you want to star. Star the selected file. © 2012 3M. All Rights Reserved.
- Page 84 Mouse Mode: Position the mouse pointer over the file you want to open and press the Touch Sensor. The file opens. Trackball Mode: Highlight the file you want open and press the Touch Sensor. The file opens. © 2012 3M. All Rights Reserved.
- Page 85 Documents To Go, it is not recommended to use these files with Documents To Go. File formats may be distinguished based on the file extension and icon for that file in Documents To Go: Example: Word 2007-2008 (top) vs. Word 97-2004 (bottom) © 2012 3M. All Rights Reserved.
-
Page 86: Word To Go
Open the Zoom dialog by pressing the Menu button and selecting View. Choose the zoom level. 100% is the default. Changing the Zoom Level for an Individual Graphic Place the cursor before the graphic. Choose Selection Mode. © 2012 3M. All Rights Reserved. - Page 87 Mouse Mode. To change to Mouse Mode, hold down the Search button and follow the instructions above. Press the Back button to return to the document. Move the cursor next to the graphic you want to zoom. Choose Selection Mode. © 2012 3M. All Rights Reserved.
- Page 88 Go to the Top, Bottom of Document or Go to Bookmark Open the Go dialog by pressing the Menu button. Select View and then Go. Choose Go to Top, Go to Bottom, or Go To Bookmark. © 2012 3M. All Rights Reserved.
- Page 89 Copy – Copy the selected text and objects and exit Selection Mode • Cut – Copy and then delete the selected text and objects and exit Selection Mode • Paste – Replace selected text and objects with previously copied text and exit Selection Mode © 2012 3M. All Rights Reserved.
- Page 90 Type the text you want to find using the onscreen keyboard. Open the onscreen keyboard by pressing the Touch Sensor. Press the Enter button on the onscreen keyboard. Select Find again to find the next occurrence in the document. © 2012 3M. All Rights Reserved.
- Page 91 Pocket Projector MP220 ™ To find text in a document, press Menu and then select View. Select Find and type in text you want to find using the onscreen keyboard. © 2012 3M. All Rights Reserved.
- Page 92 Trackball Mode: Move your finger across the Touch Sensor in the direction of the cell and the selected cell is highlighted. • Using Mouse Mode, move the cursor into the table cell you want to edit. • Press the Touch Sensor. The cursor appears in the cell. © 2012 3M. All Rights Reserved.
- Page 93 When you are finished making changes, press Done. Exiting a Table Edit Mouse Mode: Position the pointer outside the cell. Press the Touch Sensor to exit. Trackball Mode: Press the Back button until the cell is highlighted again. © 2012 3M. All Rights Reserved.
- Page 94 Pocket Projector MP220 ™ Selecting Hyperlinks The 3M MP220 projector does not have a Wi-Fi or mobile network connection, so hyperlinks that open web pages will not work. Viewing and Editing Comments You can view and edit the comments in a document. Each comment is preceded by the author’s initials and a number.
- Page 95 Pocket Projector MP220 ™ To add comments, select View and then select Comments from the menu. The Comments pane opens below the document. Press the Menu button to use the onscreen keyboard. © 2012 3M. All Rights Reserved.
- Page 96 Microsoft Word, you need to delete the cropped area when compressing the picture. • Word To Go does not display tracked changes in the standard version. • Word To Go Basic does not track changes made while editing in the standard version. © 2012 3M. All Rights Reserved.
-
Page 97: Sheet To Go
You can view and navigate within a spreadsheet and workbook files, edit cell contents, and edit spreadsheet columns and rows. When you select an .xls or .xlsx file, Sheet To Go opens and displays the spreadsheet. Name Box Formula © 2012 3M. All Rights Reserved. - Page 98 Opening the File Dialog While you have another file open, press the Menu button. Select File and the File dialog will appear. *New – Not supported in the standard version. © 2012 3M. All Rights Reserved.
- Page 99 Selecting a Cell Mouse Mode: Move the mouse pointer over the cell. Press the Touch Sensor. Trackball Mode: Move your finger across the Touch Sensor in the direction of a cell and the selector will move. © 2012 3M. All Rights Reserved.
- Page 100 Press and hold the Touch Sensor. The context menu will appear. Select "Selection Mode". Select the furthest-diagonal cell from the initially selected cell and the selected area will be grayed out. Select the furthest-diagonal Selected area will be grayed out. © 2012 3M. All Rights Reserved.
- Page 101 • End – Moves the selector to the last populated cell in the worksheet. Using Zoom While viewing a worksheet, you can zoom and scroll up or down the page. © 2012 3M. All Rights Reserved.
- Page 102 Trackball Mode: Move your finger across the Touch Sensor. Move the cursor up or down on the page. Using Freeze Panes Select the cell where you want the freeze pane to appear above and to the left Press the Menu Button. Select View. Select Freeze Panes. © 2012 3M. All Rights Reserved.
- Page 103 Select Row or Column and a context menu will appear. Select "Select Row" or "Select Column" and the row or column will be highlighted gray. Select the row and then press the Menu button and select More. © 2012 3M. All Rights Reserved.
- Page 104 Move the selector to a cell next to the hide row or column and press and hold the Touch Sensor. Choose Selection Mode and select a cell on the opposite side of the hidden row or column. Select More. © 2012 3M. All Rights Reserved.
- Page 105 Trackball Mode: Move your finger up or down across the Touch Sensor and move the gray bar. Accept the new row height by pressing the Touch Sensor. Select a cell in the row for which you want to change the height. © 2012 3M. All Rights Reserved.
- Page 106 Move the selector to a cell in the column you want to change the width of. Press the Menu Button. Select More. Select Column Width and a gray bar will appear below the row. Move the gray bar right or left to mark the new column width. © 2012 3M. All Rights Reserved.
- Page 107 Select a cell in the column for which you want to change the width. After you press the Menu button and select More, select Columns. Select Column Width and a gray bar appears over the selected column. © 2012 3M. All Rights Reserved.
- Page 108 Select OK and the new row or column is inserted. Deleting Rows and Columns Move the selector to a cell that is the row or column you want to delete. Press the Menu Button. Select More. © 2012 3M. All Rights Reserved.
- Page 109 Select OK. Finding Text or Data in a Spreadsheet or Workbook Press the Menu Button. Select View. Select Find and the Find dialog appears. Press the Touch Sensor and the onscreen keyboard will appear. © 2012 3M. All Rights Reserved.
- Page 110 Formulas - Search reports matches within the cell content including individual numbers and letters in formulas. • Values - Search reports matches from the cell values, such as the result of a formula. • Comments - Search reports matches found in cell comments. © 2012 3M. All Rights Reserved.
- Page 111 Use the onscreen keyboard to modify the content of the cell. Modify using the context menu: Place the mouse pointer over the cell. Press and hold the Touch Sensor. The context menu will appear. Select Edit Cell. © 2012 3M. All Rights Reserved.
- Page 112 Press the Menu button. Select Edit and then Edit Cell. Use the onscreen keyboard to modify the content of the cell. Press Back to exit the onscreen keyboard. Press Back again to exit the formula bar. © 2012 3M. All Rights Reserved.
- Page 113 Select the cell by moving your finger across the Touch Sensor in the direction of cell. Press the Menu button. Select View. Select Cell Contents. The Cell Contents dialog will appear. Press Back or select OK to exit the dialog. © 2012 3M. All Rights Reserved.
- Page 114 Press and hold the Touch Sensor. The context menu appears. Choose Selection Mode. Move the selector to grow or shrink the selection area. Press and hold the Touch Sensor for more options or press the Back button to exit the selection mode. © 2012 3M. All Rights Reserved.
- Page 115 Cut and paste and move data from one area to another. Copy and Paste Select a cell or range. Press and hold the Touch Sensor. An Options menu will appear. Select Copy. Move the Worksheet and Cell where you want to paste the data. © 2012 3M. All Rights Reserved.
- Page 116 Formulas with range of cell references. Simple Formula: 1+1 Select a Cell. Press the Touch Sensor and the onscreen keyboard opens. Type =1+1. Note: Access = by selecting the ?123 button and then the ALT button. © 2012 3M. All Rights Reserved.
- Page 117 Press Menu and then select Enter and the results will appear in the Cell. Inserting Functions and AutoSum Select the cell where you want the results of the function or autosum to appear. Press Menu and select Insert. Select Function or Autosum. The Insert Function screen appears. © 2012 3M. All Rights Reserved.
- Page 118 Press and hold the Touch Sensor. The context menu appears. Select Selection Mode. Move the selector to grow or shrink the selection area. Press and hold the Touch Sensor for more options or press the Back button to exit the selection mode. © 2012 3M. All Rights Reserved.
- Page 119 Only one preference is supported in the standard version. Preferences allow you to perform location formatting. Locale (locations) – Defines how certain numbers, such as currency and the characters used for decimal mark and thousand separators, will display in Sheet To Go. © 2012 3M. All Rights Reserved.
-
Page 120: Slideshow To Go
You can view and navigate within a slideshows while in slide view or outline view, and edit text in slides. When you select a .ppt or .pptx file, Slideshow To Go opens and displays the slideshow in slide view. Filename Current Slide © 2012 3M. All Rights Reserved. - Page 121 Save As – Saves a copy of a file with changes under another filename and location. Send – Not supported in the standard version. Viewing and Navigating within Slideshow There are two ways to view a slide show: slide view and outline view. © 2012 3M. All Rights Reserved.
- Page 122 Mouse Mode: Press and hold the Touch Sensor and a context menu opens. Select Previous Slide. Trackball Mode: Move your finger across the Touch Sensor from right to left. The following is the context menu you receive when in Mouse Mode: © 2012 3M. All Rights Reserved.
- Page 123 Press the Menu button. Select View. Select Go To Slide and a list of the slide headings will appear. The following is an example of the screen you receive with a list of slide headings: © 2012 3M. All Rights Reserved.
- Page 124 You can make minor changes to slide text such as changing the slide title or updating text. Editing Slide Text While in Slide View: Press and hold the Touch Sensor to open the context menu. © 2012 3M. All Rights Reserved.
- Page 125 Select Find and the Find dialog appears. Press the Touch Sensor and the onscreen keyboard will appear. Use the onscreen keyboard to enter search text and click Find. Press the Back button to exit the onscreen keyboard. © 2012 3M. All Rights Reserved.
- Page 126 Press and Hold the Touch Sensor: Select the location in the slide text where you want to start your selection. Press and hold the Touch Sensor and then a list will appear. Select the Selection Mode option. © 2012 3M. All Rights Reserved.
- Page 127 Selection Mode Option Menu Cancel Selection – Exits Selection Mode. Cut – Copies the selected text. Once you paste the text into another slide or in another area of the current slide, the text is deleted. © 2012 3M. All Rights Reserved.
- Page 128 Select Move Cursor Over Text to highlight the text you want to cut. Press the Menu button. Select Edit. Select Cut. Move the cursor to the place in the text where you want to paste the text. © 2012 3M. All Rights Reserved.
- Page 129 Name and Initials – When saving a new file, Slideshow To Go attaches a name and initials to the new file to distinguish it from existing files. © 2012 3M. All Rights Reserved.
-
Page 130: Pdf To Go
While you have another file open, press the Menu button. Select File and the File dialog will appear. • Select Open to open a local file in internal memory or from the SD card. • Select Close to exit the current file. © 2012 3M. All Rights Reserved. - Page 131 While viewing a document, you can zoom and scroll up or down the page. Changing the Page Zoom Level Open the Zoom dialog by pressing the Menu button. Select View. Choose the zoom level. 100% is the default. © 2012 3M. All Rights Reserved.
-
Page 132: Rotating Pages
Select View and the View option menu appears. Select Rotate. Select Rotate left, Rotate Right, or Rotate 180. The entire PDF document will rotate in the direction you chose. Press Back to exit Rotate. © 2012 3M. All Rights Reserved. -
Page 133: Fun Pack
The Fun Pack is a set of backgrounds for special occasions and games. When you click on the Fun Pack icon, the main menu appears. Animation and Pictures Click the Animations & Pictures icon to access animations and pictures for a variety of events. © 2012 3M. All Rights Reserved. - Page 134 The example below shows the menu that appears when you select Birthdays. Picture Guessing Game Click the Picture Guessing Game icon. Choose a photo album from a folder on your ID card. © 2012 3M. All Rights Reserved.
- Page 135 Time’s up! dialog appears. Click OK. Click OK when the Time’s Timer for guessing what the picture is. Up! dialog appears. Click Next to continue to the next picture. Picture Customizer Click the Picture Customizer icon. © 2012 3M. All Rights Reserved.
- Page 136 Frames – Select a photo frame. You can also select None. Undo – Undo the last change you made to the picture. Save – Saves the new picture to your gallery. Cancel – Discards all changes and goes back to the main menu. © 2012 3M. All Rights Reserved.
-
Page 137: Cannon Ball Pro
Select Avatar – Allows you to select the Avatar image you want to shoot from the cannon. Achievements – Shows the highest scores for the game. Instructions – Provides detailed game instructions. Options – Sets the game options. About – Shows the current version of the game. © 2012 3M. All Rights Reserved. -
Page 138: Settings
Brightness Brightness in Display settings affects the brightness of the projected image. When the MP220 is turned on for the first time, Brightness is set to Minimum. The image brightness increases by 30%, when you change Brightness from Minimum to Maximum. -
Page 139: Application Settings
The features in Location and Security are not used by the projector. Application Settings Application Settings provide a way for you to view a list of applications and services installed on the projector, manage their data and force them to stop. © 2012 3M. All Rights Reserved. - Page 140 Info screen will open. There are four sections on this screen: • Version – Displays the version of the application. • Force Stop – Stops the application. The application will not start again unless you or another application or service opens it. © 2012 3M. All Rights Reserved.
- Page 141 Unmount/Mount SD card – Mounts (connects) or unmounts (disconnects) the SD card. • Format SD Card – Formats the SD card. • Device Media Storage – Lists total and available memory space on the projector internal memory. © 2012 3M. All Rights Reserved.
-
Page 142: Select Language
Use 24-hour format You can change the time format to 24-hour time. The 24-hour time format displays the time, such as 1:00 pm, as 13:00. Select date format Formats the way the date is displayed. © 2012 3M. All Rights Reserved. - Page 143 This is the serial number of the projector. This same serial number is located on a label beneath the battery. Optical Engine Serial Number This is the serial number for the installed optical engine. Over-temperature errors If the projector over heats, the overheating occurrence will be recorded here. © 2012 3M. All Rights Reserved.
-
Page 144: Limited Warranty
All replaced parts or products become property of 3M. If the product is repaired, 3M will repair the defective part(s) with a new or used part(s). If the 3M product is replaced, 3M will replace the 3M product with the same or equivalent model and with a new or refurbished 3M product. - Page 145 This warranty does not cover consumables (e.g., batteries). This warranty is not transferable. 3M is not responsible for warranty service should the 3M label or logo or the rating label or serial number be removed unless otherwise stated in writing for the purposes of private labeling for partnership requirements.
- Page 146 What 3M Will Do To Correct Problems: If your 3M product requires service, 3M will ask you to bring or send the 3M product, securely packaged in its original container or equivalent, along with proof of the date of original purchase, to your 3M Service Dealer or 3M Service Center.
- Page 147 • 3M’s liability for replacement of the warranted 3M product or part will not exceed the original retail selling price of the 3M product. Exchange or replacement products or parts assume the remaining warranty period of the product covered by this limited warranty.
-
Page 148: Weee Statement
(b) 0.01% (by weight) for cadmium. This information represents 3M’s knowledge and belief, which may be based on information provided by third party suppliers to 3M. © 2012 3M. All Rights Reserved. -
Page 149: Video And Audio Decoder Notices
™ Copyright, Trademarks and Properties Notices 3M and the 3M logo are trademarks of 3M Company. Used under license in Canada. Microsoft, Windows, Windows XP, Windows Vista, Word, Excel, and PowerPoint are either registered trademarks or trademarks of Microsoft Corporation in the United States or other countries. - Page 150 (payaudio or audio-ondemand applications and the like) or on physical media (compact discs, digital versatile discs, semiconductor chips, hard drives, memory cards and the like). An independent license for such use is required. For details, please visit http://mp3licensing.com. © 2012 3M. All Rights Reserved.
Need help?
Do you have a question about the mp220 and is the answer not in the manual?
Questions and answers