EnGenius EAP300 User Manual
802.11b/g/n wireless indoor access point
Hide thumbs
Also See for EAP300:
- Quick installation manual (3 pages) ,
- Manual (64 pages) ,
- Manual (64 pages)
Table of Contents
Advertisement
Quick Links
Advertisement
Table of Contents

Related Manuals for EnGenius EAP300


Summary of Contents for EnGenius EAP300
-
Page 2: Table Of Contents
Table of Contents Introduction ..................................5 Before you Begin ................................9 Configuring Your Access Point ............................17 Building a Wireless Network ............................20 Status ....................................24... - Page 3 System ....................................32 Wireless .................................... 37 Management..................................56...
- Page 4 Appendix A – FCC Interference Statement .......................... 79 Appendix B – Industry Canada Statement........................... 80 Appendix C – CE Interference Statement..........................81...
- Page 5 Revision History Version Date Notes...
-
Page 6: Introduction
1 Introduction EAP300 1.1 Features and Benefits Features Benefits High Speed Data Rate Up to 300Mbps Capable of handling heavy data payloads including video multimedia streaming. 10/100 Fast Ethernet Supports up to 100 Mbps wired networking speed. IEEE 802.11n Compliant and Backwards Fully compatible with IEEE 802.11b/g/n devices. -
Page 7: Package Contents
O Offers an additional layer of protection within the network by isolating specific clients. Power-over-Ethernet (IEEE802.3af) Enables the EAP300 to be powered via Ethernet cable so it can be deployed on ceilings or in crawlspaces where electrical outlets may not be available. -
Page 8: System Requirements
• • 1.3 System Requirements • • • 1.4 Applications a) Difficult-to-Wire Environments b) Temporary Workgroups c) The Ability to Access Real-Time Information... - Page 9 d) Frequently Changing Environments e) Small Office and Home Office (SOHO) Networks f) Wireless Extensions to Existing Ethernet-based Networks g) Training/Educational Facilities...
-
Page 10: Before You Begin
2 Before you Begin 2.1 Considerations for Wireless Installation • • •... - Page 11 2.2 Computer Settings (in Windows XP/Windows 7) Start Control Panel •...
- Page 12 Windows XP Network Connection • Windows 7 View Network Status and Tasks Network and Internet Change • adapter settings Local Area Connection Properties •...
- Page 13 Internet Protocol Version 4 (TCP/IPv4) • Properties Use the following IP address • Note:...
- Page 14 Computer Settings in Apple Mac OS X System Preferences Applications • Network Internet & Network • Ethernet • Configure IPv4 Manually • • Note Apply •...
- Page 15 2.4 Hardware Installation POWER WLAN...
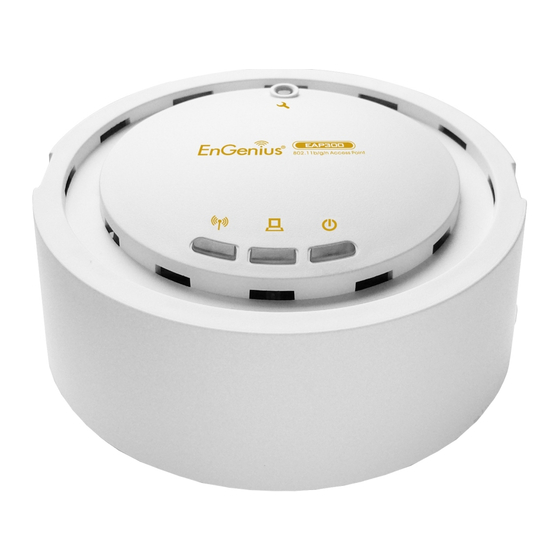
- Page 17 Front Panel Reset Button One click for reset the device. Press over 10 seconds for reset to factory default. LED Lights LED lights for Wireless, Ethernet port and Power. Rear Panel DC IN DC IN for Power. Ethernet Port Ethernet port for RJ-45 cable.
-
Page 18: Configuring Your Access Point
3 Configuring Your Access Point 3.1 Default Settings Default Settings xxxxxx Note: xxxxxx represented in the wireless SSID above is the last 6 characters of your device MAC Address. This can be found on the device body label and is unique for each device. -
Page 19: Web Configuration
3.2 Web Configuration http://192.168.1.1 • Note: If you have changed the default LAN IP Address of the Access Point, ensure you enter the correct IP Address. admin • Login... - Page 20 •...
-
Page 21: Building A Wireless Network
4 Building a Wireless Network 4.1 Access Point Mode... - Page 22 4.2 WDS AP Mode...
-
Page 23: Wds Bridge Mode
4.3 WDS Bridge Mode Note: WDS Bridge Mode does not act as an Access Point. Access Points linked by WDS are using the same frequency channel. More Access Points connected together may lower throughput. This configuration can be susceptible to generate endless network loops in your network, so it is recommended to enable the Spanning Tree setting (see 6.3 Spanning Tree Setting, below) to prevent this from happening. - Page 24 4.4 Repeater mode...
-
Page 25: Status
Status Status 5.1 Save/Reload Unsaved changes list... - Page 26 5.2 Main Main Status Home System Information Note:...
- Page 27 LAN Settings Current Wireless Settings Note:...
-
Page 29: Wireless Client List
5.3 Wireless Client List Wireless Client List Status Kick Refresh Note: Only applicable in Access Point, WDS AP, and Repeater mode. -
Page 30: Connection Status
5.4 Connection Status Connection Status Status Note: Only applicable in Repeater mode. - Page 31 5.5 WDS Link List WDS Link List Status Note: Only applicable in WDS AP and WDS Bridge mode.
-
Page 32: System Log
5.6 System Log System Log Status System Log Refresh Update the log. Clear Clear the log. -
Page 33: Operation Mode
6 System 6.1 Operation Mode System Properties Device Name Enter a name for the device. The name you type appears in SNMP management. This name is not the SSID and is not broadcast to other devices. Country/Region Select a Country/Region to conform to local regulations. Operation Mode Use the radio button to select an operating mode. - Page 34 6.2 IP Settings...
- Page 35 IP Settings IP Network Setting Select whether the device IP address will use the static IP address specified in the IP Address field or be obtained automatically when the device connects to a DHCP server. IP Address The IP Address of this device. IP Subnet Mask The IP Subnet Mask of this device.
-
Page 36: Spanning Tree Setting
6.3 Spanning Tree Setting Spanning Tree Spanning Tree Status Enable or disable the Spanning Tree function. Bridge Hello Time Specify Bridge Hello Time, in seconds. This value determines how often the device sends hello packets to communicate information about the topology throughout the entire Bridged Local Area Network. - Page 37 Priority Specify the Priority number. Smaller number has greater priority. Accept / Cancel Click Accept to confirm the changes or Cancel to cancel and return previous settings.
- Page 38 7 Wireless 7.1 Wireless Network Access Point / WDS AP mode:...
- Page 39 Wireless Network (Access Point / WDS AP mode) Wireless Mode Wireless mode supports 802.11b/g/n mixed mode. Channel HT Mode The default channel bandwidth is 20/40MHz. The larger the channel, the better the transmission quality and speed. Extension Channel Select upper or lower channel. Your selection may affect the Auto channel function. Channel / Frequency Select the channel and frequency appropriate for your country’s regulation.
- Page 40 SSID Profile SSID Specify the SSID for the current profile. VLAN ID Specify the VLAN tag for the current profile. Suppressed SSID Check this option to hide the SSID from clients. If checked, the SSID will not appear in the site survey.
- Page 41 Wireless Network (Repeater mode) Wireless Mode Wireless mode supports 802.11b/g/n mixed mode. SSID The SSID is a unique named shared amongst all the points of the wireless network. The SSID must be identical on all points of the wireless network and cannot exceed 32 characters. You may specify an SSID or select one from the Site Survey.
-
Page 42: Wireless Security
7.2 Wireless Security Note: Only in Access Point and WDS AP mode. WEP Encryption: WEP Encryption Auth Type Select Open System or Shared Key. Input type ASCII: regular text (recommended) HEX: for advanced users Key Length Select the desired option, and ensure the wireless clients use the same setting. Choices are 64, 128, 152-bit password lengths. - Page 43 Default Key Select the key you wish to be the default. Transmitted data is ALWAYS encrypted using the Default Key; the other Keys are for decryption only. You must enter a Key Value for the Default Key. Encryption Key # Enter the key value or values you wish to use.
- Page 44 WPA Encryption: Only in Access Point / WDS AP mode WPA Encryption Encryption Select the WPA encryption type you would like. Please ensure that your wireless clients use the same settings. Radius Server Enter the IP address of the Radius server. Radius Port Enter the port number used for connections to the Radius server.
- Page 45 Radius Accounting Secret Enter the secret required to connect to the Radius accounting server. Interim Accounting Interval Specify how often, in seconds, the accounting data sends. Note...
-
Page 46: Site Survey
7.3 Site Survey Note: Only applicable in Repeater mode. Site Survey... - Page 48 Site Survey (Repeater mode) BSSID Access Point's wireless MAC address. SSID SSID that the Access Point is broadcasting. Channel Channel that the Access Point is using. Signal Level (dBm) Signal strength from the Access Point to your station. Type The band that the Access Point is using. Security Encryption method that the Access Point is using to secure data over the WLAN.
- Page 49 Accept...
-
Page 50: Wireless Mac Filter
7.4 Wireless MAC Filter Disabled Note: Only in Access Point, WDS AP and Repeater mode. Wireless Filter (Access Point / WDS AP / Repeater mode) ACL Mode Determines whether network access is granted or denied to clients whose MAC addresses appear in the MAC Address table on this page. - Page 51 7.5 Wireless Advanced...
- Page 52 Wireless Advanced Data Rate Select a data rate from the drop-down list. The data rate affects throughput. If you select a low data rate value, for example, the throughput is reduced but the transmission distance increases. Transmit Power Set the power output of the wireless signal. RTS/CTS Threshold Specify the threshold package size for RTC/CTS.
- Page 53 7.6 WPS (Wi-Fi Protected Setup) Note: Only in Access Point and WDS AP mode.
- Page 54 WPS (Wi-Fi Protected Setup) Select Enable or Disable the WPS feature. WPS Current Status Shows whether the WPS function is Configured or unConfigured. When it is Configured, the WPS has been used to authorize connection between the device and wireless clients. Self Pin Code The PIN code of this device.
-
Page 55: Wds Link Settings
7.7 WDS Link Settings Note Also note To create a WDS network, please enter the MAC addresses of the Access Points that you want included in the WDS. There can be a maximum of four access points in WDS AP mode and eight access points in WDS Bridge mode. Note: Only applicable in WDS AP and WDS Bridge mode. - Page 56 WDS Link Settings Security Select None or WEP or AES from drop-down list. WEP Key Enter the key values you wish to use if selecting WEP. Note: Only applicable in WDS Bridge mode. AES Passphrase Enter the key values you wish to use if selecting AES. MAC Address Enter the Access Point’s MAC address to which you want to extend the wireless area.
- Page 57 8 Management 8.1 Administration admin admin Login Setting New Name Enter a new username for logging in to the Web Configurator. New Password Enter a new password for logging in to the Web Configurator. Confirm Password Re-enter the new password for confirmation. Save/Apply / Cancel Click Save/Apply to apply the changes or Cancel to return previous settings.
-
Page 58: Management Vlan
Click Accept to confirm the changes or Cancel to cancel and return previous settings. Note: 1. If you reconfigure the Management VLAN ID, you may lose your connection to the EAP300. Verify that the DHCP server supports the reconfigured VLAN ID and then reconnect to the EAP300 using the new IP address. - Page 59 VLAN Setup Save & Apply Save/Reload Status...
- Page 60 Access Point...
- Page 61 Edit Isolation Enable...
- Page 63 Accept Save/Reload...
- Page 66 8.3 SNMP...
- Page 67 SNMP SNMP Enable/Disable Enable or Disable SNMP feature. Contact Specify the contact details of the device Location Specify the location of the device. Community Name (Read Only) Specify the password for the SNMP community for read only access. Community Name (Read/Write) Specify the password for the SNMP community with read/write access.
- Page 68 Restore Saved Settings To restore settings that have been previously backed up, click Browse, select the file, and from A File click Restore. Revert to Factory Default Click Factory Default button to restore the EAP300 to its factory default settings. Settings...
- Page 69 8.5 Auto Reboot Auto Reboot Auto Reboot Setting Select Enable from the drop-down menu to setup this function. Frequency of Auto Reboot Select the frequency interval using the drop-down menus. Save/Apply / Cancel Click Save/Apply to apply the changes or Cancel to return previous settings.
-
Page 70: Firmware Upgrade
8.6 Firmware Upgrade To perform the Firmware Upgrade: Browse Upgrade File Upload Note: The device is unavailable during the upgrade process and must restart when the upgrade is completed. Any connections to or through the device will be lost. -
Page 71: Time Setting
8.7 Time Setting Time Manually Set Date and Time Manually specify the date and time. Automatically Get Date and Select a time zone from the drop-down list and check whether you want to Time enter the IP address of an NTP server or use the default NTP server to get have the internal clock set automatically. -
Page 72: Cli Setting
8.8 CLI Setting CLI Setting Select ON or OFF to enable or disable the ability to modify the EAP300 via a command line interface (CLI). Save/Apply / Cancel Click Save/Apply to apply the changes or Cancel to return previous settings. - Page 73 8.9 Log Syslog Enable or disable the syslog function. Log Server IP Address Enter the IP address of the log server. Local Log Enable or disable the local log service. Save/Apply / Cancel Click Save/Apply to apply the changes or Cancel to return previous settings.
- Page 74 8.10 Diagnosis...
- Page 75 Start Speed Test Click Start Speed Test to begin the speed test operation. IPv4 / IPv6 Port EAP300 use IPv4 port 5001 and IPv6 port 5002 for the speed test. Please run iperf server (iperf -s) in the target PC.
-
Page 76: Device Discovery
8.11 Device Discovery Device Discovery Device Name Displays the name of the devices connected to the network. Operation Mode Displays the operation mode of the devices connected to the network. IP Address Displays the IP address of the devices connected to the network. System MAC Address Displays the system MAC address of the devices connected to the network. - Page 77 8.12 LED Control...
- Page 78 8.13 Logout Logout Management...
- Page 79 8.14 Reset Reboot the Device...
- Page 80 Appendix A – FCC Interference Statement Federal Communication Commission Interference Statement This equipment has been tested and found to comply with the limits for a Class B digital device, pursuant to Part 15 of the FCC Rules. These limits are designed to provide reasonable protection against harmful interference in a residential installation. This equipment generates uses and can radiate radio frequency energy and, if not installed and used in accordance with the instructions, may cause harmful interference to radio communications.
- Page 81 Appendix B – Industry Canada Statement This device complies with RSS-210of the Industry Canada Rules. Operation is subject to the following two conditions: (1) This device may not cause harmful interference, and (2) this device must accept any interference received, including interference that may cause undesired operation. Ce dispositif est conforme à...
- Page 82 Appendix C – CE Interference Statement Europe – EU Declaration of Conformity This device complies with the essential requirements of the R&TTE Directive 1999/5/EC. The following test methods have been applied in order to prove presumption of conformity with the essential requirements of the R&TTE Directive 1999/5/EC: EN60950-1 Safety of Information Technology Equipment EN50385...
- Page 83 This device may not be used for setting up outdoor radio links in France and in some areas the RF output power may be limited to 10 mW EIRP in the frequency range of 2454 – 2483.5 MHz. For detailed information the end-user should contact the national spectrum authority in France. 0560 [Jméno výrobce] [typ zařízení]...
- Page 84 [name of manufacturer / izgatavotāja nosaukums] [type of equipment / iekārtas tips] [manufacturer name] [equipment type] [naam van de fabrikant] [type van toestel] [isem tal-manifattur] [il-mudel tal-prodott] [gyártó neve] [... típus] [nazwa producenta] [nazwa wyrobu] [Nome do fabricante] [tipo de equipamento] [Ime proizvajalca] [tip opreme] [Meno výrobcu]...
Need help?
Do you have a question about the EAP300 and is the answer not in the manual?
Questions and answers