
Related Manuals for Samsung SCC-C9302P


Summary of Contents for Samsung SCC-C9302P
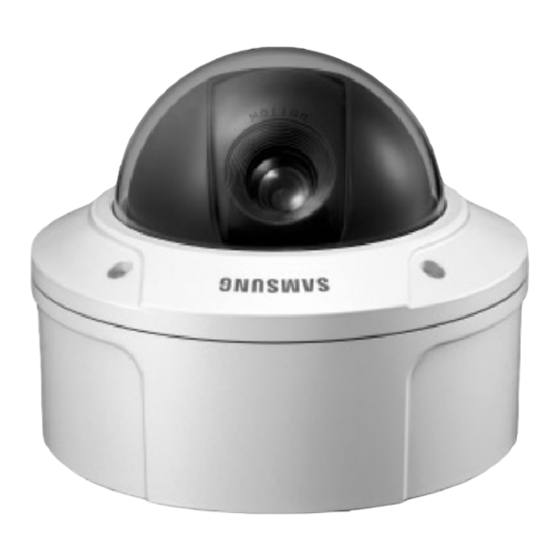
- Page 1 ANTI-VANDAL DOME CAMERA SCC-C9302(F)P User’s Manual Bedienungsanleitung Guide de l’utilisateur Guía del Usuario Manuale d’uso...
-
Page 2: Important Safety Instructions
Connect the alarm signal wires to the alarm terminals. Connect the DC12V power adapter to the SCC-C9302P power input, making sure that the currect polarity is observed. Connect the DC12V or AC24V power adapter to the SCC-C9302P power input. -
Page 3: Fcc Statement
Safety Precautions FCC Statement 6. Do not place conductive objects (e.g., screwdrivers, coins, and metal things) or containers filled with water on top of the camera. This device complies with Part 15 of the FCC Rules. Operation is subject (Serious injury may result from fire, electrical shock, or falling objects.) to the following two conditions: 7. -
Page 4: Table Of Contents
Table of Contents Chapter 1 Chapter 1 Overview ................ Introduction ................ 8 Overview Part Names and Functions ..........9 Chapter 2 Installing the Camera ..........Before Installation ..............12 Preparing Cables ..............16 This chapter briefly introduces the Camera and Installing the Camera ............17 describes its key features, part names and functions. -
Page 5: Introduction
White Balance function that provides accurate color rendition under any light source, the BLC function that enables effective back light compensation even at locations with bright incident light, and the Rear View Auto Focus function that automatically tracks and focuses on the moving subject. SCC-C9302P SCC-C9302F... -
Page 6: E Chapter
Part Names and Functions Chapter 2 Camera Operation Switches (Setup Switches) The functions of the camera operation switches change Installing the Camera depending on whether the Camera is currently in the usual operation mode (i.e., the setup menu is not showing on the screen) or the setup menu mode. -
Page 7: Before Installation
HUD 5 installation location (to strengthen ANCHOR the installation). Use to block holes on the ceiling BH M5 X L6... ASSY SCREW SCC-C9302P:8EA assembly of the CASE when installing the PIPE,WALL MACHINE SCC-C9302F:4EA WHITE+0 RING MOUNT and other items. Anti-Vandal Dome Camera User’s Guide... - Page 8 - Be careful not to let the cable be jammed in inappropriate places or to let B : Use when directly installing on the JUNCTION BOX - SCC-C9302P can be assembled into a 4 1/8" DIAMETER ROUND the insulation covering of the cable peel off during installation.
-
Page 9: Preparing Cables
Preparing Cables Installing the Camera The following cables are required to install and use the Camera. Installing on a PIPE (for SCC-C9302P) 1. Carefully read the 'Before Installation'section before starting installation. Power Adapter Cable Video Cable - All holes that are not used for installation must be closed up with the... - Page 10 CASE firmly adjust the BOLT into place to make it waterproof.) clockwise to reassemble it. - To change the direction of the SAMSUNG LOGO on the DOME COVER,change the assemble location (Check to see if the O RING (P22 T2.4) of the connection rubber and turn it back into place is attached to the CAP-BOLT.
- Page 11 Installing the Camera For SCC-C9302P Installing on the ceiling 1. Carefully read the 'Before Installation' section before starting installation. - All holes that are not used for installation must be closed up with the SCREWs provided in your ACCESSORY set as described in the installation HOLE section.
- Page 12 2) Pull the right and left levers inwards toward the arrow directions and then release the latch and disassemble the bundle. 3. Pass the ALARM CABLE through the PIPE assembly hole of SCC-C9302P and then connect it to the ALARM TERMINAL of the PCB.
-
Page 13: Connecting Cables And Checking Operations
2. Next, connect the other end of the BNC cable to the video input terminal of the power adapter into the power receptacle. monitor. 5. If the camera operates normally, the following screen will be displayed for 5 sec- onds before it disappears. SAMSUNG PROTOCOL ADDRESS TYPE RS-485, HALF... -
Page 14: Chapter 3 Setup Menu Overview
Structure of the Setup Menu CAMERA ID ON.../OFF Chapter 3 IRIS ALC.../WDR.../MANU... SHUTTER OFF/1/100 ~ 1/10K/AUTO X2~X160 Setup Menu Overview AGC/MOTION OFF/LOW/HIGH(AGC) S.SLOW/SLOW/NORM/ FAST/F.FAST(MOTION) WHITE BAL ATW1/ATW2/AWC/MANU... This chapter looks into the overall organization of the setup FOCUS MODE menus and explains their functions. MF/ONEAF ALARM SET COLOR/BW... -
Page 15: Camera Menu Organization
CAMERA MENU Organization CAMERA ID In the CAMERA ID menu, you may designate the CAMERA ID to be displayed in the monitor CAMERA ID ON... (IRIS/ALC) connected to a camera. Set the CAMERA ID menu to ON... and press [ENTER] and the IRIS ALC... - Page 16 CAMERA MENU Organization (IRIS/ALC) SIZE WDR(Wide Dynamic Range) enlarges the advantage of a screen, mostly effective photographing both indoor and outdoor subjects simultaneously. In short, both subjects can be distinctly revived. Select WDR... and press [ENTER] to set up WDR LEVEL. PRESS THE USER...
-
Page 17: Shutter
CAMERA MENU Organization SHUTTER In the SHUTTER menu, you may determine the fast electronic shutter speed or MANU slow AUTO shutter speed. The fast electronic shutter supports 7 speeds from When you press [ENTER] key after selecting MANU in the IRIS item, an additional 1/100(1/120) sec. -
Page 18: Agc/Motion
CAMERA MENU Organization The DIS feature is unavailable while setting the AUTO slow shutter. WHITE BAL If you set SHUTTER to between AUTO X4... and AUTO X128..., FOCUS mode will be displayed as “MF”(the product can operate only in MF mode). You can’t adjust the You can select one of four modes for white balance adjustment as follows: settings manually. -
Page 19: Focus Mode
CAMERA MENU Organization ALARM SET (MANU) The Alarm Set feature consists of one Alarm In and one Alarm Out, which detects an Alarm In signal from an external sensor and moves to the position pre-defined by the Position Set for the alarming process. Then, it returns to the original position. And it also transfers the Alarm Out signal to external devices. -
Page 20: Color/Bw
CAMERA MENU Organization COLOR/BW COLOR/BW turns IR(Infrared) Filter on or off. In the poor illumination environment, turns SIZE (MOTION DET) IR Filter off to raise the sensitivity to the same level as an black-and-white camera while in the good illumination environment, turns it on to convert to the COLOR mode in the normal screen condition to lower the sensitivity. - Page 21 CAMERA MENU Organization AUTO This is the IR Filter OFF mode, black-and-white Depending on illumination, it is automatically switched to the COLOR or BW mode. (with the same sensitivity as a black-and-white camera). Select BW... and press In the poor illumination environment, turns IR Filter off to convert to the Black-and- [Enter] and the BW submenu will appear.
-
Page 22: Privacy
CAMERA MENU Organization PRIVACY This function designates an area that may violate PRIVACY and hides it when the camera PRIVACY NO. shoots a screen including the area to protect Privacy. Up to 8 PRIVACY ZONEs are available for setup. After PRIVACY menu setup, press ENTER to enter the PRIVACY MAP POSITION SET SIZE PRESS THE... -
Page 23: Special
CAMERA MENU Organization SPECIAL In SPECIAL menu, you can set the settings related to the VIDEO signals and various additional C-LEVEL : It is used to set the levels for the Burst signal and the entire colour functions. signal of the video signal. OTHER SET : In OTHER SET menu, you can adjust LANGUAGE, ZOOM SPEED, D-ZOON, RS-485, SYSTEM INFO..., and V-SYNC function, etc. - Page 24 LANGUAGE ENGLISH ROM VER 0.207 ZOOM SPEED EEP VER 0.208 DIGITAL ZOOM as follows. PROTOCOL SAMSUNG RS-485 ADDRESS PRESS THE SYSTEM INFO ZOOM SPEED 1 : About 17Sec. from X 1 to X 12(Slowest) TYPE RS-485, HALF ENTER V-SYNC BAUD RATE...
-
Page 25: Preset
CAMERA MENU Organization PRESET EXIT Select the PRESET menu and press [ENTER] and the PRESET MAP submenu screen The EXIT menu is used to terminate the CAMERA SETUP menu. will appear. - QUIT : Select to ignore any changes you have made and restore the previously saved settings. - Page 26 SCC-C9302P SCC-C9302(F)P Unit : mm Unit : mm...
-
Page 27: External Connector Pin Specifications
External Connector Pin Specifications Product Specifications CN 52 : Camera Power Input and Video Signal Output Item Description Product Type Anti-Vandal Dome Camera Power Source Voltage AC 24V ± 10% (NTSC:60Hz ± 0.1Hz, PAL:50Hz ± 0.1Hz), DC12V +10% ~ -5% Pin No Pin Specifications Power Consumption... - Page 28 Weight SCC-C9302P : 1.1Kg / SCC-C9302F : 0.88Kg (Net Weight) Business users should contact their supplier and check the terms and conditions of the purchase contract. This product should not be mixed with...
- Page 29 ELECTRONICS Part No. AB68-00578A(00)
- Page 30 Anti-Vandalismus Dome Kamera SCC-C9302(F)P Bedienungsanleitung...
- Page 31 Alarmanschlüße an. aus. Setzen Sie die Kamera keinen Starken Vibrationen oder magnetischen Störfeldern aus. Der DC12V Netzadapter an die SCC-C9302P Netzsteckdose anschließen und 2. Die Kamera darf nicht an Orten mit hohen Temperaturen bzw .tiefen Temperaturen oder hoher achten Sie dabei auf die richtige Polarität.
- Page 32 Inhalt Kapitel 1 Übersicht ................ Einführung................6 Kapitel 1 Bezeichnung der Teile und ihre Funktionen ...... 7 Kapitel 2 Installation der Kamera ..........Übersicht Überprüfung des Lieferumfangs ........10 Vorsichtsmaßnahmen für Installation und Gebrauch....12 Vorbereitung der Kabel ............14 Dieses Kapitel enthält eine kurze Einführung in die Kamera Installation der Kamera............15 und beschreibt ihre Hauptmerkmale, die Bezeichnung der Anschluss der Kabel und überprüfung des Betriebs ....22...
-
Page 33: Einführung
Wenig-Light-Überwachungsfunktion ermöglicht die Aufnahme bewegter Objekte bei sehr geringer Beleuchtung , die Wei·abgleichsfunktion sorgt für eine exakte Farbwiedergabe bei einer beliebigen Lichtquelle, die BLC-Function erlaubt eine wirkungsvolle Gegenlichtkompensation auch an Orten mit starkem Lichteinfall und die Autofokusfunktion verfolgt und fokussiert bewegte Objekte automatisch. Rückseite SCC-C9302P SCC-C9302F... -
Page 34: Installation Der Kamera
Bezeichnung der Teile und ihre Funktionen Kapitel 2 Kamerabedienungsschalter (Einstellschalter) Die Funktionen der Schalter im Kamerabedienfeld Installation der Kamera ändern sich je nachdem, ob sich die Kamera gerade in der Normalbetriebsart (wo das Einstellmenü nicht auf dem Bildschirm angezeigt wird) oder im Einstellmenümodus befindet. -
Page 35: Überprüfung Des Lieferumfangs
SCHRAUBENLÖCHER ein, um die ANCHOR Aufhängung zu stabilisieren. Verwenden Sie diese Schrauben, um Löcher in der Deckenaufhängung BH M5 X L6... ASSY SCREW SCC-C9302P:8EA des GEHÄUSES zu verschließen, wenn Sie das ROHR, die MACHINE SCC-C9302F:4EA WHITE+0 RING WANDABDECKUNG oder andere Bestandteile montieren. - Page 36 B: Verwendung bei Montage direkt an der VERTEILERDOSE - Das Modell SCC-C9302P kann auf einer RUNDEN VERTEILERDOSE - Stellen Sie sicher, dass kein Kabel eingeklemmt ist und die Isolierung mit einem DURCHMESSER von 10,5 cm montiert werden. Das Modell während der Installation nichtbeschädigt wird.
-
Page 37: Vorbereitung Der Kabel
Installation der Kamera Folgende Kabel werden für die Installation und den Einsatz der Kamera benötigt. Montage an einem ROHR (für SCC-C9302P) 1. Lesen Sie sich vor der Montage den Abschnitt „Vor der Installation“ sorgfältig durch. - Alle bei der Installation nicht benutzten Löcher müssen, wie im Abschnitt zur Beschreibung der LÖCHER für die Installation beschrieben, mit den... - Page 38 HUTSCHRAUBE wieder ins GEHÄUSE SCHRAUBENSCHLÜSSEL fest an, damit das Gerät einzusetzen, indem Sie diese im Uhrzeigersinn wasserdicht ist.) - Um die Ausrichtung des SAMSUNG-LOGOS auf der drehen. KUPPELABDECKUNG zu verändern, setzen Sie das (Stellen Sie sicher, dass sich an der Verbindungsgummi, wie in der folgenden Grafik dargestellt, neu ein (nur 180°).
- Page 39 Installation der Kamera For SCC-C9302P Deckenmontage (für SCC-C9302P) 1. Lesen Sie sich vor der Montage den Abschnitt „Vor der Installation“ sorgfältig durch. - Alle bei der Installation nicht verwendeten Löcher müssen, wie im Abschnitt zur Beschreibung der LÖCHER für die Installation beschrieben, mit den mitgelieferten SCHRAUBEN verschlossen werden.
- Page 40 2) Drücken Sie die Klemmen links und rechts in Pfeilrichtung nach innen, und lassen Sie dann den Schnappverschluss los. Entfernen Sie anschließend die Kamera. 3. Ziehen Sie das ALARMKABEL durch das ROHRLOCH der SCC-C9302P, und schließen Sie es danach an den ALARMANSCHLUSS auf der Platine an.
-
Page 41: Anschluss Der Kabel Und Überprüfung Des Betriebs
2. Schließen Sie als nächstes das andere Ende des BNC-Kabels an die anschließend den Netzadapter in die Steckdose ein. Videoeingangsbuchse des Monitors an.monitor. 5. Wenn die Kamera normal funktioniert, erscheint der folgende Bildschirm und wird nach 5 Sekunden wieder ausgeblendet. SAMSUNG PROTOKOLL ADDRESS TYPE RS-485, HALB... -
Page 42: Übersicht Über Das Einstellmenü
Aufbau des Einstellmenüs KAMARA ID EIN.../AUS Kapitel 3 BLENDE ALC.../WDR.../MANU... AUS/1/100 ~ 1/10K/AUTO X2~X160 SHUTTER Übersicht über das Einstellmenü AGC/AKTIVITAET AUS/WENIG/HICH(AGC) S.LANGS/LANGS/NORM/SCHN/S.SCHN(AKTIVITAET) WEISSABGL ATW1/ATW2/AWC/MANU... Dieses Kapitel gibt einen überblick über den Aufbau der AF/MF/EINAF... FOKUS MODE Einstellmenüs und erläutert ihre Funktionen. ALARM PROG FARBE/S/W FARBE.../S/W.../AUTO... -
Page 43: Aufbau Des Kameramenüs
Aufbau des KAMERAMENÜS KAMERA ID Im KAMERA ID Menü können die KAMERA ID kennzeichnen, um im Monitor der an eine KAMERA ID EIN... (BLENDE/ALC) Kamera angeschlossen wird, angezeigt zu werden. Stellen Sie das KAMERA ID Menü auf EIN BLENDE ALC... SHUTTER ein... - Page 44 Aufbau des KAMERAMENÜS (BLENDE/ALC) GROESSE WDR(Wide Dynamik Range) vergrößert den Vorteil eines Schirmes, meistens wirkungsvoll die Gegenstände, die im Innen oder Außen sind, gleichzeitig zu fotografieren. Kurz gesagt können beide Gegenstände deutlich wieder auferstanden werden. Wählen Sie WDR...aus und betätigen Sie die [EINGABE] Taste, um WDR PEGEL und DIE ENTER BENUTZER...
-
Page 45: Shutter
Aufbau des KAMERAMENÜS SHUTTER Im SHUTTER Menü können Sie die schnelle elektronische Shutter Geschwindigkeit oder MANU langsame Auto Shutter Geschwindigkeit feststellen. Der schnelle elektronische Shutter Wenn Sie im Untermenü Blende auf MANU gehen und die Taste [ENTER] drücken, wird unterstützt stützt 7 Geschwindigkeiten von 1/100(1/120) Sek. zu 1/10K Sek., um ein helles und ein zusätzlicher Bildschirm angezeigt, über den Sie das Öffnen und Schließen der Blende schnelles bewegliches Bild zu fotografieren. -
Page 46: Agc/Aktivitaet
Aufbau des KAMERAMENÜS Wenn Sie für den Modus SHUTTER (Verschluss)eine der Einstellungen AUTO X4... WEISSABGL (AUTO 4fach)bis AUTO X128... (AUTO 128fach)wählen,wird der Modus FOCUS (Fokus)auf dem Bildschirm als „MF“angezeigt, da er nur im Modus MF (Manueller Fokus)funktioniert. Für den Weißlichtabgleich sind drei Einstellungen wie folgt möglich: Diese Einstellung kann nicht manuell konfiguriert werden. -
Page 47: Fokus Mode
Aufbau des KAMERAMENÜS ALARM PROG (MANU) Zur Funktion Alarme Set gehören die Signale Alarme In und Alarme Aus. Sobald das Gerät ein Alar meingangssignal von einem externen Sensor empfängt, schwenkt es zu der vorher unter Positions Prog für den Alarmzustand eingestellten Position. Anschließend schwenkt das Gerät in die Ausgangsposition zurück. -
Page 48: Farbe S/W
Aufbau des KAMERAMENÜS FARBE S/W FARBE/S/W stellt IR(Infrarot) Filter an oder ab. In schlechter Beleuchtung Umgebung stellt IR GROESSE (AKTIVITAET) Filter ab, um die Empfindlichkeit zum gleichen Niveau wie eine Schwarzweiß Kamera zu erhöhen, während es in guter Beleuchtung Umgebung, anstellt, um den Farbe Modus in normalen Schirmzustand zu umwandeln, um die Empfindlichkeit zu senken. - Page 49 Aufbau des KAMERAMENÜS S/W... AUTO... Abhängig von Beleuchtung wird es automatisch zum FARBE oder S/W Modus Dieses ist der IR Filter AUS Modus, Schwarzweiß (mit der gleichen Empfindlichkeit wie geschaltet. In der schlechten Beleuchtung Umgebung, stellt IR Filter ab, um im eine Schwarzweiß...
-
Page 50: Privat
Aufbau des KAMERAMENÜS PRIVAT Diese Funktion bestimmt einen Bereich, der PRIVATLEBEN verletzen kann und versteckt PRIVAT NR. 0 ihn, um Privatleben zu schützen, wenn die Kamera einen Schirm einschließlich des Bereichs aufnimmt. Bis zu den 8 PRIVAT Zonen sind für die Einstellung verfügbar. Nach POSITIONS PROG der PRIVAT Menü... -
Page 51: Spezial
Aufbau des KAMERAMENÜS SPEZIAL In SPEZIAL menu, you can set the settings related to the VIDEO signals and various additional C-Pegel : Hier können Sie den Pegel für das Farbtrager-Signal und für das functions. gesamte Farbsignal des Videosignals einstellen. WEITERE PROG : Im Menü WEITERE PROG können Sie unter anderem die Optionen SPRACHE, CTRL TYPE, ZOOM GESCH, D-ZOOM, RS-485, SYSTEM KAMERA ID EIN... - Page 52 ZOOM GESCH : Verwendet [Links, Rechts] key im Zoom Geschwindigkeit Menü, wie ROM VER 0.207 ZOOM GESCH EEP VER 0.208 DIGITAL ZOOM folgt einzustellen. PROTOKOLL SAMSUNG RS-485 ADRESSE DIE ENTER SYSTEM INFO ZOOM GESCH 1 : Ca. 17Sek. von X 1 zu X 12(langsamste) TYPE RS-485, HALB V-SYNC...
-
Page 53: Preset
Aufbau des KAMERAMENÜS AUSGANG PRESET Wählen Sie das PRESET Menü aus und betätigen Sie die [EINGABE], und dann wird Das AUSGANG Menü wird verwendet, um das Kamera Einstellung Menü zu beenden. der PRESET KARTE Submenü Schirm angezeigt. - VERL : Übergeht alle von Ihnen vorgenommenen Veränderungen und stellt das vorherig gespeicherte Einstellmenu wieder her. - Page 54 SCC-C9302P SCC-C9302(F)P Einheit: mm Einheit: mm...
-
Page 55: Stiftbelegung Des Externen Anschlusses
Stiftbelegung des externen Anschlusses Produktspezifikationen Parameter Beschreibung CN 52 : Kameranetzeingang und Videosignalausgang Produkttyp ANTI-VANDAL DOME KAMERA Spannungsquelle AC 24V ± 10% (NTSC:60Hz ± 0.1Hz, PAL:50Hz ± 0.1Hz), DC12V +10% ~ -5% Stift- Leistungsaufnahme Ca. 6W Stiftbelegung nummer Fernsehnorm NTSC(PAL) Standardfarbsystem VBS_AUS Bildaufnehmer 1/4 Zoll IT S-HAD CCD... - Page 56 Gerät auf umweltfreundliche Weise recyceln können. Abmessungen 150(ø) x 121 mm Gewicht SCC-C9302P : 1.1Kg / SCC-C9302F : 0.88Kg (Nettogewicht) Gewerbliche Nutzer sollten sich an Ihren Lieferanten wenden und die Bedingungen des Verkaufsvertrags konsultieren. Dieses Produkt darf nicht zusammen mit anderem Gewerbemüll entsorgt werden.
- Page 57 ELECTRONICS Part No. AB68-00578A(00)
- Page 58 CAMÉRA DÔME ANTI-VANDALISME SCC-C9302(F)P Guide de l’utilisateur...
- Page 59 CC à l’entrée d’alimentation de 3. Evitez un emplacement exposé aux rayonnements direct du soleil ou proche des sources de SCC-C9302P en respectant la polarité. chaleur telles que les radiateurs. Connectez l’adaptateur de puissance 12V CC ou 24V CA à l’entrée (Ne pas respecter ceci risque de provoquer un incendie.)
- Page 60 Sommaire Chapitre 1 Vue d’ensemble .............. Introduction ................6 Chapitre 1 Nomenclature des pièces et fonctionnalités ......7 Chapitre 2 Installation de la caméra dôme Caméra ....Vue d’ensemble Vérifiez soigneusement le contenu du carton ......10 Précautions à prendre lors de l’installation et de l’utilisation de la caméra dôme ..............12 Suggestions d’installation ............13 Caractéristiques du cordon d’alimentation et du câble vidéo ..14...
-
Page 61: Introduction
CJOUR (Backlight Compensation), corrige les effets d’éclairage en contre- jours même dans des conditions de très forte luminosité ; mise au point automa- tique, effectue la mise au point automatiquement pour capter les sujets animés avec précision. SCC-C9302P SCC-C9302F... -
Page 62: Installation De La Caméra Dôme Caméra
Nomenclature des pièces et fonctionnalités Commutateurs de fonctionnement (commutateurs de réglage) Chapitre 2 Les fonctions des commutateurs de fonctionnement changent selon que la Caméra est en mode de fonction- Installation de la caméra dôme nement normal (le menu de configuration principal n’est pas affiché... -
Page 63: Vérifiez Soigneusement Le Contenu Du Carton
ANCHOR (pour renforcer l'installation). Utilisation pour obstruer les trous en vue d’une BH M5 X L6... ASSY installation au plafond du SCC-C9302P:8EA SCREW WHITE+0 BOITIER lors du montage du SCC-C9302F:4EA MACHINE TUYAU, de la FIXATION RING MURALE et des autres éléments. - Page 64 B : à utiliser pour une installation directe sur la BOITE DE JONCTION. DOME (modèle SCC-C9302P). - Le modèle SCC-C9302P peut être monté dans une BOITE DE - Attention à ne pas coincer le câble ou retirer la gaine d'isolation de ce JONCTION RONDE D'UN DIAMETRE DE 10,5 cm.
-
Page 65: Caractéristiques Du Cordon D'alimentation Et Du Câble Vidéo
Installation de la caméra dôme Caméra et du câble vidéo Le cordon et le câble suivants sont nécessaires à l’installation et à l’utilisation de la Installation sur un TUYAU (modèle SCC-C9302P) Caméra. 1. Lisez attentivement le chapitre « Avant l'installation » avant de procéder à... - Page 66 étanche). le BOULON DU CHAPEAU préalablement - Pour modifier le sens du LOGO SAMSUNG sur le DOME DE PROTECTION, modifiez l'emplacement démonté du BOITIER afin de le remonter d'assemblage du caoutchouc de connexion et (vérifiez que le JOINT TORIQUE (P22 T2.4) est...
- Page 67 Installation de la caméra dôme Caméra For SCC-C9302P Installation au plafond (modèle SCC-C9302P) 1. Lisez attentivement le chapitre “Avant l'installation” avant de procéder à l'installation. - Tous les trous non utilisés pour l'installation doivent être bouchés à l'aide des VIS fournies avec les ACCESSOIRES, comme décrit dans le chapitre concernant les TROUS d'installation.
- Page 68 3. Passez le CABLE D'ALARME à travers le trou de montage du TUYAU du modèle SCC-C9302P, puis branchez-le sur la BORNE D'ALARME de la carte de circuit imprimé. Retirez le bouchon en caoutchouc situé sur le modèle SCC-C9302F, puis passez à...
-
Page 69: Connexions Électriques Et Vérification Du Fonctionnement
Branchez le cordon de l’adaptateur sur la prise d’alimentation. 2. Branchez l’autre extrémité du câble BNC sur la prise d’entrée vidéo du moniteur. 5. Si la caméra fonctionne correctement, l’écran suivant s’affichera pendant cinq secondes. SAMSUNG PROTOCOLE ADRESSE TYPE... -
Page 70: Aperáu Général Du Menu De Configuration Principa
Structure du menu de configuration principal ON.../OFF Chapitre 3 Aperáu général du menu de configuration principa T.LENT/LENT/NORM/VITE/T.VITE(MOUVE) AF/MF/UNAF... Le présent chapitre présente l’organisation globale du menu de PROG ALARME configuration principal et ses fonctions. ON.../OFF LANGAGE ZOOM VITESSE / ZOOM DIGITAL / / DISPLAY ZOOM... -
Page 71: Disposition Du Menu De La Camera
Disposition du MENU de la CAMÉRA CAMERA ID Dans le menu ID CAMERA, vous pouvez sélectionner le nom de caméra à afficher sur le CAMERA ID ON... (IRIS/ALC) moniteur connecté à une caméra. Réglez le menu ID CAMERA sur ON... et appuyez sur le IRIS ALC... - Page 72 Disposition du MENU de la CAMÉRA (IRIS/ALC) TAILLE WDR (Wide Dynamic Range) augmente la capacité d’un écran, permettant une photographie efficace des sujets aussi bien de l’intérieur que de l’extérieur. En bref, les deux sujets peuvent être séparément ranimés. Sélectionnez WDR... et appuyez sur APPUYEZ SUR [Entrée] pour configurer le NIVEAU WDR et ANTI-BATTEMENT (Stabilisation de l’image).
-
Page 73: Shutter
Disposition du MENU de la CAMÉRA SHUTTER Dans le menu SHUTTER, vous pouvez définir la vitesse de l’obturateur électronique rapide ou la vitesse d’obturateur automatique lent. L’obturateur électronique rapide supporte 7 vitesses à MANU savoir de 1/100(1/120) sec à 1/10K sec pour photographier une image lumineuse ayant des Si vous appuyez sur la touche [Entrée] après avoir sélectionné... -
Page 74: Cag/Mouve
Disposition du MENU de la CAMÉRA Lorsque la fonction SHUTTER (OBTURATEUR) est réglée entre AUTO X4... BAL BLANCS (X4 AUTOMATIQUE) et AUTO X128... (X128 AUTOMATIQUE), le mode FOCUS (MISE AU POINT) apparaît sous la forme “ MF ” (l'appareil fonctionne en mode MF (Mise au point manuelle) uniquement). -
Page 75: Mode Focus
Disposition du MENU de la CAMÉRA (MANU) PROG ALARME La fonction Alarme Set se compose d'une entrée Alarme In et d'une sortie Alarme Sortie. Cett e fonction permet de détecter un signal d'entrée d'alarme provenant d'un capteur externe et de passer à... -
Page 76: Couleur/N&B
Disposition du MENU de la CAMÉRA COULEUR/N&B La fonction COULEUR/NB permet d’activer ou désactiver le Filtre IR (Infrarouge). Dans des TAILLE (DET MOUVE) conditions de faible éclairage, désactivez le Filtre IR afin d’augmenter la sensibilité au même niveau que celle d’une caméra monochrome dans des conditions d’éclairage fort et activez- le pour convertir le mode vers le mode COULEUR avec des écrans normaux afin de diminuer APPUYEZ SUR LE BOUTON... - Page 77 Disposition du MENU de la CAMÉRA AUTO Le mode se bascule automatiquement entre le mode COULEUR et le mode NB N&B selon l’éclairage. Dans des conditions de faible éclairage, désactivez le filtre IR pour Le mode Filtre IR est désactivé : monochrome (avec la même sensibilité qu’une caméra convertir le mode vers le mode LB afin d’obtenir une meilleure sensibilité...
-
Page 78: Privee
Disposition du MENU de la CAMÉRA PRIVEE Cette fonction désigne une aire qui pourrait porter atteinte à la privee et la cache lorsque PRIVEE NO. la caméra filme un écran y compris la zone pour protéger la privee. Jusqu’à 8 zones privées peuvent être installées. -
Page 79: Special
Disposition du MENU de la CAMÉRA SPECIAL Dans le menu SPECIAL, vous pouvez effectuer les réglages concernant les signaux VIDEO et C-NIVEAU : cette fonction permet de régler l'option Levels (Niveaux) du signal Burst diverses fonctions supplémentaires. (S.porteuse) ainsi que la totalité du signal Couleur du signal vidéo. Dans le menu OTHER SET (AUTRE PROG), vous pouvez régler entre autre les fonctions CAMERA ID ON... - Page 80 VERS ROM 0.207 ZOOM VITESSE VERS EEP 0.208 VITE ZOOM : Utilisez dans le menu VITESSE ZOOM pour régler la vitesse ZOOM DIGITAL PROTOCOLE SAMSUNG RS-485 ADRESSE APPUYEZ SUR comme suit : INFO SYSTEME TYPE RS-485, DEMI V-SYNC LE BOUTON...
-
Page 81: Preset
Disposition du MENU de la CAMÉRA PRESET SORTIE Sélectionnez le menu PRESET et appuyez sur le bouton [Entrée] pour afficher l’écran de Le menu QUITTER est utilisé pour quitter le menu CONFIGURATION CAMERA. sous-menu PLAN PRESET. - QUITTER : A sélectionner pour ignorer toute modification apportée et restaurer les paramètres précédents. - Page 82 SCC-C9302P SCC-C9302(F)P Unité : mm Unité : mm...
-
Page 83: Caractéristiques Techniques Du Connecteur Externe À Broches
Caractéristiques techniques du connecteur Caractéristiques Techniques externe à broches Article Description CN 52 : Entrée de courant et sortie du signal vidéo Type de produit CAMÉRA DÔME ANTI-VANDALISME Tension de la source d’alimentation AC 24V ± 10% (NTSC:60Hz ± 0.1Hz, PAL:50Hz ± 0.1Hz), DC12V +10% ~ -5% Consommation d’électricité... - Page 84 Dimensions 150(ø) x 121 mm Poids SCC-C9302P : 1.1Kg / SCC-C9302F : 0.88Kg (Poids net) Les entreprises sont invitées à contacter leurs fournisseurs et à consulter les conditions de leur contrat de vente. Ce produit ne doit pas être éliminé...
- Page 85 ELECTRONICS Part No. AB68-00578A(00)
- Page 86 CÁMARAAVTIVANDÁLICATIPO DOME SCC-C9302(F)P Guía del Usuario...
- Page 87 (El no respetar estas advertencias puede causar incendios o descargas eléctricas.) entrada de corriente SCC-C9302P, cerciorándose de que la polaridad sea 3. Evite exponer el producto a la luz solar directa, o a fuentes de calor tales como calefactores o radiadores.
- Page 88 Contenido Capítulo 1 Resumen ................ Introducción ..............6 Capítulo Nombres de los componentes y funciones ...... 7 Capítulo 2 Instalación de la Cámara .......... Resumen Revisión del contenido del paquete ........10 Precauciones de instalación y uso........12 Preparación de los cables ..........14 Instalación de la Cámara ..........15 Este capítulo presenta en forma resumida el Cámara y describe sus Conexión de los cables y comprobación de las...
-
Page 89: Introducción
CLUZ que permite una efectiva compensación de contraluz en lugares con mucha luz Vista posterior incidente, y la función de Enfoque automático que rastrea y enfoca automática- mente el sujeto en movimiento. SCC-C9302P SCC-C9302F... -
Page 90: Instalación De La Cámara
Nombres de los componentes y funciones Conmutadores de operación de la cámara (Conmutadores de configuración) Capítulo Las funciones de los conmutadores de operación de la cámara dependen de si la Cámara está en ese momento Instalación de la Cámara en el modo de operación normal (p.ej., el menú de con- figuración no aparece en la pantalla) o en el modo de configuración del menú. -
Page 91: Revisión Del Contenido Del Paquete
ANCHOR la instalaci ó n sea m á s segura). Utilice los orificios de bloque en el BH M5 X L6... ASSY SCREW SCC-C9302P:8EA conjunto para techo de la CAJA al instalar el TUBO, MONTAJE EN MACHINE WHITE+0 RING SCC-C9302F:4EA PARED y otros elementos. - Page 92 B: Se utiliza al instalar directamente en la CAJA DE CONEXIONES NDALISMO (SCC-C9302P). - SCC-C9302P se puede montar en una CAJA DE CONEXIONES DE - Tenga cuidado de que el cable no se dirija por lugares inapropiados y de TIPO REDONDEADO DE 4 1/8 PULG.
-
Page 93: Preparación De Los Cables
Instalación de la Cámara Los siguientes cables son necesarios para instalar y usar la Cámara. Instalaci ó n en un TUBO (para SCC-C9302P) 1. Lea detenidamente la secci ó n 'Antes de la instalaci ó n'antes de iniciar Cable de adaptador la instalaci ó... - Page 94 CAJA para - Para cambiar la direcci ó n del LOGOTIPO DE SAMSUNG en la CUBIERTA DEL DOMO,cambie el volver a montarlo. punto de montaje de la goma de conexi ó n y g í rela a (Compruebe si LA JUNTA T Ó...
- Page 95 Instalación de la Cámara For SCC-C9302P Instalaci ó n en el techo (para SCC-C9302P) 1. Lea detenidamente la secci ó n 'Antes de la instalaci ó n'antes de iniciar la instalaci ó n. - Todos los orificios que no se utilizan para la instalaci ó n deben estar cerrados con los TORNILLOS que se facilitan en el juego de ACCESORIOS como se describe en la secci ó...
- Page 96 2) Tire de las palancas derecha e izquierda en la direcci ó n de las flechas, libere el pestillo y desmonte el paquete. 3. Pase el CABLE de ALARMA por el conjunto del TUBO de SCC-C9302P y conecte el TERMINAL DE LA ALARMA del PCB.
- Page 97 Después, enchufe firmemente el adaptador en el del monitor. receptáculo de corriente. 5. Si la cámara funciona normalmente, aparecerá la siguiente pantalla durante 5 segundos antes de desaparecer. SAMSUNG PROTOCOL ADDRESS TYPE RS-485, HALF BAUD RATE...
-
Page 98: Estructura Del Menú De Configuración
Estructura del menú de configuración CÁMARA ID ACTIVAR.../APAGAR Capítulo DIAFRAGMA ALC...WDR...MANU... OBTURADOR APAGAR/1/100 ~ 1/10K/AUTO X2 ~ X160 Vista general del menú de CGA/MOVI APAGAR/BASO/ALTO(CAG) configuración M.DULC/DULC/NORM/RÁPIDO/R.RÁPIDO(MOVI) BA1/BA2/BM/MANU... AF/MF/UNOAF... MODO FOCO En este capítulo se revisa la organización general de los menús de ALARMA PROG configuración y se explican sus funciones. -
Page 99: Organización De La Pantalla Cámara Menú
Organización de la pantalla CÁMARA MENÚ CÁMARA ID ACTIVAR... (DIAFRAGMA/ALC) DIAFRAGMA ALC... CÁMERA ID OBTURADOR APAGAR BAJO BAL BLANCO En el menú de CAMERA ID, usted puede designar CAMERA ID el cual se mostrará en el monitor MODO FOCO UNOAF conectado a una cámara. - Page 100 Organización de la pantalla CÁMARA MENÚ (DIAFRAGMA/ALC) DIMENSION WDR (Gama Dinámica Ampliada) amplia la ventaja de una pantalla, fotografiando efectivamente ambas posiciones tanto interiores como exteriores de forma simultánea. En activación, ambos sujetos pueden ser reconocidos de forma distinta. Seleccione PRESIONE EL WDR...
-
Page 101: Obturador
Organización de la pantalla CÁMARA MENÚ OBTURADOR En el menú de OBTURADOR, usted puede determinar la velocidad electrónica rápida del MANU obturador o la velocidad lenta del AUTO obturador. El obturador electrónico rápido Cuando pulse la tecla [ENTER] tras seleccionar MANU en la opción DIAFRAGMA, dispone 7 velocidades a partir 1/100(1/120) seg. -
Page 102: Cag/Movi
Organización de la pantalla CÁMARA MENÚ BAL BLANCO Si define SHUTTER (OBTURADOR)entre AUTO X4... y AUTO X128...,aparecer á el modo FOCUS (ENFOQUE)como “MF“(s ó lo est á operativo en modo MF (MF)). No puede ajustar manualmente los valores. Si lo define en APAGAR (NO)o 1/100(1/120) Usted puede seleccionar uno de cuatro modos para el ajuste de balance blanco como ~1/10K, la unidad recuperar á... -
Page 103: Modo Foco
Organización de la pantalla CÁMARA MENÚ ALARMA PROG (MANU) La función Alarm Set (Ajustar alarma) se compone de Alarm In (Alarma Entr.) y Alarm Out (Alarma Sal.), que detecta la señal de entrada de alarma desde un sensor externo y se mueve a la posición predefinida mediante Position Set (Ajuste de posición) para el proceso de alarma. -
Page 104: Color/Byn
Organización de la pantalla CÁMARA MENÚ COLOR/ByN COLOR/ByN enciende o apaga el filtro de IR(infrarrojo). En un ambiente pobre de DIMENSION (DET MOVI) iluminación, se apaga el filtro IR paraaumentar la sensibilidad al mismo nivel como una cámara blanca y negro mientras que en el buen ambiente de la iluminación, lo enciende parapasar al modo de COLOR a una condición normal de la pantalla para bajar la PRESIONE EL BÓTON... - Page 105 Organización de la pantalla CÁMARA MENÚ AUTO Dependiendo de la iluminación, se cambia automáticamente al modo de COLOR o Esto es el modo de FILTRO IR APAGAR, blanco y negro de ByN. En un ambiente pobre de iluminación, se apaga el filtro IR para convertir al (con la misma sensibilidad como una cámara blanca y negra).
-
Page 106: Privada
Organización de la pantalla CÁMARA MENÚ PRIVADA Esta función designa un área que pueda violar la PRIVADA y la oculta cuando la cámara PRIVADA NO. dispara una pantalla incluyendo el área para proteger la Privada. Hasta 8 ZONAS de la PRIVADA están disponibles para la configuración. -
Page 107: Especial
Organización de la pantalla CÁMARA MENÚ ESPECIAL En el menú ESPECIAL, puede definir los ajustes relacionados con las señales de vídeo y C-NIVEL : se utiliza para a justar los niveles de la señal Burst (Ráfaga) y toda la diversas funciones adicionales. señal de color de vídeo. - Page 108 VEL ZOOM para fijar la velocidad como sigue. VEL ZOOM EEP VER 0.208 ZOOM DIGITAL APAGAR PROTOCOLO SAMSUNG VEL ZOOM 1 : Sobre 17Seg. de X 1 a X12 (más lento). RS-485 DIRECCIÓN PRESIONE EL INFOR. SISTEMA TIPO RS-485, MEDIO VEL ZOOM 2 : Sobre 10Seg.
-
Page 109: Preset
Organización de la pantalla CÁMARA MENÚ PRESET SALIDA Seleccione el menú de PRESET y presione [ ENTER ] y la pantalla del submenu de El menú de SALIDA se utiliza para terminar el menú de CONFIGURACIÓN de PRESET MAP aparecerá. CÁMARA. - Page 110 SCC-C9302P SCC-C9302(F)P Unidad : mm Unidad : mm...
-
Page 111: Especificaciones De Las Clavijas Del Conector Externo
Especificaciones de las clavijas del conector externo Especificaciones del producto CN 52 : Entrada de energía de la cámara y salida de la señal de video ARTÍCULO DESCRIPCIÓN Tipo de producto CÁMARA ANTIVANDÁLICA TIPO DOMO Voltaje del suministro de energía CA 24V ±... - Page 112 150(ø) X 121 mm un reciclaje ecológico y seguro. Peso SCC-C9302P : 1.1Kg / SCC-C9302F : 0.88Kg (Peso neto) Los usuarios comerciales pueden contactar con su proveedor y consultar las condiciones del contrato de compra. Este producto no debe eliminarse...
- Page 113 ELECTRONICS Part No. AB68-00578A(00)
- Page 114 TELECAMERA PANORAMICA ANTI- VANDALISMO SCC-C9302(F)P Manuale d’uso...
- Page 115 Collegare l’alimentatore 2. Non installare in ambienti soggetti a temperature troppo elevate o troppo basse o molto umidi. DC12V all’ingresso dell’alimentazione di SCC-C9302P, rispettando le (così facendo si potrebbero provocare incendi o scariche elettriche). 3. Evitate di installare l'apparecchio in luoghi esposti alla luce solare diretta o in prossimità di fonti di polarità.
- Page 116 Sommario Capitolo 1 Capitolo 1 Panoramica ............5 Introduzione ..............6 Nomi e funzioni dei componenti ..........7 Panoramica Capitolo 2 Installazione dell’ Camera ........9 Verifica del contenuto della confezione......10 Precauzioni per l’installazione e l’uso ........12 Preparazione dei cavo ............14 Questo capitolo introduce brevemente l’apparecchio Camera Installazione dell’Camera ..........15 riportando caratteristiche principali, nomi dei componenti e...
-
Page 117: Introduzione
Vista posteriore zione BLC consente un’efficace compensazione della retroilluminazione anche in luoghi con elevata luce incidente; infine, la funzione di messa a fuoco automatica rintraccia e mette automaticamente a fuoco il soggetto in movimento. SCC-C9302P SCC-C9302F... -
Page 118: Installazione Dell' Camera
Nomi e funzioni dei componenti Interruttori per il funzionamento della telecamera Capitolo 2 (dipendenti dalla modalità impostata) Le funzioni degli interruttori per il funzionamento della tele- Installazione dell’ Camera camera variano a seconda che la telecamera SCC-931 TP si trovi nella modalità operativa abituale (con il menu di setup non visualizzato sullo schermo) oppure nella modalità... -
Page 119: Verifica Del Contenuto Della Confezione
ANCHOR la stabilit à . Durante l ’installazione del TUBO, del SUPPORTO PER MONTAGGIO BH M5 X L6... ASSY SCREW SCC-C9302P:8EA A MURO e degli altri elementi, utilizzare i fori di blocco MACHINE SCC-C9302F:4EA WHITE+0 RING dell ’elemento per il montaggio su soffitto del TELAIO. - Page 120 VIDEOCAMERA A CUPOLA ANTI-VANDALI (SCC-C9302P). B: Utilizzare per l ’installazione diretta su CASSETTA DI GIUNZIONE. - SCC-C9302P pu ò essere assemblato in una CASSETTA DI - Durante l ’installazione, prestare attenzione a non fare impigliare il cavo e a GIUNZIONE ROTONDA DEL DIAMETRO DI 4 1/8". SCC-C9302F è...
-
Page 121: Preparazione Dei Cavo
Preparazione dei cavo Installazione dell’Camera Per installare e utilizzare l’Camera, sono necessari i seguenti cavi. Installazione su TUBO (per SCC-C9302P) 1. Leggere attentamente la sezione'Prima dell’installazione'prima di iniziare l’installazione. Cavo adattatore di Cavo video alimentazione - Tutti i fori non utilizzati per l’installazione devono essere chiusi con le VITI... - Page 122 Utilizzare la CHIAVE A L per fissare saldamente il in senso orario il DADO precedentemente BULLONE e garantirne l’impermeabilit à. - Per cambiare la direzione del LOGO SAMSUNG smontato dal TELAIO per montarlo nuovamente. sul COPERCHIO A CUPOLA, modificare il punto di Controllare che l’O RING (P22 T2.4)sia fissato...
- Page 123 Installazione dell’Camera For SCC-C9302P Installazione su soffitto (per SCC-C9302P) 1. Leggere attentamente la sezione'Prima dell ’installazione'prima di iniziare l ’installazione. - Tutti i fori non utilizzati per l ’installazione devono essere chiusi con le VITI fornite nel set di ACCESSORI, come descritto nella sezione sul FORO di installazione.
- Page 124 ’elemento di fermo e smontare il gruppo. 3. Fare passare il CAVO DI ALLARME attraverso il foro di assemblaggio del TUBO di SCC-C9302P, quindi collegarlo al TERMINALE DI ALLARME del PCB. 5. Regolare l ’OBIETTIVO nella direzione desidera e montare il Rimuovere l ’arresto in gomma su SCC-C9302F, quindi fare passare nuovamente il...
-
Page 125: Collegamento Dei Cavi E Controllo Delle Operazioni
2. Collegare quindi l’altra estremità del cavo BNC al terminale di ingresso video del l’apposita presa. monitor. 5. Se la telecamera funziona normalmente, la seguente schermata verrà visualiz- zata per 5 secondi, dopodiché scomparirà. SAMSUNG PROTOCOL DIRECCIÓN TYPE RS-485, HALF... -
Page 126: Panoramica Del Menu Di Setup
Struttura del menu di setup Capitolo 3 ON.../OFF Panoramica del menu di setup AGC/ACTIVITY M.LENTO/LENTO/NORM/VELOC/M.VELOC(ACTIVITY) Questo capitolo descrive l’organizzazione complessiva dei menu di OAF/MF/UNOAF... setup e le relative funzioni. PROG ALLARMI ON.../OFF LINGUA/VEL ZOOM / ZOOM DIGITALE / / DISPLAY ZOOM USCITA... -
Page 127: Organizzazione Menu Camera
Organizzazione MENU CAMERA ID CAMERA Nel menu ID CAMERA, si può assegnare un numero di identi-ficazione alla telecamera che ID CAMERA ON... (IRIS/ALC) compare sul monitor in stato di connessione. Impostare il menu ID CAMERA su ON e premere IRIS ALC... - Page 128 Organizzazione MENU CAMERA (IRIS/ALC) DIMENSIONE La telecamera WDR (Wide Dynamic Range) ha una tecnologia che permette di aumentare il guadagno dello schermo,molto efficace per riprese in luoghi sia esterni che interni. In breve, questa funzione permette di ottenere immagini nitide. Selezionare WDR PREMERE IL e premere [ENTER] per impostare il livello WDR e FLICKERLESS.
-
Page 129: Shutter
Organizzazione MENU CAMERA SHUTTER Nel menu SHUTTER si può impostare la velocità dellolo shutter elettronico ad alta velocità e MANU dello shutter automatico a bassa velocità. Lo shutter elettronico ad alta velocità supporta 7 Quando si preme il tasto [ENTER] dopo aver selezionato MANU nell’opzione IRIS, viene velocità, da 1/100 (1/120) a 1/10K secondi, per riprendere immagini video veloci e luminose. -
Page 130: Agc/Activity
Organizzazione MENU CAMERA Se si imposta lo SHUTTER (OTTURATORE)tra AUTO X4... e AUTO X128..., la modalit à BIL BIANCO FOCUS (MESSA A FUOCO)verr à visualizzata come “MF”(il prodotto funziona solo in mod alit à MF). Non è possibile regolare le impostazioni manualmente. Potete selazionare una delle quattro modalità... -
Page 131: Modalita' Focus
Organizzazione MENU CAMERA PROG ALLARMI (MANU) La funzione Alarm Set (Impostazione allarme) consiste di un Alarm In (Ingresso allarme) e un Alarm Out (Uscita allarme), che rileva un segnale Ent Alarma attraverso un sensore esterno e raggiunge la posizione predefinita dalla funzione Position Set (Impostazione posizione) per il processo di allarme. Quindi, ritorna alla posizione originale. -
Page 132: Colore-B/N
Organizzazione MENU CAMERA COLORE-B/N Nel menu COLORE-B/N è possibile attivare o disattivare il filtro a raggi DIMENSIONE (ACTIVITY DET) infrarossi (IR) In condizioni di scarsa illuminazione, disattivare il filtro IR e la sensibilità alla scarsa illuminazione aumenta fino a raggiungere quella di una telecamerea in bianco e nero. - Page 133 Organizzazione MENU CAMERA B/N... AUTO... La modalità AUTO cambia automaticamente tra la modalità COLORE o B/N a Il filtro IR è disattivato e lo schermo è impostato sulla modalità B/N (con una sensibilità seconda dell'illuminazione. In condizioni di scarsa illuminazione, disattivare il filtro IR equivalente a quella di una telecamera B/N).
-
Page 134: Privacy
Organizzazione MENU CAMERA PRIVACY Questa funzione designa una area che può violare PRIVACY e nasconderlo quando la PRIVACY NO. camera spara uno schermo incluso l’area per preteggere Privacy. Sopra 8 ZONE PRIVACY sono disponibile per setup. Dopo il menu setup PRIVACY, premere ENTER PROG POSIZIONE DIMENSIONE …... -
Page 135: Speciale
Organizzazione MENU CAMERA SPECIALE Nel menu SPECIALE, è possibile impostare i valori dei segnali VIDEO e altre funzioni. C-LIVELLO : E’ utilizzato per impostare i livelli del segnale Burst e il colore complessivo del segnale video. ALTRA PROG : Nel menu ALTRA PROG, è possibile regolare le opzioni LINGUA, VEL ZOOM, D-ZOOM, RS-485, INFO SISTEMA…, la funzione ID CAMERA ON... - Page 136 LINGUA ITALIANO VERS. ROM 0.207 VEL ZOOM VERS. EEP 0.208 come segue: ZOOM DIGITALE PROTOCOLLO SAMSUNG RS-485 INDIRIZZO PREMERE IL EL ZOOM 1 : Ingrandimento x12 in circa 17 secondi: velocità minima INFO SISTEMA TIPO RS-485, HALF PULSANTE V-SYNC VELOCITÁ...
-
Page 137: Preset
Organizzazione MENU CAMERA PRESET USCITA Selezionare il menu PRESET e premere il tasto [ENTER] e apparirà la schermata del Il menu USCITà è usato per determinare il menu CAMERA SETUP. sottomenu PRESET MAP. - QUIT : selezionare QUIT per ignorare tutte le modifiche effettuate e ritornare al menu superiore. - Page 138 SCC-C9302P SCC-C9302(F)P Unità: mm Unità: mm...
-
Page 139: Specifiche Codice Del Connettore Esterno
Specifiche codice del connettore esterno Specifiche del prodotto Elemento Descrizione CN 52 : Alimentazione elettrica videocamera e emissione segnale video Tipo di apparecchio TELECAMERA PANORAMICA ANTI-VANDALISMO Voltaggio sorgente elettrica AC 24V ± 10% (NTSC:60Hz ± 0.1Hz, PAL:50Hz ± 0.1Hz), DC12V +10% ~ -5% Numero Specifiche codice Consumo elettrico... - Page 140 Gli utenti aziendali sono invitati a contattare il proprio fornitore e verificare i termini e le condizioni del contratto di acquisto. Questo prodotto non deve Peso SCC-C9302P : 1.1Kg / SCC-C9302F : 0.88Kg (Peso netto) essere smaltito unitamente ad altri rifiuti commerciali.
- Page 141 ELECTRONICS Part No. AB68-00578A(00)
Need help?
Do you have a question about the SCC-C9302P and is the answer not in the manual?
Questions and answers