Panasonic HX-WA10 Basic Operating Instructions Manual
Hide thumbs
Also See for HX-WA10:
- Owner's manual (216 pages) ,
- Specification sheet (3 pages) ,
- Operating instructions manual (198 pages)
Table of Contents
Advertisement
Basic Operating Instructions
Dual Camera
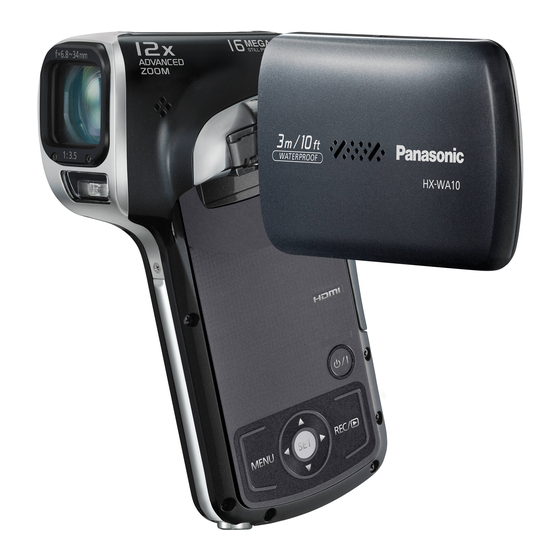
HX-WA10
Model No.
Before use, please read these instructions completely.
More detailed instructions on the operation of this unit are contained
in "Operating Instructions (PDF format)" in the supplied CD-ROM.
Install it on your PC to read it.
VQT3P46
GC GA GN
1AG6P1P6323--(S)
Advertisement
Table of Contents

Related Manuals for Panasonic HX-WA10


Summary of Contents for Panasonic HX-WA10
- Page 1 Basic Operating Instructions Dual Camera HX-WA10 Model No. Before use, please read these instructions completely. More detailed instructions on the operation of this unit are contained in “Operating Instructions (PDF format)” in the supplied CD-ROM. Install it on your PC to read it.
-
Page 2: Information For Your Safety
Dear Customer, CAUTION! We would like to take this i DO NOT INSTALL OR opportunity to thank you for purchasing this Panasonic Dual PLACE THIS UNIT IN A Camera. Please read these BOOKCASE, BUILT-IN Operating Instructions carefully and CABINET OR IN ANOTHER keep them handy for future CONFINED SPACE. - Page 3 Do not disassemble, heat operating the unit and consult the above 60 C or incinerate. Panasonic Customer Care Centre on 132600. Keep this unit as far away as CAUTION possible from electromagnetic Danger of explosion if battery is equipment (such as microwave incorrectly replaced.
- Page 4 IMPORTANT! PLEASE READ k About handling the camera i Opening and closing the battery cover or terminal cover in a sandy or dusty environment may cause water to get inside the camera and result in malfunction, so be especially careful in these environments. i Do not touch the lens or terminals with dirty hands.
- Page 5 Indemnity about recorded content Panasonic does not accept any responsibility for damages directly or indirectly due to any type of problems that result in loss of recording or edited content, and does not guarantee any content if recording or editing does not work properly.
- Page 6 k Concerning this unit’s recording method and compatibility <Video compatibility> i This camera is an MP4 standard (MPEG-4AVC/H.264 format) digital movie camera that records high-definition HDTV video. The AVCHD and MPEG2 video formats are different and are therefore not compatible. i This camera may degrade or be unable to play back videos recorded or created with other products, and other products may degrade or not be able to play back videos recorded with this camera, even if the products...
-
Page 7: Table Of Contents
CONTENTS Information for Your Safety ..............2 IMPORTANT: ABOUT THE WATERPROOF PERFORMANCE OF THE CAMERA ..................9 MAINTENANCE AND WATERPROOF PERFORMANCE ....10 After using in water ................18 CHECKING THE INCLUDED ACCESSORIES ........19 ABOUT THE CARD ................20 Media cards that can be used with this camera (as of February 2011) ...............20 SETUP PARTS NAMES ..................22... - Page 8 OTHER DEVICES AND CONNECTIONS CONNECTING TO A TV CONNECTING TO A TV ..............47 Connecting to a video input terminal ..........48 Connecting to the HDMI terminal ..........48 PLAYING BACK ON A TV ..............49 IMPORTANT MESSAGES AND ALERTS OPTIONAL ACCESSORIES ..............
-
Page 9: Important: About The Waterproof Performance Of The Camera
* This means that the camera can be used underwater for a specified time in a specified pressure in accordance with the handling method established by Panasonic. It does not guarantee against destruction or malfunction, or guarantee waterproofing, in all conditions. -
Page 10: Maintenance And Waterproof Performance
MAINTENANCE AND WATERPROOF PERFORMANCE k Before using the camera in water, please check the following Do not open or close any of the covers in sandy or dusty environments, near the waterside, or with wet hands. Sand or dust adhering to the camera can result in water getting inside. - Page 11 k To prevent water leaking into the camera, please observe the following precautions before using it. k Check that there is sufficient battery power and card memory remaining. k Do not open or close the battery cover or terminal cover in places with sand and dust, or with wet hands.
- Page 12 If there is foreign matter adhering to the camera, use the supplied brush to remove it. h If there is any foreign matter, such as lint, hair, sand, etc., on the parts indicated by the text balloons in the illustration, water will leak inside within seconds and may damage the Brush (supplied) camera.
- Page 13 i If there is liquid on the surface, wipe it off with a soft dry cloth. i The integrity of the rubber seals decreases after about 1 year. It is strongly recommended that you have the seals replaced (subject to a fee) at least once a year at the store where the camera was purchased or at nearby service centre.
- Page 14 HINT i If there is any foreign matter on the camera, use the supplied brush to remove it. i If the camera is used in the following environments, foreign matter such as sand or dust may inadvertently get caught in the gap between the battery cover or terminal cover and the body.
- Page 15 k Causes of water leak i If the camera is used in any of the following conditions, a gap may appear between the camera body and the battery cover or terminal cover, resulting in water seeping in and causing the camera to malfunction. Water can leak inside through the Battery cover...
- Page 16 Wipe off the water, place the camera on a dry cloth and leave it to dry for a while in a well-ventilated shaded spot. Check that there is no water on the camera, and open the battery cover and terminal cover.
- Page 17 k About the water draining design This camera is designed so that water that entered the gaps around the zoom switch etc. drains out. For this reason, bubbles may appear when the camera is immersed in water, but this is not a malfunction. <Draining water from the camera>...
-
Page 18: After Using In Water
After using in water After using the camera in water, wash it with fresh water and dry it completely. Turn off the camera, and close the battery cover and terminal cover securely. Wash the camera with fresh water. h Fill a shallow basin with fresh water, and immerse the closed camera for about 10 minutes. -
Page 19: Checking The Included Accessories
CHECKING THE INCLUDED ACCESSORIES Check the accessories before using this unit. Product numbers correct as of February, 2011. These may be subject to change. Battery pack AC adaptor VW-VBX070 1 (GC) VSK0752 USB cable Hong Kong Special Administrative VFA0544 Region of China and Saudi Arabia 2 (GA) VSK0751 Areas Other than Hong Kong Special Administrative Region of China, Saudi... -
Page 20: About The Card
See the card label to confirm the rating. (Example) Please confirm which of our SD Memory Cards/SDHC Memory Cards/ SDXC Memory Cards can be used with this product by visiting the support web site at the address below. http://panasonic.jp/support/global/cs/e_cam (This website is in English only.) VQT3P46... - Page 21 i 4 GB or more Memory Cards that do not have the SDHC logo or 48 GB or more Memory Cards that do not have the SDXC logo are not based on SD Memory Card specifications. i Cards with capacity larger than 64 GB cannot be used. i When the write-protect switch on the SD card is locked, no recording, deletion or editing will be possible on the card.
-
Page 22: Setup
SETUP SETUP PARTS NAMES Front Speaker Monitor unit Lens Internal Stereo microphone Flash i The flash unit becomes very hot and may cause a burn. Avoid touching the flash unit when shooting. * The tripod mounting hole is on the bottom. Attaching to a tripod having a screw length longer than 5.5 mm may damage the... - Page 23 Rear ] button [@] button Photo shooting Video recording button button Zoom switch button During recording: Zoom photography [W/T] During playback: Volume adjustment Image magnification Playback display switching LCD monitor Status indicator Terminal cover Terminal cover lock USB/AV Battery cover terminal HDMI terminal...
- Page 24 k About the status indicator (See page 178 in the Operating Instructions (PDF format) regarding the charging status.) i The status indicator lights or flashes to Status indicator show the camera’s operating status. Status indicator status Camera status Colour Lit/flashing Accessing built-in memory or...
-
Page 25: Charging The Battery Pack
Please be advised that we are not liable for any accident or failure occurring as a result of use of a counterfeit battery pack. To ensure that safe products are used we recommend that a genuine Panasonic battery pack be used. - Page 26 Recording time Approx. 85 min Playback time Approx. 180 min Recording conditions by CIPA standard i CIPA is an abbreviation of Camera & Imaging Products Association. i Using the supplied battery i Using a Panasonic SD Memory Card (2 GB) VQT3P46...
- Page 27 Open the battery cover. Battery cover lock 2 Open Battery cover 1 Push the battery cover lock to the right to release it. VQT3P46...
- Page 28 Insert the battery pack, then replace the battery cover. h It is possible to insert the battery incorrectly, so please pay particular attention when inserting that it is correctly oriented. <To remove the battery pack...> h Be sure the turn off the camera by pressing the power button until the status indicator (page 24) turns off before removing the battery pack.
- Page 29 Use the USB cable (supplied) to connect the camera and the AC adaptor, and then connect the AC adaptor to a power outlet. h Use only the supplied USB cable. Operation is not guaranteed if a different USB cable is used. h The AC adaptor is for this camera only.
-
Page 30: Installing The Card
INSTALLING THE CARD Before using a newly purchased card or one that was used in another device, be sure to format it with this camera (see pages 113 and 124 in the Operating Instructions (PDF format)). If an unformatted card is used, the card itself may become unusable. - Page 31 HINT Close the battery cover securely i If the battery cover is not closed or is not closed completely, the camera will no longer be waterproof. When closing the battery cover, close it securely while making sure that no foreign object such as sand, hair, dust, etc.
-
Page 32: Turning The Camera On And Off
TURNING THE CAMERA ON AND OFF Turning on the camera Open the monitor unit, and Power button press the power button. h The LCD monitor turns on. Monitor unit LCD monitor <How to open the monitor unit> 90° 180° 105° VQT3P46... -
Page 33: Turning Off The Camera
Turning off the camera Press the power button for at least 1 second. h The camera turns off. h If you briefly press the power button, once, the camera will switch to the sleep mode. VQT3P46... -
Page 34: Date And Time Setting
DATE AND TIME SETTING The camera will record the date and time an image or audio recording is taken so that you can display them during playback. Therefore, before capturing images, make sure the correct date and time are set. h If the screen to set the date and time appears when you turn on the camera, skip to step 3 and follow the steps to set the date and time. - Page 35 Set the clock. CLOCK SET 1 Select [TIME]. 2 Press the SET button. h The Set Time Screen 19 : 30 TIME appears. 3 Set the time to “19:30”. h The time is set in the following order: Set the hour ENTER →...
-
Page 36: Date And Time Backup
HINT To correct the date and time settings 1 Turn on the camera. 2 Display the Option Setting Menu 1 (see page 109 in the Operating Instructions (PDF format)). 3 Select [CLOCK SET] and press the SET button. h The screen to set the date and time appears. h The current date and time settings are shown. -
Page 37: Switching Between The Recording Mode And Playback Mode
SWITCHING BETWEEN THE RECORDING MODE AND PLAYBACK MODE Switch between the recording mode (for recording) and the playback mode (for viewing your recorded images). Turn on the camera (page 32). Press the REC/ button. h The mode changes. h The mode changes each time the REC/ button is pressed. -
Page 38: Intelligent Auto Mode
INTELLIGENT AUTO MODE The following modes (appropriate for the condition) are set just by pointing the unit to what you want to record. button Press the button once to activate the Intelligent Auto (iA) mode. i The icon appears on the LCD monitor. - Page 39 Mode Scene Effect Night Recording night You can record night scenery scenery scenery vividly by slowing the shutter speed. Macro Recording zooming This allows recording in on a flower etc. at very close proximity to the object of recording. Normal Other situations Contrast is adjusted automatically for clear...
-
Page 40: Basic Operation
BASIC OPERATION SHOOTING BASIC OPERATION/SHOOTING VIDEO RECORDING Turn on the camera (page 32), [@] button and set it to the recording mode (page 37). h If the subject is a person, a green double-frame appears around the face (see page 86 in the Operating Instructions (PDF format)). -
Page 41: Taking Photos
TAKING PHOTOS Turn on the camera (page 32), and set it to the recording [O] button mode (page 37). h If the subject is a person, a green double-frame appears around the face (see page 86 in the Operating Instructions (PDF format)). -
Page 42: Macro-Photography (Zoom)
MACRO-PHOTOGRAPHY (ZOOM) Your camera has two zoom functions: Optical zoom and Digital zoom (see page 49 in the Operating Instructions (PDF format)). Point the camera lens at the subject. Zoom switch Push the zoom switch toward [T/]] or [W/P] to compose the desired image. -
Page 43: Playback
PLAYBACK BASIC OPERATION/PLAYBACK PLAYING BACK VIDEOS AND PHOTOS Set the camera to the playback mode (page 37). Yellow frame Select the image to play back. h Use the arrow keys to move the yellow frame to the file you wish to play back. h The image information for the framed image is shown at the 20.12.2011... - Page 44 Video playback operation To do this... Do this Normal forward playback Press the SET button. Stop playback During playback, press [J]. During playback, press the SET button or Pause press [I]. During accelerated playback, press [I]. To play back During forward After pausing playback, press [H].
-
Page 45: How To Save One Frame From A Video As A Photo
How to save one frame from a video as a photo Play back the video. Pause the playback at the point you wish to “snap” a photo. Press the [O] button. h The screen to select the aspect ratio of the photo appears. Select the desired aspect ratio, and press the SET button. -
Page 46: Deleting Images
Deleting images Display the file that you want to delete. Press [I]. h The Confirm Delete Screen appears. Select “DELETE”, and press the SET button. h The current image is deleted. h To return to the Playback Screen, select “EXIT”, and press the SET button. -
Page 47: Other Devices And Connections
OTHER DEVICES AND CONNECTIONS CONNECTING TO A TV CONNECTING TO A TV CONNECTING TO A TV By connecting the camera to a TV, you can play back files from the installed SD card or the built-in memory on the TV. HINT Insert and pull out the cable carefully i When connecting the cables, make sure that the cable plugs are correctly... -
Page 48: Connecting To A Video Input Terminal
Insert the plugs as far as they will go. Set the input to “HDMI”. HDMI mini cable (optional) To HDMI terminal To HDMI terminal on the TV i Always use a genuine Panasonic HDMI mini cable (RP-CDHM15, RP- CDHM30; optional). VQT3P46... -
Page 49: Playing Back On A Tv
PLAYING BACK ON A TV i After connecting the camera to the television, switch the TV input to the terminal to which the camera is connected. i The same playback procedure as when playing back with the camera is used to play back audio recordings as well. i The playback method is the same as when viewing images on the camera’s LCD monitor. -
Page 50: Important Messages And Alerts
IMPORTANT MESSAGES AND ALERTS IMPORTANT MESSAGES AND ALERTS OPTIONAL ACCESSORIES Product numbers correct as of February, 2011. These may be subject to change. i Battery pack (VW-VBX070) i HDMI mini cable (RP-CDHM15, RP-CDHM30) VQT3P46... -
Page 51: Specifications
SPECIFICATIONS Specifications are subject to change due to performance upgrades. Digital Movie Camera Power source: DC 5.0 V (when using AC adaptor) 3.7 V (when using battery) Power consumption: Recording: 2.3W Signal system: 1080/60i, 1080/30p, 720/60p, 720/30p, 480/30p, 540/30p Recording format: Video: MPEG-4 AVC/H.264 file format compliant, iFrame Voice memo:... - Page 52 Zoom: (Photo) 5× optical zoom; (Video) 12× (30p)/6× (60i/60p) advanced zoom Digital zoom; 120× (video mode, 30p mode), 60× (video mode, 60i/60p mode), 50× (photo mode) Image stabiliser: Electronic Monitor: 6.7 cm (2.6”) wide LCD monitor (Approx. 230 K dots) Microphone: Internal stereo microphone Speaker:...
- Page 53 AV multi connector audio output: 155 mV, output impedance 220Ω, 2 ch HDMI mini connector audio output: Linear PCM USB: Reader/writer function SD card: Read/Write (No copyright protection support) Built-in memory: Read/Write Hi-Speed USB (USB 2.0), micro USB connector Webcam Compression: Motion JPEG Image size:...
- Page 54 Water-resistant: Compliant with JIS protection grade 8 standards (according to tests conducted in-house by Panasonic) Can be submerged at a maximum depth of 3.0 m, for up to 60 minutes. Battery operation time: See page 25 k Video Recording media:...
- Page 55 Audio compression: AAC (2 ch) k Photo Recording media: SD Memory Card (FAT12 and FAT16 system compliant) SDHC Memory Card (FAT32 system compliant) SDXC Memory Card (exFAT system compliant) Refer to page 20 for details concerning SD cards that can be used in this unit. Built-in memory: Approx.
-
Page 56: About Copyright
ABOUT COPYRIGHT k Carefully observe copyright laws Whatever you have recorded and created can be used for your personal entertainment only. Under copyright laws, other materials cannot be used without obtaining permission from the holders of the copyrights. It is forbidden to copy the software accompanying this unit, or to reproduce it on a network, without permission. -
Page 57: Reading The Operating Instructions (Pdf Format)
READING THE OPERATING INSTRUCTIONS (PDF FORMAT) More detailed instructions on the operation of this unit are contained in “Operating Instructions (PDF format)” in the supplied CD-ROM. Install it on your computer to read it. k For Windows Turn the PC on and insert the CD-ROM containing the Operating Instructions (supplied). - Page 58 [Adobe(R) Reader(R)] and then follow the messages on the screen to install. k To uninstall the Operating Instructions (PDF format) Delete the PDF file from the “Program Files\Panasonic\HX\” folder. i If the contents in the Program Files folder are not displayed, click the [Show the contents of this folder] to display them.
- Page 59 VQT3P46...
- Page 60 Panasonic Corporation VQT3P46 Web site: http://panasonic.net M0411-0 1AG6P1P6323--(S) © Panasonic Corporation 2011...
Need help?
Do you have a question about the HX-WA10 and is the answer not in the manual?
Questions and answers