VAPamore MR-100 PRIMO Instruction Book And Users Manual
Hide thumbs
Also See for MR-100 PRIMO:
- User manual ,
- Instruction book and users manual (15 pages) ,
- Instruction handbook manual (15 pages)
Table of Contents
Advertisement
Available languages
Available languages
Quick Links
Advertisement
Table of Contents

Subscribe to Our Youtube Channel
Related Manuals for VAPamore MR-100 PRIMO


Summary of Contents for VAPamore MR-100 PRIMO
- Page 1 Mode d’emploi et manuel de l’utilisateur...
-
Page 2: Safety Information
SAFETY INFORMATION GO TO VAPAMORE.COM TO SEE THE MR-100 PRIMO INSTRUCTIONAL VIDEO FAILURE TO FOLLOW SAFETY INFORMATION AND WARNINGS MAY CAUSE PERMANENT DAMAGE AND VOID PRODUCT WARRANTY. use only with a grounded outlet. Only use distiled water. Using hard water can cause calcium or mineral build up and void the warranty. -
Page 3: Parts Overview
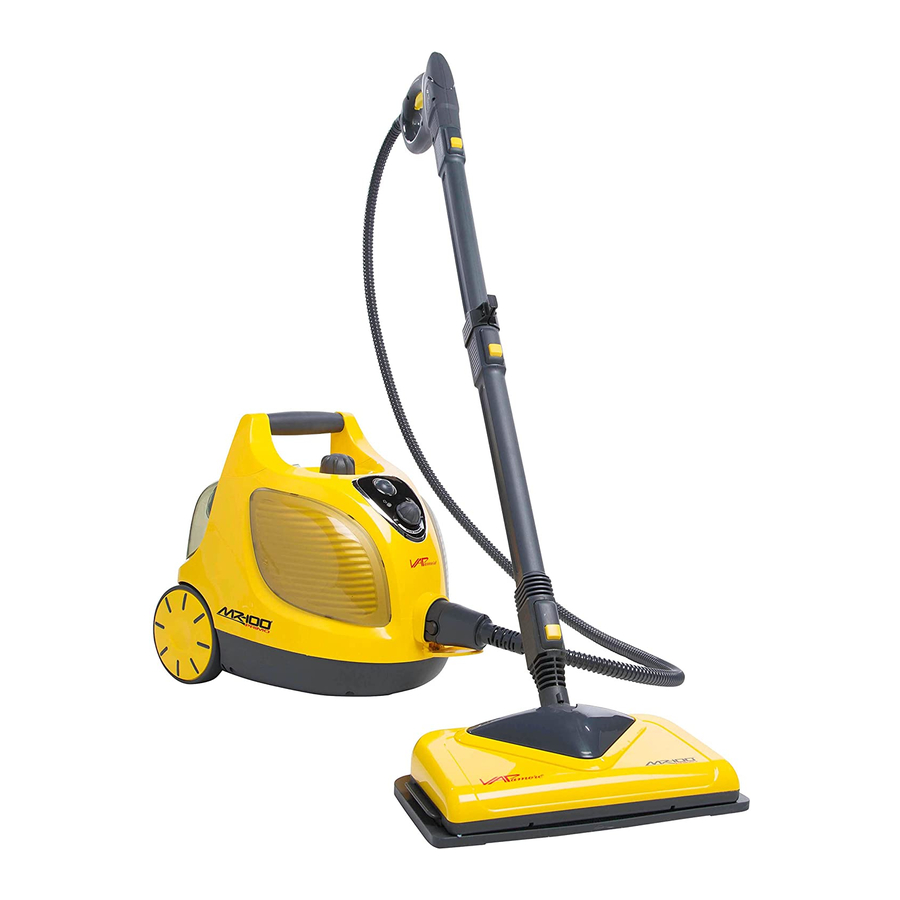
PARTS OVERVIEW GO TO VAPAMORE.COM TO SEE THE MR-100 PRIMO INSTRUCTIONAL VIDEO PARTS LIST TECHNICAL SPECIFICATIONS 10.5lbs - 4.8kg... -
Page 4: Steam Cleaner Assembly
STEAM CLEANER ASSEMBLY GO TO VAPAMORE.COM TO SEE THE MR-100 PRIMO INSTRUCTIONAL VIDEO Fig. 1 Accessory compartment The MR-100 Primo has an accessory compartment that houses the Detail adapter, Jet nozzle attachment, Clothes / fabric - smooth surface tool, and all brushes. Open the accessory compartment by pulling the accessory cover back - away from the machine. -
Page 5: Filling & Operation
FILLING & OPERATION GO TO VAPAMORE.COM TO SEE THE MR-100 PRIMO INSTRUCTIONAL VIDEO To ll the water tank, switch the steam cleaner o and remove the plug from the wall outlet. Allow steam cleaner to cool down before removing water tank cap. Unscrew the water tank cap (Fig.7) by pressing the cap down and simultaneously turning counter... -
Page 6: Operation
OPERATION GO TO VAPAMORE.COM TO SEE THE MR-100 PRIMO INSTRUCTIONAL VIDEO Vapamore at a Fig.12 (Fig.12) the steamer is always on the oor or at surface when in operation. The red WARNING: Hot steam may escape when opening the cap if the machine is not fully cooled o and / or all the remaining pressure is not released. - Page 7 OPERATION GO TO VAPAMORE.COM TO SEE THE MR-100 PRIMO INSTRUCTIONAL VIDEO Fig.13 ‘ ’ CLICK Attach the oor cleaning head to the end of the extension tube (use 1 to 3 tubes as desired). Ensure that the oor cleaning head clicks into place. (Fig.13)
- Page 8 OPERATION GO TO VAPAMORE.COM TO SEE THE MR-100 PRIMO INSTRUCTIONAL VIDEO Fig. 19 ACCESSORIES / BRUSHES There are 4 brushes supplied with the Vapamore MR-100 Primo. The brushes attach to the detail adaptor by aligning the arrows and twisting to lock.
- Page 9 The tool supplied with the Vapamore MR-100 Primo allow you to treat all areas where these pest can hide such as bedding, sofas, furniture, pillows, carpet, cracks and crevices that are ideal hiding places for pests.
-
Page 10: Cleaning & Storage
GO TO VAPAMORE.COM TO SEE THE MR-100 PRIMO INSTRUCTIONAL VIDEO CLEANING / MAINTENANCE Always ensure before cleaning or maintaining the Vapamore MR-100 Primo that it is switched of and unplugged from the wall outlet. Only clean the outer surface with a slightly, water moistened cloth. -
Page 11: Troubleshooting
IMPORTANT : Do not return to the place of purchase for warranty or repairs. Only Vapamore is authorized to facilitate all repairs to keep the highest quality and ETL standards. Repairs or tampering by any other party will void the Warranty. - Page 12 TIPS GO TO VAPAMORE.COM TO SEE THE MR-100 PRIMO INSTRUCTIONAL VIDEO TECHNIQUE APPLICATION ATTACHMENT STEAM VOLUME FLOORS / CHEMICAL FREE CLEANING WITH NO RESIDUE LEFT BEHIND Floor Cleaning Head + Sweep or vacuum first. Steam mop with Vinyl Tile Or Vinyl Sheet...
-
Page 13: Need Help
Detailing, Exterior, Engine Medium - High Jet Nozzle for small detail areas. NEED HELP? Visit www.vapamore.com to see video demonstrations and tips along with full details or simply call us at 480-951-8900 or E-mail us at info@vapamore.com WE ARE HERE TO HELP... - Page 14 For this warranty to apply the original purchaser must return the warranty registration form (included in the original packaging or available online at vapamore.com) along with a copy of the original purchase receipt to Vapamore 7464 East Tierra Buena Ln Suite 108 – Scottsdale, AZ 85260 within 15 days after the original purchase date.
-
Page 15: Consignes De Securite
CONSIGNES DE SECURITE Aller sur www.vapamore.com pour voir la vidéo d’instructions du MR-100 Primo ATTENTION : LE NON SUIVI DES CONSIGNES DE SÉCURITÉ ET PRÉCAUTIONS PEUT ENTRAINER DES DOMMAGES PERMANENTS ET L’ANNULATION DE LA GARANTIE DU PRODUIT. Ne pas laisser le nettoyeur vapeur sans surveillance lorsqu’il N’utiliser l’appareil que dans des endroits qui ne contiennent... -
Page 16: Vue D'ensemble Des Accessoires
VUE D’ENSEMBLE DES ACCESSOIRES Aller sur www.vapamore.com pour voir la vidéo d’instructions du MR-100 Primo LISTE DES ACCESSOIRES SPECIFICATIONS TECHNIQUES Entonnoir Modèle: MR-100 Primo Tasse de mesure Alimentation électrique: 120V – 60Hz Pistolet à vapeur avec tuyau et connecteur Puissance de chauffage: 1500W Embout de fixation des accessoires (adaptateur) Vapeur sous pression: 3.5 bar (max) - Page 17 MONTAGE DU NETTOYEUR VAPEUR Aller sur www.vapamore.com pour voir la vidéo d’instructions du MR-100 Primo Ne jamais dévisser le bouchon du réservoir d’eau pendant l’utilisation. Le réservoir est sous pression. Fig. 1 ACCESSOIRES Compartiment des accessoires Le MR-100. Primo a un compartiment pour les accessoires qui contient l’embout de fixation...
- Page 18 REMPLISSAGE ET UTILISATION Aller sur www.vapamore.com pour voir la vidéo d’instructions du MR-100 Primo Pour remplir le réservoir d’eau, toujours s’assurer que le nettoyeur vapeur est éteint et débranché et est froid avant d’enlever le bouchon du réservoir. Dévisser le bouchon du réservoir (Fig.
- Page 19 à une mauvaise utilisation du nettoyeur vapeur ou à une intolérance à la vapeur. NOTE : Le Vapamore est équipé d’un thermostat et d’une protection thermique pour la surchau e. Le nettoyeur vapeur s’éteint automatiquement à une température de 250 degrés F pour éviter une surchau e.
- Page 20 UTILISATION Aller sur www.vapamore.com pour voir la vidéo d’instructions du MR-100 Primo Fig.13 ACCESSOIRES : ACCESSOIRE POUR LES SOLS Enclencher Fixer l’accessoire pour les sols au bout du tube d’extension (utiliser de 1 à 3 tubes selon besoin). S’assurer que l’accessoire soit bien en place (clic).
- Page 21 UTILISATION Aller sur www.vapamore.com pour voir la vidéo d’instructions du MR-100 Primo Fig. 19 ACCESSOIRES / BROSSES Quatre brosses sont fournies avec le Vapamore MR-100. Primo. Attacher les brosses à l’adaptateur en alignant les èches et en tournant pour bloquer. Utilisations suggérées: Brosse en acier: Grilles de fours et de BBQ,...
- Page 22 H1N1 et autres bactéries et virus sans laisser aucun résidus chimiques nocifs après utilisation. Les accessoires fournis avec le Vapamore MR-100 Primo vous permettent de traiter toutes les surfaces où ces insectes se refugient, telles que literies, divans, meubles, coussins, tapis, ssures.
-
Page 23: Nettoyage & Entretien
(voir page de garde du manuel de l’utilisateur) au nettoyeur vapeur en insérant la languette située sur l’accessoire pour les sols dans la fente située sur le coté du Vapamore Les pièces détachées, tubes d’extension et accessoires peuvent être aussi rangés dans le sac de rangement des accessoires fourni. -
Page 24: Depannage
IMPORTANT : Ne pas retourner chez votre revendeur pour la garantie ou les réparations. Seul Vapamore est autorisé à e ectuer toute réparation pour garder le plus haut niveau de qualité et les standards ETL. Toute réparation ou manipulation e ectuée par un tiers annulera la garantie. - Page 25 Garantie un (1) an pièces et main d’œuvre des accessoires et du boitier extérieur. Les accessoires et le boitier extérieur du Vapamore MR-100 Primo sont garantis un an à partir de la date d’achat, contre les défauts de matière et vices de constructions quand l’utilisation de l’appareil est pour un usage domestique normal et opéré...
- Page 26 Vapamore 7464 E. Tierra Buena Lane Suite 108 Scottsdale, AZ 85260...
Need help?
Do you have a question about the MR-100 PRIMO and is the answer not in the manual?
Questions and answers