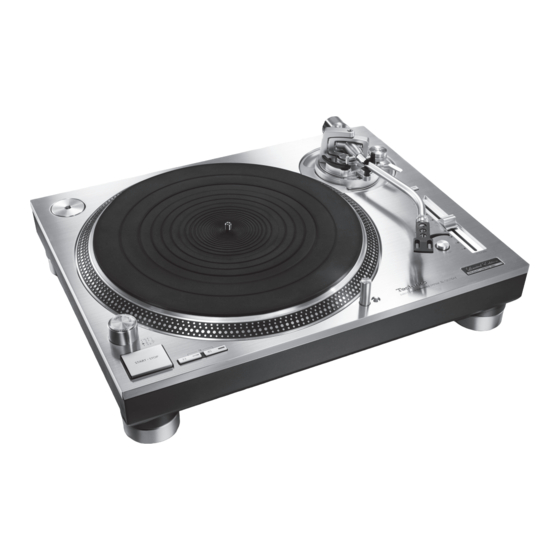
Technics SL-1200GAE Owner's Manual
Direct drive turntable system
Hide thumbs
Also See for SL-1200GAE:
- Operating instructions manual (26 pages) ,
- Owner's manual (52 pages)

Subscribe to Our Youtube Channel
Related Manuals for Technics SL-1200GAE


Summary of Contents for Technics SL-1200GAE
- Page 1 SL-1200GAE Owner's Manual Direct Drive Turntable System Manuel d’utilisation Platine tourne-disque à entraînement direct...
- Page 2 Music is borderless and timeless, touching people’s hearts across cultures and generations. Each day the discovery of a truly emotive experience from an unencountered sound awaits. Let us take you on your journey to rediscover music. Sans frontières, la musique est aussi intemporelle, touchant le coeur des gens en traversant les cultures et les générations.
- Page 3 Delivering the Ultimate Emotive Musical Experience to All At Technics we understand that the listening experience is not purely about technology but the magical and emotional relationship between people and music. We want people to experience music as it was originally intended and enable them to feel the emotional impact that enthuses and delights them.
- Page 4 High-quality terminals z The tone arm pipe employs magnesium which provides high rigidity. z The use of traditional Technics gimbal z The use of brass-milled and gold-plated suspension construction and high-precision terminals prevents degradation in sound bearings attains high initial-motion sensitivity.
-
Page 5: Table Of Contents
Table of contents z Before use IMPORTANT SAFETY INSTRUCTIONS ........6 Accessories ................9 Parts Name ................. 10 z Getting started Putting the player together ..........11 z Attaching the cartridge .......... 11 z Fitting the turntable ..........13 z Fitting the turntable mat ........13 z Attaching the head shell ......... -
Page 6: Important Safety Instructions
IMPORTANT SAFETY INSTRUCTIONS Read these operating instructions carefully before using AC power supply cord the unit. Follow the safety instructions on the unit and z The power plug is the disconnecting device. the applicable safety instructions listed below. Install this unit so that the power plug can be Keep these operating instructions handy for future unplugged from the socket outlet immediately. - Page 7 51分 NSTRUCTIONS The following mark and symbols are located on THE FOLLOWING APPLIES ONLY IN THE U.S.A. bottom of the unit. FCC Note: This equipment has been tested and found to comply with CAUTION the limits for a Class B digital device, pursuant to Part 15 of the FCC Rules.
- Page 8 English...
-
Page 9: Accessories
Accessories In order to prevent damage during shipping some of the equipment has been disassembled. Please check and identify the supplied accessories. Turntable (1 pc.) Turntable mat (1 pc.) Dust cover (1 pc.) (RYQ1618-X) (RGS0008) (RYF1035-Q) EP record adaptor (1 pc.) Balance weight (1 pc.) Auxiliary weight small (1 pc.) (RMX0551) -
Page 10: Parts Name
Parts Name Numbers such as ( 20) indicate reference pages. Arm clamp ( 16) Arm rest ( 16) Cue lever ( 16) EP record adaptor ( 20) Balance weight ( 13) Center spindle ( 12) Stylus pressure control ( ... -
Page 11: Putting The Player Together
Putting the player together Attaching the cartridge Attach a cartridge (store-bought) Adjust the overhang. tentatively. Use the included overhang gauge. Follow the cartridge’s instructions to correctly attach it to the head shell, and tighten the screws lightly. Fit the overhang gauge to the head shell. ... - Page 12 Putting the player together (continued) In order to prevent damage during shipping some of the equipment has been disassembled. Put the player together in the following order. Attention Do not connect the AC power supply cord until set up is complete. Turntable mat Handle carefully as this is heavy.
-
Page 13: Fitting The Turntable
Fitting the turntable Attaching the head shell Insert the center spindle in the Fit the head shell with the cartridge into the tone arm. center hole of the turntable. Keep the head shell horizontal and tighten the locking nut. Attention z Be careful not to touch the stylus tip. -
Page 14: Connections And Installation
Connections and installation z Turn off all units and disconnect the AC power supply cord from the outlet before making any connections. z Connect the AC power supply cord only after all other connections are completed. z Be sure to connect the PHONO earth lead. Otherwise mains hum may occur. z Refer also to the instruction manual of the connected device. -
Page 15: Installation
Installation Notes for installation Install the unit on a horizontal surface „ protected from vibrations. z Before you move the unit, remove all devices Keep this unit as far as possible from speakers. connected and turn off the power supply. z Ensure the unit is not exposed to direct Adjusting the height to make the sunlight, dust, humidity, and heat from a... -
Page 16: Adjustment
Adjustment Horizontal balance Stylus pressure Preparation Preparation z First, remove the dust cover. z First, remove the dust cover. z Remove the stylus cover, taking care not z Return the tone arm to the arm rest and fix it to damage the stylus, then release the arm with the arm clamp. -
Page 17: Anti-Skating
Anti-skating Turn the balance weight to adjust Turn the anti-skating control to to the appropriate stylus pressure adjust it to the same value as the for the cartridge. stylus pressure control. z The stylus pressure control will turn together with the balance weight. z Turn until the center line points to the appropriate stylus pressure. -
Page 18: Tone Arm Height
Adjustment (continued) Tone arm height After arm height adjustment is Make this adjustment only if the cartridge you are using makes it necessary. finished, lock the tone arm by turning the arm lock knob. Preparation z Put a record on the turntable. Release the arm lock. -
Page 19: Armlift Height
Adjusting the turntable startup/ Armlift height brake speed Make an adjustment according to your You can choose manual mode or auto mode. cartridge if necessary. (Factory setting: Auto mode) Preparation Auto mode „ We recommend auto mode that can maximize z Put a record on the turntable. -
Page 20: Playing Records
Playing records Preparation 1 Put a record on the turntable. 2 Take off the stylus cover and release the arm clamp. Turn [ON/OFF] to turn the unit on. Press [START-STOP]. The strobo light comes on. 33-1/3 r/min is The turntable starts revolving. automatically selected and the indicator [33] lights. - Page 21 When play finishes „ Lift the cue lever, return the tone arm to the arm rest and lower the cue lever. Press [START-STOP]. Press [RESET] to light the pitch The electronic brake gently stops the control blue LED lamp. turntable.
-
Page 22: Pitch Control (Fine Adjustment To Pitch)
Pitch control (fine adjustment to pitch) Press [RESET] to turn off the blue To measure pitch „ LED light. The four rows of strobe mirrors around the edge of the turntable can assist you in measuring pitch. Press the pitch range select button to select the pitch range. -
Page 23: Maintenance
Maintenance Care of the parts Cleaning the dust cover „ „ Thoroughly clean dust off the stylus and Wipe the dust cover and cabinet with a soft record. cloth. z Take off the head shell with the cartridge When dirt is heavy, wring a wet cloth tightly to and clean the stylus using a soft brush. -
Page 24: Troubleshooting Guide
See the following website for how to create z Is the AC power supply cord plugged in? a USB memory for version upgrade. Plug the cord in firmly. ( 14) www.technics.com/support/firmware/ There is power but no sound. Turn [ON/OFF] to OFF and Sound is weak. -
Page 25: Specifications
Specifications General Tone arm section Power supply AC 120V, 60 Hz Type Static Balance Power 14 W (Power ON) Effective length 230 mm (9-1/16“) consumption 0.2 W (Power OFF) Overhang 15 mm (19/32“) Dimensions 453 x 173 x 372 mm Tracking error Within 2°... -
Page 26: Limited Warranty (Only For U.s.a.)
Limited Warranty (ONLY FOR U.S.A.) Limited Warranty (ONLY FOR U.S.A.) Limited Warranty (ONLY FOR U.S.A.) Limited Warranty (ONLY FOR U.S.A.) Others Technics Products – Limited Warranty Limited Warranty (ONLY FOR U.S.A.) Technics Products – Limited Warranty Limited Warranty (ONLY FOR U.S.A.) Others Technics Products –... -
Page 27: Limited Warranty (Only For Canada)
3 (three) years parts and labour This warranty is given only to the original purchaser, or the person for whom it was purchased as a gift, of a Technics brand product mentioned above sold by an authorized Panasonic dealer in Canada and purchased and used in Canada, which product was not sold “as is”, and which product was delivered to you in new condition in the original packaging. - Page 28 Panasonic Corporation of North America Panasonic Canada Inc. Two Riverfront Plaza, Newark, NJ 07102-5490 5770 Ambler Drive, http://www.panasonic.com Mississauga, Ontario, L4W 2T3 www.panasonic.com ©Panasonic Corporation 2016 SQT1087-1 S0316AK1046...
Need help?
Do you have a question about the SL-1200GAE and is the answer not in the manual?
Questions and answers