Table of Contents
Advertisement
Quick Links
Owner's Manual
ProSeries Builder Indoor
This instruction contains 5 pages:
Page 1: Foreword
Page 2: Unpack and inspect parts contained
Page 3: Notes before installation
Page 3~4:
Page 5: C
U L
R
Toll Free: 1-855-676-7247
WARNING : Read and follow these instructions carefully and be mindful of all warnings shown throughout.
Hanging System Installation and Wire connection
anopy / Blade / Pull Chain Knob installation
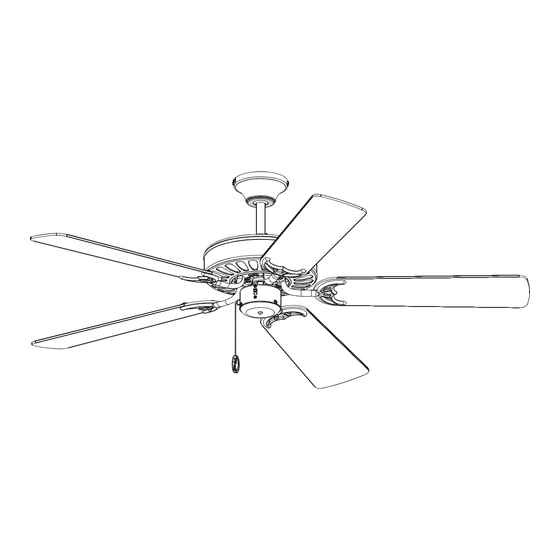
5BD52
Net weight
5.7 KGS.
12.5 LBS.
Advertisement
Table of Contents

Related Manuals for Yosemite 5BD52

Summary of Contents for Yosemite 5BD52
- Page 1 Owner’s Manual ProSeries Builder Indoor 5BD52 This instruction contains 5 pages: Page 1: Foreword Page 2: Unpack and inspect parts contained Page 3: Notes before installation Page 3~4: Hanging system installation and Wire connection Page 5: C anopy / Blade / Pull Chain Knob installation Net weight 5.7 KGS.
- Page 2 READ AND SAVE THESE INSTRUCTIONS WARNING : TO REDUCE THE RISK OF FIRE, ELECTRICAL SHOCK, OR INJURY TO PERSONS, PLEASE OBSERVE THE FOLLOWING : 1]. To ensure the success of the installation, be sure to read the instructions and review the diagrams thoroughly before beginning.
- Page 3 Unpack and inspect fan carefully to be certain all contents are included. Hardware Bag For Mounting Bracket: Mounting Flat Washer x2 Bracket Spring Washer x2 Machine Screw x2 Wood Screw x2 For Wire Connection: Wire Nut x 3 Downrod Assembly For Flush Mount On y: Canopy Set Screw x 3 For Blade Installation:...
- Page 4 WARNING: blades should be at least 7 feet from floor Note 1: Note 2: Turn off power at breaker Use metal outlet box suitable box to avoid possible for fan support. electrical shock. Outlet box must support 35 lbs min. O FF O FF O 1.
-
Page 5: Hanging The Fan
Hanging the fan (For Downrod mount) Rotate fan so that the groove on the ball engages Lift fan assembly onto mounting bracket. the ridge in the mounting bracket. Mounting Bracket Mounting Ridge Bracket Ball Groove 1E. Canopy Assembly 1F. Hanging the fan (For Flush mount) (For Flush mount) Lift the fan assembly and hang onto the tab on... - Page 6 3. CANOPY INSTALLATION Note: Four screws are pre-screwed on mounting bracket for canopy installation. Remove left-hand side screw on mounting bracket first and loosen the other one. Note: Please do the same for the other two screws on the across side of mounting bracket.) Rotate the canopy slightly until both two loosening screws are in the holes of L type slots.
Need help?
Do you have a question about the 5BD52 and is the answer not in the manual?
Questions and answers