Table of Contents

Related Manuals for General Climate ac-n9krh


Summary of Contents for General Climate ac-n9krh
- Page 1 PORTABLE AIR CONDITIONER Instruction Manual AC-N6KM AC-N6KR AC-N6KMH AC-N6KRH AC-N9KM AC-N9KR AC-N9KMH AC-N9KRH AC-N12KM AC-N12KR AC-N12KMH AC-N12KRH Read and retain these instructions for future reference Downloaded from AC-Manual.com Manuals...
- Page 2 REMARK: Heating capacity is only for the model with heating function, i.e. model no. AC-N6KMH, AC-N6KRH, AC-N9KMH, AC-N9KRH, AC-N12KMH, AC-N12KRH. The data marked with '*' may vary for technical reasons: for greater precision, please refer to the rating label placed at the back of the unit.
- Page 3 BEFORE USE GENERAL SAFETY • ONLY USE IN THE UPRIGHT POSITION ON A FLAT LEVEL SURFACE AND AT LEAST 50cm FROM ANY OBJECTS (Fig 1 & 4). • DO NOT PLACE OBJECTS ON THE UNIT OR RESTRICT AIR INLET / OUTLET (FIG. 2). •...
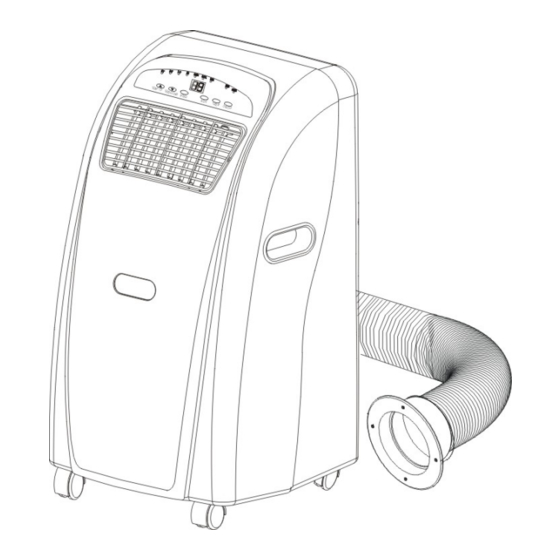
- Page 4 PARTS Front Back Air filter Control Panel (see page 5 for Air inlet picture of panel) Air outlet Exhaust air outlet Carrying handle Cord storage Caster Water stopper / drainage point Accessories 10. Inward adaptor - for insertion over hose and into back of the air conditioner.
- Page 5 INSTALLATION Installation of the exhaust pipe The unit is a portable air conditioner that may be moved from room to room. 1. Using the foam strips Foam strips FIG. 5 • Offer foam strips to the window gap and cut to size if necessary. •...
- Page 6 Mounting of the exhaust pipe • Use only the hose provided and clip exhaust hose and unit adaptor to the back of the air conditioner • Avoid kinks and bends in the FIG. 8 exhaust hose as this will cause expelled moist air to build up causing the unit to overheat and shut down.
- Page 7 Installation of the carbon filter Remove the filter frame from the unit. Separate the filter fixer from the filter frame. Remove the active carbon filter from its plastic bag. Insert the active carbon filter into the filter frame. Fix the filter by reassembling the fixer onto the filter frame.
- Page 8 OPERATION for mechanical type Cooling only model Cooling & heating model FIG. 12 FIG.13 1. Power indicator 1. Power indicator 2. Fan operating indicator 2. Fan operating indicator 3. Cooling operating indicator 3. Cooling operating indicator 4. 'Full water' indicator 4.
- Page 9 Cooling & heating models Turn the speed switch to select required setting: FAN, LOW COOL, HIGH COOL, LOW HEAT, HIGH HEAT Setting temperature Turn the THERMOSTAT to regulate the temperature you desired. The cooling intensity is increasing clockwise.. Set timer Set the TIMER to the desired operating time (1 to 8 hours).
Need help?
Do you have a question about the ac-n9krh and is the answer not in the manual?
Questions and answers