Advertisement
Quick Links
This guide describes how to easily install OfficeServ SOHO. For information on how to use
OfficeServ SOHO, refer to the 'OfficeServ SOHO User Guide'.
Unpacking OfficeServ SOHO
The cable type and quantity may be various depending on countries.
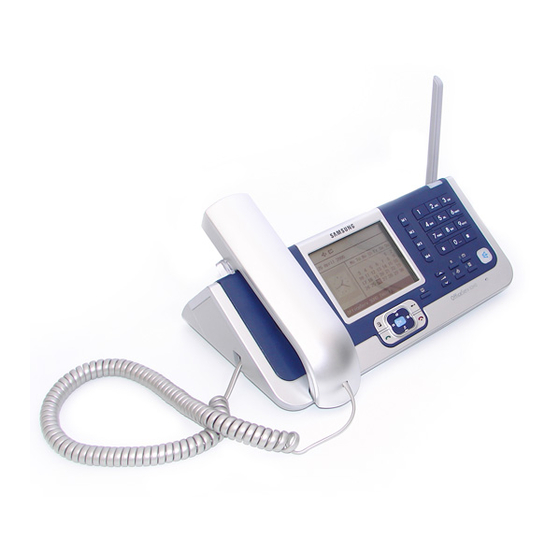
OfficeServ SOHO
(SIT200EM)
Power Adapter
Power Adapter
Fixing Screw(1)
User Guide
OfficeServ SOHO
Dual-Modular Phone
Phone Jack Cables(2)
Quick Installation Guide
LAN Cable
Cables(2)
4-Port
© SAMSUNG Electronics Co., Ltd.
WIP-5000M
WIP-5000M
WLAN phone
Charger
Battery
(1 Standard Type)
User Guide
1
Advertisement

Summary of Contents for Samsung OfficeServ SOHO SIT200EM
- Page 1 OfficeServ SOHO WIP-5000M LAN Cable WIP-5000M WLAN phone OfficeServ SOHO (SIT200EM) Dual-Modular Phone Cables(2) Charger Power Adapter 4-Port Power Adapter Battery Phone Jack Cables(2) Fixing Screw(1) (1 Standard Type) User Guide User Guide Quick Installation Guide © SAMSUNG Electronics Co., Ltd.
- Page 2 Connect the phone to the PSTN1 or PSTN2 port of OfficeServ SOHO by using a phone cable(4-port jack type or dual-modular type). Fax Connection: Connect the Facsimile to the port of OfficeServ SOHO by using a phone cable (dual-modular type). © SAMSUNG Electronics Co., Ltd.
-
Page 3: Basic Setup
- Press (OK) to move to the next step after menu settings, and Press (Cancel) to return to the previous step. Procedure for easy OfficeServ SOHO installation is as follows: © SAMSUNG Electronics Co., Ltd. - Page 4 One of the following messages will soon appear: Internet connection was successful. • The menu skips ‘4. Select Internet Service’ and moves to ‘5. Register WLAN phone. Internet connection was not successful. • Refer to ‘4. Select Internet Service’. © SAMSUNG Electronics Co., Ltd.
- Page 5 DNS address, which is provided by the ISP, and press [OK]. DHCP: Press [OK] to set the Internet • automatically. Skip Internet Setup: Press [OK] to skip • Internet setup. © SAMSUNG Electronics Co., Ltd.
- Page 6 SSID at [1. SSID] or verify the SSID at [4. WLAN Information]. SSID is the name of a radio network required for connecting the OfficeServ SOHO to a WLAN phone or to a desktop/laptop computer. This value should not coincide with SSIDs of neighboring radio sectors. © SAMSUNG Electronics Co., Ltd.
- Page 7 It is recommended that you configure the WLAN using such program. For information on how to set up a WLAN, refer to the user guide of the program. You can also set up a WLAN by using the WLAN connection service of Windows XP. © SAMSUNG Electronics Co., Ltd.
- Page 8 Even if a message, ‘A wireless connection is not available’ appears after selecting • [Enabled], proceed to the next step. Right-click [Wireless Network Connection] to select [Properties], and select [Show icon in notification area when connected]. Click [OK]. © SAMSUNG Electronics Co., Ltd.
-
Page 9: Lan Cable
Press [Start] and select [Control Panel]. Double-click [Network Connection]. Right-click [Local Area Connection] and select [Properties]. Double-click [Internet Protocol(TCP/IP)]. Select [Obtain an IP address automatically] and [Obtain DNS address automatically]. Click [OK] to finish the setting. © SAMSUNG Electronics Co., Ltd. - Page 10 Select ‘Obtain an IP address automatically’ and ‘Obtain DNS server address automatically’ and click [OK]. Windows 98/ME Select [Start] [Settings] [Control Panel] [Network]. Double-click [TCP/IP]. Select ‘Obtain an IP address automatically’ and click [OK]. Restart the computer. © SAMSUNG Electronics Co., Ltd.
- Page 11 [OK].(If the OfficeServ SOHO is in DHCP mode, enter 192.168.111.1 as the IP). To change the OfficeServ SOHO IP • address and device, select [Configuration] [Line] from the CRM program and change the corresponding data. © SAMSUNG Electronics Co., Ltd.


Need help?
Do you have a question about the OfficeServ SOHO SIT200EM and is the answer not in the manual?
Questions and answers