
Subscribe to Our Youtube Channel
Related Manuals for Sony KV-AR252M61 Trinitron


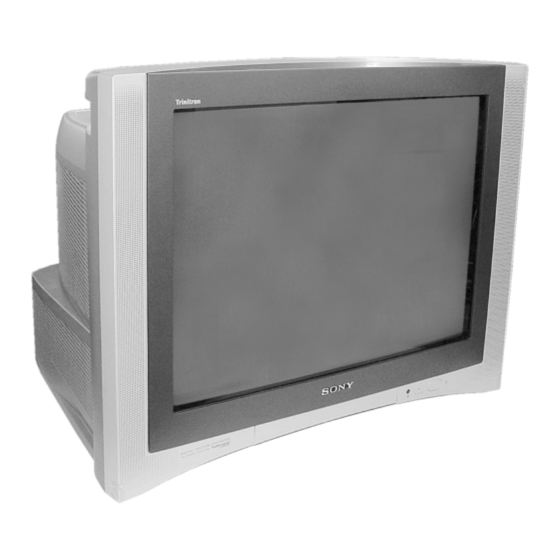
Summary of Contents for Sony KV-AR252M61 Trinitron
-
Page 1: Revision History
REVISION HISTORY CHASSIS MODEL 9-872-417-01 PART NO. : KV-AR252M61 KV-AR252M61 SUFFIX DATE SUPPL. / CORR DESCRIPTION 2003/11 1st. Issue... -
Page 2: Service Manual
SERVICE MANUAL CHASSIS MODEL COMMANDER DEST. CHASSIS NO. MODEL COMMANDER DEST. CHASSIS NO. KV-AR252M61 RM-W102 Malaysia SCC-U96L-A KV-AR252M61 RM-W102 Thailand SCC-U94U-A RM-W102 TRINITRON COLOR TV ®... -
Page 3: Table Of Contents
OR CARBON PAINTED ON THE CRT, AFTER REMOVING THE THE PARTS LIST ARE CRITICAL TO SAFE OPERATION. REPLACE THESE COMPONENTS WITH SONY PARTS ANODE. WHOSE PART NUMBERS APPEAR AS SHOWN IN THIS MANUAL OR IN SUPPLEMENTS PUBLISHED BY SONY. – 2 –... -
Page 4: Self Diagnosis Function
KV-AR252M61 RM-W102 SELF DIAGNOSIS FUNCTION The units in this manual contain a self diagnosis function. If an error occurs, the STANDBY (1) indicator will automatically begin to flash. The number of times the STANDBY (1) indicator flasher translates to a probable source of the problem. If an error symptom cannot be reproduced, the remote commander can be used to review the failure occurrence data stored in memory to reveal past problems and how often these problems occur. - Page 5 KV-AR252M61 RM-W102 2. DISPLAY OF STANDBY/(1) indicator FLASH COUNT Diagnosis Item Flash Count* +B overcurrent 2 times I-Prot 4 times IK (AKB) 5 times HV Protect 8 times * One flash count is not used for self-diagnosis. FLASH RED n Please refer diagnosis item. Lamp ON 300ms FLASH GREEN n OK Lamp OFF 3 sec...
- Page 6 KV-AR252M61 RM-W102 5. HANDLING OF SELF-DIAGNOSTIC SCREEN DISPLAY Since the diagnosis results displayed on the screen are not automatically cleared, always check the self-diagnostic screen during repairs. When you have completed the repairs, clear the result display to "0". Unless the result display is cleared to "0", the self-diagnosis function will not be able to detect subsequent faults after completion of the repairs.
-
Page 7: Disassembly
KV-AR252M61 RM-W102 SECTION 1 DISASSEMBLY 1-1. REAR COVER REMOVAL 1-2. SPEAKER REMOVAL 2 Rear cover 1 Two screws (Washer Head) (+P4 × 16) 1 Nine screws (+BVTP 4 × 16) 1-3. CHASSIS ASSY REMOVAL 1-4. SERVICE POSITION 1-5. TERMINAL BRACKET AND J1 BOARD REMOVAL 1-6. -
Page 8: H1 And H2 Boards Removal
KV-AR252M61 RM-W102 1-7. H1 AND H2 BOARDS REMOVAL 1-8. A AND B BOARDS REMOVAL 1 Two screws (Washer head) (+BVTP 3 × 12) 2 Five Hooks H1 Board 2 Three screws (+BVTP 4 × 12) 3 Cover, H 4 H2 Board 3 B Board 5 Three Hooks 4 A Board... - Page 9 KV-AR252M61 RM-W102 • REMOVAL OF ANODE-CAP Note: • After removing the anode, short circuit the anode of the picture tube and the anode cap to the metal chassis, CRT shield or carbon paint on the CRT. • REMOVING PROCEDURES anode button 3 When one side of the rubber cap is separated from the anode button, the anode-cap can be removed by turning up the rubber cap and pulling it up in the...
-
Page 10: Set-Up Adjustments
KV-AR252M61 RM-W102 SECTION 2 SET-UP ADJUSTMENTS Perform the adjustments in the following order : The following adjustments should be made when a 1. Beam Landing complete realignment is required or a new picture tube is 2. Convergence installed. 3. Focus 4. -
Page 11: Convergence
KV-AR252M61 RM-W102 H. STAT 2-2. CONVERGENCE • Before starting this adjustment, adjust the focus, horizontal size and vertical size. • Receive dot/hatch signal • Pic mode: Soft Center dot BMC (Hexapole) Magnet V. STAT Magnet H. STAT VR RV750 H. STAT RV1800 SCREEN (G2) C Board... - Page 12 KV-AR252M61 RM-W102 Rotate TLV-2 VOL (29", 34") on DY 7. Y separation axis correction magnet adjustment. XCV Rotate XCV Adj core on DY 1. Receive the cross-hatch signal and adjust YCH Rotate YCH VOL on DY [PICTURE] to [MIN] and [BRIGHTNESS] to Insert Correction Plate to DY Pocket [STANDARD] .
-
Page 13: Focus Adjustment
KV-AR252M61 RM-W102 2-3. FOCUS ADJUSTMENT 2-4. G2 (SCREEN) ADJUSTMENTS 1. Set the PICTURE to Normal. FOCUS adjustment should be completed before W/B 2. Put the VIDEO input mode without signals adjustment. 3. Connect R,G,B of the C board cathode to the oscilloscope. -
Page 14: Circuit Adjustments
VDSP Detected Stereo Type (Direct Value from CZ_ Stereo_Mode) Needed for Nicam DCXO aligment Purpose S : for Sony A : Aiwa Value of x = 0 - Unknown, 1 - BTSC, 2 - A2, 3 - NICAM, : US/Latin/Taiwan... -
Page 15: Adjustment Method
KV-AR252M61 RM-W102 e. OTHER FUNCTION VIA REMOTE COMMANDER 7, - All the data becomes the values in memory. 8, - All user control goes to the standard state. [Display], - Service data initialization (Be sure not to use usually.) 2, 5 Select Device or Category (Up, Down) 3-2. - Page 28 KV-AR252M61 RM-W102 ITEM INFORMATION No. OPB1 Item Speed Search L’ L(Euro), M(GA) Decimal KV-AR252M61 (Malaysia) KV-AR252M61 (Thailand) SPEED SEARCH (Time of speed search) 00 = disabled (original cycle speed) 01 = 4 time speed from the original 10 = 6 time speed from the original 11 = 8 time speed from the original TV System Selection 0 = disabled, 1 = enabled...
- Page 29 KV-AR252M61 RM-W102 No. OPB4 Firmware/ Item 1 spk Equalizer Surround V-Chip Text Decimal SMAT Models KV-AR252M61 (Malaysia) KV-AR252M61 (Thailand) Firmware (SSD Firmware Downloading) 0 = disabled, 1 = enabled SMAT Surround Matrix 0 = Active, 1 = Passive 1 spk Models 1 Speaker Models 0 = 2 or 3 Speaker Models, 1 = 1 speaker Models...
- Page 30 KV-AR252M61 RM-W102 No. OPB6 Item GA US Decimal Latin Feature 2 Feature 1 OSD Language Selection KV-AR252M61 (Malaysia) KV-AR252M61 (Thailand) GA US (US Model Destination) 0 = US/CANADA/Latin 1 = Taiwan/Korea/Philippine (Wake-up timer enable) (GA Surround Spec:OFF, SIMULATED, SRS) Latin (US Model Latin Destination) 0 = US/CANADA (No Volume Figure Display) 1 = Latin (Volume Figure Display)
-
Page 31: Picture Quality Adjustment
KV-AR252M61 RM-W102 3-3. PICTURE QUALITY ADJUSTMENT 80mV SUB COLOR ADJUSTMENT 1. Select Video. 2. Input PAL 100% Color Bar. 3. Set to following condition: VB1 = VB2 = VB3 = VB4 PICTURE 100%,COLOR 50%, BRIGHTNESS 50%, HUE Center, SHP 50%. The highest level of VB1, VB2, VB3, VB4 must be 4. -
Page 32: Deflection Adjustment
KV-AR252M61 RM-W102 3-4. DEFLECTION ADJUSTMENT YOUTPUT LEVEL ADJUSTMENT (AR2 series only) H-TRAPEZOID ADJUSTMENT 1. Input a color with bar with 100IRE white signal to pin 1. Receive cross hatch/dot signal 1 (CVBS) of CN2001 BC board. 2. Adjust RV1801 on C-Board to make H-Trapezoid 2. - Page 33 KV-AR252M61 RM-W102 WIDE MODE (60Hz) 4. Raise/lower data using the buttons, select and adjust the following item to obtain optimum image. (V-Compression Adjustment) Service Item 1. Input mono scope signal 2. Adjust condition to WIDE MODE : ON. GEOM: 000 HPOS HORIZONTAL SHIFT (HS) 3.
-
Page 34: Picture Distortion Adjustment
KV-AR252M61 RM-W102 V.LINEARITY (VLIN), S CORRECTION (SCOR), EW 3-5. PICTURE DISTORTION ADJUSTMENT PARABOLA/WIDTH (EWPW), AND EW TRAPEZIUM (EWTZ) ADJUSTMENTS H. CENTER ADJUSTMENT (HPOS) 1. Input Monoscope signal. 1. Input Monoscope signal. 2. Activate the Service Mode. 2. Activate the Service Adjustment Mode. 3. -
Page 35: Diagrams
KV-AR252M61 RM-W102 SECTION 4 DIAGRAMS 4-1. BLOCK DIAGRAM – 34 –... -
Page 36: Circuit Boards Location
KV-AR252M61 RM-W102 4-2. CIRCUIT BOARDS LOCATION C Board H2 Board H1 Board VM Board A Board F Board J1 Board BC Board B Board 4-3. SCHEMATIC DIAGRAM Reference information Note: All capacitors are in µF unless otherwise noted. • RESISTOR : RN METAL FILM •... -
Page 38: A Board - Processor (Block A)
KV-AR252M61 KV-AR252M61 RM-W102 RM-W102 4-3-2. A Board — Processor (Block A) CN005 CN003 TO VM1 BOARD CN5901 CN004 TO C BOARD CN701 C006 C093 3.3V (BLOCK A) PROCESSOR D057 MMDL914T1 D058 R-MUTE MMDL914T1 R5008 G MUTE R5012 100k R5010 C592 RN-CP RN-CP 470p... -
Page 39: A Board - Audio (Block B)
KV-AR252M61 KV-AR252M61 RM-W102 RM-W102 4-3-3. A Board — Audio (Block B) CN203 CN202 TO B BOARD CN205 R238 R237 RN-CP C234 D200 RN-CP CHIP C235 JR1280 IC200 CHIP R217 CHIP R208 C202 C201 R200 AUDIO AMP C217 RN-CP C214 R219 CHIP C205 C208... -
Page 40: A Board - Power Supply/Deflection
KV-AR252M61 KV-AR252M61 RM-W102 RM-W102 4-3-4. A Board — Power Supply/Deflection (Block C) CN605 CHOKE COIL R6021 TH601 THERMISTOR, NTC R6022 RN-CP ‘ C658 C698 R681 Q617 0.022 Q614 UN2211-TX RN-CP MSB709-RT1 C626 C654 R6018 CHIP ‘ 0.0047 SWITCH R665 EY692 500V D617 FPRD... -
Page 41: A Board - Tuner (Block D)
KV-AR252M61 KV-AR252M61 RM-W102 RM-W102 4-3-5. A Board — Tuner (Block D) B-BX1l12023-...-A..(Block D)-AR252M61 SWF101 FILTER SURFACE WAVE C112 (BLOCK D) SWF100 R106 C139 B:CHIP 4.7k 0.01 FILTER R114 CHIP R112 2.2K SURFACE WAVE L101 B:CHIP 6.8K CHIP 1.2uH CHIP C113 JR1100 TU101 C138... -
Page 42: A Board - Jack (Block E)
KV-AR252M61 KV-AR252M61 RM-W102 RM-W102 4-3-6. A Board — Jack (Block E) CN903 CN904 BUS CONNECTOR BUS CONNECTOR CN015 TO B BOARD CN1425 To D18 (E45)TU-AGC JR1980 To A67 (E44) B_INT R903 R900 To A68 (E43) B_DAT L902 CHIP To A69 (E42) B_CLK RN-CP RN-CP D920... -
Page 43: A Board - Heat Sink (Block F)
KV-AR252M61 RM-W102 4-3-7. A Board — Heat Sink (Block F) Mount Mecha 409311901 IC001 A001 Mount Mecha A200 409500101 IC200 EY001 EY002 Mount Mecha X40360521 IC503 A503 EY551 EY550 Mount Mecha A604 407215201 IC604 Mount Mecha 403343761 IC607 A6071 Mount Mecha A511 X40360506 Q511... -
Page 45: B Board Schematic Diagram
KV-AR252M61 KV-AR252M61 RM-W102 RM-W102 4-3-9. B Board Schematic Diagram CN1424 CN1423 CN1425 CN1422 TO BC BOARD TO A BOARD TO A BOARD TO BC BOARD CN1427 XX CN1426 XX CN2001 CN015 CN2000 CN905 CN1400 CN207 CN202 CN205 TO H1 BOARD TO H1 BOARD TO A BOARD CN3904... -
Page 46: H1 And H2 Boards Schematic Diagrams
KV-AR252M61 KV-AR252M61 RM-W102 RM-W102 4-3-10. H1 and H2 Boards Schematic Diagram CN3901 CN3905 CN3903 CN3908 CN3904 CN3902 TO SPEAKER TO A BOARD TO A BOARD CN3906 TO B BOARD TO B BOARD TO B BOARD (JACK) (PROCESSOR) TO 3D WOOFER CN014 CN207 CN202... -
Page 47: Bc Board Schematic Diagram
KV-AR252M61 KV-AR252M61 RM-W102 RM-W102 4-3-11. BC Board Schematic Diagram C2044 C2038 Q2005 C2039 R2028 R2044 R2047 L2011 MSD601-RT1 L2013 FB2000 2.2k 4.7k L2012 10uH 47uH CHIP BUFFER CHIP CHIP C2101 10uH C2040 C2094 C2031 R2038 R2032 C2052 0.01 C2033 FB2001 0.01 C2041 R2002... -
Page 48: J1 And F Boards Schematic Diagrams
KV-AR252M61 KV-AR252M61 RM-W102 RM-W102 4-3-12. J1 and F Boards Schematic Diagram CN2410 TO A BOARD JW2421 JW2410 D2410 5.0MM 5.0MM (JACK) R2410 CN010 PROTECTION DVD Y C2410 R2421 F4601 DVD BY JW4606 JW4603 JW4605 R2411 250V AC IN C2411 AC OUT DVD RY D2411 JW4604... - Page 49 KV-AR252M61 RM-W102 A BOARD ✽ MARK LIST KV-AR252M61(Thailand) KV-AR252M61(Malaysia) C523 470P 500V :CHIP CN601 PIN CONNECTOR (PC BOARD) 3P CN603 D072 1SS119-25 MMDL914-T1 D518 RU4AM-T4 D5018 FMU-G16S T503 NX-4009//M3I4 T507 NX-4009//M3I4 Note: The parts indicated as "XX" in this circuit diagram are not listed here, as they are not used for these models.
-
Page 50: Voltage Measurement And Waveforms
KV-AR252M61 RM-W102 4-4. VOLTAGE MEASUREMENT AND WAVEFORMS A BOARD VOLTAGE LIST AND WAVEFORM Pin No. Voltage[v] Pin No. Voltage[v] Pin No. Voltage[v] IC001 2.36Vp-p NTSC (1.0)[1.1] (0.9)[1.0] 2.80Vp-p 70.4mVp-p NTSC (3.3)[2.4] (3.8)[3.7] 312mVp-p (0.1)[0] (1.1)[2.1] (1.1)[2.1] (2.0)[1.8] (0.9)[1.1] (0.9)[1.1] (0.5)[0.4] (2.8)[2.9] (1.8)[0.2] 3.52Vp-p... - Page 51 KV-AR252M61 RM-W102 A BOARD VOLTAGE LIST AND WAVEFORM Pin No. Voltage[v] Pin No. Voltage[v] Pin No. Voltage[v] IC602 Q012 (1.9)[2.0] (1.4)[1.5] Q013 Q015 (1.8)[1.9] (0)[0.2] (15.0)[15.1] Q100 (2.8)[2.9] (2.2)[2.3] (0.4)[0.5] Q103 (0)[3.2] (124.5)[123.5] (3.1)[0] (115.1)[114.2] (119.0)[118.1] Q104 (3.0)[0] (0)[0.5] (0)[*] IC003 (248.0)[245.0] Q111...
- Page 52 KV-AR252M61 RM-W102 A BOARD VOLTAGE LIST AND WAVEFORM Pin No. Voltage[v] Pin No. Voltage[v] Pin No. Voltage[v] Q600 Q616 12.3 13.1 13.0 13.1 Q607 (116.0)[115.0] Q901 (1.0)[1.1] (114.4)[113.6] (247.0)[246.0] Q608 Q902 (1.0)[1.2] 128Vp-p (114.2)[113.7] Q609 Q911 Q612 Q912 (4.5)[4.6] Q613 2.28Vp-p Q614 Q615...
- Page 53 KV-AR252M61 RM-W102 B BOARD VOLTAGE LIST AND WAVEFORM Pin No. Voltage[v] Pin No. Voltage[v] Pin No. Voltage[v] Q204 Q1422 (4.2)[4.1] Q8803 (0.3)[0.2] Q1412 Q1423 Q8804 (3.7)[3.6] (4.8)[4.9] Q1413 (4.4)[4.3] Q1424 Q8805 (2.4)[2.5] Q1414 Q1425 Q8806 (-1.6)[-0.8] (2.5)[2.4] Q8807 (-1.6)[-0.8] Q1415 Q1426 (3.3)[3.1] Q8808...
- Page 54 KV-AR252M61 RM-W102 C BOARD VOLTAGE LIST Pin No. Voltage[v] Pin No. Voltage[v] Pin No. Voltage[v] IC751 J751 (315)[312] (142)[13.8] (137)[134] (141)[138] 1.340Vp-p (142)[139] Q701 (4.4)[4.5] NTSC 94.0Vp-p IC1800 NTSC 2.120Vp-p 144.0Vp-p (141)[13.6] 12.3 Q1800 1.380Vp-p NTSC Q1801 (0)[0.2] 104.0Vp-p NTSC Q1802 1.220Vp-p Q1803...
- Page 55 KV-AR252M61 RM-W102 H1 BOARD VOLTAGE LIST AND WAVEFORM Pin No. Voltage[v] Q3901 (2.7)[3.2] Q3902 (2.7)[3.2] H2 BOARD VOLTAGE LIST AND WAVEFORM Pin No. Voltage[v] IC3901 (3.1)[3.2] VM BOARD VOLTAGE LIST AND WAVEFORM Pin No. Voltage[v] Pin No. Voltage[v] Q5901 Q5905 Q5902 (135.1)[134.9] (104.5)[73.2]...
-
Page 56: Printed Wiring Boards And Parts Location
KV-AR252M61 KV-AR252M61 RM-W102 RM-W102 4-5. PRINTED WIRING BOARDS AND PARTS LOCATION PRINTED WIRING BOARDS [FRONT PANEL] [VELOCITY MODULATION] [FRONT PANEL] [RGB AMPLIFIER, ROTATION CIRCUIT, LANDING CORRECTION CIRCUIT] – H1 board – – H2 board – C3916 1-689-957-12 CN3906 CN3907 (1-723-348-12) CN3908 CN3904 C3902... - Page 57 KV-AR252M61 KV-AR252M61 RM-W102 RM-W102 PRINTED WIRING BOARDS [AV SWITCH] – B board – TU1400 A2001 A2002 C1454 C1451 R1420 CN1416 IC1404 1-860-468-11 (1-723-528-11) C1507 D1431 CN1426 C1450 CN1427 D211 C1508 L1406 C1453 R1423 A8801 Q8807 Q8806 R1515 R1516 R1434 R211 R8817 IC200 C8804...
- Page 58 KV-AR252M61 RM-W102 PRINTED WIRING BOARDS [NEW DEVICE] [CISPR] [DVD TERMINAL] – BC board – 1-860-472-11 (1-723-529-11) Q2004 A2001 C2040 L2014 FL2002 C2041 R2012 Q2003 IC2007 C2034 FL2001 C2047 R2042 R2035 C2037 C2043 R2039 FB2001 R2079 R2078 R2081 Q2007 R2077 R2055 C2042 C2049 R2080...
- Page 59 KV-AR252M61 KV-AR252M61 RM-W102 RM-W102 PRINTED WIRING BOARDS NOTE: The circuit indicated at left contains high voltage of over 1220 Vp-p. Please pay attention when inspecting or [Processor, Audio, Power Supply/Deflection, Tuner, Jack, Heat Sink] repairing it to prevent an electric shock. –...
-
Page 60: Semiconductors
KV-AR252M61 RM-W102 4-6. SEMICONDUCTORS DIODE CATHODE CATHODE ANODE ANODE CATHODE CATHODE ANODE ANODE HSS82-TJ D1NS6 MMDL914T1 MA2ZD14001S0 ERC06-155 D4SB60L MTZJ-T-77-15 EL1Z MA77 RD5.6SB-T1 D4SBL20U RD5.6ESB2 ERA22-08 UDZSTE-179.1B D10SBS4F GP08D UDZS-TE17-12B RD6.8ES-B1 RU4AM-T4 RD18ESB RD39ESB UF4005PKG23 D1NL20U-TR UPC574J 1SS119-25 1SS133T-77 TRANSISTOR LETTER SIDE ANODE (GRN) - Page 61 KV-AR252M61 RM-W102 LA6510 – 72 –...
-
Page 62: Exploded Views
KV-AR252M61 RM-W102 SECTION 5 EXPLODED VIEWS NOTE: • • Items marked " ∗ " are not stocked since Items with no part number and no The components identified by description are not stocked because they are seldom required for routine shading and mark ! are critical they are seldom required for routine service. - Page 63 KV-AR252M61 RM-W102 REF. NO. PART NO. DESCRIPTION REMARK REF. NO. PART NO. DESCRIPTION REMARK 1-452-032-00 MAGNET DISC X-4042-466-1 BEZNET ASSY 2-4,21,22,31 1-452-094-00 CIRCULAR DISC MAGNET B 4-036-405-11 SPRING COMPRESSION 4-057-714-01 PIECE TLH CONVERGENCE 4-086-448-02 BUTTON POWER * 4-086-707-01 GUIDE LIGHT 4-079-376-01 BAND DGC 8-453-021-31...
-
Page 64: Chassis
KV-AR252M61 RM-W102 5-2. CHASSIS r : 7-685-648-79 SCREW +BVTP 3 × 12 p : 7-685-663-71 SCREW +BVTP 4 × 16 REF. NO. PART NO. DESCRIPTION REMARK REF. NO. PART NO. DESCRIPTION REMARK * A-1410-517-A MOUNTED PWB, H1 (Malaysia) * 4-095-842-21 BRACKET MAIN(Malaysia) * A-1410-635-A MOUNTED PWB H1 (Thailand) * 4-095-842-11... -
Page 65: Electrical Parts List
KV-AR252M61 RM-W102 The components identified by shading and mark ! are critical for safety. SECTION 6 Replace only with part number specified. ELECTRICAL PARTS LIST REF NO. PART NO. DESCRIPTION REMARK REF NO. PART NO. DESCRIPTION REMARK • Items marked " ∗ " are not stocked since •... - Page 66 KV-AR252M61 RM-W102 The components identified by shading and mark ! are critical for safety. Replace only with part number specified. REF NO. PART NO. DESCRIPTION REMARK REF NO. PART NO. DESCRIPTION REMARK C302 1-126-964-11 ELECT 10UF C593 1-162-927-11 CERAMIC CHIP 100PF C303 1-126-933-11...
- Page 67 KV-AR252M61 RM-W102 The components identified by shading and mark ! are critical for safety. Replace only with part number specified. REF NO. PART NO. DESCRIPTION REMARK REF NO. PART NO. DESCRIPTION REMARK C698 1-126-947-11 ELECT 47UF D204 8-719-081-97 DIODE MMDL914T1 C699 1-104-662-91 ELECT...
- Page 68 KV-AR252M61 RM-W102 The components identified by shading and mark ! are critical for safety. Replace only with part number specified. REF NO. PART NO. DESCRIPTION REMARK REF NO. PART NO. DESCRIPTION REMARK <FERRITE BEAD> JR030 1-216-864-11 SHORT CHIP JR600 1-216-864-11 SHORT CHIP FB100 1-414-229-11...
- Page 69 KV-AR252M61 RM-W102 The components identified by shading and mark ! are critical for safety. Replace only with part number specified. REF NO. PART NO. DESCRIPTION REMARK REF NO. PART NO. DESCRIPTION REMARK <TRANSISTOR> R058 1-216-809-11 METAL CHIP 1/10W R060 1-216-809-11 METAL CHIP 1/10W Q001...
- Page 70 KV-AR252M61 RM-W102 The components identified by shading and mark ! are critical for safety. Replace only with part number specified. REF NO. PART NO. DESCRIPTION REMARK REF NO. PART NO. DESCRIPTION REMARK R364 1-216-819-11 METAL CHIP 1/10W R588 1-243-535-71 METAL OXIDE R365 1-216-864-11 SHORT CHIP...
- Page 71 KV-AR252M61 RM-W102 The components identified by shading and mark ! are critical for safety. Replace only with part number specified. REF NO. PART NO. DESCRIPTION REMARK REF NO. PART NO. DESCRIPTION REMARK R992 1-216-864-11 SHORT CHIP <RELAY> R2644 1-249-389-11 CARBON 1/4W R5000 1-216-081-00...
- Page 72 KV-AR252M61 RM-W102 The components identified by shading and mark ! are critical for safety. Replace only with part number specified. REF NO. PART NO. DESCRIPTION REMARK REF NO. PART NO. DESCRIPTION REMARK <CONNECTOR> C1414 1-164-346-11 CERAMIC CHIP C1415 1-126-960-11 ELECT CN601 1-573-963-11 PIN, CONNECTOR (PC BOARD) 3P (Malaysia)
- Page 73 KV-AR252M61 RM-W102 The components identified by shading and mark ! are critical for safety. Replace only with part number specified. REF NO. PART NO. DESCRIPTION REMARK REF NO. PART NO. DESCRIPTION REMARK D1406 8-719-069-60 DIODE UDZSTE-179.1B R212 1-216-864-11 SHORT CHIP D1407 8-719-069-60 DIODE UDZSTE-179.1B...
- Page 74 KV-AR252M61 RM-W102 The components identified by shading and mark ! are critical for safety. Replace only with part number specified. REF NO. PART NO. DESCRIPTION REMARK REF NO. PART NO. DESCRIPTION REMARK R1481 1-218-285-11 METAL CHIP 1/10W C2044 1-126-947-11 ELECT 47UF R1482 1-216-813-11...
- Page 75 KV-AR252M61 RM-W102 The components identified by shading and mark ! are critical for safety. Replace only with part number specified. REF NO. PART NO. DESCRIPTION REMARK REF NO. PART NO. DESCRIPTION REMARK <CHIP CONDUCTOR> R2070 1-216-295-91 SHORT CHIP R2071 1-216-067-00 RES-CHIP 5.6K 1/10W...
- Page 76 KV-AR252M61 RM-W102 The components identified by shading and mark ! are critical for safety. Replace only with part number specified. REF NO. PART NO. DESCRIPTION REMARK REF NO. PART NO. DESCRIPTION REMARK <DIODE> R1808 1-249-425-11 CARBON 4.7K 1/4W R1809 1-249-435-11 CARBON 1/4W D750...
- Page 77 KV-AR252M61 RM-W102 The components identified by shading and mark ! are critical for safety. Replace only with part number specified. REF NO. PART NO. DESCRIPTION REMARK REF NO. PART NO. DESCRIPTION REMARK * A-1410-517-A MOUNTED PWB, H1 (Malaysia) S3904 1-692-431-21 SWITCH, TACTILE * A-1410-635-A MOUNTED PWB, H1 (Thailand) S3905...
- Page 78 KV-AR252M61 RM-W102 The components identified by shading and mark ! are critical for safety. Replace only with part number specified. REF NO. PART NO. DESCRIPTION REMARK REF NO. PART NO. DESCRIPTION REMARK * A-1410-523-A MOUNTED PWB, VM (Malaysia) Q5906 8-729-809-29 TRANSISTOR 2SC4159-E * A-1410-639-A MOUNTED PWB, VM (Thailand) Q5907...
- Page 79 BAND, HOLD (Malaysia) 4-392-003-21 BAND, HOLDING (Thailand) 4-392-004-11 CLIP (Malaysia) 4-059-705-01 CLIP (Thailand) ****************************************************************** <REMOTE COMMANDER *********************** 1-478-460-11 REMOTE COMMANDER (RM-W102) 3-073-096-01 REMOTE COMMANDER BATTERY COVER Sony Corporation Sony Technology Malaysia Sdn. Bhd. English 9-872-417-01 Visual Products 2003.11 – 90 –...
-
Page 80: Operating Instruction
• Before operating the unit, please read this manual thoroughly and retain it for future reference. 使用說明書 • 使用本電視機之前請先詳細閱讀此手冊﹐並妥善保存以備日後用作參考。 Panduan Pengendalian • Sebelum mengendalikan unit, sila baca buku panduan ini dengan teliti dan simpan untuk rujukan masa depan. KV-AR292 KV-AR252 © 2003 Sony Corporation... - Page 81 WARNING • Dangerously high voltages are present inside the TV. • TV operating voltage: 220 – 240 V AC. • Do not plug in the power cord until you have completed making all other connections; otherwise a minimum leakage current might flow through the antenna and other terminals to ground.
- Page 82 Do not plug in too many appliances to the same To prevent fire or shock hazard, do not expose the power socket. Do not damage the power cord. TV to rain or moisture. Pull the power cord out by the plug. Do not pull the power cord itself.
- Page 83 x Securing the TV To prevent the TV from falling, use the supplied screws, clamps and band to secure the TV. 20 mm 3.8 mm screws clamps band Screw the band to the TV stand and to the provided hole at the rear of your TV. (1) Put a cord or chain through the clamps.
- Page 84 Table of Contents Menu Adjustment Installation Getting Started ........6 Introducing the menu system ..14 Setting up your TV Changing the “Picture” setting ..17 (“Initial Setup”) ........7 Changing the “Sound” setting ..18 Changing the “Timer” setting ..20 Overview of Controls Changing the “Channel Setup”...
-
Page 85: Installation
Installation x Getting Started Step 1 Insert the batteries (supplied) into the remote. Note • Do not use old or different types of batteries together. Step 2 Connect the antenna cable (not supplied) to 8 (antenna input) at the rear of the TV. •... -
Page 86: Setting Up Your Tv ("Initial Setup")
x Setting up your TV (“Initial Setup”) When you turn on your TV for the first time, the “Initial Setup” menu will appear. You may change the menu language, preset the TV channels automatically and adjust the picture position using the buttons on the TV front panel. and V/v/B/b buttons on the remote control can also be used for the •... -
Page 87: Overview Of Controls
Overview of Controls TV front and rear panels TV rear panel ENTER SELECT AUTO L(MONO) MENU PROGR PROGR TV front panel 8 7 6 AUTO PROG:Press ([MENU] for 5sec L(MONO) SOUND MENU MODE (AUTO PROG) PROG Button/Terminal Function Page Turn off or turn on the TV. Standby indicator. -
Page 88: Using The Remote Control And Basic Functions
Using the remote control and basic functions SOUND MENU PIP PROG PIP PROG RESET Button Description Page Turn off temporarily or turn on the TV. – Display the TV program. – Select TV or video input. Change the picture size: –... - Page 89 continued Button Description Page Select sound mode options. 5-Band Graphic Equalizer display will appear. Select picture mode options. 0 – 9, - Input numbers. – 2 +/– Adjust volume. – RESET Set TV to factory setting. Menu operations MENU Display or cancel the menu. Confirm selected items.
-
Page 90: Advanced Operations
Advanced Operations Selecting the picture and sound modes You can select picture and sound modes and adjust the setting to your preference in the “Personal” option. Selecting the picture mode Press to select the desired picture mode. Select To view SOUND “Dynamic”... -
Page 91: Enjoying Stereo Or Bilingual Programs
x Enjoying stereo or bilingual programs You can enjoy stereo sound or bilingual programs of NICAM and A2 stereo systems by using the A/B button. When receiving a NICAM program Broadcasting On-screen display (Selected sound) NICAM Mono NICAM stereo (Regular sound) SOUND (Stereo sound) MENU... -
Page 92: Viewing Teletext
x Viewing Teletext Some TV stations broadcast an information service called Teletext which allows you to receive various information, such as stock market reports and news. You can use the buttons on the remote to view Teletext. Do this display a Teletext Press . -
Page 93: Menu Adjustment
Menu Adjustment x Introducing the menu system The MENU button lets you open a menu and change the settings of your TV. The following is an overview of the menu system. Return icon Picture icon Name of the current Sound icon Setup menu Language:... - Page 94 Level 3/Function Page Level 1 Level 2 Set TV to turn off automatically. “Timer” “Sleep Timer” Set TV to turn on automatically. “Wake Up Timer” “Channel Setup” “Auto Program” Preset channels automatically. Preset channels manually. “Manual Program” Select the TV system: “TV System”...
- Page 95 continued How to use the menu SOUND MENU Picture PIP PROG Press MENU to Mode: Dynamic Picture Adjustment display the menu. Color Temperature: Cool High 3D Intelligent Picture: On PIP PROG Select Confirm Press V or v to select the desired item. Channel Setup Auto Program Manual Program...
-
Page 96: Changing The "Picture" Setting
x Changing the “Picture” setting The “Picture” menu allows you to adjust the picture settings. Press MENU. Make sure the “Picture” icon ( ) is Picture Mode: Dynamic selected, then press Picture Adjustment Color Temperature: Cool High 3D Intelligent Picture: Select Confirm Press V or v to select the desired item (e.g., “Mode”), then press... - Page 97 continued Adjusting the “Picture Adjustment” items under “Personal” mode Press V or v to select either “Picture” (contrast), “Brightness”, “Color”, “Hue” (color tones) or “Sharpness”, then press Selecting “Reset” will set your TV to the factory setting. Press V,v,B or b to adjust the setting of your selected item, then press Repeat the above steps to adjust other items.
-
Page 98: Changing The "Sound" Setting
x Changing the “Sound” setting The “Sound” menu allows you to adjust the sound settings. Press MENU. Press V or v to select the “Sound” icon ( Sound Mode: Dynamic then press Sound Adjustment Balance Intelligent Volume: Surround: Select Confirm Press V or v to select the desired item (e.g., “Mode”), then press Select “Mode”... - Page 99 continued Adjusting the “Sound Adjustment” item under “Personal” mode The 5-Band Graphic Equalizer feature allows you to adjust sound frequency settings of “Personal” mode in the menu. Make sure that “Adjust” is selected, Adjustment: Personal then press Adjust Reset Selecting “Reset” will set your TV to the factory setting.
-
Page 100: Changing The "Timer" Setting
x Changing the “Timer” setting The “Timer” menu allows you to set TV to turn off and turn on automatically. Press MENU. Press V or v to select the “Timer” icon ( ), Timer then press Sleep Timer: Wake Up Timer: Select Confirm Press V or v to select the desired item (e.g., “Sleep Timer”), then press... -
Page 101: Changing The "Channel Setup" Setting
x Changing the “Channel Setup” setting The “Channel Setup” menu allows you to preset channels automatically, manually preset channels, select the TV system, label the program number and block unwanted programs. Press MENU. Press V or v to select the “Channel Setup” Channel Setup icon ( ), then press... - Page 102 Presetting channels manually After selecting “Manual Program”, select the program number to which you want to preset a channel. Manual Program Program: (1) Make sure “Program” is selected, then press TV System: VHF Low (2) Press V or v until the program number you want Fine: Auto Skip:...
-
Page 103: Changing The "Setup" Setting
x Changing the “Setup” setting The “Setup” menu allows you to change the menu language, adjust the picture position, change the picture size, label the connected equipment and select the color system. Press MENU. Press V or v to select the “Setup” icon ( Setup then press Language:... -
Page 104: Additional Information
Additional Information x Connecting optional components Connecting to the video input terminal ( t ) S Video cable TV front panel (not supplied) Camcorder Audio/Video L(MONO) cable (not supplied) TV rear panel Video game equipment Antenna cable (not supplied) Audio/Video cable (not supplied) S Video cable... - Page 105 continued Connecting to the component video input terminal ( TV rear panel Component video cable (not supplied) DVD player Audio cable (not supplied) Notes • If your DVD player can output interlace and progressive mode signals, select the interlace output when connecting to (component video input) on your TV.
-
Page 106: Troubleshooting
• The antenna setup is • Check the antenna setup. – inappropriate. Contact a Sony dealer for advice. Noisy sound • Channel presetting is • Display the “Channel Setup” menu and inappropriate or select “Manual Program” to preset the incomplete. - Page 107 Dotted lines or interference from cars, equipment near the TV. stripes neon signs, hair dryers, • Check the antenna setup. Contact a Sony – power generators, etc. dealer for advice. • Broadcast signals are • Use a highly directional antenna.
- Page 108 TV, VCR and at the wall. or the cable is receive stereo damaged. broadcast sound. – •Check the antenna setup. Contact a Sony • The antenna setup is dealer for advice. inappropriate. Stereo broadcast sound switches on and off or is distorted.
- Page 109 (standby) indicator flashes. Press ! indicator on diagnosis function (main power) to turn off your TV. your TV flashes indicates the possible red several Contact your nearest Sony service problems. times after center. every three seconds. TV cabinet • Changes in room creaks.
-
Page 110: Specifications
25 in. Tube size (cm) Measured diagonally Screen size (cm) Measured diagonally 765 × 578 × 502 650 × 517 × 496 Dimensions (w/h/d, mm) Mass (kg) Design and specifications are subject to change without notice. Sony Corporation Additional Information... - Page 111 °Ë Õ π‡√‘ Ë ¡ °“√„™È ß “π°√ÿ ≥ “ÕË “ π§Ÿ Ë ¡ ◊ Õ π’ È ‚ ¥¬≈–‡Õ’ ¬ ¥∑— È ß À¡¥·≈–‡°Á ∫ √— ° …“§Ÿ Ë ¡ ◊ Õ ‰«È • ”À√— ∫ ÕÈ “ ßÕ‘ ß „π‚Õ°“ µË Õ Ê‰ª KV-AR292 KV-AR252 © 2003 Sony Corporation...
- Page 112 WARNING • Dangerously high voltages are present inside the TV. • TV operating voltage: 220 – 240 V AC. • Do not plug in the power cord until you have completed making all other connections; otherwise a minimum leakage current might flow through the antenna and other terminals to ground.
- Page 113 Do not plug in too many appliances to the same To prevent fire or shock hazard, do not expose the power socket. Do not damage the power cord. TV to rain or moisture. Pull the power cord out by the plug. Do not pull the power cord itself.
- Page 114 x Securing the TV To prevent the TV from falling, use the supplied screws, clamps and band to secure the TV. 20 mm 3.8 mm screws clamps band Screw the band to the TV stand and to the provided hole at the rear of your TV. (1) Put a cord or chain through the clamps.
- Page 115 Table of Contents Menu Adjustment Installation Getting Started ........6 Introducing the menu system ..14 Setting up your TV Changing the “Picture” setting ..17 (“Initial Setup”) ........7 Changing the “Sound” setting ..19 Changing the “Timer” setting ..21 Overview of Controls Changing the “Channel Setup”...
-
Page 116: Installation
Installation x Getting Started Step 1 Insert the batteries (supplied) into the remote. Note • Do not use old or different types of batteries together. Step 2 Connect the antenna cable (not supplied) to 8 (antenna input) at the rear of the TV. •... -
Page 117: Setting Up Your Tv ("Initial Setup")
x Setting up your TV (“Initial Setup”) When you turn on your TV for the first time, the “Initial Setup” menu will appear. You may change the menu language, preset the TV channels automatically and adjust the picture position using the buttons on the TV front panel. and V/v/B/b buttons on the remote control can also be used for the •... -
Page 118: Overview Of Controls
Overview of Controls TV front and rear panels TV rear panel ENTER SELECT AUTO L(MONO) MENU PROGR PROGR TV front panel 8 7 6 AUTO PROG:Press [MENU] for 5sec L(MONO) SOUND MENU MODE (AUTO PROG) PROG Button/Terminal Function Page Turn off or turn on the TV. Standby indicator. -
Page 119: Using The Remote Control And Basic Functions
Using the remote control and basic functions SOUND MENU PIP PROG PIP PROG RESET Button Description Page Turn off temporarily or turn on the TV. – Display the TV program. – Select TV or video input. Change the picture size: –... - Page 120 continued Button Description Page Select sound mode options. 5-Band Graphic Equalizer display will appear. Select picture mode options. 0 – 9, - Input numbers. – 2 +/– Adjust volume. – RESET Set TV to factory setting. Menu operations MENU Display or cancel the menu. Confirm selected items.
-
Page 121: Advanced Operations
Advanced Operations Selecting the picture and sound modes You can select picture and sound modes and adjust the setting to your preference in the “Personal” option. Selecting the picture mode Press to select the desired picture mode. Select To view SOUND “Dynamic”... -
Page 122: Enjoying Stereo Or Bilingual Programs
x Enjoying stereo or bilingual programs You can enjoy stereo sound or bilingual programs of NICAM and A2 stereo systems by using the A/B button. When receiving a NICAM program Broadcasting On-screen display (Selected sound) NICAM Mono NICAM stereo (Regular sound) (Stereo sound) SOUND MENU... -
Page 123: Viewing Teletext
x Viewing Teletext Some TV stations broadcast an information service called Teletext which allows you to receive various information, such as stock market reports and news. You can use the buttons on the remote to view Teletext. Do this display a Teletext Press . -
Page 124: Menu Adjustment
Menu Adjustment x Introducing the menu system The MENU button lets you open a menu and change the settings of your TV. The following is an overview of the menu system. Return icon Picture icon Name of the current Sound icon Setup menu Language:... - Page 125 Level 1 Level 2 Level 3/Function Page Set TV to turn off automatically. “Timer” “Sleep Timer” Set TV to turn on automatically. “Wake Up Timer” Preset channels automatically. “Channel Setup” “Auto Program” Preset channels manually. “Manual Program” Select the TV system: “TV System”...
- Page 126 continued How to use the menu SOUND MENU Picture PIP PROG Press MENU to Mode: Dynamic Picture Adjustment display the menu. Color Temperature: Cool High 3D Intelligent Picture: On PIP PROG Select Confirm Press V or v to select the desired item. Channel Setup Auto Program Manual Program...
-
Page 127: Changing The "Picture" Setting
x Changing the “Picture” setting The “Picture” menu allows you to adjust the picture settings. Press MENU. Make sure the “Picture” icon ( ) is Picture Mode: Dynamic selected, then press Picture Adjustment Color Temperature: Cool High 3D Intelligent Picture: Select Confirm Press V or v to select the desired item (e.g., “Mode”), then press... - Page 128 continued Adjusting the “Picture Adjustment” items under “Personal” mode Press V or v to select either “Picture” (contrast), “Brightness”, “Color”, “Hue” (color tones) or “Sharpness”, then press Selecting “Reset” will set your TV to the factory setting. Press V,v,B or b to adjust the setting of your selected item, then press Repeat the above steps to adjust other items.
-
Page 129: Changing The "Sound" Setting
x Changing the “Sound” setting The “Sound” menu allows you to adjust the sound settings. Press MENU. Press V or v to select the “Sound” icon ( Sound Mode: Dynamic then press Sound Adjustment Balance Intelligent Volume: Surround: Select Confirm Press V or v to select the desired item (e.g., “Mode”), then press Select “Mode”... - Page 130 continued Adjusting the “Sound Adjustment” item under “Personal” mode The 5-Band Graphic Equalizer feature allows you to adjust sound frequency settings of “Personal” mode in the menu. Make sure that “Adjust” is selected, Adjustment: Personal then press Adjust Reset Selecting “Reset” will set your TV to the factory setting.
-
Page 131: Changing The "Timer" Setting
x Changing the “Timer” setting The “Timer” menu allows you to set TV to turn off and turn on automatically. Press MENU. Press V or v to select the “Timer” icon ( ), Timer then press Sleep Timer: Wake Up Timer: Select Confirm Press V or v to select the desired item (e.g., “Sleep Timer”), then press... -
Page 132: Changing The "Channel Setup" Setting
x Changing the “Channel Setup” setting The “Channel Setup” menu allows you to preset channels automatically, manually preset channels, select the TV system, label the program number and block unwanted programs. Press MENU. Press V or v to select the “Channel Setup” Channel Setup icon ( ), then press... - Page 133 Presetting channels manually After selecting “Manual Program”, select the program number to which you want to preset a channel. Manual Program Program: (1) Make sure “Program” is selected, then press TV System: VHF Low (2) Press V or v until the program number you want Fine: Auto Skip:...
-
Page 134: Changing The "Setup" Setting
x Changing the “Setup” setting The “Setup” menu allows you to change the menu language, adjust the picture position, change the picture size, label the connected equipment and select the color system. Press MENU. Press V or v to select the “Setup” icon ( Setup then press Language:... -
Page 135: Additional Information
Additional Information x Connecting optional components Connecting to the video input terminal ( t ) S Video cable TV front panel (not supplied) Camcorder Audio/Video L(MONO) cable (not supplied) TV rear panel Video game equipment Antenna cable (not supplied) Audio/Video cable (not supplied) S Video cable... - Page 136 continued Connecting to the component video input terminal ( TV rear panel Component video cable (not supplied) DVD player Audio cable (not supplied) Notes • If your DVD player can output interlace and progressive mode signals, select the interlace output when connecting to (component video input) on your TV.
-
Page 137: Troubleshooting
• The antenna setup is • Check the antenna setup. – inappropriate. Contact a Sony dealer for advice. Noisy sound • Channel presetting is • Display the “Channel Setup” menu and inappropriate or select “Manual Program” to preset the incomplete. - Page 138 Dotted lines or interference from cars, equipment near the TV. stripes neon signs, hair dryers, • Check the antenna setup. Contact a Sony – power generators, etc. dealer for advice. • Broadcast signals are • Use a highly directional antenna.
- Page 139 TV, VCR and at the wall. or the cable is receive stereo damaged. broadcast sound. – •Check the antenna setup. Contact a Sony • The antenna setup is dealer for advice. inappropriate. Stereo broadcast sound switches on and off or is distorted.
- Page 140 (standby) indicator flashes. Press ! indicator on diagnosis function your TV flashes (main power) to turn off your TV. indicates the possible red several Contact your nearest Sony service problems. times after center. every three seconds. TV cabinet • Changes in room creaks.
-
Page 141: Specifications
Dimensions (w/h/d, mm) 765 × 578 × 502 650 × 517 × 496 Mass (kg) Design and specifications are subject to change without notice. Sony Thai Co., Ltd. 2126 Kromadit Building, New Petchburi Road, Bangkapi, Huaykwang, Bangkok 10320 Sony Corporation Additional Information...
Need help?
Do you have a question about the KV-AR252M61 Trinitron and is the answer not in the manual?
Questions and answers