
Related Manuals for Doco DOCOMATIC 1200


Summary of Contents for Doco DOCOMATIC 1200
- Page 1 Installation Manual - With tips on operation and maintenance - Garage door drives DOCOMATIC 1200 Art.-Nr. 501003 1/23 04-10 DOCOMATIC...
-
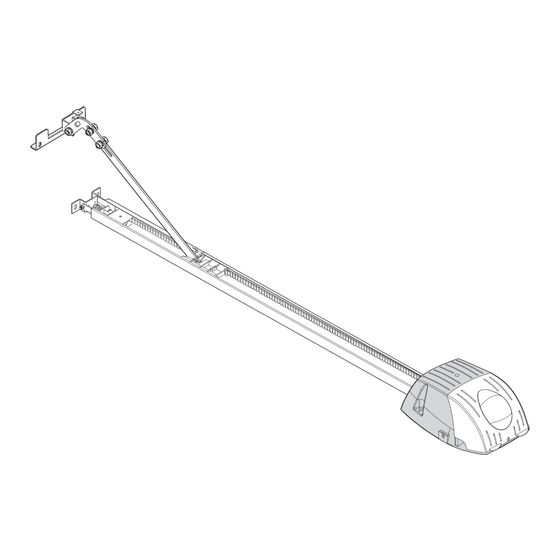
Page 2: Assembly Drawings
Ø3 Ø10 Ø5 6/10/13/17 2/23 04-10 DOCOMATIC... - Page 3 0,5 cm 0,5 cm 3/23 04-10 DOCOMATIC...
- Page 4 max. 30˚ 90˚ Ø10 4/23 04-10 DOCOMATIC...
- Page 5 Ø3 Ø5 5/23 04-10 DOCOMATIC...
-
Page 6: Overview Diagram
Ø3 Ø3 Ø10 Ø5 Ø5 Ø10 07.04 09.02 07.03 BY 1225 09.01 09.00 08.05 07.00 08.03 09.XX 07 .02 08.00 07.01 08.01 08.04 08.XX BY 1270 08.02 05.03 05.01 05.02 06.02 04.00 od e r 04.01 05.00 01.06 10.00 (2x) 04.02 04.03 01.03... -
Page 7: Controller Connection Diagram
Control board B 300.01-OKP LED green LED red Transformer Motor Secondary Sensor cable Motor 24 V/DC Lamp Earth base plate Signal module Transformer B 300.04 Primary Mains power supply External lighting 230 V AC max. 60 W Start command Green signal 230 V AC max. -
Page 8: Brief Instructions On Programming
START (Ready for operation) MENUE 5sec. till the door (...) START S SCROLL Save ENTER opens Programming of path and force SCROLL till the door is (...) START S SCROLL Save closed ENTER automatic automatic START S till door is opend till door is closed Shutdown SCROLL... -
Page 9: Table Of Contents
1. GENERAL INSTRUCTIONS IMPORTANT SAFETY INSTRUCTIONS FOR PREVEN- TING PERSONAL INJURIES AND DAMAGE TO PRO- Dear Customer, Congratulations on the purchase of this pro- PERTY! duct. The garage door drive has been developed using the latest state-of-the-art technology and is manufactured by IMPORTANT INSTRUCTIONS FOR PROPER INSTAL- using the most reliable and modern electrical / electronic LATION AND OPERATION! -
Page 10: Storage And Transport
1.2 Storage and transport • The garage door drive may only be stored lying down and transported under the following environmental conditions: -20°C to +40°C / 20-80% RH (relative humidity) non-condensing. • When stacking the equipment, please note that the maximum height of 6 motor heads or 6 rails must not be exceeded. Equipment that is completely packed (kit cartons) can be stacked up to a maximum height of 6 devices. -
Page 11: Pre-Assembly Of The Drive
• Put all those mechanical locks and devices of the garage door, which are not required after installing the drive, out of operation and remove them. • Please note that the drive is installed with the garage door closed: all tools and tackles required must be kept inside the garage if it does not have any other access route. -
Page 12: Affixing Warning Labels
FIG. 18/19: Mounting the lintel fixture • Place the lintel fixture supplied along with the equipment based on the dimensions obtained (centre of the door, instal- lation height) on the lintel (depending on the site conditions, the fixing screws supplied may have to replaced with other suitable ones). -
Page 13: Commissioning
3. COMMISSIONING If the springs are weak or broken, or the weight of the door is not balanced properly, operating the drive can lead to uncontrolled movements of the door. During commissioning, you must remain inside the garage. This means that you can open the door using the manual unlocking mechanism in the event of a fault. -
Page 14: Adjusting The Shutdown Force
3.3 Adjusting the shutdown force ("F") CAUTION: Do not set the value of the shutdown force for hindrance detection too high, as this can lead to damage to property and human injury. If the drive power is adjusted in such a manner that a force greater than 150 N is ap- plied at the door edge or the shear points before automatic shutdown takes place, additional safeguard must be provided by means of a light barrier or some other equivalent device. - Page 15 "Automatic door closing" feature is enabled, see 3.5 / b: binary add-on functions / POINT 3). •Using the SCROLL button, page to the desired setting and confirm this by pressing the ENTER button, which saves the set- ting, and return to the menu (display shows "U" again). •...
-
Page 16: Wireless
3.6 Wireless The following models pertain to equipment fitted with the BERNAL-Keeloq® wireless system "PICO" 868.5 MHz. 3.7 Teaching the handheld transmitter (plug-in receiver) A maximum of 28 handheld transmitters can be programmed on the wireless receiver. At the end, the initial codes will be overwritten •... -
Page 17: Connecting Accessories
4.0 CONNECTING ACCESSORIES Remove the mains plug before laying any wiring or connections to the controller in order to prevent damage to the controller! Always lay the control and signal lines in such a way that they are separate and isolated from power cables in order to prevent interferences. -
Page 18: Signal Module
4.5 Signal module Using the optional signal module B 300.04, red and green signal lamps of up to max. 60 W respectively can be connected to the 230 V supply. FUNCTION: While opening, the red signal lights up or starts flashing after input of the start impulse (setting via menu, see 3.5 / b: binary add-on functions / POINT 6 or brief instructions on page 8). -
Page 19: Emergency Off / Flap Door Contact
4.8 Emergency off / flap door contact ATTENTION! The factory-fitted wire jumper across the terminals 3/4 may not be removed under any circumstances if the connection is not being used - this prevents the device from starting! Potential-free NC (normally closed contacts) of any safety device or its signal transmission can be connected to the termi- nals 3/4. -
Page 20: Operation
5.2 Operation The garage door can be opened or closed in a number of ways using the garage door drive: using the handheld transmitter, the START button or indoor button / key switch / wireless code lock (accessory). Each operation of an operating element triggers a new impulse ("Impulse follow-up function"): Start - Stop - Reverse - etc.“). -
Page 21: Rectifying Faults
5.4 Fault rectification ATTENTION - DANGER TO LIFE! Faults in the 230 V part of the system may only be attended to by skilled electrical technicians. Service and repair work may only be carried out by qualified and skilled technicians. Please do not operate the system if service or repair work is required! PROBLEM DEFINITION POSSIBLE CAUSE... -
Page 22: Maintenance And Repair
5.5 Maintenance and repair Please do not operate the garage door system if any repair or service work needs to be done, since a fault in the system or an incorrectly adjusted garage door can lead to severe injuries. Please have all repair and service work carried out by qualified and skilled technicians only. Only original spare parts may be used for repair work. -
Page 23: Accessories
8.0 ACCESSORIES Wireless handheld transmitter 4-channel Wireless handheld transmitter III 4-channel Spare battery for handheld transmitter (CR 2032) Wireless code lock 4-channel Supplementary antenna with 6.00 m coaxial cable Aluminium key switch IP54 Roof pull-button Cord for roof pull-button "FT" light barrier, 10 m range Flap door contact Safety switch strip 8.2 Kohm Warning lamp 24 V, 15 W...
Need help?
Do you have a question about the DOCOMATIC 1200 and is the answer not in the manual?
Questions and answers