
Related Manuals for Sony CDX-G1152U


Summary of Contents for Sony CDX-G1152U
- Page 1 4-542-302-43(1) FM/MW/SW Operating Instructions Compact Disc Player For the connection/installation, see page 14. To cancel the demonstration (DEMO) display, see page 8. CDX-G1152U/CDX-G1151U/CDX-G1150U...
- Page 2 OFF until the display disappears each time you turn the ignition off. Disclaimer regarding services offered by third parties Services offered by third parties may be changed, suspended, or terminated without prior notice. Sony does not bear any responsibility in these sorts of situations.
-
Page 3: Table Of Contents
Table of Contents Guide to Parts and Controls ....4 Getting Started Detaching the Front Panel....5 Setting the Clock . -
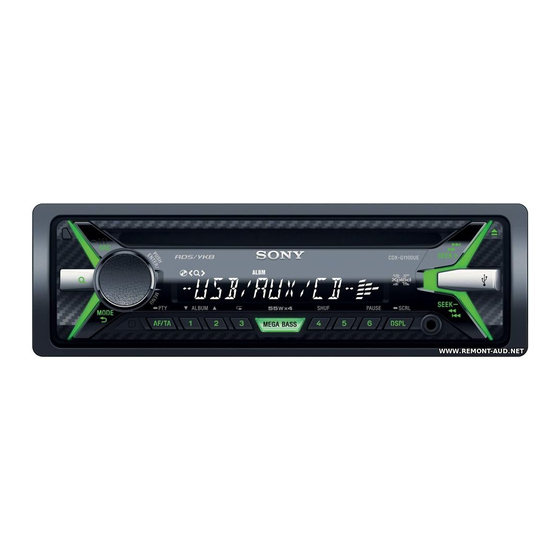
Page 4: Guide To Parts And Controls
Guide to Parts and Controls Main unit Front panel release button (back) Return to the previous display. SRC (source) MODE (page 6) Turn on the power. Change the source. Receptor for the remote commander PTY (program type) Press and hold for 1 second to turn the source Select PTY in RDS. -
Page 5: Getting Started
RM-X211 Remote commander Getting Started Detaching the Front Panel You can detach the front panel of this unit to prevent theft. Press and hold OFF until the unit turns off, press the front panel release button , then pull the panel towards you to remove. -
Page 6: Connecting A Usb Device
Connecting a USB Device Listening to the Radio Turn down the volume on the unit. Listening to the Radio Connect the USB device to the unit. To listen to the radio, press SRC to select [TUNER]. Storing automatically (BTM) Press MODE to change the band (FM1, FM2, FM3, MW, SW1 or SW2). -
Page 7: Using Radio Data System (Rds)
Using Radio Data System (RDS) Playback Selecting program types (PTY) Playing a Disc Press PTY during FM reception. Insert the disc (label side up). Rotate the control dial until the desired program type appears, then press it. The unit starts to search for a station broadcasting the selected program type. -
Page 8: Searching And Playing Tracks
Searching and Playing Tracks Settings Repeat play and shuffle play Canceling the DEMO Mode During playback, press (repeat) or You can cancel the demonstration display which SHUF repeatedly to select the desired appears when the source is off and the clock is displayed. -
Page 9: Sound Setup (Sound)
AUTO OFF Display Setup (DISPLAY) Shuts off automatically after a desired time when the unit is turned off: [NO], [30S] (30 DEMO (demonstration) seconds), [30M] (30 minutes), [60M] (60 Activates the demonstration: [ON], [OFF]. minutes). BLK OUT (black out) AUX-A (AUX audio) Turns off the illumination automatically for any Activates the AUX source display: [ON], [OFF]. -
Page 10: Additional Information
If you have any questions or problems concerning Notes on discs your unit that are not covered in this manual, consult your nearest Sony dealer. Do not expose discs to direct sunlight or heat sources such as hot air ducts, nor leave it in a car parked in direct sunlight. -
Page 11: Specifications
CD Player section WARNING Signal-to-noise ratio: 95 dB Battery may explode if mistreated. Do not Frequency response: 10 – 20,000 Hz recharge, disassemble, or dispose of in fire. Wow and flutter: Below measurable limit Cleaning the connectors The maximum number of: (CD-R/CD-RW only) ... -
Page 12: Troubleshooting
Copyrights During playback or reception, the demonstration mode starts. If no operation is performed for 5 minutes with Windows Media is either a registered trademark or [DEMO-ON] set, the demonstration mode starts. trademark of Microsoft Corporation in the United ... - Page 13 If these solutions do not help improve the situation, You cannot play back items via a USB hub. consult your nearest Sony dealer. This unit cannot recognize USB devices via a USB If you take the unit to be repaired because of CD hub.
-
Page 14: Connection/Installation
Parts List for Installation Connection/Installation Cautions Run all ground (earth) leads to a common ground (earth) point. × 2 Do not get the leads trapped under a screw, or caught in moving parts (e.g., seat railing). ... -
Page 15: Connection
Connection Subwoofer* Power amplifier* White White/black striped Front speaker* Gray Gray/black striped Green Green/black striped *1*2 Rear speaker Purple Purple/black striped Black Yellow For details, see “Making connections” (page 16). Blue/white striped (MAX 0.4A) from a wired remote control (not supplied)* from a car antenna (aerial) *1 Not supplied... -
Page 16: Installation
Making connections Installation To a common ground (earth) point First connect the black ground (earth) lead, then Removing the protection collar and the connect the yellow and red power supply leads. bracket To the +12 V power terminal which is energized at all times Before installing the unit, remove the protection Be sure to first connect the black ground (earth) -
Page 17: Detaching And Attaching The Front Panel
In such a case, Make sure the 4 catches on the protection collar consult your nearest Sony dealer. are properly engaged in the slots of the unit. Mounting the unit in a Japanese car You may not be able to install this unit in some makes of Japanese cars. - Page 18 http://www.sony-asia.com/caraudio/...
- Page 21 http://www.sony-asia.com/caraudio/...
- Page 22 .ر ا وﺻﻞ ﮐﻨﯿﺪ ﺟﺪا ﮐﺮدن و وﺻﻞ ﮐﺮدن ﭘﺎﻧﻞ ﺟﻠﻮﯾﯽ ﺗﻌﻮﯾﺾ ﻓﯿﻮز آﻣﭙﺮ ﻓﯿﻮز ﻧﮑﺎت Sony ﻧﺼﺐ واﺣﺪ در ﯾﮏ ﺧﻮدروی ژاﭘﻨﯽ Sony TOYOTA در داﺷﺒﻮرد/ﮐﻨﺴﻮل ﻣﺮﮐﺰی ﻧﮕﻬﺪارﻧﺪه ﻧﮕﻬﺪارﻧﺪه ...
- Page 23 ﺑﺮﻗ ﺮ اری اﺗﺼﺎﻻت ﻧﺼﺐ ﺑﻪ ﯾﮏ ﻧﻘﻄﻪ اﺗﺼﺎل ﺑﻪ زﻣﯿﻦ ﻣﺸﱰک ﺟﺪا ﮐﺮدن ﻗﺎب ﻣﺤﺎﻓﻆ و ﻧﮕﻬﺪارﻧﺪه وﻟﺘﯽ ﮐﻪ ﻫﻤﯿﺸﻪ ﺟﺮﯾﺎن در آن ﺑﺮﻗ ﺮ ار اﺳﺖ ﺑﻪ ﺗﺮﻣﯿﻨﺎل ﺑﺮق .ر ا ﺑﮕﯿﺮﯾﺪ و ﺳﭙﺲ آن ر ا ﺟﺪا ﮐﻨﯿﺪ دو...
- Page 24 اﺗﺼﺎل ﺳﺎب ووﻓﺮ آﻣﭙﻠﯽ ﻓﺎﯾﺮ ﺑﺮق ﺳﻔﯿﺪ ﺳﻔﯿﺪ/ﺳﯿﺎه ر اه ر اه ﺑﻠﻨﺪﮔﻮی ﺟﻠﻮ ﺧﺎﮐﺴﱰی ﺧﺎﮐﺴﱰی/ﺳﯿﺎه ر اه ر اه ﺳﺒﺰ ﺳﺒﺰ/ﺳﯿﺎه ر اه ر اه ﺑﻠﻨﺪﮔﻮی ﭘﺸﺖ ﺑﻨﻔﺶ ﺑﻨﻔﺶ/ﺳﯿﺎه ر اه ر اه ﺳﯿﺎه ﺑ ﺮ ای ﮐﺴﺐ اﻃﻼﻋﺎت زرد...
- Page 25 ﻟﯿﺴﺖ ﻗﻄﻌﺎت ﺑ ﺮ ای ﻧﺼﺐ اﺗﺼﺎل/ﻧﺼﺐ اﺣﺘﯿﺎط .ﻫﻤﻪ ﺳﯿﻢ ﻫﺎی اﺗﺼﺎل ﺑﻪ زﻣﯿﻦ ر ا ﺑﻪ ﻧﻘﺎط اﺗﺼﺎل ﺑﻪ زﻣﯿﻦ وﺻﻞ ﮐﻨﯿﺪ × 2 زرد ﻗﺮﻣﺰ ﻣﻮارد اﺣﺘﯿﺎﻃﯽ ×...
- Page 26 .ﺻﺪا ﭘﺮش دارد ﯾﺎ ﭘﺨﺶ .ﭘﺨﺶ ﮐﻨﯿﺪ ﺷام منﯽ ﺗﻮاﻧﯿﺪ آﯾﺘﻢ ﻫﺎ ر ا ﺗﻮﺳﻂ ﻫﺎب Sony .ﻣﺪت ﺑﯿﺸﱰی ﻃﻮل ﻣﯽ ﮐﺸﺪ ﺗﺎ ﭘﺨﺶ ﺷﻮد ﯾﮏ دﺳﺘﮕﺎه .ﺻﺪا ﻣﺘﻨﺎوب اﺳﺖ .ﻓﺎﯾﻞ ﺻﻮﺗﯽ ﻗﺎﺑﻞ ﭘﺨﺶ ﻧﯿﺴﺖ ...
- Page 27 .در ﻃﻮل ﭘﺨﺶ ﯾﺎ درﯾﺎﻓﺖ، ﺣﺎﻟﺖ منﺎﯾﺶ ﴍوع ﻣﯽ ﺷﻮد ﺣﻘﻮق ﻧﴩ [DEMO-ON] Windows Media ) [DEMO-OFF] Microsoft Corporation ﺻﻔﺤﻪ منﺎﯾﺶ از ﭘﻨﺠﺮه ﺻﻔﺤﻪ منﺎﯾﺶ ﻣﺤﻮ ﻣﯽ ﺷﻮد ﯾﺎ ﺑﺮ آن ﻇﺎﻫﺮ منﯽ Microsoft Corporation .ﺷﻮد ) [DIM-ON] Microsoft Microsoft ...
- Page 28 ﻗﺴﻤﺖ ﭘﺨﺶ ﮐﻨﻨﺪه ﻫﺸﺪار 20,000 – 10 متﯿﺰ ﮐﺮدن اﺗﺼﺎﻻت (CD-R/CD-RW ) 150 ( ) 300 ) 64/( ) 32 ( wma) WMA ( mp3) MP3 ﻗﺴﻤﺖ ﭘﺨﺶ ) USB 256 ( ﻧﮑﺎت ( wma) WMA ( mp3) MP3 ...
- Page 29 (ﻓﻮﻟﺪر )آﻟﺒﻮم MP3/WMA MP3/WMA ()ﻗﻄﻌﻪ ﻓﺎﯾﻞ ﺗﺠﻤﻊ رﻃﻮﺑﺖ ﺑ ﺮ ای ﻧﮕﻪ داﺷنت ﮐﯿﻔﯿﺖ ﺻﺪای ﺑﺎﻻ ﻧﮑﺎﺗﯽ درﺑﺎره دﯾﺴﮏ ﻫﺎ Sony ﻧﮕﻬﺪاری ﺗﻌﻮﯾﺾ ﺑﺎﻃﺮی ﻟﯿﺘﯿﻮﻣﯽ ﮐﻨﱰل از ر اه دور (CD) اﺣﺘﯿﺎط (CD) ﺑﻪ ﻃﺮف ﺑﺎﻻ...
- Page 30 (AUX ) AUX-A (DISPLAY) ﺗﻨﻈﯿﻢ ﺻﻔﺤﻪ منﺎﯾﺶ ) [OFF] [ON] ) DEMO [OFF] [ON] ) CT ) BLK OUT [OFF] [ON] ) BTM [OFF] [ON] (SOUND) ﺗﻨﻈﯿﻢ ﺻﺪا DIMMER [OFF] [ON] ) MEGABASS ) SND SYNC [OFF] [ON] [OFF] [ON] EQ5 PRESET ) AUTO SCR [OFF] [ON]...
- Page 31 ﺟﺴﺘﺠﻮ و ﭘﺨﺶ ﻗﻄﻌﺎت ﺗﻨﻈﯿامت ﭘﺨﺶ ﻣﮑﺮر و ﭘﺨﺶ ﻣﺨﻠﻮط DEMO ﻟﻐﻮ ﺣﺎﻟﺖ SHUF ر ا ﺑ ﺮ ای اﻧﺘﺨﺎب ﭘﺨﺶ ﯾﺎ ﺗﮑ ﺮ ار ، در ﻃﻮل ﭘﺨﺶ .ﻣﻮردﻧﻈﺮ ﺑﻪ ﻃﻮر ﻣﮑﺮر ﻓﺸﺎر دﻫﯿﺪ [DISPLAY] MENU ، ﮐﻨﱰل ر ا ﻓﺸﺎر دﻫﯿﺪ و ﺑ ﺮ ای اﻧﺘﺨﺎب .ﭼﺮﺧﺎن...
- Page 32 اﺳﺘﻔﺎده از ﺳﯿﺴﺘﻢ داده ﻫﺎی ر ادﯾﻮﯾﯽ ﭘﺨﺶ (RDS) ﭘﺨﺶ دﯾﺴﮏ (PTY) اﻧﺘﺨﺎب ﻧﻮع ﺑﺮﻧﺎﻣﻪ ﺑﺮﭼﺴﺐ ﺑﻪ ﻃﺮف ﺑﺎﻻ ﺑﺎﺷﺪ دﯾﺴﮏ ر ا ﻗ ﺮ ار دﻫﯿﺪ .ﻓﺸﺎر دﻫﯿﺪ ر ا درﻃﻮل درﯾﺎﻓﺖ ﮐﻨﱰل ﭼﺮﺧﺎن ر ا ﺑﭽﺮﺧﺎﻧﯿﺪ ﺗﺎ اﯾﻨﮑﻪ ﻧﻮع ﺑﺮﻧﺎﻣﻪ دﻟﺨﻮاه منﺎﯾﺎن .ﺷﻮد،...
- Page 33 اﺗﺼﺎل ﯾﮏ دﺳﺘﮕﺎه ﮔﻮش دادن ﺑﻪ ر ادﯾﻮ .درﺟﻪ ﺻﺪای واﺣﺪ ر ا ﮐﻢ ﮐﻨﯿﺪ ﮔﻮش دادن ﺑﻪ ر ادﯾﻮ .ر ا ﺑﻪ درﺳﺘﯽ ﺑﻪ واﺣﺪ ﻣﺘﺼﻞ ﮐﻨﯿﺪ دﺳﺘﮕﺎه [TUNER] (BTM) ذﺧﯿﺮه ﮐﺮدن ﺑﻄﻮر ﺧﻮدﮐﺎر FM1) MODE ، ، ، ،...
- Page 34 RM-X211 ﮐﻨﱰل ر اه دور ﻧﺤﻮه ﴍوع ﮐﺎر ﺟﺪا ﮐﺮدن ﭘﺎﻧﻞ ﺟﻠﻮﯾﯽ OFF ر ا ﺗﺎ وﻗﺘﯽ ﮐﻪ واﺣﺪ ﺧﺎﻣﻮش ﺷﻮد، ﻓﺸﺎر دﮐﻤﻪ ر ا ﻓﺸﺎر دﻫﯿﺪ و ﻧﮕﻪ دارﯾﺪ و ﺳﭙﺲ دﮐﻤﻪ رﻫﺎ ﮐﺮدن ﭘﺎﻧﻞ .دﻫﯿﺪ و ﭘﺎﻧﻞ ر ا ﺑﻪ ﺳﻤﺖ ﺧﻮدﺗﺎن ﺑﮑﺸﯿﺪ ﺗﺎ ﺟﺪا ﺷﻮد ﻫﺸﺪار...
- Page 35 ر اﻫﻨامی ﻗﻄﻌﺎت و ﮐﻨﱰل ﻫﺎ واﺣﺪ اﺻﻠﯽ ﻋﻘﺐ دﮐﻤﻪ رﻫﺎ ﮐﺮدن ﭘﺎﻧﻞ ﺟﻠﻮﯾﯽ ) SRC ﻣﻨﺒﻊ ) MODE ﺻﻔﺤﻪ ﮔﯿﺮﻧﺪه ﮐﻨﱰل از ر اه دور ) PTY ﻧﻮع ﺑﺮﻧﺎﻣﻪ ﺗﺎ دﮐﻤﻪ ﻫﺎی ﻋﺪدی ALBUM /...
- Page 36 ﻓﻬﺮﺳﺖ ﻣﻄﺎﻟﺐ ﻧﺤﻮه ﴍوع ﮐﺎر ﮔﻮش دادن ﺑﻪ ر ادﯾﻮ (RDS) ﭘﺨﺶ ﺗﻨﻈﯿامت DEMO (GENERAL) (SOUND) (DISPLAY) اﻃﻼﻋﺎت اﺿﺎﻓﯽ اﺗﺼﺎل/ﻧﺼﺐ...
- Page 37 ترک دعوی رسویس های ا ر ائه شده توسط شخص ثالث رسویس های ا ر ائه شده توسط شخص ثالث ممکن است بدون اطالع هیچ گونه مسئولیتی در .قبلی تغییر، معوق یا خامته یابند Sony .اینگونه موارد بر عهده منی گیرد...
- Page 39 http://www.sony-asia.com/caraudio/...
- Page 40 Sony Sony TOYOTA NISSAN ...
- Page 41 AMP REMOTE IN ...
- Page 42 (MAX 0.4A) 4 × 8 – 4 ) RCA...
- Page 43 × 2 8 × 5 × 4 ...
- Page 44 :READ MP3/WMA :USB NO SUPRT Sony FAT32 FAT16 FAT32 FAT16 :ERROR :HUB NO SUPRT :NO DEV :NO MUSIC :OVERLOAD :PUSH EJT ) ...
- Page 45 Windows Media [DEMO-ON] ) [DEMO-OFF] Microsoft Corporation ) [DIM-ON] Microsoft Corporation Microsoft Microsoft MPEG Layer-3 Thomson Fraunhofer IIS Google Inc Android MODE/( DSPL ) REM OUT ...
- Page 46 20,000 – 10 CD-R/CD-RW) ) 150 ( ) 300 ) 64/( ) 32 ( wma) WMA ( mp3) MP3 ) USB 256 ( ( wma) WMA ( mp3) MP3 8 – 4 ) 4 × 10⁸ 0 –...
- Page 47 CD-R/CD-RW ISO9660 MP3/WMA MP3/WMA ) MP3/WMA Sony (CD) (CD) (CD) CD-R/CD-RW CD-DA CD-DA CD-R/CD-RW CD-R/CD-RW CD-R/CD-RW...
- Page 48 (AUX ) AUX-A (DISPLAY) [ON] ) [OFF] ) DEMO [OFF] [ON] ) CT [OFF] [ON] CT ) BLK OUT ) BTM [OFF] [ON] (SOUND) DIMMER ) MEGABASS [OFF] [ON] [OFF] [ON] ) SND SYNC EQ5 PRESET [OFF] [ON] [DANCE] [POP] [ROCK] [R AND B] [OFF] ) AUTO SCR [AFRO POP] [JAZZ] [ELECTRONICA] [HIP-HOP] [OFF] [ON]...
- Page 49 DEMO SHUF [DISPLAY] MENU [DEMO] [DEMO-OFF] (Quick-BrowZer™) (SOUND) (GENERAL) (DISPLAY) MENU Quick-BrowZer (GENERAL) SEEK + ) CLOCK-ADJ ) CAUT ALM ) [OFF] [ON] ENTER Quick-BrowZer BEEP [OFF] [ON] AUTO OFF 60) [60M] ( 30) [30M] ( 30) [30S] [NO]...
- Page 50 (RDS) (PTY) ) INFO ( ) AFFAIRS ( ) NEWS ) DRAMA ( ) EDUCATE ( ) SPORT ) VARIED ( ) SCIENCE ( ) CULTURE ) ROCK M ( ) POP M ) LIGHT M (M O R ) EASY M OTHER M ( ) CLASSICS ( FINANCE (...
- Page 51 [TUNER] (BTM) FM1) MODE (SW2 [GENERAL] MENU [BTM] FM1) MODE ) AUX (SW2 SEEK +/– SEEK +/– SEEK +/– [AUX] [MEM] ) [AUX VOL] [SOUND] MENU...
- Page 52 RM-X211 ) VOL ) ATT SOUND SOUND MENU / / / ENTER ) / (+/– ) +/– [GENERAL] MENU VOL +/– ( [CLOCK-ADJ] SEEK +/– MENU DSPL...
- Page 53 ) SRC ) MODE ) PTY ALBUM / PUSH ENTER ) SHUF PAUSE MENU MEGA BASS MEGA BASS ) DSPL SEEK +/– SCRL ) / ...
- Page 54 (RDS) DEMO (GENERAL) (SOUND) (DISPLAY)
- Page 55 .سويتش تشغيل املح ر ّ ك إىل وضع اإليقاف إخالء املسؤولية عن الخدمات التي تقدمها الجهات الخارجية قد يتم تغيري الخدمات التي تقدمها الجهات الخارجية أو تعليقها أو أي مسؤولية عن أنواع إنهاؤها دون إخطار مسبق. وال تتحمل Sony .املواقف هذه...
- Page 56 .رجوع کنید ب ر ای کسب اطالعات بیشرت درباره اتصال/نصب، به صفحه ، ر اجع صفحة إللغاء العرض التوضيحي (DEMO) .ر ا ببینید ، صفحه ب ر ای لغو منایش حالت منایشی (DEMO) http://www.sony.net/ ©2014 Sony Corporation Printed in Thailand CDX-G1152U/CDX-G1151U/CDX-G1150U...
Need help?
Do you have a question about the CDX-G1152U and is the answer not in the manual?
Questions and answers