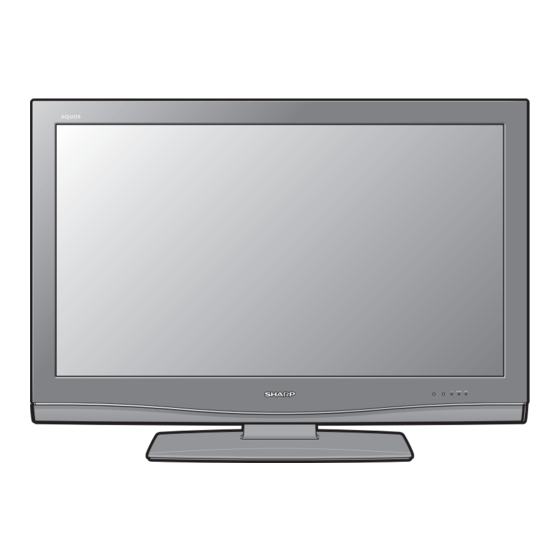
Sharp LC-37XD1E Operation Manual

Sharp LC-37XD1E Operation Manual

Hide thumbs Also See for LC-37XD1E:
Table of Contents

Advertisement

LC-37XD1E
LC-42XD1E
LCD COLOUR TELEVISION
LCD-FARBFERNSEHGERÄT
TÉLÉVISION COULEUR À ÉCRAN
À CRISTAUX LIQUIDES (LCD)
TELEVISORE A COLORI LCD
LCD-KLEURENTELEVISIE
TELEVISIÓN EN COLOR LCD
Downloaded From TV-Manual.com Manuals
OPERATION MANUAL
BEDIENUNGSANLEITUNG
MODE D'EMPLOI
MANUALE DI ISTRUZIONI
GEBRUIKSAANWIJZING
MANUAL DE MANEJO

Advertisement

Table of Contents
loading

Summary of Contents for Sharp LC-37XD1E

  • Page 1 LC-37XD1E LC-42XD1E LCD COLOUR TELEVISION LCD-FARBFERNSEHGERÄT TÉLÉVISION COULEUR À ÉCRAN À CRISTAUX LIQUIDES (LCD) TELEVISORE A COLORI LCD LCD-KLEURENTELEVISIE TELEVISIÓN EN COLOR LCD OPERATION MANUAL BEDIENUNGSANLEITUNG MODE D'EMPLOI MANUALE DI ISTRUZIONI GEBRUIKSAANWIJZING MANUAL DE MANEJO Downloaded From TV-Manual.com Manuals...
  • Page 2 SPECIAL NOTE FOR USERS IN THE U.K. The mains lead of this product is fi tted with a non-rewireable (moulded) plug incorporating a 13A fuse. Should the fuse need to be replaced, a BSI or ASTA approved BS 1362 fuse marked and of the same rating as above, which is also indicated on the pin face of the plug, must be used.
  • Page 3: Table Of Contents

    • The examples used throughout this manual are based on the LC-42XD1E model. Contents Geometry menu ..............18 Contents ..................1 Picture horizontal ............18 Dear SHARP customer ..............2 Important Safety Precautions ............2 Picture vertical ..............18 Phase position ..............18 Trademarks ..................2 Other menu items ..............19 Supplied accessories ..............3...
  • Page 4: Dear Sharp Customer

    Dear SHARP customer Thank you for your purchase of the SHARP LCD colour TV product. To ensure safety and many years of trouble- free operation of your product, please read the Important Safety Precautions carefully before using this product. Important Safety Precautions •...
  • Page 5: Supplied Accessories

    Supplied accessories AC cord ( g 1) Cable tie ( g 1) Stand unit ( g 1) Remote control Cable clamp 3 RCA to 15-pin unit ( g 1) (Small g 1, Large g 1) D-sub adapter ( g 1) Product shape varies in some countries.
  • Page 6: Setting The Tv

    Setting the TV on the wall • This TV should be mounted on the wall only with the wall mount bracket available from SHARP. (See page 36.) The use of other wall mount brackets may result in an unstable installation and may cause serious injuries.
  • Page 7: Tv (Front View)

    Quick guide TV (Front view) Remote control sensor OPC indicator OPC sensor SLEEP indicator B (Standby/On) indicator TV (Rear view) P ( s / r ) MENU button (Programme [channel] buttons) a (Power button) i ( l / k ) (Volume buttons) NOTE •...
  • Page 8: Inserting The Batteries

    Quick guide Inserting the batteries Before using the TV for the fi rst time, insert two “AAA” size batteries (supplied). When the batteries become depleted and the remote control unit fails to operate, replace the batteries with new “AAA” size batteries. Press and slide the battery cover to open it.
  • Page 9: Remote Control Unit

    Quick guide Remote control unit B (Standby/On) truD (Page 8) Demonstrate the truD effects in a dual screen format. (Page 14) m (Teletext) SLEEP TV: Display the analogue teletext. (Page 21) Set the sleep timer on (in units of 30 min.
  • Page 10: Turning On The Power

    Quick guide Turning on the power Initial auto installation (DTV) Press a on the TV. Digital Video Broadcasting is a transmission scheme. It is much more than a simple replacement for existing analogue television transmission. DVB provides more Standby mode stations, clearer picture quality and other services Press B on the remote control unit when the TV is on.
  • Page 11: Channel Selection Using The Station List (Analogue)

    Quick guide Entering characters using the buttons Channel selection using the station list (Analogue) This section explains how to change/delete/ move/rename stations using the analogue Station List. If you are watching DTV, refer to the “Using the digital programme list” section.
  • Page 12: Using External Equipment

    Using external equipment Setting the input source INPUT SOURCE Connecting a DVD player To view external source images, select the input source using b on You can use the EXT 3, 4, 5 (HDMI) or 6 (HDMI) EXT1 the remote control unit. (Page 19) terminals when connecting to a DVD player and other EXT2 audiovisual equipment.
  • Page 13: Connecting A Decoder

    Using external equipment Connecting a decoder Using AV Link function You can use the EXT 1 terminal when connecting a This TV incorporates four typical AV Link functions decoder and other audiovisual equipment. for smooth connections between the TV and other audiovisual equipment.
  • Page 14: Menu Operations

    Menu operations On-Screen Display Common operations Press MENU and the TV menu screen displays. Example Press c / d to select the desired menu, and then press OK. TV menu Press a / b to select the desired menu item. Picture Sound Connections...
  • Page 15: Picture Menu

    TitleB Menu operations Picture menu Colour temp.* Adjust the colour temperature to give the best white Various picture-related settings can be optimised. image. TV menu Item High: White with bluish tone Picture Sound Connections Mid-High: Intermediate tone between High and Middle SOFT Middle: Natural tone Backlight...
  • Page 16: Film Mode

    Menu operations Sound menu Film mode Automatically detects a fi lm-based source (originally Various sound-related settings can be optimised. encoded at 24/25 frames/second, depending on the vertical frequency), analyses it and then recreates each TV menu frame for fi lm-like picture quality. Sound Connections truD(R)
  • Page 17: Connections Menu

    Menu operations Connections menu HDMI setup HDMI (High-Defi nition Multimedia Interface) terminal selection. TV menu Press MENU and the TV menu screen displays. Connections Setup Press c / d to select “Connections”, and then Decoder EXT 2 press OK. Input select Press a / b to select “HDMI setup”, and then HDMI setup press OK.
  • Page 18: Supply Voltage

    Menu operations Setup menu Supply voltage Antennas with an integrated amplifi er need a supply You can search for stations automatically or manually voltage on the antenna line. (Page 4) as well as set the menu language, time and date, child lock, on-screen displays, etc.
  • Page 19: Child Lock

    Menu operations Manual tune Child lock Use the manual tune option when receiving TV signal With the child lock you can bar access to all stations whose TV/Colour standard deviate from the one immediately or daily for a certain time period. specifi...
  • Page 20: Miscellaneous

    Menu operations Miscellaneous Geometry menu No signal off You can set the geometry values of the picture such as When set to “Enable” the TV will automatically enter the picture position and phase relation. The adjustments standby mode if there is no signal input for 6 minutes. are stored independently for each input mode.
  • Page 21: Other Menu Items

    Menu operations Other menu items INPUT SOURCE Some of the useful features can be directly called up by Use the INPUT SOURCE screen to select/check the pressing assigned buttons on the remote control. external equipment connected to the terminal(s) on the back of the TV.
  • Page 22: Wide Modes

    Menu operations Wide modes Wide modes PC only You can select the picture size. You can select the picture size. Selectable picture size varies with the type of signal received. Press f . • The Wide modes menu displays. Basically, if you set Auto format to “on” in the Setup Press f or a / b to select a desired item on menu, the optimum Wide mode is automatically chosen the menu.
  • Page 23: Analogue Teletext

    Menu operations Analogue Teletext Using analogue teletext menu While in the analogue teletext mode, press What is Teletext? MENU to display the Teletext Menu. Teletext broadcasts pages of information and entertainment to specially equipped television sets. Menu Your TV receives Teletext signals broadcast by a TV Newsflash Reveal Setup...
  • Page 24: Setup

    Menu operations Buttons for teletext operation Setup Buttons Description Menu Colour (Red/ Select a group or block of pages displayed Green/Yellow/ in the coloured brackets at the bottom of the Setup Newsflash Reveal Blue) screen by pressing the corresponding Colour (Red/Green/Yellow/Blue) on the remote Sub-title pages control unit.
  • Page 25: Dtv Menu Operations

    DTV menu operations DTV menu operation buttons DTV On-Screen Display Use the following buttons on the remote control unit to Example operate the DTV Menu. DTV MENU / Language Select DTV MENU Language • To customise the language preference for audio and MHEG5 application.
  • Page 26: About Using The Character Set Screen

    DTV menu operations Language About using the character set screen Select language settings for audio (if a programme is broadcast in more than one language) and MHEG5 In some cases you may be prompted to enter service. characters. See below for details. Press OK while the cursor is on “Language”.
  • Page 27: Favourite

    DTV menu operations Favourite Move To Assign services to 4 different favourite groups. Use this function to change the position of two selected services Press a / b to select the desired service. Press a / b to select the desired service. Press on the remote control.
  • Page 28: Select

    DTV menu operations Installation Select Use this function to jump to the specifi c service in This section describes how to reconfi gure the DTV one step. This is useful when there are many services settings after conducting Initial auto installation displayed on screen to scroll through.
  • Page 29: Carrier Setup

    DTV menu operations Carrier Setup System Setup This is provided for you to rename (label), erase, or re- Confi gure On-Screen Display and Child Lock settings. scan carriers. “Carrier” in this context refers to a service station that provides a set of individual services. OSD Setup Press c / d to select “Installation”.
  • Page 30: Child Lock

    DTV menu operations Software Upgrade Child Lock The software for controlling the built-in DTV decoder This function allows TV and Radio services to be can be upgraded when necessary. In Great Britain this restricted. It prevents children from watching violent or can be achieved via an Over Air Download.
  • Page 31: Common Interface

    DTV menu operations Common Interface Inserting a CA card Check the detailed information on the Common A single DVB Common Interface (CI) will be Interface module card in use. implemented to allow adoption of a Conditional Access (CA) system by means of a plug-in CA module. Press OK while the cursor is on “Common Scrambled Broadcasting service can be routed via the Interface”.
  • Page 32: About Epg

    (about 23W) until the programmed event is broadcast. When pressing a on the TV to turn off the power, the power consumption will be same as normal standby consumption (about 2.4W: LC-37XD1E/2.3W: LC-42XD1E), and the EPG Timer will not be in operation. Downloaded From TV-Manual.com Manuals...
  • Page 33: Using The Esg

    DTV menu operations Viewing a service banner Using the ESG A service banner shows event names, start/end time of The Electronic Service Guide (ESG) is a simplifi ed event, and other useful information. version of EPG, giving you only essential information of current events for faster access.
  • Page 34: Using The Multi Audio Function

    DTV menu operations Using the multi audio function Using the MHEG5 application (UK only) Some services bring you programmes with the MHEG Change the audio mode and language for the currently (Multimedia and Hypermedia Expert Group) application viewed service. encoded, letting you experience DTV interactively. Press 2 when no other menu screen is When provided, the MHEG5 application will start when displayed.
  • Page 35: Appendix

    Appendix Troubleshooting Problem Possible Solution • No power. • Check if you pressed B on the remote control unit. If the indicator on the TV lights up red, press B . • Is the AC cord disconnected? • Check if you pressed a on the TV. •...
  • Page 36: Pc Compatibility Chart

    Appendix Communication procedure PC compatibility chart Send the control commands from the PC via the RS- 232C connector. Horizontal Vertical VESA Resolution The TV operates according to the received command Frequency Frequency Standard and sends a response message to the PC. ✔...
  • Page 37: Rating Table For Child Lock

    Appendix Commands CONTROL CONTROL CONTROL ITEM COMMAND PARAMETER CONTROL ITEM COMMAND PARAMETER CONTENTS CONTENTS H-POSITION AV (f10 – e10) POWER SETTING GEOMETRY POWER OFF INPUT SELECTION A PC (0 – 80) TV (CHANNEL FIXED) AV (f10 – e10) PC (0 – 80) DTV (CHANNEL FIXED) V-POSITION AV (f10 –...
  • Page 38: Specifi Cations

    Operating temperature • As a part of policy of continuous improvement, SHARP reserves the right to make design and specifi cation changes for product improvement without prior notice. The performance specifi cation fi gures indicated are nominal values of production units.
  • Page 39: End Of Life Disposal

    If the product is used for business purposes and you want to discard it: Please contact your SHARP dealer who will inform you about the take-back of the product. You might be charged for the costs arising from take-back and recycling. Small products (and small amounts) might be taken back by your local collection facilities.
  • Page 40 Note Downloaded From TV-Manual.com Manuals...
  • Page 41 ) : LC-37XD1E ] : LC-42XD1E : LC-37XD1E LC-42XD1E 540.0 540,0 ( 920.0 ) / [ 1031.0 ] (99.9 ) / [95.9] (120.9) / [139.5] ( 920, 0 ) / [ 1031,0 ] (99, 9 ) / [95,9] (120,9) / [139,5] (823.0 ) / [933.0]...
  • Page 42: Sharp Corporation

    SHARP CORPORATION SHARP ELECTRÓNICA ESPAÑA S.A. Polígono Industrial Can Sant Joan Calle Sena s/n 08174 SANT CUGAT DEL VALLÉS BARCELONA (ESPAÑA) Printed on environmentally friendly paper Printed in Spain Auf ökologischem Papier gedruckt Gedruckt in Spanien Imprimé sur papier écologique Imprimé...

This manual is also suitable for:

Lc-42xd1eLc-46xd1eLc-52xd1e

Table of Contents