
Subscribe to Our Youtube Channel
Related Manuals for True TUI-15-R/L-SS-B


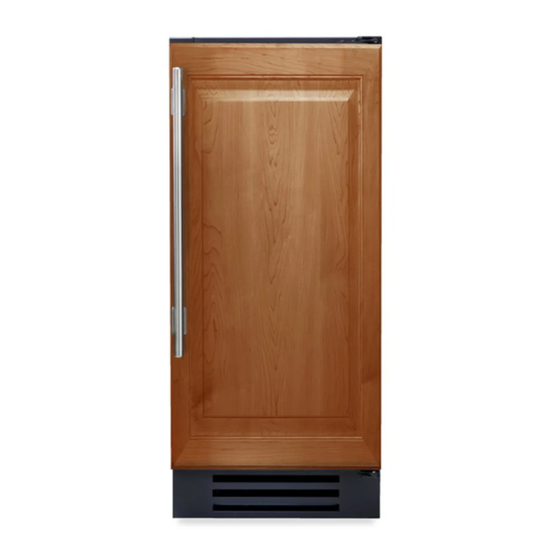
Summary of Contents for True TUI-15-R/L-SS-B
- Page 1 I N DE X TRUE RESIDENTIAL ™ 15 INCH CLE AR ICE MACHINE MODEL S INSTALL ATION GUIDE AND USER’ S MANUAL...
- Page 2 We hope that this guide offers you what you need for the True Residential products in your customers’ (or your own) homes. If you don’t see what you’re looking for, please contact True customer service at 888-616-8783 or info@true-residential.com or you...
- Page 3 Commercial refrigeration refined for the home, envied in the industry, and crafted—gorgeously—in America. AL 4.9.15...
-
Page 4: Table Of Contents
WATER SUPPLY DR AIN C ONNECTION WATER FILTER P O SITION THE UNIT TRUE PRECISION C ONTROL OPER ATION AND TRUE ICE ™ MACHINE C OMP ONENTS BEFORE OPER ATING ICE MAK ING SEQUENCE P OW ER AND BIN LIGHT... -
Page 6: Instal L Ation Check List
INS TALL ATION CHECKLIS T Use this checklist during installation to ensure that no part of the process has been overlooked. Has an authorized True dealer or licensed installer inspected stainless steel surfaces for imperfection? (Cosmetic defects are covered by a limited 30-day warranty) Have all packaging materials and tape been removed? Is the water temperature always between 40˚F (4˚C) and 100˚F (38˚C)? - Page 7 TRUE RESIDENTIAL LINE...
- Page 8 1 5 INCH S TAINLESS S TEEL S T A I N L E S S S T E E L D O O R ( S S ) ICE MACHINE TUI-15-R/L-SS-B 1 5 INCH OVERL AY PANEL S O L I D P A N E L R E A D Y D O O R ( O P )
- Page 9 TRUE RESIDENTIAL LINE...
-
Page 10: Fe Atures Of The Ice Machine
6 - 9 F E A T U R E S O F T H E I C E M A C H I N E O W N E R S H I P S A F E T Y P R E C A U T I O N S P R O P E R D I S P O S A L A N D C F C D I S P O S A L W A R N I N G &... - Page 11 MU S T B E IN S TA L L E D A C C O R D IN G T O A L L Before you start to install your True Residential Ice A P P L I C A B L E N AT I O N A L , S TAT E A N D L O C A L Machine, carefully inspect it for freight damage.
-
Page 12: Warning & Safe T Y L Abel S
PROPER DISP OSAL OF WARNING & SAFE T Y L ABEL S THE OLD ICE M ACHINE CAUTION: Child entrapment and suffocation are not problems Located on the of the past. Junked or abandoned ice machines are back of the unit. still dangerous, even if they will sit for “just a few days.”... -
Page 13: Uncr Ating
E. Remove kickplate located inside ice bin. The Move your unit as close to the final location as kickplate attaches to the front of the ice machine possible before removing the wooden skid. with magnets. PACKING MATERIAL REMOVE KICKPLATE FROM ICE BIN KICKPLATE INSTALLED TRUE RESIDENTIAL LINE... -
Page 14: El Ectrical Specifications
ELEC TRIC AL SPECIFIC ATIONS WA R NIN G : T HI S A P P L I A N C E MU S T B E P R O P E R LY If the outlet is a standard G R O UND E D. - Page 15 TRUE RESIDENTIAL LINE...
-
Page 16: Instal L Ation Specifications
12 - 21 I N S T A L L A T I O N S P E C I F I C A T I O N S O V E R L A Y P A N E L I N S T A L L A T I O N I N S T A L L I N G D O O R S T O P P L U M B I N G C O N N E C T I O N S L E V E L I N G I C E M A C H I N E... - Page 17 1 5 INCH S TAINLESS S TEEL ICE MACHINE TUI-15-R/L-SS-B " " " TOP VIEW FRONT VIEW FRONT SIDE ICE MACHINE VIEW " SIDE VIEW VIEW VIEW " ICE MACHINE ICE MACHINE " " " 3/16 " 11/16 Dimensions may vary by ± 1/8"...
- Page 18 INS TALL ATION SPECIFIC ATIONS - S TAINLESS SOLID DOOR True’s Stainless Solid Door units are designed to be inserted into a cabinet opening or free standing. Below are recommended minimum dimensions for rough opening. Avoid running wires or 9"...
- Page 19 N O T E: UNI T I S SH O W N W I T H O P T I O N A L PA N E L / H A N D L E P R O V ID E D BY O T H E R S. TRUE RESIDENTIAL LINE...
- Page 20 INS TALL ATION SPECIFIC ATIONS - SOLID PANEL RE ADY True’s Solid Panel Ready Door units are designed to be inserted into a cabinet opening or free standing. Below are recommended minimum dimensions for rough opening. Avoid running wires or 9"...
- Page 21 SOLID DOOR PANEL DIMENSIONS SIDE " Door Panel Width 14 5/8 VIEW " " Door Panel Height 29 23/32 Door Panel Depth 3/4" max Door Panel Weight 10 lb. max. " " " *Including 3/4" thick panel (provided by others) TRUE RESIDENTIAL LINE...
-
Page 22: Overl Ay Panel Ins Tall Ation
OVERL AY PANEL INS TALL ATION Required Tools: Phillips Screwdriver • 3/8" Wrench • 1/8" Drill Bit • Three (3) Screws #6 • SEE PAGE 16 FOR OVERLAY PANEL DIMENSIONS BEFORE INSTALLING. FOR EASY OVERLAY INSTALLATION, ICE MACHINE DOOR REMOVAL IS REQUIRED. 1. - Page 23 Overlay panel and door stay aligned with each other while installing. IM A G E A Reinstall screws on top and bottom hinge Door Layers - General View OVERLAY PANEL DOOR GASKET HANDLE OVERLAY PANEL TRUE RESIDENTIAL LINE...
-
Page 24: Instal Ling D O Or Stop
INS TALLING THE D OOR S TOP PLUMBING CONNEC TIONS All units are provided with an optional door stop. The ice machine must be installed with adequate When installed, the door stop will restrict the door clearance for water and drain connections at the rear from opening past approximately 120º... -
Page 25: L E V Eling Ice Machine 2
Locate the water supply. adequate ventilation in your room. The water supply line should be connected to the 2. Proper leveling of your True unit is critical to house supply with an easily accessible shut-off valve operating success. Effective drainage and door between the water supply and the ice machine. -
Page 26: Dr Ain C Onnection
DR AIN CONNEC TION WATER FILTER The True Ice™ machine has a built-in drain pump that The built-in water filter is designed to filter sediment, will pump water up to a drain point, such as a sink. remove unpleasant taste and odor and inhibit scale. - Page 27 TRUE RESIDENTIAL LINE...
- Page 28 24 - 27 T R U E P R E C I S I O N C O N T R O L O P E R A T I O N A N D T R U E I C E M A C H I N E C O M P O N E N T S ™...
- Page 29 TRUE PRECISION CONTROL OPER ATION ™ 1. Power Button 2. Bin Light 3. Initiate Cleaning Sequence ADDITIONAL CONTROL FEATURES: 4. Adjust Cube Size Press LIGHT to change bin light color. See instructions on page 30. 5. Display CLEAN LIGHT = Reset “FLT” (Filter Replacement Reminder).
-
Page 30: Before Oper Ating 2
BEFORE OPER ATING ICE M AKING SEQUENCE To insure ice quality, please clean and sanitize Your True Ice™ machine will produce one batch this machine prior to first use. To ensure proper of ice (24 cubes) roughly every 30 minutes. The... -
Page 31: Cube Size Adjustment
BIN LIG HT Use the LIGHT button as follows: LIGHT • PRESS THE BUTTON REPEATEDLY TO CYCLE THROUGH THE 14 PRESET DESIGNER COLORS. • HOLD THE LIGHT BUTTON FOR FIVE SECONDS TO TOGGLE THE BIN LIGHT ON OR OFF. TRUE RESIDENTIAL LINE... -
Page 32: Bin Thermo Stat / Ice L E V El Adjustments 2
BIN THERMOS TAT / ICE LE VEL WATER QUALIT Y SE T TING AD JUS TMENT Your True Ice™ machine may operate differently depending on the water quality setting of the The bin thermostat senses when ice has reached machine. To determine your water quality, it is the top of the bin and shuts the machine off. - Page 33 TRUE RESIDENTIAL LINE...
-
Page 34: Gener Al Maintenance 3
30 - 39 G E N E R A L M A I N T E N A N C E W A T E R S H U T T E R S , I C E C H U T E , A N D P U M P C L E A N - O U T C A P S P R A Y B A R D I S A S S E M B L Y W A T E R F I L T E R R E P L A C E M E N T A N D R E P L A C E M E N T P A R T S C O N D E N S E R C L E A N I N G... -
Page 35: C Ondenser Cl E Aning 3
WARNING: IF YOU DO NOT UNDERSTAND THE Perform every six months. Follow the PROCEDURES OR SAFETY PRECAUTIONS THAT MUST BE FOLLOWED, CALL YOUR LOCAL TRUE instructions on page 35 or the instructions on SERVICE REPRESENTATIVE TO PERFORM THE the inside of the ice machine door. - Page 36 WATER SHU T TERS Water shutters prevent spraying water from escaping the evaporator compartment. Removing water shutters for cleaning: 1. Lift shutter shaft out of recesses on either end of shaft. 2. To reinstall, insert ends of shaft into recesses above either side of evaporator compartment opening.
- Page 37 2. Carefully pull the two apart. 3. To reinstall spray bar attach the water supply hose to the bottom of the spraybar assembly. Re-seat the spray bar in the evaporator compartment. SPRAY BAR ICE CHUTE WATER SHUTTERS TRUE RESIDENTIAL LINE...
-
Page 38: Warr Ant
WATER FILTER REPL ACEMENT REPL ACEMENT PART S The built-in water filter is designed to filter True maintains a record of the serial number sediment, remove unpleasant taste and odor and for your unit. If at any time during the life of inhibit scale. - Page 39 Allow the stainless steel equipment to air dry. Oxygen helps maintain the passivity film on stainless steel. 5. Never use hydrochloric acid (muriatic acid) on stainless steel. 6. Regularly restore / passivate stainless steel. TRUE RESIDENTIAL LINE...
- Page 40 F O R T HR EE SEC OND S. 6. Create a descaling solution by mixing 10 fl. oz. A full descaling should be performed every six of undiluted True Ice™ Machine Descaler with 1 months. Descaling also involves removing key ice gallon of water.
- Page 41 4. Descale the ice machine per the instructions on page 35. 5. Press the power button to start ice making. NOTE: THE FRESH WATER THAT IS INTRODUCED DURING DESCALING AND START-UP WILL FLUSH THE PROPYLENE GLYCOL DOWN THE DRAIN. TRUE RESIDENTIAL LINE...
- Page 42 FREQUENTLY A SKED QUE S TIONS Q. WHY IS THE MACHINE RUNNING BUT NOT MAKING Q. WHY IS THE ICE MACHINE MAKING LESS ICE ANY ICE? THAN BEFORE? A. The machine will run but not make ice if there A. If the ambient temperature or the water is no water supplied to the machine.
- Page 43 This limited or picture of tag must be returned to TRUE along warranty excludes any type of freight / concealed with the above listed information. Warranty labor damage.
- Page 44 God. OUTSIDE U.S. / CANADA This warranty does not apply to, and TRUE is not responsible for, any warranty claims made on products sold or used outside the United States or Canada.
- Page 45 N O T E S TRUE RESIDENTIAL LINE...
- Page 46 CONTACT US www.true-residential.com info@true-residential.com (636)240-2400 • toll free (888)616-8783 2001 East Terra Lane O’Fallon, MO 63366...
Need help?
Do you have a question about the TUI-15-R/L-SS-B and is the answer not in the manual?
Questions and answers