Advertisement
corsair.com
EMAIL:
support@corsair.com
facebook.com/corsairmemory
FACEBOOK:
BLOG:
corsair.com/blog/
USA and CANADA: (800) 205-7657 | INTERNATIONAL: (510) 657-8747 | FAX: (510) 657-8748
47100 Bayside Parkway • Fremont • California • 94538 • USA
© 2015 Corsair Components, Inc. All Rights Reserved. The Corsair logo is a registered trademark, and Hydro Series is a trademark of
Corsair in the United States and/or other countries. All other names and products are trademarks and property of their respective owners.
Document Number: 49-001322 rev AA
FORUM:
forum.corsair.com
twitter.com/corsairmemory
TWITTER:
H110i GT PAGE:
corsair.com/H110iGT
H110i GTX
QUICK START GUIDE
GUIDE DE DÉMARRAGE RAPIDE
SCHNELLSTARTANLEITUNG
GUIDA INTRODUTTIVA
GUÍA BREVE DE INICIO
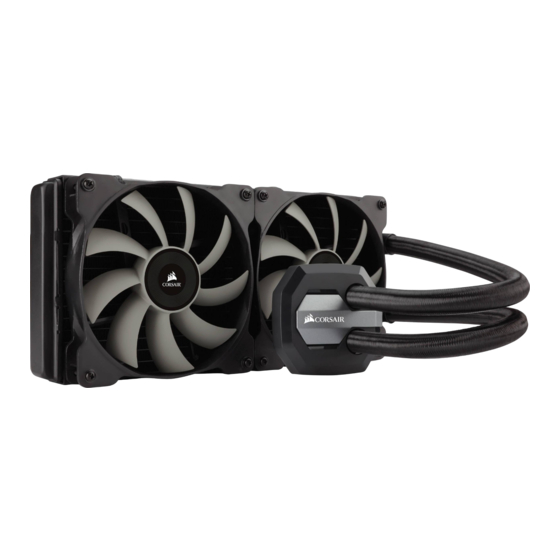
EXTREME PERFORMANCE LIQUID CPU COOLER
TM
Advertisement

Related Manuals for Corsair H110iGTX


Summary of Contents for Corsair H110iGTX
- Page 1 EXTREME PERFORMANCE LIQUID CPU COOLER © 2015 Corsair Components, Inc. All Rights Reserved. The Corsair logo is a registered trademark, and Hydro Series is a trademark of Corsair in the United States and/or other countries. All other names and products are trademarks and property of their respective owners.
-
Page 2: Included Hardware
Se il case non include un ritaglio, occorrerà rimuovere la scheda madre dal case prima di procedere con l'installazione. CORSAIR LINK USB CABLE Nota: La mayoría de las carcasas de las nuevas PC incluyen una puerta trasera para el x4 AMD BLACK STANDOFF... - Page 3 Installing the Intel Backplate Installation de la plaque arrière Intel • Installation der Intel-Rückwand Installazione della piastra posteriore Intel • Instalación de la placa de soporte para Intel Intel LGA 1366 • For LGA 115X installation, slide the backplate • Per l'installazione del supporto LGA 115X, far scorrere pins inside (figure 1).
- Page 4 Installing the Intel Stando Screws Install the Fans and Radiator Installation des vis d'entretoise Intel • Installation der Intel-Abstandhalter Installation des ventilateurs et du radiateur • Lüfter und Kühler einbauen Installazione delle viti del supporto Intel • Instalación de los tornillos del separador para Intel Installare la ventola e il radiatore •...
- Page 5 Installing the Pump Unit Connect Power to the Fans and Pump Installation de la pompe • Montage der Pumpe • Installazione dell'unità pompa Branchement des ventilateurs et de la pompe à l'alimentation • Lüfter und Pumpe anschließen Collegamento delle ventole e della pompa all'alimentazione • Conexión de la alimentación Instalación de la unidad de bomba •...
- Page 6 Collegare la pompa all'header USB • Enchufe el conector USB a la bomba Using the included Corsair Link USB cable, ™ attach pump unit to a motherboard USB header. Utilisez le câble USB Corsair Link ™ inclus pour brancher x8 LONG FAN SCREWS x4 LGA 115X / 1366 STANDOFF x4 LGA 2011/2011-3 STANDOFF la pompe à...
- Page 7 Installing the AMD Stando Screws Installation des vis d'entretoises AMD • Installation der AMD-Abstandhalter Installazione delle viti del supporto AMD • Instalación de los tornillos del separador para AMD • Remove the stock AMD top mounting • Rimuovere le sta e AMD visualizzate per il bracket(s) shown.
- Page 8 Installing the AMD Mounting Bracket Installation du support de fixation AMD • Installation der AMD-Montagehalterung Installazione della sta a di montaggio AMD • Instalación del soporte de montaje para AMD Note: It is important that the AMD retention bracket be Nota: È...
- Page 9 Installing the Pump Unit Install the Fans and Radiator Installation de la pompe • Montage der Pumpe • Installazione dell'unità pompa Installation des ventilateurs et du radiateur • Lüfter und Kühler einbauen Instalación de la unidad de bomba • Installare la ventola e il radiatore • Instale los ventiladores y el radiador Attach the radiator and the fans as shown.
- Page 10 VENTOLA_CPU sulla scheda madre. attach pump unit to a motherboard USB header. • Connect the fans to the two connectors • Collegare le ventole ai due connettori che fuoriescono Utilisez le câble USB Corsair Link ™ inclus pour brancher coming o the pump.
- Page 11 3. Où peut-on se procurer des vis de radiateurs supplémentaires pour la configuration « Push-Pull » ? Vous pouvez acheter ces vis sur le site Web www.corsair.com 3. ¿Dónde puedo comprar un tornillo adicional de Radiador para configurarlo en modo push/pull (empuje/extracción)? Se pueden comprar tornillos adicionales en www.corsair.com...
- Page 12 Thank you for purchasing the Corsair Hydro Series H110i GTX Extreme Performance Liquid CPU Cooler. Please visit: corsair.com/h80i to download a detailed user guide or to obtain technical support. Merci d'avoir acheté le dissipateur à liquide pour processeur hautes performances Corsair Hydro Series H110i GTX.
Need help?
Do you have a question about the H110iGTX and is the answer not in the manual?
Questions and answers