Table of Contents
Advertisement
Advertisement
Table of Contents

Related Manuals for Alcatel IDEAL


Summary of Contents for Alcatel IDEAL
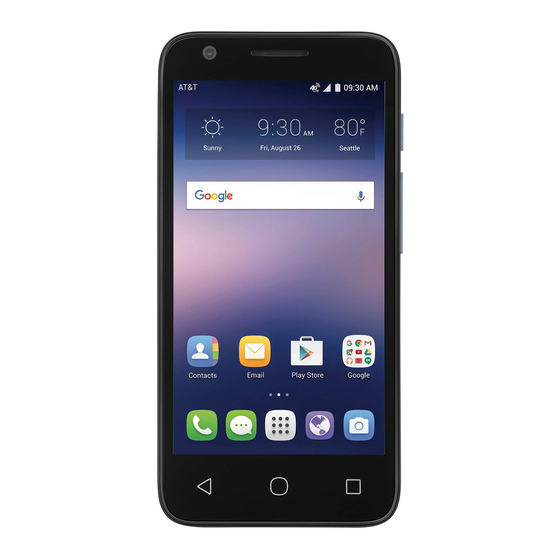
- Page 1 IDEAL...
-
Page 2: Table Of Contents
Table of Contents Your device............1 Keys and connectors ..........1 Getting started ............4 Home screen ............6 Text input ............13 Using onscreen keyboard ........13 Android keyboard ..........13 Text editing ............. 13 AT&T Services ............ 14 AT&T services............14 4 Call and Contacts..........15 Call ................ - Page 3 Others ..............51 Radio ................ 51 Calculator ..............51 File Manager ............52 Voice Search ............52 Sound Recorder ............ 52 Other applications ..........53 10 Google applications.........54 10.1 Chrome..............54 10.2 Gmail................54 10.3 Maps.................54 10.4 YouTube..............54 10.5 Play Store..............55 10.6 Drive................55 10.7 Play Music..............55 10.8 Play Movies &...
-
Page 4: Your Device
Your device ........Keys and connectors ......Headset jack Homescreen Recent apps Back Home Charger/USB port... - Page 5 Camera Power/Lock Volume Recent apps • Touch to open a card view of applications you've worked with recently. • Long press to access Manage Home screen, Add widgets, Manage Wallpaper and Settings. Home • While on any application or screen, touch to return to the Home screen.
-
Page 6: Power/Lock
Power/Lock • Press: Lock the screen/Light up the screen • Press and hold: Power on or pop up the menu to get more options, such as Power off, Restart and Airplane mode. • Press and hold the Power key and Volume down key to make a screenshot. -
Page 7: Getting Started
Getting started ........1.2.1 Set-up Inserting or removing the SIM/microSD card A micro-SIM card is required to make phone calls and use cellular networks. If you have a SIM card, insert it before setting up the phone. Do not attempt to insert other SIM types like mini or nano cards, as you may damage your phone. -
Page 8: Home Screen
1.2.3 Power off your phone To turn your phone off, hold down the Power key until the Phone options appear, then select Power off. Home screen .......... You can bring all your favorite icons (applications, shortcuts, folders and widgets) to your Home screen for quick access. Touch the Home key to switch to Home screen. - Page 9 1.3.1 Using the touchscreen Touch To access an application, touch it with your finger. Long press Long press the Home screen to access WALLPAPERS / WIDGETS/SETTINGS screen. Drag Place your finger on any item to drag it to another location. Slide/Swipe Slide the screen to scroll up and down the applications, images, web pages…...
-
Page 10: Notification Panel
1.3.2 Status bar From the status bar, you can view both phone status (on the right side) and notification information (on the left side). Drag down the status bar to view notifications and drag again to enter the quick settings panel. Touch and drag up to close it. - Page 11 1.3.3 Search bar The device provides a Search function which can be used to locate information within applications, the device or the web. Search by text • Touch Search bar from the Home screen. • Enter the text/phrase you want to search for. • Touch on the keyboard if you want to search on the web.
- Page 12 1.3.4 Lock/Unlock your screen To protect your device and privacy, you can lock the device screen by choosing swipe or creating a password, PIN or unlock pattern. To create a screen unlock pattern on the Home screen and select Settings, then • Touch touch Lock screen\Screen lock\Pattern.
- Page 13 1.3.5 Personalize your Home screen You can long press a folder, an application or a widget to activate the Move mode, and drag the item to your preferred Home screen. Reposition Long press the item to be repositioned to activate the Move mode, drag the item to the desired position and then release.
- Page 14 Consult recently-used applications To consult recently-used applications, touch the Recent apps key. Touch a thumbnail in the window to open the application. Touch one thumbnail and slide it right/left or touch X Remove to close the application. Touch at the bottom of the screen to close all the running applications.
-
Page 15: Text Input
Text input ........Using onscreen keyboard ....Onscreen Keyboard settings Touch the Application tab from the Home screen, select Settings>Language & input, choose a keyboard under Keyboard & input methods. Google keyboard ........Touch to Touch to switch be- enter voice tween "abc/Abc"... -
Page 16: At&T Services
AT&T Services ......AT&T services ......... AT&T Locker™: Store, sync, and share photos, videos, and documents in one place. AT&T Protect Plus: You can back up your content and find this device if it is lost. AT&T Visual Voicemail: Review and manage your voicemail from your phone. -
Page 17: Call And Contacts
Call and Contacts ....... Call ........... 4.1.1 Making a call You can launch a call by using Call. Touch the icon on the Home screen to access the Call application. Slide to access the RECENT and CONTACTS. Touch to display keyboard. -
Page 18: Answering Or Rejecting Call
Enter the desired number from the keyboard and touch place the call or select a contact from CONTACTS or RECENT by sliding or touching tabs, then to make the call. The number you entered can be saved to Contacts by touching and then touching Create new contact. -
Page 19: Calling Voicemail
When you receive a call, you can touch ANSWER to answer the call, or touch the incoming call and then: • Slide the icon to the right to answer; • Slide the icon to the left to reject; • Slide the icon upwards to reject the call by sending a preset message. - Page 20 Touch to end the current call. Touch to activate the speaker during the current call. Touch this icon again to deactivate the speaker. Touch to mute the current call. Touch this icon again to unmute the call. Touch to display the Dial pad. Touch to hold the current call.
- Page 21 4.1.5 Managing multiple calls With this phone you can handle multiple calls at the same time. Swap calls When you accept two calls, touch the icon, you can now switch between two lines. The current call will be put on hold and you are able to join the other call.
- Page 22 Other • Quick responses: To edit quick responses which will be used when you reject a call with messages. Call settings • Call barring: Touch to configure Call barring settings. Mark the check box to activate the call barring for outgoing and incoming calls.
-
Page 23: Contacts
to text for the person using the hearing aid and converts outgoing text from the hearing aid device to a spoken voice for the person on the other end of the conversation. • DTMF Tones: Dual Tone Multi-Frequency, or DTMF is a method for instructing a telephone switching system of the telephone number to be dialled, or to issue commands to switching systems or related telephony equipment. -
Page 24: Consult Contacts
4.2.1 Consult your contacts Touch to search in Contacts. Touch to open Quick Contact panel. Touch to add a new contact. Delete a contact To delete a contact, touch the icon on the left of contact you want to delete, the icon will turn to , then touch confirm to delete. - Page 25 • Revert AT&T Touch to revert to show AT&T address Address Book book. • Show contacts Touch to set contacts type to show, ALL, type Business or People. • Settings Set contacts' display mode. 4.2.2 Managing contact groups The contact group helps you to improve the organization of your contacts.
- Page 26 Touch to save. Touch to select a picture for the contact. Touch to unfold the other predefined labels of this category. If you want to add more information, touch ADD ANOTHER FIELD to add a new category. When finished, touch to save.
- Page 27 Import/Export, then select to Import/Export contacts from/ to SIM card, phone storage, Accounts, etc. You can share a single contact or contacts with others by sending the contact’s vCard to them via Bluetooth, Gmail, etc. Touch a contact you want to share, touch the Menu icon from Contact details screen, and select Share, then select the application to perform this action.
-
Page 28: Messaging
Messaging ......You can create, edit and receive SMS and MMS with this phone. To send a message, touch from the Home screen then select Messaging. 5.2.1 Write a message On the message list screen, touch the new message icon to write text/multimedia messages. -
Page 29: Email
An SMS message of more than 160 characters will be charged as several SMS. A counter will be on the right of the text box to remind you how many characters are allowed to be entered in one message. Specific letters (accented) will also increase the size of the SMS, this may cause multiple SMS to be sent to your recipient. - Page 30 5.2.4 Manage messages When receiving a message, an icon will appear on the status bar as a notification. Drag down the status bar to open the Notification panel, touch the new message to open and read it. You can also access the Messaging application and touch the message to open it.
-
Page 31: Adjust Message Settings
5.2.5 Adjust message settings You can adjust a range of message settings. From the Messaging application screen, touch and touch Settings. • SMS enable Touch to change your default SMS app. Storage • Delete old Select to delete old messages when the messages maximum number of stored messages is reached. - Page 32 • Group Touch to enable use MMS to send a messaging single message when there are multiple recipients. • Creation Touch to select MMS creation mode. mode • Maximum Select to input the maximum message message size size. Notifications • Notifications Select to display message notifications in the status bar.
- Page 33 • Vibrate Select to have phone vibrate as a notification when receiving a new message. • Cell broadcast Touch to select channels and configure settings languages. • Emergency Touch to enter emergency alert settings, alerts including whether to show threats and alert tones.
-
Page 34: Calendar
Calendar & Alarm clock & Calculator ........Calendar ......... Use Calendar to keep track of important meetings, appointments, etc. Multimode view You can display the Calendar in weekly, monthly, or agenda view. • Touch the Year/Month/Week/Agenda label on the bottom to change your Calendar view. - Page 35 To create new events You can add new events from any Calendar view except Year. • Touch the icon to access new event edit screen. • Fill in all required information for this new event. If it is a whole-day event, you can select ALL DAY. • When finished, touch from the top of the screen.
- Page 36 Time ..........Your mobile phone has a built-in clock. To open it, touch the Application tab from the Home screen, then touch Time. 6.2.1 Alarm To set an alarm From the Clock screen, touch to enter the Alarms screen, then touch to add a new alarm.
- Page 37 To adjust alarm settings Touch from the Alarms screen. The following options will be available under Settings: Clock • Style Touch to set Analog or Digital style. • Automatic home Will automatically add a home clock while clock travelling outside. To disable it, unmark the checkbox.
- Page 38 Touch to start the countdown. Pause/play Add a countdown Delete 6.2.4 Timer From the Time screen, touch to enter the Timer screen. Touch to start the timer. Show a list of records according to the updated time: Touch Pause: Touch Share the timer through Bluetooth, Gmail, etc.: Touch Delete the record: Touch Calculator ........
- Page 39 • Swipe the basic calculation screen to the left to open the scientific calculation. • Or turn the device to the landscape mode from the basic panel to open the scientific calculation. This option only available if Settings > Display > When device is rotated > Rotate screen contents is on.
-
Page 40: Getting Connected
Getting connected ....To connect to the internet with this device, you can use 3G/4G networks or Wi-Fi, whichever is most convenient. Connecting to the Internet ....7.1.1 3G/4G To create a new access point A new 3G/4G network connection can be added to your device with the following steps: • Touch on the Home screen to access Settings. - Page 41 the Wi-Fi icon will appear on the status bar whenever the device detects an available wireless network within range. The following steps activate the notification function when Wi-Fi is on: • Touch on the Home screen to access Settings. • Touch Wi-Fi. Then touch the Menu icon and select Advanced.
-
Page 42: Connecting To Bluetooth Devices
2. Touch FORGET to confirm. You are recommended to use alcatel Bluetooth headsets, which have been tested and proved compatible with your phone. You can go to www.alcatel-mobile.com for more information about the alcatel... -
Page 43: Connecting To A Computer
Connecting to a computer ....With a USB cable, you can transfer media files and other files between microSD card/internal storage and computer. To connect/disconnect your device to/from the computer: • Use the USB cable that came with your device to connect the device to a USB port on your computer. -
Page 44: Connecting To Virtual Private Networks
• Then following the instructions on your device to share your device’s internet connection with other devices. Connecting to virtual private networks ..........Virtual private networks (VPNs) allow you to connect to the resources inside a secured local network from outside that network. - Page 45 notification for the VPN disconnection. To edit/delete a VPN To edit a VPN: • Touch on the Home screen to access Settings. • Touch More\VPN. • VPNs you have added are listed; long press the VPN you want to edit. • Touch Edit profile.
-
Page 46: Multimedia Applications
Multimedia applications ... Camera ........... Your device is fitted with a Camera for taking photos and shooting videos. Before using the Camera, please be sure to open the protective lens cover before use to avoid affecting your picture quality. Touch to switch Touch to show between front/ settings. - Page 47 to choose camera mode or touch to adjust a number of settings in framing mode. Back camera shooting mode • Auto Auto mode is turned on. mode • Polaroid In default, Polaroid will stitch two shots into one picture. Touch to display more options.
-
Page 48: Gallery
• Grid Switch the toggle to enable/disable grid view. It divides the screen into equal parts and helps you take better photos by making it simple to align compositional elements to the grid, such as the horizon or buildings to the lines in the grid. • Exposure Touch to set exposure value. - Page 49 Working with pictures You can work with pictures by editing them, sharing them with friends, etc. Touch to share the picture. Touch to edit the picture. Touch to show more settings. Batch operation Gallery provides a multi-select function, so that you can work with pictures/videos in batches.
-
Page 50: Others
Others .......... Radio ..........Your device is equipped with a radio . You can use the application as a traditional radio with saved channels or with parallel visual information related to the radio program on the display if you turn to stations that offer Visual Radio service. To access this function, touch Apps icon from the Home screen, then touch Radio. -
Page 51: Voice Search
File Manager works with both external SD card and internal storage. File Manager displays all data stored on both microSD card and internal storage, including applications, media files; videos, pictures or audios you have captured; other data transferred via Bluetooth, USB cable, etc. When you download an application from PC to microSD card, you can locate the application on File Manager, then touch it to install it in your device. -
Page 52: Google Applications
Google applications ....Google apps are preinstalled on your phone to improve work efficiency and help you enjoy life. This manual briefly introduces the apps. For detailed features and user guides, refer to related websites or the introduction provided in the apps. You are recommended to register with a Google account to enjoy all the functions. - Page 53 Delete all contents During web page surfing, touch for settings or more options. 10.3 Gmail As the Google’s web-based email service, Gmail is configured when you first set up your phone. Gmail on your phone can be automatically synchronised with your Gmail account on the web.
- Page 54 6 Finally, touch the icon to send. 7 If you do not want to send the mail out right away, you can icon and then Save draft or touch the Back key touch the to save a copy. To view the draft, touch your account name to display all labels, then select Drafts.
-
Page 55: Drive
10.4 Maps Google Maps offers satellite imagery, street maps, 360° panoramic views of streets, real-time traffic conditions, and route planning for traveling by foot, car, or public transportation. By using this application, you can get your own location, search for a place, and get suggested route planning for your trips. - Page 56 the phone or microSD card using a USB cable. You will find five categories in which all songs are classified: PLAYLISTS, GENRES, ARTISTS, ALBUMS, SONGS. Touch their tabs to open the lists. Touch a song to play it. ...
-
Page 57: Settings
Settings ........ To access this function, touch from Home screen and then touch the Settings icon. 11.1 Wireless & networks ......11.1.1 Wi-Fi Using Wi-Fi you can now to surf the Internet without using your SIM card whenever you are in range of a wireless network. The only thing you have to do is to enter the Wi-Fi screen and configure an access point to connect your device to the wireless network. - Page 58 11.1.4 Mobile networks Mobile Data Touch to enable mobile data such as email, web browsing and push notifications over the cellular network. International Data roaming If you don’t need to transmit data on other operators’ mobile networks, disable International Data roaming to avoid incurring significant roaming charges.
-
Page 59: Device
such events because the network tunnel is disrupted, causing applications to disconnect, time out, fail, or even the computing device itself to crash. For more information on VPN, refer to “7.6 Connecting to virtual private networks”. 11.1.8 More...\Emergency alerts Emergency alerts • Presidential: Presidential alerts are always displayed. - Page 60 11.2.2 Sound & notification Touch to adjust call and notification ringtones, music, notification and other audio settings. • Sound Set volume for media, ringtone, notification and alarms. • Headset Mark the checkbox to enable headset mode mode. Ringtones will only be heard from the headset if it is plugged in.
-
Page 61: Automatically Lock
11.2.3 Display • Brightness Touch to adjust the brightness of the level screen. • Wallpaper Touch to set the wallpaper. • Sleep Touch to set screen timeout. • Daydream Touch to setup what and how to display when the phone is locked and sleeping. • Font size Touch to set the fond size. - Page 62 Owner info Touch to input owner information which will display on the locked screen. 11.2.5 Storage Use these settings to monitor the total and available space on your device and on your microSD card; to manage your microSD card. If a warning message comes up saying that device memory is limited, you are required to free up space by deleting some unwanted applications, downloaded files, etc.
-
Page 63: Personal
11.3 Personal ..........11.3.1 Location Touch the switch to enable or disable the use of information from Wi-Fi and mobile networks to determine your approximate location, for use in Google Maps, when you search, and so on. When you select this option, you’re asked whether you consent to share your location anonymously with Google’s location service. -
Page 64: Device Administrators
a PIN code. Touch Change SIM PIN to change the PIN code. SMS message limit Touch to set a SMS message limit alert in order to prevent applications from sending SMS two frequently. Make passwords visible Touch the switch to show passwords as you type. Device administrators Touch to view activate or deactivate device administrators. - Page 65 Apps with usage access When you allow Apps access, the app can view general information about the apps on your device, such as how often you use them. 11.3.3 Accounts Contacts, data or other information can be synchronised from multiple accounts, depending on the applications installed on your phone.
- Page 66 Personal dictionary Touch to open a list of the words you’ve added to the dictionary. Touch a word to edit or delete it. Touch the add button (+) to add a word. Current Keyboard Touch to select an input method. Google keyboard The Google keyboard settings apply to the onscreen keyboard that is included with your device.
- Page 67 11.3.5 Backup & reset Back up my data Mark the checkbox to back up your device’s settings and other application data to Google Servers, with your Google Account. If you replace your device, the settings and data you’ve backed up are restored onto the new device for the first time you sign in with your Google Account.
-
Page 68: System
Press the Volume up key and the Power key at same time until the screen lights up. Device reset Touch to erase all configures and preference settings on phone, it will not delete data or media. Touch OK to confirm. 11.4 System ............. - Page 69 11.4.2 Accessibility You use the Accessibility settings to configure any accessibility plug-ins you have installed on your device. Talkback Touch to turn on/off to activate/deactivate talkback function. Switch access Switch access allow you to control your device using configurable key combination. You can move focus to clickable items and select them.
- Page 70 Accessibility shortcut Touch to enable/disable quick activating for accessibility features. Text-to-speech output Touch to update the settings for text-to-speech output, such as the speech rate. Touch & hold delay Touch to adjust the duration of touch and hold delay. This function enables your phone to differ touch and touch &...
-
Page 71: Software Update
Software update To access Software update, please open Settings>System >AT&T Software updates. Touch Check for updates, and the device will search for the latest software. Software update requires Wi-Fi networks. If there is a software update available but you haven’t connect Wi-Fi, touch CONTINUE to connect to Wi-Fi network, the software will download automatically when Wi-Fi connected. -
Page 72: Safety Information
Safety information ....We recommend that you read this chapter carefully before using your device. The manufacturer disclaims any liability for damage, which may result as a consequence of improper use or use contrary to the instructions contained herein. • TRAFFIC SAFETY Given that studies show that using a device while driving a vehicle constitutes a real risk, drivers are requested to refrain from using their device when the vehicle is not parked. - Page 73 When the device is switched on, it should be kept at least 15 cm from any medical device such as a pacemaker, a hearing aid or insulin pump, etc. Do not let children use the device and/or play with the device and accessories without supervision.
- Page 74 These seizures or blackouts may occur even if a person never had a previous seizure or blackout. If you have experienced seizures or blackouts, or if you have a family history of such occurrences, please consult your doctor before playing video games on your device or enabling a flashing-lights feature on your device.
- Page 75 personal attributes, and duplicate or distribute them, as this may be considered to be an invasion of privacy. It is the user's sole responsibility to ensure that prior authorization be obtained, if necessary, in order to record private or confidential conversations or take a photograph of another person;...
- Page 76 Avoid dropping the device or battery. If the device or battery is dropped, especially on a hard surface, and the user suspects damage, take it to a service center for inspection. Improper battery use may result in a fire, explosion or other hazard.
- Page 77 equipment use. They are also compliant to the eco design directive 2009/125/EC. Due to different applicable electrical specifications, a charger you purchased in one jurisdiction may not work in another jurisdiction. They should be used for this purpose only. The charger shall be installed near the device and shall be easily accessible.
- Page 78 from that to which the receiver is connected. - Consult the dealer or an experienced radio/TV technician for help. FCC Caution: Changes or modifications not expressly approved by the party responsible for compliance could void the user‘s authority to operate the equipment. FCC RF Exposure Information (SAR): This device is designed and manufactured not to exceed the emission limits for exposure to radio frequency (RF) energy...
- Page 79 "http://www.fcc.gov/oet/ea/fccid" www.fcc.gov/oet/ea/fccid after searching on: FCC ID: 2ACCJB039 For this device, the highest reported SAR value for usage near the body is: Maximum SAR for this model and conditions under which it was recorded: Body-worn 1.27 W/kg SAR compliance for body operation is based on a separation distance of 0 cm between the device and the human body.
- Page 80 • LICENCES microSD Logo is a trademark. The Bluetooth word mark and logos are owned by the Bluetooth SIG, Inc. and any use of such m arks by TCL Communication Ltd. and its affiliates is under license. Other trademarks and trade names are those of their respective owners.
-
Page 81: General Information
General information ....• Internet address: http://www.alcatelonetouch.us • Hot Line Number: see "TCL Communication Ltd. Services" leaflet or go to our website. On our website, you will find our FAQ (Frequently Asked Questions) section. You can also contact us by e-mail to ask any questions you may have. - Page 82 of mobile devices and devices in complying with Intellectual Property rights. TCL Communication Ltd. will at no stage be responsible for the inability or failure of the Third Party Materials to operate on this device or in interaction with any other devices of the purchaser. To the maximum extent permitted by law, TCL Communication Ltd.
-
Page 83: Warranty
Warranty ........Your device is warranted against any defect or malfunctioning which may occur in conditions of normal use during the warranty period of twelve (12) months (1) from the date of purchase as shown on your original invoice. Batteries (2) and accessories sold with your device are also warranted against any defect which may occur during the first six (6) months (1) from the date of purchase as shown on your original invoice. - Page 84 Electronic Recycling (Within USA Only): For more information on Electronic Recycling, please: 1) Visit ALCATEL ONETOUCH Electronic Recycling Program website at http://www.alcatelonetouch.us/electronic- recycling-program, or 2) Call ALCATEL ONETOUCH US Customer Support at 1-855- 368-0829.
-
Page 85: Troubleshooting
Troubleshooting ......Before contacting the service centre, you are advised to follow the instructions below: • You are advised to fully charge ( ) the battery for optimal operation. • Avoid storing large amounts of data in your device as this may affect its performance. - Page 86 • Check the battery charge level. • My device cannot charge properly • Make sure that your battery is not completely discharged; if the battery power is empty for a long time, it may take around 20 minutes to display the battery charger indicator on the screen.
- Page 87 subscription includes this service. I am unable to add a contact in my contacts • Make sure that your SIM card contacts are not full; delete some files or save the files in the device contacts (i.e. your professional or personal directories). SIM card PIN locked • Contact your network operator to obtain the PUK code (Personal Unblocking Key).
- Page 88 • After a partial charge, the battery level indicator may not be exact. Wait for at least 20 minutes after removing the charger to obtain an exact indication. • Adjust the brightness of screen as appropriate • Extend the email auto-check interval for as long as possible. • Update news and weather information on manual demand, or increase their auto-check interval.
Need help?
Do you have a question about the IDEAL and is the answer not in the manual?
Questions and answers