Table of Contents
Advertisement
Advertisement
Table of Contents

Related Manuals for Russell Hobbs RH140


Summary of Contents for Russell Hobbs RH140
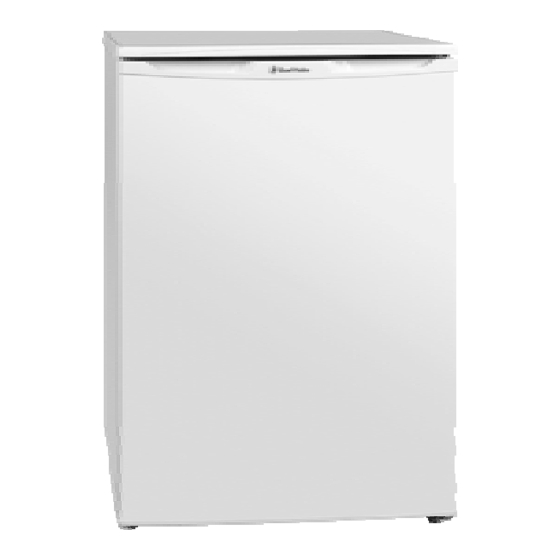
- Page 1 REFRIGERATOR INSTRUCTION MANUAL Model num ber: RH140 Please read these instructions carefully and keep them for future reference For Customer Services, Spare parts & Warranty Information please call 0845 683 8717 Opening times: Monday - Friday 8am until 8pm Saturday & Sunday 10am until 4pm...
-
Page 2: Technical Data
Technical data RUSSEL HOBBS Brand Table Top Refrigerator Appliance type 4 Stars Star rating 50 Hz. Frequency ( Hz ) 15 W Light Power (Watts) 12 l Net Freezer volume 105 l Net Refrigerator Volume 2 kg Freezing capacity (kg/24h) 220 - 240V Rated Voltage ( V ) Climate Class +Ambient Range... -
Page 3: Table Of Contents
Index Technical data ........................1 BEFORE USING THE APPLIANCE ..............3 Safety Instructions ......................3 Recommendations ......................4 Installation and Switching On The Appliance ..............5 Before Switching On ......................5 THE PARTS OF THE APPLIANCE AND THE COMPARTMENTS ......6 THE VARIOUS FUNCTION AND POSSIBILITIES .......... -
Page 4: Before Using The Appliance
BEFORE USING THE APPLIANCE Safety Instructions • If the model contains R600a-see name plate inside refrigerator (the coolant isobutane), naturals gas that, is very environmentally friendly but also combustible. When transporting and installing the unit care must be taken to ensure that none of the refrigeration circuit components become damaged. -
Page 5: Recommendations
Recommendations Warning: Do not use mechanical devices or other means to accelerate the defrosting process, other than those recommended by the manufacturer. Do not use electrical appliances inside the food storage compartments of the appliance, unless they are of the type recommended by the manufacturer. Keep ventilation openings, in the appliance enclosure or in the built-in structure, clear of obstruction. -
Page 6: Installation And Switching On The Appliance
Installation and Switching On The Appliance • This appliance is connecting to 220-240V or 200-230V and 50 Hz. Please check nameneplate of appliance and be sure voltage range suitable to your mains voltage. • You can offer help from the service to install and switching on the appliance. •... -
Page 7: The Parts Of The Appliance And The Compartments
THE PARTS OF THE APPLIANCE AND THE COMPARTMENTS 1) Top Table 8) Leveling Feet 2) Freezer Compartment and Cover 9) Bottle Shelf 3) Ice Tray 10) Bottle Rock 4) “Door Open” Indicator 11) Top Shelf 5) Refrigerator Shelf 12) Top Shelf Cover 6) Crisper Cover 13) Egg Shelf 7) Crisper... -
Page 8: The Various Function And Possibilities
THE VARIOUS FUNCTION AND POSSIBILITIES Thermostat Setting • Thermostat automatically regulates the inside temperature of the refrigerator compartment and freezer compartment.By rotating the knob from position 1. to 5., colder temperatures can be obtained. • « 0 » position shows thermostat is closed and no cooling is available. •... -
Page 9: Accessories
Accessories “Door Open” Indicator; • The « Door Open » indicator on the handle shows whether the door has closed properly or whether it is still open. • If the indicator is red, the door is still open. • If the indicator is white, the door is properly closed. •... -
Page 10: Cleaning And Maintenance
CLEANING AND MAINTENANCE • Disconnect unit from the power supply before cleaning. • Do not clean the appliance by pouring water. • The refrigerator compartment should be cleaned periodically using a solution of bicarbonate of soda and lukewarm water. • Clean the accessories seperately with soap and water Do not clean them in the washing machine. -
Page 11: Replacing The Light Bulb
The frost, accumulated in the freezer compartment, should be removed periodically. The freezer compartment should be cleaned in the way as the refrigerator compartment, with the defrost operations of the compartment at least twice a year. For this; • The day before you defrost, set the thermostat dial to 5. position to freeze the foods completely. -
Page 12: Transportation And Changing Of Installation Position
TRANSPORTATION AND CHANGING OF INSTALLATION POSITION Transportation and Changing of Installation Position • The original packages and foamed polystyrene (PS) can be concealed if required. • In transportation the appliance should be tied with a wide stripe or a strong rope. The rules written on the corrugated box must be applied while transporting. - Page 13 Step-3: Unscrew the two screws which are Step-4: Dismantle the bottom hinge. fixing the bottom hinge. Step-5: After removing the door from the Step-6: Screw the pin on the left top hinge. cabined and unscrew the pin of the right top hinge. Step-7: Replace the bushing and bushing Step-8: Unscrew the pin of the bottom caps on the door as shown.
-
Page 14: Before Calling Your After Sales Service
Step-9: Assemble the door and the bottom Step-10: Assemble both levelling feet to hinge with two screw on the left their places. side. BEFORE CALLING YOUR AFTER SALES SERVICE If your refrigerator is not working properly,it may be a minor problem, therefore check the following, before calling an electrician to save time and money. - Page 15 If there is water in the lower part of the refrigerator ; Check that ; The drain hole for defrost water is not clogged(Use defrost drain plug to clean the drain hole) If your fridge is not cooling enough; Your fridge is designed to operate in the ambient temperature intervals stated in the standards, according to the climate class stated in the information label.
- Page 16 For Customer Services, Spare Parts & Warranty Information please call 0845 683 8717 Opening times: Monday - Friday 8am until 8pm Saturday & Sunday 10am until 4pm Customer Service Department Picktree Court Picktree Lane Chester-le-Street Co Durham DH3 3SY Revision 1 This symbol is known as the 'Crossed-out wheelie bin Symbol'.
Need help?
Do you have a question about the RH140 and is the answer not in the manual?
Questions and answers