
Related Manuals for Keestar GK1800


Summary of Contents for Keestar GK1800
- Page 1 Bag Closing Sewing Machine INSTRUCTIONS, ENGINEER’S AND PARTS MANUAL PORTABLE BAG CLOSER...
-
Page 2: Table Of Contents
INSTRUCTIONS FOR Portable Bag Closer First Edition TABLE OF CONTENTS Page APPLICATIONS AND STRUCTURE SAFTY AND ADJUSTMENTS SAFTY INSTALLATION AND ADJUSTMENTS OPERATION 5 - 9 STITCHING CHANGING THE NEEDLE LOOPER AND NEEDLE ADJUSTMENTS CLEANING THE MACHINE LUBRICATION MAINTAINANCE OPTIONAL ACCESSORIES EXPLODED VIEWS AND DESCRIPTION OF PARTS SPARE PARTS LIST... -
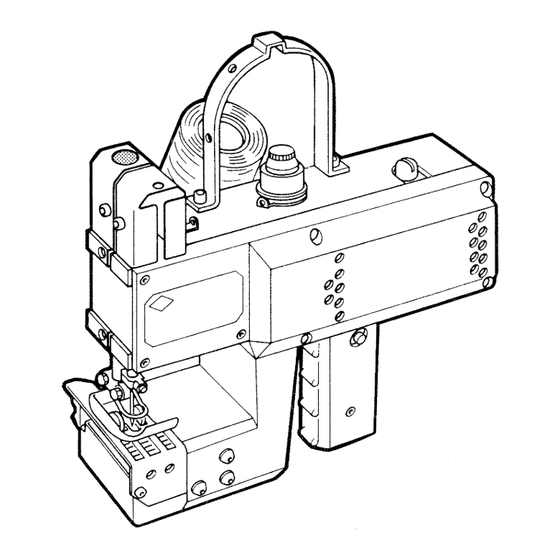
Page 3: Applications And Structure
APPLICATIONS AND STRUCTURE The Portable Bag Closer is a lastest and upgraded product, which has been designed to stitch paper, plastic, net, jute, raffia, textile bags etc. with different thickness from thin to thick. Wholly metallic built, the well processed components ensures a great performance also with heavy materials and hard duty work. -
Page 4: Safty And Adjustments
SAFETY AND ADJUSTMENTS SAFETY The machine has to be disconnected from the power supply by pulling out the main plug before: 1. Threading needle and looper. 2.replacing any parts such as needle presser foot, throat plate, looper, spreader, feed dog, needle guard, folder, fabric guide etc. -
Page 5: Installation And Adjustments
Do not damage the button under hammer stroke. Routine and maintenance must be done by an electrician or under direction and supervision of special skilled personnel. INSTALLATION AND ADJUSTMENS Thread the machine as shown, and make sure the thread end is about 10cm out of the needle's eye. -
Page 6: Operation
Adjust the current knob in the transformer will change the sewing speed of the machine. Use a sample to test the quality of stitching. Place a sample under the press foot and push the start button. OPERATION STITCHING If the chain stitch is tight or loose, please turn the tension knob to regulat till the machine sews and chains off perfectly. -
Page 7: Changing The Needle
CHANGING THE NEEDLE Loosen the screw for the needle and draw out the needle. Insert the shank of the new needle as far as it will go into the needle seat and with the flat on the shank facing to the front. Retighten screw for the needle on the flat of the needle shank and thread the needle eye. -
Page 8: Cleaning The Machine
Loosen the screw for the looper and replace the looper. Retighten screw for the looper. Warning: Do not loosen the screw A which is position the looper. The presser foot pressure is regulated with the regulating screw. CLEANING THE MACHINE Clean the machine at least once a week from lint. -
Page 9: Lubrication
LUBRICATION The machine has to be oiled before use. Monthly: Oiled on thread cutter, needle bar and pressure foot bar. Release the screw shown in the figure. Lubricated by grease from the oil point, retighten the screw. Warning: Do not drop oil and grease on the belt. Yearly: Open the cover, lubricated by grease on feed dog gear, looper cam and moving parts of... -
Page 10: Optional Accessories
OPTIONAL ACCESSORIES Balancer Pedestal stand with foot pedal Pedestal and Column... -
Page 12: Spare Parts List
SPARE PARTS LIST M001 Cone holder M043 Pressure bar bushing M085 Carbon brush M002 Thread guide bracket M044 Bearing M086 Motor M003 Tension knob M045 Lever shaft washer M087 Screw M004 Tension spring M046 Lever M088 Position screw M005 Tension screw M047 Pressure bar bracket slot M089 Pulley...
Need help?
Do you have a question about the GK1800 and is the answer not in the manual?
Questions and answers