Philips BDP2205 Service Manual
Hide thumbs
Also See for BDP2205:
- User manual (28 pages) ,
- Specifications (3 pages) ,
- Brochure & specs (3 pages)
Table of Contents
Advertisement
Quick Links
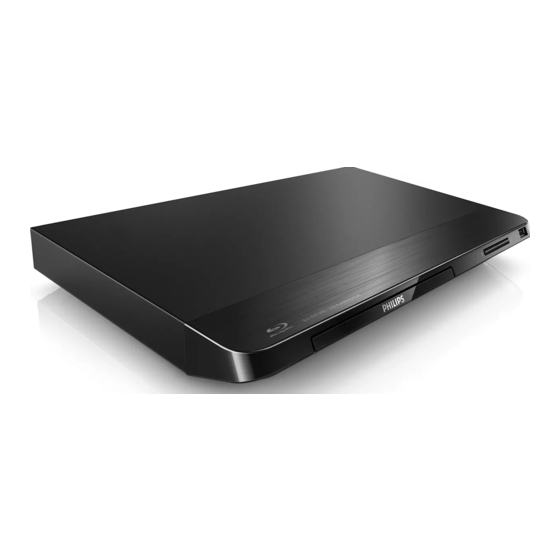
Blu-ray Player
Copyright 2014 WOOX Innovations Limited.
All rights reserved. No part of this publication may be reproduced, stored in a retrieval system
or transmitted, in any form or by any means, electronic, mechanical, photocopying, or otherwise
without the prior permission of WOOX Innovations. Philips and the Philips'Shield Emblem are
registered trademarks of Koninklijke Philips N.V. and are used by WOOX Innovations Limited
under license from Koninklijke Philips N.V.
Published by Arya & Lynn WK1417
Subject to modification
Version 1.3
TABLE OF CONTENTS
Location of PC Boards & Versions Variation ........................ 1
Specifi cations ....................................................................... 2
Safety Instruction .................................................................. 3
Software Upgrade Instruction..................................................4
Troubleshooting.................................................................... 5
Disassembly Instructions ..................................................... 6
Set Block Diagram ................................................................ 7
Set Wiring Diagram .............................................................. 8
Circuit Diagram & PCBA Layout........................................... 9
Set Mechanical Exploded View ..........................................10
Revision List ........................................................................ 11
BDP2205/F7/12/05
Page
3140 038 61483
Advertisement
Table of Contents

Related Manuals for Philips BDP2205


Summary of Contents for Philips BDP2205
- Page 1 WOOX Innovations. Philips and the Philips’Shield Emblem are registered trademarks of Koninklijke Philips N.V. and are used by WOOX Innovations Limited under license from Koninklijke Philips N.V.
- Page 2 PCB Board Locations FRONT CONTROL BOARD LOADER POWER BOARD MAIN BOARD VERSION VARIATIONS Type / Versions BDP2205 Service Policy Board in used /1 2 MAIN BOARD POWER BOARD FRONT CONTROL BOARD LOADER C -- Component Lever Repair Tips: * M -- Module Lever Repair...
-
Page 3: Performance Specifications
4 Performance Specifications 4.1 Audio Performance 4.1.1 Analogue Audio Outputs 4.1.2 Digital Audio Outputs Standard Reference: IEC60958 IEC61937 4.1.2.1 Coaxial Output Description Specification Test Condition 75Ω termination Output Signal Amplitude 0.5Vpp ± 20% Output Impedance 75Ω ± 20% 75Ω termination DC Output Voltage <... - Page 4 4.6 USB Standard Reference: USB Specification Revision 2.0, dated 27 April 2000 USB-IF USB 2.0 Electrical Test Specification, Version 1.03, dated January 2005 USB-IF Embedded Host Compliance Plan, Revision 1.0, dated August 2006 Need to support USB HDD eg.2.5”. Refer to USB Device List from FRS. USB HDD playback FRONT 1000mA...
-
Page 5: Infra-Red Receiver
5 Infra-Red Receiver 5.1 ReceiverRequirements Parameters Requirement Receiver sensitivity Max Distance • E(0°) = 0.70 mW/m on axis • E(30°,h) = 1.12 mW/m atγ= ± 30° off 7.92m horizontal axis Receiver Sensitivity • E(45°,h) = 2.19 mW/m atγ= ± 45° off 5.65m horizontal axis •... -
Page 6: Electrical Specifications
6 Electrical Specifications 6.1 Mains Voltage / Mains Cord Stroke Voltage Frequency AC Cord Type Version 220V-240V 50Hz VDE 2-pins round 220V-240V 50Hz VDE 2-pins round INMETRO 2-pins round mainscord(INMETRO-to-2-pins flat adaptor /55/78 100V - 240V 50Hz, 60Hz to be included) 100V - 240V 50Hz, 60Hz 2-pins flat... - Page 7 6.5 Additional Requirements for India 6.5.1 VoltageRange Check The set should work NORMALLY at mains voltage from 170V to 280V AC. (Incases of set with Audio amplifiers, at lower mains voltages, audio rated poweroutput might be lower against the specified power at nominal mains voltage, butremaining performance should be unaffected).
-
Page 8: Mechanical Specifications
7 Mechanical Specifications 7.1 Mechanical Strength and Ease of Control 7.1.1 Mechanical Strength Set exterior parts such as lens, buttonsetc, shall be able to withstand a force of 50N during 30 seconds from all possible directions. The rigid test finger, according to IEC60065 clause: 9.1.8 should be used. Set shall be proof against a pinch force of 150N, loaded by a bare hand. -
Page 9: Support Foot
7.2.2 a) Detachable mains cord inlet has to withstand minimal 2500 insertions and withdrawals. b) Mains cord operating force should be within the following limits: • Withdrawal Force, P: 10N ≤ P ≤ 50N • F ≤ 50N Insertion Force, F: 7.3 Visibility of User Interface Displays &... - Page 10 7.6 Touch Control Criteria • 7.7 Bezel and Tray loader design 7.7.1 Strength Permissible load on Bezel in any direction is ≥ 5 0N.The Tray & Bezel should not be broken or permanently deformed, nor cause damage to other parts of set. The Bezel may dislodge above 30N without suffering any damage, and the user must be able to easily put the Bezel back.
-
Page 11: Noise Specifications
7.11 Noise Specifications Test Conditions: Measurements are to be made inside an Anechoic Chamber (echo-free environment) with ambient noise of less than 16dBA. Measurements are to be taken at the following positions: (a) Top-Surface and at center of Front-Cabinet (b) Front-Surface and at center of Front-Cabinet The microphone is to be positioned 10cm from abovementioned surfaces. - Page 12 2-10 Refer to OQA Cosmetic Criteria for details. The visibility of flow lines, sink marks, scratches, unevenness and flashes has to be judged at a distance of 30 cm, with normal overhead lighting (800–1000 lux): Surface Area Requirements For highly visible surfaces Very high appearance requirements: None or very small flow lines (≤...
- Page 13 2-11 7.12.2.3 Resistance to Dry Abrasion Test method A fixed load of 2.5 N is used for this method. The specific pressure depends on the size of the area to be tested. This implies, in relation to real use in practice, a higher load on ribs, raised lettering, etc. The abrasive wheel is made from 3 discs of abrasive material (Scotch Brite Cleaning and finishing material type A-VFN, thickness 6.35mm).
-
Page 14: Transportation & Handling
2-12 • To get a better insight in the real worn effect, test have to be performed starting with a load one step lower and ending with a load one step higher then defined load. 7.13 Transportation & Handling 7.13.1 POS & Label Adhesion and Print Requirements 7.13.1.1 Label Adhesion For Removable Labels (e.g. - Page 15 2-13 7.14.1.2 For China & India Regions ONLY...
- Page 16 2-14 7.14.2 Packaging Robustness Test Specifications Note: To conduct this during Design Verification Test (DVT) phase only. Purpose is to reveal weak points in the Product or Packaging and to take preventive actions to strengthen these points so as to ensure a more robust Product/Packaging. The test is referenced to ISTA-2A standard as follows: Drop Sequence: (a) Drop on 1x Corner, 3x Edges, 6x Faces...
- Page 17 2-15 No of layer in stack: As indicated on Packaging Box graphics Note: If simulated weight is used, a very rigid flat Plate shall be placed over a single layer of packages, and the weights shall be evenly distributed over the plate. Test Criteria: After the test, the packaging and its content should still be in good physical condition.
-
Page 18: Electromagnetic Compatibility
2-16 8 Regulatory 8.1 Safety Player shall as a minimum comply with the requirements laid down in IEC 60065:2001/A1:2005. This is applicable to all countries. However, in countries having national safety standards, which differ from IEC60065, the relevant national standards are applicable, For European countries: EN60065(latest addendum) For USA, Canada: UL60065 All Information technology equipmentshall as a minimum comply with the requirements laid down in IEC60950-... -
Page 19: Electrostatic Discharge Immunity
2-17 ETSI EN 301 489-1 v1.8.1 (2008-04)for European countries ETSI EN 301 489-17 v.2.1.1 (2009-05)for European countries ETSI EN 300 328 v1.7.1 (2006-10)for European countries In countries where EMC standards are not compulsorily enforced, CISPR22 must be enforced. 8.3 Electrostatic Discharge Immunity Standard Reference: IEC61000-4-2:2001 The product shall withstand electrostatic discharges on all user accessible parts. - Page 20 2-18 Criteria D: Loss of function or degradation of performance which is not recoverable, owning to damage to hardware or software, or loss of data. 8.4.2 Mains Drop-out Immunity Standard Reference: IEC 61000-4-11:2004 - Variation 0% (= 100% dip) at T-event = 50msec. Performance criteria B - Variation 40% (= 60% dip) at T-event = 100msec.
- Page 21 • Thick Disc: 1.5mm Philips Thin disc • Thin Disc: 1.1mm • Vertical Deviation: _0.5mm Philips VDD disc Philips ECC disc • Eccentricity: 200μ Philips 8cm skew disc • Skew: 0.6_ • Unbalance: 10gmm Philips SBC442 10gmm unbalance SCD-4013 • Birefringence: 150μ...
- Page 22 • Substrate thickness test disc2 test disc3 test disc4 Horror Disc, no set 520µm 670-730µm 560- hang up allowed. 530µm SVD-4010 • Birefringence: 150μ Philips Hair scratch test disc • Hair scratch Glass CVP02.19 disc • Glass substrate DVD Double Layer Philips LVP11.01A TDV-545 • Black dot: 1100μ...
- Page 23 2-21 TDV-R521CW • Scratch: 3mm • Vertical deviation: _0.5mm TDV-R533CW TDV-R513CW • Eccentricity: 150μ DVD–RW TDV-MW525CW • Black dot: 1000μ TDV-MW525CW • Normal Fingerprint: 65μ TDV-MW525CW • Heavy Fingerprint: 75μ TDV-MW521CW • Scratch: 3mm • Vertical deviation: _0.5mm TDV-MR533CW TDV-MW513CW •...
- Page 24 2-22 OM&T 05151 (BD-ROM DL) OM&T TBM2-A2-S2 (BD-ROM • BD-R(E)(ROM) Hair scratch: Normal 03171 (BD-RE) DL) TBE-V2-S2 (BD-RE) OM&T 04151 (BD-R DL) TBR2-V3-S2 (BD-R DL) OM&T 01741 (BD-ROM SL) OM&T TBM-A1-B70 (BD-ROM • BD-ROM SL/DL unbalance: 7gmm 05031 (BD-ROM DL) SL) BM2-A2-B70 (BD- ROM DL) •...
- Page 25 Solder Joint...
- Page 26 Software check and upgrade steps Preparation to Software Upgrade 1. Procedure for software upgrade a) Upgrade from USB: 1) Go to www.philips.com/support to check if the latest software version is available for this player. 2) Build UPG file in USB 3) Copy the upgrade file to USB UPG folder. 4) Then insert USB ,start up DUT enter into HOME screen ,select Setup >>Advance>> software update >>USB. 5) When upgrade file detected, select "Yes" to upgrade, select "No" to cancel. 6) Once you start upgrade, pls don’t power off the DUT, after upgrade DUT will restart up later a moment time. ...
- Page 27 3.Factory Reset Steps Press"Home" button ‐‐‐Setup‐‐‐Advanced‐‐‐Restore default settings and show Do you want restore factory settings? Message ,Please choose OK。 ...
-
Page 28: Troubleshooting Chart
Trouble shooting chart No light on LED, and buttons do not work No light on LED, and buttons do not work Check every supply Check whether the voltage on main board is connection of line is normal(Pin 6 is 5v in xs1 on front board) Fix it Check the front board... - Page 29 Trouble shooting chart No audio output No audio output Check whether the P3 is ok Peplace P3. Check whether R611 , R612 , C616 , Add them C614,R613 is on Peplace the main IC and reset the software.
- Page 30 Trouble shooting chart Remote control does not work Remote control does not work Check whether the remote Replace the battery for remote controller’s battery controller exhausted or not. Check the ET4002 power Check the VCC net no front board supply ET4002 (PIN16 )is about 3V Replace ET4002...
- Page 31 Trouble shooting chart Can’t read disc or can’t open the disk door Can’t read disc or can’t open the disk door Check whether Check the connection 4pin cable from the DVD loader running is main board normal Check 45pin 8pin cable from main board Fix the connection the 45pin cable or connection to the loader is...
- Page 32 Trouble shooting chart No HDMI output No HDMI output Check if J2 is ok Replace J2 Check If F1 is on Add F1 is 0 ohm Replace the main board...
- Page 33 Trouble shooting chart Can not connect to network Can not connect to network Check UTH16C52 Fix U12 in mainboard (U12) is on In mainboard Check if the P1 is ok Or not Change P1...
- Page 34 5- 7 Trouble shooting chart Can not connect to WIFI Can not connect to WIFI Check USB401 (pin4) Check the R969 is fixed on voltage is 3.3v the mainboard Check the order of wifi Check the connection wire:yellow\white\red from wifi board to to yellow \white\red mainboard Change the wifi module...
-
Page 35: Mechanical And Dismantling Instructions
Mechanical and Dismantling Instructions Dismantling Instruction Detailed information please refer to the model set. The following guidelines show how to dismantle the player. Step 1:Open the top cover.Remove 2 screws on the back panel,then open the cover.(Figure 1) (Figure 1) Step 2:Dismantle the loader.Disconnect all the connectors on the boards.Open the tray,dismantle the take out the loader.(Figure 2) CD door,remove 2 screws besides the loader. - Page 36 Mechanical and Dismantling Instructions Dismantling Instruction Detailed information please refer to the model set. The following guidelines show how to dismantle the player. Step 3:Dismantle the front panel.Remove 1 screw on the ground plate.Release 2 buckles on the left and right side,and 1 buckle under bottom cover.(FIgure 3) (Figure 3) Step 4:Dismantle the front control board.Remove 2 screws and brackets(under the screws) on the board.
- Page 37 Block Diagram for BDP2205: MAIN BD Coaxi HDMI crystal oscillato MT8551 PDAG H5TQ2G63FFR voltage stabilizing Loader Power supply IC G5175RV1 Sanyo 416A/ IM 640G DC DC AS5422AD/TR LF PW BD U501 DNY176/177 FE BD KEY1 KEY2 LED2 LED Light...
- Page 38 Wiring Diagram for BDP2205: MAIN BD 45pin 4pin Loader 8pin USB401(4pi Sanyo 416A/ XP3(12pin) IM 640G 12pin XP2(12pin) PW BD XP3(6pin) USB401(4pin) 6pin 4pin XS2(4pin) XS1(6pin) FE BD...
- Page 39 Circuit Diagram-Front Control Board OPEN/CLOSE OPEN/CLOSE KEY1 KEY1 4PIN/2.0mm 4PIN/2.0mm USB_VCC OPEN/CLOSE R305 R305 KEY2 KEY2 USBM STANBY/ON STANBY/ON connector USBP GND1 STANBY/ON R303 R303 C313 C313 C312 C312 100pF/50V/NP0 100pF/50V/NP0 100pF/50V/NP0 100pF/50V/NP0 6PIN/2.0mm 6PIN/2.0mm OPEN/CLOSE STANBY/ON IROUT IRM_8.3mm IRM_8.3mm R328 R328 2.2K...
- Page 40 Circuit Diagram-Power Board:Power CY502 CY502 1000pF/250VAC 1000pF/250VAC L502 L502 C501 C501 R503 R503 R502 R502 1500pF/1KV 1500pF/1KV 150K 150K 150K 150K R501 R501 D503 D503 D501 D501 T501 T501 LF501 LF501 CE501 CE501 CE502 CE502 30mH 30mH CY501 CY501 15uF/400V 15uF/400V 15uF/400V 15uF/400V...
- Page 41 Circuit Diagram-Power Board:Front Board DuPont pin 14PIN/2.0mm 14PIN/2.0mm +12V +12V +12V +12V +12V IROUT IROUT IROUT IROUT IROUT USBP USBP USBP USBP USBP USBM USBM USBM USBM USBM USB_VCC USB_VCC USB_VCC USB_VCC USB_VCC VSTB VSTB VSTB VSTB VSTB VSCK VSCK VSCK VSCK VSCK...
- Page 42 Print Layout-Front Control Board...
- Page 43 Print Layout-Power Board...
- Page 44 10-1 10-1 Exploded View for BDP2205: Partlist refer to a separated excel file on FYP...
-
Page 45: Revision List
REVISION LIST V 1.0 2014-1-24 Initial release for BDP2205/F7. V 1.1 2014-2-24 Initial release for BDP2205/12/05. V1.2 2014-4-10 BDP2205/12 Indonesia use the same data with BDP2205/12. V1.3 2014-4-24 BDP2205/05 Indonesia use the same data with BDP2205/05.