JVC KD-LX300 Service Manual
Hide thumbs
Also See for KD-LX300:
- Instructions manual (74 pages) ,
- Service manual (32 pages) ,
- Service manual (38 pages)
Table of Contents
Advertisement
Quick Links
Download this manual
See also:
Instruction Manual
QQ
3 7 63 1515 0
SERVICE MANUAL
www
.
http://www.xiaoyu163.com
CD RECEIVER
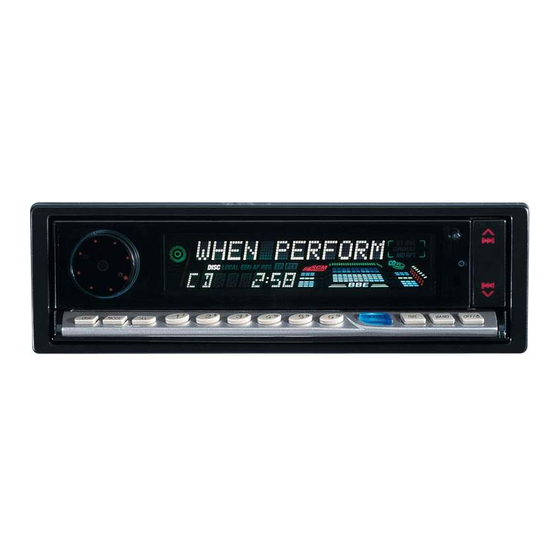
KD-LX300/KD-LX100
SEL
Difference piont
KD-LX300
KD-LX100
Contents
under the service mode
until TOC read
x
Description of major ICs
COPYRIGHT
2001 VICTOR COMPANY OF JAPAN, LTD.
8
Q Q
3
6 7
1 3
7
8
9
10
11
12
OFF
LINE IN
SUBWOOFER OUT
O
O
X
X
.
KD-LX300/KD-LX100
2 9
9 4
2 8
Area Suffix
J
Northern America
1 5
0 5
8
2 9
9 4
1-2
1-3
1-4
1-13
1-14
1-16
m
1-18
1-19
co
1-19
1-21~37
9 9
2 8
9 9
No.49635
Apr. 2001
Advertisement
Table of Contents

Related Manuals for JVC KD-LX300


Summary of Contents for JVC KD-LX300
-
Page 1: Table Of Contents
KD-LX300/KD-LX100 3 7 63 1515 0 SERVICE MANUAL CD RECEIVER KD-LX300/KD-LX100 Area Suffix Northern America L 13942296513 Difference piont LINE IN SUBWOOFER OUT KD-LX300 KD-LX100 Contents Safety preccaution Preventing static electricity Disassembly method Adjustment method 1-13 Extension cord connectiong method... -
Page 2: Tel 13942296513
KD-LX300/KD-LX100 3 7 63 1515 0 Safety precaution Burrs formed during molding may be left over on some parts of the chassis. Therefore, pay attention to such burrs in the case of preforming repair of this system. Please use enough caution not to see the beam directly or touch it in case of an adjustment or operation check. -
Page 3: Preventing Static Electricity
KD-LX300/KD-LX100 3 7 63 1515 0 Preventing static electricity 1.Grounding to prevent damage by static electricity Electrostatic discharge (ESD), which occurs when static electricity stored in the body, fabric, etc. is discharged, can destroy the laser diode in the traverse unit (optical pickup). Take care to prevent this when performing repairs. -
Page 4: Disassembly Method
Move the top chassis upward and disconnect the CD mechanism connector from the main board connector by pulling it. Remove the top chassis from the body. Fig.2 L 13942296513 Top chassis Heat sink Fig.4-1 (KD-LX300) Fig.3 Top chassis Fig.4-2 (KD-LX100) u163 Fig.5 http://www.xiaoyu163.com... - Page 5 CN701 on the main board assembly. Remove the four screws H attaching the front panel assembly on both sides of the body. Remove the front panel toward the front. Front panel assembly Fig.6-1 (KD-LX300) CN701 L 13942296513 Front panel assembly Fig.6-2 (KD-LX100)
- Page 6 Removing the feed motor (L) (See Fig.11) Prior to performing the following procedure, remove Lifter unit assembly the lifter unit. Fig.10-1 (KD-LX300) Remove the washer attaching the clutch assembly and detach the clutch assembly from the shaft of the lifter unit.
- Page 7 KD-LX300/KD-LX100 3 7 63 1515 0 Removing the operation assembly (See Fig.13 to 17) Prior to performing the following procedure, remove the top chassis assembly, the front panel assembly and the lifer unit. Disconnect the card wire from connector CN702 on Bracket (L) the main board and remove the operation assembly.
- Page 8 KD-LX300/KD-LX100 3 7 63 1515 0 Removing the operation switch board (See Fig.17 and 18) Prior to performing the following procedure, remove the operation assembly. Remove the six screws N attaching the button panel on the operation assembly. Pull out the operation switch board from inside of the Button panel button panel.
- Page 9 CN702 Front panel assembly rear heat sink.) Fig.20-1 (KD-LX300) Remove the three screws Q attaching the rear heat sink on the back of the body. Remove the two screws R and the screw S attaching the rear panel.
-
Page 10: Cd Mechanism Section
KD-LX300/KD-LX100 3 7 63 1515 0 <CD mechanism section> Damper bracket Pickup cover Removing the CD mechanism control board (See Fig.1 and 2) Remove the screw A and the pickup cover attached to the front bracket with the double-sided tapes. - Page 11 KD-LX300/KD-LX100 3 7 63 1515 0 Loading motor Belt Fig.5 Removing the CD mechanism assembly CD mechanism assembly Damper bracket (See Fig.1, 6 to 9) Prior to performing the following procedure, remove the CD mechanism control board and the front bracket (loading motor).
- Page 12 KD-LX300/KD-LX100 3 7 63 1515 0 Removing the feed motor assmbly Part j FD screw (See Fig.10) Feed motor assembly Prior to performing the following procedure, remove the CD mechanism control board, the front bracket Part i (loading motor) and the CD mechanism assembly.
-
Page 13: Adjustment Method
6. Digital tester FM 87.5MHz ~ 108.0MHz 7. Tracking offset meter MW 520kHz ~ 1620 kHz 8. Test Disc JVC :CTS-1000 Dummy load 9. Extension cable for check Exclusive dummy load should be used for AM,and FM. For EXTGS004-26P 1 FM dummy load,there is a loss of 6dB between SSG output and antenna input.The loss of 6dB need not be considered... -
Page 14: Extension Cord Connectiong Method
KD-LX300/KD-LX100 3 7 63 1515 0 Extension cord connecting method Using the extention cords to connect the front panel with the main board Remove the main board follwing the disassembly methode. Then reattachi the heat sink to main board. - Page 15 KD-LX300/KD-LX100 3 7 63 1515 0 Extension cord list EXTLX002-JIG : Kit including the following 8 extension parts. Parts number Quantity Description EXTLX001-2P 2Pin, 30cm extension cord EXTLX001-6PF 6Pin, 30cm flat wire EXTLX001-6PC 6Pin x 2, interlocking connector EXTLX002-16PF...
-
Page 16: Functions Of The Mechanism
KD-LX300/KD-LX100 3 7 63 1515 0 Functions of the mechanism under the service mode With the three error modes stored in maximum in the internal memory of the mechanism in the body of this system, it is posible under the service mode to call the contents of error according to the following steps when any error has occurred. - Page 17 KD-LX300/KD-LX100 3 7 63 1515 0 1. Display of mechanism error Occurrence condition Description Error codes 09 0011 1. SW4 is not turned off. Disc loading error 09 0013 2. SW3 is not turned on. Eject error 01 0021 1.
-
Page 18: Flow Of Functional Operation
KD-LX300/KD-LX100 3 7 63 1515 0 Flow of functional operation until TOC read Power ON • When the laser diode correctly Set Function to CD • When the pickup correctly moves emits to the inner area of the disc... - Page 19 KD-LX300/KD-LX100 3 7 63 1515 0 Feed Section Check CD 9V Is the voltage output at Is the wiring for IC521 Is 5V present at IC581 and 5V. IC521 pin "53" 5V or 0V? (90) ~ (100) correct? pin "11"? Check the vicinity of IC521.
-
Page 20: Maintenance Of Laser Pickup
KD-LX300/KD-LX100 3 7 63 1515 0 Maintenance of laser pickup (1) Cleaning the pick up lens Before you replace the pick up, please try to clean the lens with a alcohol soaked cotton swab. (2) Life of the laser diode When the life of the laser diode has expired, the following symptoms will appear. - Page 21 KD-LX300/KD-LX100 3 7 63 1515 0 Description of major ICs FAN8037 (IC661) : CD driver 1. Pin layout & Block diagram 48 47 46 45 44 43 41 40 39 38 37 STAND BY T.S.D ALL MUTE POWER SAVE...
- Page 22 KD-LX300/KD-LX100 3 7 63 1515 0 UPD784215AGC-128 (IC701) : UNIT CPU 1.Terminal Layout 2.Pin Function (1/2) Function Symbol Pin No. Detection switch of CD mechanism Detection switch of CD mechanism Detection switch of CD mechanism Reset signal input from CD mechanism...
- Page 23 KD-LX300/KD-LX100 3 7 63 1515 0 Pin Function (2/2) Function Symbol Pin No. LCD-CE1 Chip enable output to LCD driver BUZZER BUZZER control signal output E2PR-DA-I Data input terminal from EEPROM E2PR-DA-O Data output terminal for EEPROM E2PR-CLK Clock signal I/O terminal with EEPROM...
- Page 24 KD-LX300/KD-LX100 3 7 63 1515 0 TC9490FA (IC521) : DSP 1. Pin layout & Block diagram DVss3 49 32 TEZI Clock 31 TEI RO 50 generator 30 SBAD DVDD3 51 DVR 52 29 FEI 1-bit Servo control LO 53...
- Page 25 KD-LX300/KD-LX100 3 7 63 1515 0 2. Pin function (2/2) Pin No. Symbol Function /UHSO Playback speed mode output terminal PVDD3 PLL-only 3.3V power supply voltage terminal EFM and PLCK phase difference signal output terminal TMAX TMAX detection result output terminal...
-
Page 26: Ao Y U163
KD-LX300/KD-LX100 3 7 63 1515 0 BA3220FV-X (IC301,IC401) : Driver 1. Pin layout & Block diagram LGND OUTL OUTR RGND CR - CR + REFL REFR FILTER 2. Pin function Symbol Function L 13942296513 Powe supply terminal for amp. - Page 27 KD-LX300/KD-LX100 3 7 63 1515 0 BD3860K (IC911) : E. volume 1.Terminal layout 2.Bockdiagram GND FIL VCC SEL1 VIN1 LOUD1 HF1 LF1 DET1 VCA1 MIX1 BBOUT1 TIN1 TNF1 BNF1 BOUT1 POWER FADER SUPPLY MAIN INPUT OUTF1 CH1 FRONT TREBLE...
- Page 28 KD-LX300/KD-LX100 3 7 63 1515 0 BR24C16F-X (IC703) : EEPROM 1. Pin layout 2. Pin function Symbol I/O Function Power supply. A0,A1,A2 No use connect to GND. Serial clock input. Serial data I/O of slave and ward address. Write protect terminal.
- Page 29 KD-LX300/KD-LX100 3 7 63 1515 0 HA13164 (IC961) : Regulator 1.Terminal layout 1 2 3 4 5 6 7 8 9 10 11 12 13 14 15 2.Block diagram 100u 0.1u BATT.DET OUT ANT OUT Surge Protector 0.1u EXT OUT...
- Page 30 KD-LX300/KD-LX100 3 7 63 1515 0 NJM2100M (IC821) : Operation amp HD74HC126FP (IC771) : Changer control A OUT B OUT – A IN– + – A IN+ B IN– B IN+ HD74HC126 M5282FP-XE (IC321) : E. volume L 13942296513 1.
- Page 31 KD-LX300/KD-LX100 LA4743K (IC941) : Power amp 3 7 63 1515 0 1.Block diagram 2.Terminal layout L 13942296513 3.Pin function Pin No. Symbol Function Header of IC Power GND OUTRR- Outpur(-) for front Rch STBY Stand by input OUTRR+ Output (+) for front Rch...
- Page 32 KD-LX300/KD-LX100 3 7 63 1515 0 LC75811W (IC602) : LCD driver 1. Pin layout 2. Block diagram COMMON SEGMENT DRIVER DRIVER LATCH CGROM ADRAM CGRAM VLCD INSTRUCTION 5x9x16 5x9x240 DECODER bits bits bits VLCD1 VLCD2 ADDRESS DCRAM INSTRUCTION VLCD3...
- Page 33 KD-LX300/KD-LX100 3 7 63 1515 0 LC75823W (IC602) : LCD driver 1. Pin Layout & Symbol 64 63 62 61 60 59 58 57 56 55 54 53 52 51 50 49 17 18 19 20 21 22 23 24 25 26 27 28 29 30 31 32 2.
- Page 34 KD-LX300/KD-LX100 3 7 63 1515 0 NJM2904M (IC951) : Dual ope amp NJM4565MD (IC323,IC960) : Ope amp 1. Pin layout & Block diagram 1. Pin layout A OUTPUT 1 A OUT 1 8 V+ A - INPUT 2 B OUTPUT...
- Page 35 KD-LX300/KD-LX100 TA2147F-X (IC601) : Head amp 3 7 63 1515 0 1. Pin layout & Block diagram 10 pF 30 k 40 k 1.3V 180 k 40 pF 40 k 60 A 10 pF L 13942296513 2. Pin function Pin No.
- Page 36 KD-LX300/KD-LX100 3 7 63 1515 0 TA8273H (IC941) : 4ch amp 1. Pin layout 2. Block diagram Vcc1 Vcc2 OUT1 (+) PW-GND1 OUT1 (-) OUT2 (+) PW-GND2 OUT2 (-) AUX IN L 13942296513 OUT3 (+) PW-GND3 OUT3 (-) OUT4 (+)
- Page 37 KD-LX300/KD-LX100 3 7 63 1515 0 TB2118F-X (IC21) : PLL 1.Terminal Layout 2.Block diagram Constant power supply voltage Buff. ON/OFF AM CP. Phase OSC circuit Reference Counter Comparator switch FM VCO 4-bit Prescaler Swallow counter 12-bit AMVCO Programmable counter REG.
- Page 38 KD-LX300/KD-LX100 3 7 63 1515 0 L 13942296513 u163 VICTOR COMPANY OF JAPAN, LIMITED MOBILE ELECTRONICS DIVISION PERSONAL & MOBILE NETWORK BUSINESS UNIT. 10-1,1Chome,Ohwatari-machi,Maebashi-city,371-8543,Japan 200104 (No.49635) http://www.xiaoyu163.com...
-
Page 39: Block Diagram
KD-LX300/KD-LX100 3 7 6 3 1 5 1 5 0 Block diagram TU-L AU.IL IC911 IC171 AUX IN FM/AM TU-R AU.IR E.VOL LINE IN SUB WOOFER TUNER PACK SEEK/STOP LOUTF IC301 LOUTR DRIVER FM/AM FM/AMOSC ROUTF IC401 IC21 ROUTR... - Page 40 KD-LX300/KD-LX100 KD-LX300/KD-LX100 3 7 6 3 1 5 1 5 0 Standard schematic diagrams Main amp sction 1 3 9 4 2 2 9 6 5 1 3 Parts are safety assurance parts. When replacing those parts make sure to use the specified one.
- Page 41 KD-LX300/KD-LX100 3 7 6 3 1 5 1 5 0 CD servo, LCD & Key control section (KD-LX300) 1 3 9 4 2 2 9 6 5 1 3 CD servo, LCD & Key control section (KD-LX100) w w w u 1 6 3 http://www.xiaoyu163.com...
- Page 42 Printed circuit boards Main board (Forward side) Main board (Reverse side) 1 3 9 4 2 2 9 6 5 1 3 KD-LX300 Switch board (Forward side) KD-LX300 Switch board (Reverse side) KD-LX100 Switch board (Forward side) KD-LX100 Switch board (Reverse side)
-
Page 43: Parts List
KD-LX100/KD-LX300 3 7 63 1515 0 PARTS LIST [KD-LX100/KD-LX300 ] * All printed circuit boards and its assemblies are not available as service parts. Area suffix J -------------- Northern Americal L 13942296513 - Contents - Exploded view of general assembly and parts list... - Page 44 KD-LX100/KD-LX300 3 7 63 1515 0 < M E M O > L 13942296513 u163 http://www.xiaoyu163.com...
- Page 45 KD-LX100/KD-LX300 3 7 6 3 1 5 1 5 0 Exploded view of general assembly and parts list Block No. A’ Switch board KD-LX300 53 50 54 KD-LX100 1 3 9 4 2 2 9 6 5 1 3 Main board A’...
- Page 46 KD-LX100/KD-LX300 KD-LX100/KD-LX300 3 7 6 3 1 5 1 5 0 (General assembly) Parts list (General assembly) Parts list Block No. M1MM Block No. M1MM Item Parts number Parts name Q'ty Description Area Item Parts number Parts name Q'ty...
- Page 47 KD-LX100/KD-LX300 CD mechanism assembly and parts list 3 7 63 1515 0 Block No. Grease G-31SA TN-CCD1001Z-138 G-31SA(Bottom side) RX-405 L 13942296513 u163 106 29 http://www.xiaoyu163.com...
- Page 48 KD-LX100/KD-LX300 3 7 63 1515 0 (CD mechanism) Parts list Block No. M2MM Item Parts number Parts name Q'ty Description Area 30310101T FRAME 30310103T DANPER PIN 30310107T UPPER PLATE 30310108T SEL STOP PLATE 30310142T SEL ARM (L)L 30310143T SEL ARM (R)L...
- Page 49 KD-LX100/KD-LX300 3 7 63 1515 0 (CD mechanism) Parts list Block No. M2MM Item Parts number Parts name Q'ty Description Area 68150232T CONNECTOR TKC-W26X-C1 30311105T SOPPORT PLATE 30311138T GR MT BLK(N) 30311109T LDG GEAR (2) 30311110T LDG GEAR (3)
- Page 50 KD-LX100/KD-LX300 3 7 63 1515 0 (Main board) Electrical parts list Block No. 01 Item Parts number Parts name Remarks Area Item Remarks Parts number Parts name Area BZ791 000393760 BUZZER CD11PA-XZ C 251 CE4754468 CAPACITOR 4.7 UF CY473623J CAPACITOR 0.047 UF...
- Page 51 KD-LX100/KD-LX300 3 7 63 1515 0 (Main board) Block No. 01 Electrical parts list Item Remarks Item Parts number Parts name Remarks Area Parts number Parts name Area C 508 CY104423J CAPACITOR 0.1 UF C 771 CY473623J CAPACITOR 0.047 UF...
- Page 52 KD-LX100/KD-LX300 3 7 63 1515 0 (Main board) Electrical parts list Block No. 01 Item Parts number Parts name Remarks Area Item Parts number Parts name Remarks Area CN701 KZ041170L CONNECTOR 17P FPC 52559- L 961 000125560 CHOKE COIL...
- Page 53 KD-LX100/KD-LX300 3 7 63 1515 0 (Main board) Block No. 01 Electrical parts list Item Parts number Parts name Remarks Area Item Parts number Parts name Remarks Area R 134 RK681JA0J RESISTOR RK 1/10W 680 R 308 RK000JA0J RESISTOR...
- Page 54 KD-LX100/KD-LX300 3 7 63 1515 0 (Main board) Block No. 01 Electrical parts list Item Parts number Parts name Remarks Area Item Parts number Parts name Remarks Area R 524 RK472JA0J RESISTOR RK 1/10W 4.7K R 730 RK103JA0J RESISTOR...
- Page 55 KD-LX100/KD-LX300 3 7 63 1515 0 (Main board) Electrical parts list Block No. 01 Item Parts number Parts name Remarks Area R 984 RK473JA0J RESISTOR RK 1/10W 47K R 985 RK472JA1J N.F RESISTOR RK 1/10W 4.7K R 986 CY104423J...
- Page 56 KD-LX100/KD-LX300 3 7 63 1515 0 Electrical parts list (Front board) Block No. 02 Item Parts number Parts name Remarks Area Item Parts number Parts name Remarks Area C 601 CY475316J CAPACITOR 4.7 UF R 604 RK473JA0J RESISTOR RK 1/10W 47K...
- Page 57 KD-LX100/KD-LX300 3 7 63 1515 0 (Front board) Electrical parts list Block No. 02 Item Parts number Parts name Remarks Area S 636 000392870-T SWITCH TACT SW LS8J2 S 637 000392870-T SWITCH TACT SW LS8J2 S 638 000392870-T SWITCH...
- Page 58 KD-LX100/KD-LX300 3 7 63 1515 0 Packing materials and accessories parts list Block No. Block No. A1,A2,A4 L 13942296513 A3,A5,A6 A7,A8,A9 u163 Front view 3-16 http://www.xiaoyu163.com...
- Page 59 POLY BAG (Accessories) Parts list Block No. M4MM Item Parts number Parts name Q'ty Description Area PIM163800 INSTRUCTION KD-LX300 ENG SPA FRE PIM163600 INSTRUCTION KD-LX100 ENG SPA FRE PIM163700 INSTALLATION ENG SPA FRE LVT0717-001A TROUBLE SHEET PTC003800 CAUTION SHEET PTC003900...
Need help?
Do you have a question about the KD-LX300 and is the answer not in the manual?
Questions and answers