Table of Contents
Advertisement
Advertisement
Table of Contents

Related Manuals for TATA Motors Aria


Summary of Contents for TATA Motors Aria
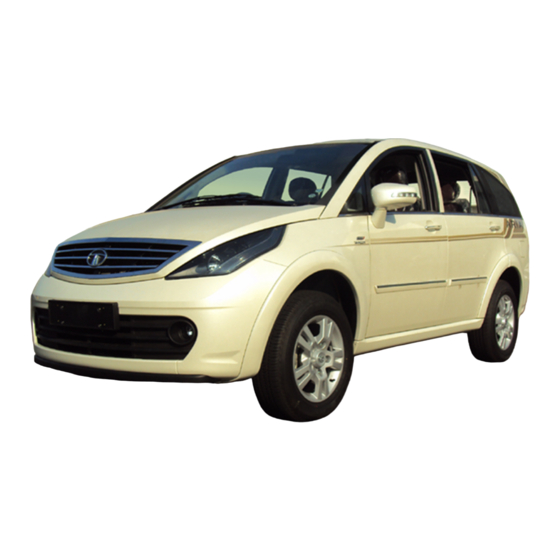
- Page 3 TA T T T T T A A A A A ARIA ARIA ARIA ARIA ARIA OWNER’S MANUAL & SERVICE BOOK This owner’s manual is advised to be kept in the vehicle at all the times. Passenger Vehicle Business Unit...
- Page 4 This owner's manual & service book includes information on the operation and maintenance of various equipment installed on the different variants of TATA ARIA. Please note that this manual applies to all the models and explains all equipment including options not installed on your vehicle.
- Page 5 FORWARD Dear Customer, Thank you for choosing TATA ARIA. TATA ARIA is a crossover type of vehicle that has been built on a completely new platform. ARIA comes with TOD (Torque-On-Demand) transfercase. It automatically and smoothly delivers four-wheel drive operation as and when the driving conditions demand.
- Page 6 INTRODUCTION CUSTOMER ASSISTANCE...
-
Page 7: Table Of Contents
INTRODUCTION CONTENTS INTRODUCTION VALUE ADDED SERVICE 1 24X7 On Road Assistance 2 Extended Warranty 3 Anti-rust, Sound Deadening & Engine Waxing 4 Exterior & Interior Enrichment Program ENVIRONMENT PROTECTION WARRANTY-TERMS & CONDITIONS GETTING STARTED 1 E-Key and Remote Keyless Entry 2 Door Locking / Unlocking 3 Child Lock &... - Page 8 INTRODUCTION CONTENTS DRIVING CONTROLS 3 Tail Lamp 1 Gear Shift Lever 4 Registration Plate Lamp 2 Parking Brake 5 High Mounted Stop Lamp 3 Combi-Switch 6 Puddle Lamp / Door Lamp 4 Instrument Cluster- Gauges & Indicators 7 Cargo Lamp 8 Reflex Reflectors 5 Facia Switches 6 Steering Wheel Switches...
- Page 9 INTRODUCTION CONTENTS 6 Brakes & Braking 9 Intercooler 7 Driving In Adverse Condition 10 Catalytic Converter 11 Tyres IN CASE OF EMERGENCY 12 Battery 1 Advanced Warning Triangle / Jack / Tools 13 Window Glasses 2 If You Have Flat Tyre 14 Wiper 3 Jacking Points / Jack Location 15 Vehicle Care...
- Page 10 INTRODUCTION IMPORTANT INFORMATION ABOUT THIS MANUAL SAFETY AND VEHICLE DAMAGE WARNINGS SAFETY SYMBOL In this manual, you will see CAUTION and NOTICE WARNINGS. CAUTION This is a warning. May cause injury to people if the warning is ignored. You are informed what you must or must not do in order to avoid or reduce the risk to yourself and other people.
-
Page 11: Value Added Service
VALUE ADDED SERVICES INTRODUCTION Dear Customer, It is our never ending responsibility and endeavor to ensure that our customer’s expectations are fulfilled comprehensively. To fulfill your vehicle service needs, we recommend the following : 1) Extended Warranty 2) Anti Rust / Sound Deadening / Engine waxing treatment 3) Vehicle detailing programming : Exterior Enrichment and Interior Enrichment Program These products shall help maintain optimum vehicle performance and shall enhance vehicle life. -
Page 12: 24X7 On Road Assistance
• Park your vehicle on the edge of the road, open the happening within hailing distance of a TATA MOTORS Authorized Workshop is very low. It is Precisely for this bonnet and put on the hazard warning signal. - Page 13 I. The 24x7 On Road Assistance Program Service covers Basic and Premium. In the premium plan, this includes 1 the following services on your vehicle during warranty instance of towing upto the nearest TATA MOTORS period. authorised workshop. • Wheel change through spare wheel.
- Page 14 • ^ On spot repairs at breakdown site shall depend on nature of complaints & will be as per the discretion of the ASP. • *The decision for free of charge repairs will be as per the warranty policy & procedures of TATA MOTORS LTD.
- Page 15 EXCLUSION OF LIABILITIES : customer’s risk & TATA MOTORS shall not be liable for • It is understood that TATA MOTORS shall be under no any damages / claims as a result of the same. liability whatsoever in respect of any loss or damage •...
-
Page 16: Extended Warranty
Extended Warranty Booklet & Cover Note : The Extended Warranty booklet and cover note is the basis of the contract between TATA MOTORS LIMITED and the Owner of the vehicle shown on the Extended Warranty booklet. The Customer to retain this booklet and the same to be produced to the dealer while claiming... - Page 17 Mechanical / Emission / Electrical break down as defined in this warranty and confirmed by the dealer within the stipulated terms and conditions. • Tata Motors dealer shall either repair or replace any part found to be defective with a new part or an equivalent at no cost to the owner for parts or labour. •...
-
Page 18: Anti-Rust, Sound Deadening & Engine Waxing
VALUE ADDED SERVICES ANTI-RUST, SOUND DEADENING & ENGINE WAXING Why are Corrosion Protection Waxes necessary? Corrosion is caused by: Water / salt water acid rain & atmospheric fallouts. Critical areas are: Cavities: joints, crevices, spot welds, underbody • Corrosion is the most important factor when we talk about the vehicle life. If you treat your car you can prolong the life. - Page 19 Areas covered - four doors, rear quarter panels & dicky. In case of diesel vehicles, can be used in the bonnet. TATA MOTORS has tied up with M/s Wuerth , M/s Autokrom, M/s 3M India Ltd & M/s Bardahl for these world class treatment at affordable prices.
-
Page 20: Exterior & Interior Enrichment Program
• Cleaning & dressing of tyres, Bumpers & all exterior plastic moldings/trims. Tata Motors has tied up with M/s Autokrom, M/s 3M & M/s Wuerth for this world class treatment at affordable prices. This treatment is available in all authorized workshops. The Dealer Service Marketing Executive will explain to you the benefits and... - Page 21 Specialised protection for seat fabric from liquid spills. Tata Motors has tied up with M/s Wuerth , M/s Autokrom & M/s 3M India Ltd for this world class treatment at affordable prices. This treatment is available in all authorized workshops. The Dealer Service Marketing Executive will explain to you the benefits and terms and conditions of this treatment.
- Page 22 VALUE ADDED SERVICES...
-
Page 23: Environment Protection
ENVIRONMENTAL PROTECTION TATA MOTORS is committed to produce • MAINTENANCE Avoid using devices requiring high the vehicles using environ-mentally • power consumption during slow city Ensure that recommended sustainable technology. A number of traffic condition. maintenance is carried out on the features have been incorporated in Tata •... - Page 24 ENVIRONMENTAL PROTECTION • 4. All filters such as air, oil & fuel filters Do not allow unauthorised person to (check periodically). tamper with engine settings or to carry modifications on the vehicle. 5. Turbocharger. • Never allow the vehicle to run out of fuel. 6.
-
Page 25: Warranty-Terms & Conditions
WARRANTY - TERMS & CONDITIONS We WARRANT each TATA ARIA vehicle apply. However buyers of the vehicle not carried out by the buyer through our & parts thereof manufactured by us to be shall be entitled to, so far as permissible... - Page 26 WARRANTY - TERMS & CONDITIONS or vibration and defects appearing d a m a g e s o r c o m p e n s a t i o n f o r only under particular or irregular losses, incidental or indirect, or operations or items considered inconvenience or consequential characteristic of the vehicle.
-
Page 27: Getting Started
GETTING STARTED REMOTE KEYLESS ENTRY REMOTE KEYLESS ENTRY (RKE) : Unlock : Please note that spare original E-Key Press once to unlock driver door & fuel is required when making an additional UNLOCK LOCK flap. To open all doors including tailgate, E-Key. -
Page 28: Door Locking / Unlocking
GETTING STARTED DOOR LOCKING / UNLOCKING LOCK SWITCH : This switch is OPENING AND CLOSING DOOR Locking without a key from inside: provided to lock the doors. Front Doors (Driver and Co-driver): By pressing the lock button all the doors can be locked. - Page 29 GETTING STARTED DOOR LOCKING / UNLOCKING Child lock: Tail gate Locking / Unlocking: LH DOOR RH DOOR 2. Location of tailgate lock 1. Location of door handle Both the rear doors of the car are provided with a child lock. Push the lock The tail gate can be opened only from NOTE lever located on vertical face of the door...
-
Page 30: Steering Lock Cum Ignition Switch
GETTING STARTED STEERING LOCK CUM IGNITION SWITCH The engine can be turned ‘OFF’ without Steering Lock and Ignition Switch : NOTE locking steering wheel by turning to Illuminated key ring ‘ACC’ position from ‘ON’ position. To assist you to locate your vehicle’s ignition switch in the dark, the steering In this position, all the electricals and lock cum ignition switch comes with... -
Page 31: Seat & Seat Adjustments
GETTING STARTED SEATS & SEAT ADJUSTMENTS SEATS : 1. Seat Back Recliner: 2. Seat Height Adjustment (Only for Driver’s Seat ): Front Seats: To change the seat back angle, lean 1. Seat Back Recliner Lever forward slightly and raise the smaller Driver’s seat height can be adjusted by 2. - Page 32 GETTING STARTED SEATS & SEAT ADJUSTMENTS 3.Moving the Seat Forward and 4. Lumbar Support (if fitted): Front Seat Armrest (if fitted): Backward: Lumbar support is provided on Driver Front seats are provided with armrest. To adjust the seat position, lift the lever and Co-driver’s seats to give you For folding the armrest, pull the knob under the seat cushion front, slide the...
- Page 33 GETTING STARTED SEATS & SEAT ADJUSTMENTS Second Row Seat : Foldable Armrest (if provided) : Moving the Seat Forward and Backward: A foldable arm rest has been provided Second row seat is split in 2 parts Lever for Forward and Backward movement in the second row seat.
- Page 34 GETTING STARTED SEATS & SEAT ADJUSTMENTS Second Row Seat Folding : For keeping the seat backrest upright, Third Row Seat Folding : push back the seat backrest untill it gets locked in its position. Front Facing Third Row Seat : Fabric hook for folding seat backrest Plastic hook for folding seat backrest A fabric hook is provided behind the...
- Page 35 GETTING STARTED SEATS & SEAT ADJUSTMENTS Getting in and out Third Row Seat : To get in/out,you have to fold any of the row seats.To fold the this seat : 1. Pull the plastic hook located on top of the middle seat backrest. The seat back rest collapses.
- Page 36 GETTING STARTED SEATS & SEAT ADJUSTMENTS Getting extra luggage space: Parcel Shelf fitment provision : Extra luggage space can be created by folding either second or third row seat based on your requirement. NOTE When folded, each seat base can carry a load of approximately 25 Kgs.
- Page 37 GETTING STARTED HEAD RESTRAINT & SEAT BELT Head Restraint: SEAT BELTS Your vehicle is equipped with seat belts, for front and rear seats as a part of occupant restraint system. Wearing seat belts properly can protect you from being thrown against the insides of the vehicle or against other occupants in case of an accident or sudden braking.
-
Page 38: Seat Belt
GETTING STARTED SEAT BELTS • Position the lap belt across your How to use shoulder / lapbelts : seat is adjusted to a good driving thighs, below your abdomen. To position and the back of the seat is remove slack in the lap belt portion, upright. - Page 39 GETTING STARTED SEAT BELTS When vehicle speed exceeds above 16 periodically, checking for cuts, • Each belt assembly must only be km/h, the lamp will continue to flash with frays, or loose parts.Do not used by one occupant. It is intermittent audio alarm.
- Page 40 GETTING STARTED SEAT BELTS snug across the hips as possible. Keep Use only approved Child restrained Seat belt parking brackets : the belt low so that it does not come system which meets safety standards. across the abdomen. That way the Only fit a child seat that has been strong bones of the hips will take the approved for use in your vehicle and...
- Page 41 GETTING STARTED REAR VIEW MIRRORS REAR VIEW MIRRORS : Power Fold and Motorised Outer Rear View Mirror (if fitted): Inner Rear View Mirror : 1. Mirror Adjustment Switch 2. Mirror Selection Swich 3. Mirror Fold Switch adjust the rear view mirrors to required 1.
- Page 42 GETTING STARTED STEERING WHEEL ADJUSTMENT & 4X2 / 4X4 / AUTO SELECTION SWITCH Steering wheel position Adjustment 3. Move the steering wheel up or down 4 X 2 and 4X 4 / AUTO mode selection to the desire position. Position the switch : wheel such a way that all the instrument panel gauges and...
-
Page 43: Head Light Controls
GETTING STARTED HEAD LIGHT CONTROLS Master Light Switch: The Master Light Switch is located on the right of the steering wheel on the dashboard. Knob functions : 1. Auto Light (if fitted) : In this position, the headlights will be automatically switched ON depending on ambient light conditions (while entering a tunnel or when it is twilight). - Page 44 GETTING STARTED HEAD LIGHT CONTROLS first push will switch ‘OFF’ the rear fog PARKING AUTO lamps and second push will turn ‘OFF’ the front fog lamps. HEADLAMP NOTE Use fog lamps in foggy / misty conditions to improve visibility. LAMP 3.
- Page 45 GETTING STARTED Adjusting the Headlamp: Loading Condition Switch Position Unladen One Person in the driver’s seat One Person in the driver’s seat + One in the front passenger seat One Person in the driver’s seat + One in the front passenger seat + Two people in the rear most seat All seats occupied (7 People) All Seats occupied + Luggage area...
-
Page 46: Power Windows
GETTING STARTED WINDOW WINDING Power Windows : PRESS - ‘ON’ Position Again PRESS TO RELEASE - ‘OFF’ position When the switch is in “LOCK” position, the rear window switches (located on rear doors) do not function. The rear window glasses can still be operated by using the switches on the console. -
Page 47: Dashboard
GETTING STARTED DASH BOARD DASHBOARD 01. Side A.C. Vents 02. Side A.C. Vents 03. Top Stowage Box 04. Display Monitor 05. Rain Light Sensor 06. Steering Wheel 07. Instrument Cluster 08. Horn Pad 09. Accelerator Pedal 10. Brake Pedal 11. Clutch Pedal 12. -
Page 48: Parking Brake
DRIVING CONTROLS GEAR SHIFTING LEVER & PARKING BRAKE Gearshift lever & Shifting pattern : Parking brake : on the instrument panel will go 'OFF' when the parking brake lever is fully released. When parking on level ground, place the gear lever in the 'Neutral' position. -
Page 49: Combi-Switch
DRIVING CONTROLS COMBI-SWITCH COMBI-SWITCH (LH STALK) : slightly and release. It will return to WARNING ‘OFF’ position. The wiper will operate If you operate wash and wipe function for once. more than 30 seconds the controller cuts off the supply to washer motors to avoid B) Intermittent wipe : To operate overheating. - Page 50 DRIVING CONTROLS COMBI-SWITCH NOTE 2. Always check and top up the windshield washer fluid in the Turn the ignition switch to ‘ON’ container. position, to operate all wash and wipe functions. 3. Get the front and rear washer nozzles cleaned periodically. All functions pauses temporarily, when the engine is being cranked and COMBI-SWITCH (RH STALK) :...
- Page 51 DRIVING CONTROLS COMBI-SWITCH downward. For changing lanes, lightly To switch over from high beam to low Cruise master ON / OFF switch : flip the stalk downwards. beam, PULL the lever back towards the (As applicable) steering wheel. Left turn signal : TRIP, FUEL, SET functions : Left indicator lamps and instrument cluster tell tale will come ‘ON’...
- Page 52 DRIVING CONTROLS INSTRUMENT CLUSTER INSTRUMENT CLUSTER Indicators RPM meter Speedometer Temperature Fuel Messaging Gauge Gauge Center...
- Page 53 DRIVING CONTROLS INSTRUMENT CLUSTER Instrument Cluster : The Instrument cluster consists of Speedometer, RPM Meter, Temperature gauge and Fuel gauge. The instrument cluster also houses the Message Centre. It consists of : 1) Main Odometer 2) Trip meter (Distance for two trips - A &...
- Page 54 DRIVING CONTROLS INSTRUMENT CLUSTER Instrument cluster - Tell tales BUZZER TEXT ON DISPLAY TELL TALES COLOUR SYMBOL PRE-CHECK ENABLED WITH PRIORITY √ Turn Indicator Green High Beam Blue √ Battery Charging √ Amber TOD/Transmission fault Park Brake Applied PARK BRAKE ON (H) √...
- Page 55 DRIVING CONTROLS INSTRUMENT CLUSTER BUZZER TEXT ON DISPLAY TELL TALES COLOUR SYMBOL PRE-CHECK ENABLED WITH PRIORITY √ Low Engine Oil Pressure √ Amber Low Fuel warning √ √ High Temperature Warning √ √ Water In Fuel (Diesel) Amber √ Amber √...
- Page 56 DRIVING CONTROLS INSTRUMENT CLUSTER BUZZER TEXT ON DISPLAY TELL TALES COLOUR SYMBOL PRE-CHECK ENABLED WITH PRIORITY √ FASTEN √ Seat Belt SEATBELT (H) - Only for Export Immobilizer Front Fog Green Rear Fog Amber Driver Door open Co-Driver Door open Rear Left Door open Rear Right Door open Tail gate open...
- Page 57 DRIVING CONTROLS INSTRUMENT CLUSTER Tell Tales Description Battery charging: Park Brake / Brake Fluid Oil level Indicator: Turn Signal: This symbol lights up when the ‘IGN’ is This indicator comes ‘ON’ for turned ‘ON’ and should go ‘OFF’ after One of these symbols comes ‘ON’ when approximately three seconds when the engine starts.
- Page 58 DRIVING CONTROLS INSTRUMENT CLUSTER Low Fuel CAUTION WARNING Indicator: This symbol will remain ‘ON’ for any Never remove the radiator pressure engine related fault that may cause cap from the radiator when the engine This symbol lights up when ignition is is hot.
- Page 59 DRIVING CONTROLS INSTRUMENT CLUSTER This symbol will continue to remain 'ON' Seat Belt Lamp Blink: Car is in immobilised or will come 'ON' after Ignition On condition when key is not inserted. Indicator: precheck if there is a problem in the Lamp OFF: Normal...
- Page 60 DRIVING CONTROLS INSTRUMENT CLUSTER Rear Left Door Cruise Control: CAUTION Open Warning: If service lamp remains ON when This comes ON for approx. 3 seconds engine is running, the engine’s If Rear Left Door is open or not properly performance may get deteriorated. when ignition is turned ON.
- Page 61 DRIVING CONTROLS INSTRUMENT CLUSTER INSTRUMENT CLUSTER - MESSAGING CENTRE Sr. No. Parameter Characteristics Sr. No. Parameter Characteristics Trip meter reset Trip meter (A & B) are reset by pressing “Trip” switch when Multifunctional Colour: Blue Text with Black the particular Trip-meter is Display back ground selected...
- Page 62 DRIVING CONTROLS INSTRUMENT CLUSTER FUEL GAUGE Sr. No. Parameter Characteristics Average Fuel When Trip meter “A” or “B” is There are 3 types of Fuel Computer information is available Consumption reset reset, the Average Fuel to you as indicated in table below, which you can select by Consumption “A”...
- Page 63 DRIVING CONTROLS INSTRUMENT CLUSTER 1) Instantaneous Fuel Consumption: 2) Average Fuel Consumption: Cluster starts updating Range data only when the below conditions are Updates display “Instantaneous Fuel This function updates the display met : consumption” at regular time interval. “Average Fuel consumption” since it was last reset.
- Page 64 DRIVING CONTROLS INSTRUMENT CLUSTER Switch Functions: When “ ” Switch in “Trip” Mode: Dispaly Information Control (DIC) Display selection by “Trip” switch If “Trip” switch is pressed & released If “Trip” switch is pressed & released Sr. No. Indication on Display immediately after a delay Display changes to Trip meter “B”...
- Page 65 DRIVING CONTROLS INSTRUMENT CLUSTER Switch Functions: When “Dispaly Information Control (DIC)” Switch in “Set” Mode Display selection by “Trip” switch : If “Trip” switch is pressed & Indication on Display If “Trip” switch is pressed & released after a released immediately delay Display does not change.
- Page 66 DRIVING CONTROLS INSTRUMENT CLUSTER Switch Functions: Fuel Unit Selection Display selection by “Trip” switch: If “Trip” switch is pressed & released after a delay Indication on Display If “Trip” switch is pressed & released immediately Display changes to “Temperature unit Fuel Units Displays Fuel unit as “L/100km”...
-
Page 67: Facia Switches
DRIVING CONTROLS FACIA SWITCHES Facia switches : 2. 4 X 2 Switch NOTICE (with LED) During hazard ON condition, if power is switched OFF, the function is Same previous selected mode (4X4 or 4X2) during last switched ‘OFF’ position switched OFF but is activated once will be retained when you restart. -
Page 68: Steering Wheel Switches
DRIVING CONTROLS STEERING WHEEL SWITCHES STEERING WHEEL SWITCHES : FUNCTIONS : You can control various functions by using the switches on the steering wheel. Detailed Information on various functions of these switches are available in ‘INFOTAINMENT MANUAL’. 5, 6 & 7. Cruise Control functions Reset and Set Switch : Increment / Decrement : Using this function, you can either increase or decrease vehicle speed. - Page 69 DRIVING CONTROLS HEATING, VENTILATION & AIR CONDITIONING Towards windscreen (Defrost) Solar Sensor Central A.C. vents Invehicle Sensor To quarter glass To quarter glass Side A.C. vents Side A.C. vents To foot board To foot board PERSONALISED VENTS FOR EACH PASSENGER A.C.
- Page 70 DRIVING CONTROLS HEATING, VENTILATION & AIR CONDITIONING Heating, Ventilation and Controls (Manual HVAC) conditioning : Aria is available in two types of HVAC systems : 1) Manual HVAC 2) FATC (Fully Automatic Temp. Control) 1) MANUAL HVAC: HVAC controls temperature, humidity and air flow to enhance comfort level 1.
- Page 71 DRIVING CONTROLS HEATING, VENTILATION & AIR CONDITIONING Temperature Control Knob and B. Recirculation Button: Blower Speed Control Knob and A.C. Recirculation Button: ECON mode ON-OFF Button : When the recirculation indicator is ‘ON’, the air within the cabin is recirculated. When the indicator is ‘OFF’, air is being used in from outside of the vehicle (Fresh air mode).
- Page 72 DRIVING CONTROLS HEATING, VENTILATION & AIR CONDITIONING D. A.C. & ECON mode ON-OFF Air Distribution Control Knob / Towards feet and windshield (Recommended for clearing Button : Demister Button : mist on windshield) First Press : Normal A.C.is switched Air demist/defrost windshield ‘ON’.
- Page 73 DRIVING CONTROLS HEATING, VENTILATION & AIR CONDITIONING 2) FULLY AUTOMATIC TEMPERATURE CONTROL (FATC): Automatic Operation : To put the automatic climate control in Controls (Fully Automatic Air Conditioning System) fully-automatic mode: 1. Press the ‘AUTO’ button. 2. Set the desired temperature by turning temperature control knob.
- Page 74 DRIVING CONTROLS HEATING, VENTILATION & AIR CONDITIONING • Keep the system ‘OFF’ for short C to 30 C increases the temperature Switch the recirculation mode when periods only. of the air. Where as the anti-clockwise driving through dusty or smoky direction decreases the the temperature.
- Page 75 DRIVING CONTROLS HEATING, VENTILATION & AIR CONDITIONING Air Distribution Control Button : It also overrides any mode selection you Rear A.C. Operating instruction : may have made. In AUTO mode, the FATC system will Rear A.C. blower control switch is regulate the blower speed automatically.
-
Page 76: Tft Display
DRIVING CONTROLS HVAC & TFT / LCD DISPLAY TFT / LCD Display : (Thin Film Transistor) screen. However If your vehicle is fitted with a reverse guiding sensors, it displays a graphical image on a LCD (Liquid Crystal Display) screen. For detailed information, please refer ‘MUSIC SYSTEM / INFOTAINMENT’... -
Page 77: Interiors
INTERIORS SUNVISORS Sun visors (Driver and Co-driver): Vanity Mirror on passenger side The vanity mirror is provided in the co- sunvisor (if applicable): driver side sunvisor. It has a cover flap for protection. The lights are also provided on the both sides of the mirror. The lights turn ‘ON’, when vanity mirror cover is opened and remain ON as long as the vanity mirror cover is open. -
Page 78: Grab Handle / Coat Hook
INTERIORS GRAB HANDLE, COAT HOOK , GOGGLE CASE & CUP HOLDER holders third Grab Handles & Coat Hook : Goggle Case : passengers : 1. Grab handle 2. Coat Hook A goggle case is provided above the Cup holders are provided for both the Grab handles are provided on all seats driver’s door. -
Page 79: Utility Pockets On Door Trims
INTERIORS CUP HOLDER & UTILITY POCKET Cup Holders for second row seat Utility pockets on door trims: Utility pocket is provided on all the four middle passengers : door trims, which gives you extra space to keep magazines/ papers / drinking water bottle etc. -
Page 80: Power Socket
INTERIORS POWER SOCKETS Power Sockets: 2. On centre console below A.C. 3. Behind left hand side third row vents for middle passengers : seat for rear passengers : Three power sockets are provided at the following locations along with illumination ring : 1. -
Page 81: Glove Box & Top Stowage Box
INTERIORS GLOVE BOX & TOP STOWAGE BOX Glove box & Top Stowage Box : A Lamp is provided in the glove box for illumination. This lamp will remain ON till the glove box cover is open, which is spring loaded. Glove Box : A regular glove box is also provided on the dash board below glove box with... - Page 82 INTERIORS INTERIOR LIGHTS - ROOF LAMPS INTERIOR LIGHTS : Spot Lamp / Reading Lamp : Ambient Interior Roof Lamps: The lamp has two separate switches to operate the spot / reading lamps on The Ambient Interior roof lamps are either side. mounted in the roof console at the following three different locations : These lamps are not provided in the roof...
- Page 83 INTERIORS MUSIC SYSTEM Music System :(If provided) Antenna : Tweeter located on ‘A’ pillar A music system is provided in your Antenna located on third quarter glass vehicle in the central console. Printed antenna is located on the left Tweeters are provided on front 'A' pillar and on rear doors below rear door lock hand side third quarter glass.
- Page 84 INTERIORS MUSIC SYSTEM Removal of Music System : USB / AUX ports : AUX port : The AUX port can be used to attach devices like ear / head phones, extra speakers, etc. Pins for removal of music system 1. USB port 2. AUX port Music system can be removed from USB and AUX Ports are provided just below HVAC control panel on the front...
-
Page 85: Exteriors
EXTERIORS HEAD LAMPS, FOG LAMPS & TAIL LAMPS Head lamps : Fog lamps : Tail lamps : 1.Turn Indicator 2.Stop & rear position lamp 1. Low beam Front and rear fog lamps are provided 3. Reverse Lamp 4. Fog Lamp 2. -
Page 86: Registration Plate Lamp
REGISTRATION PLATE LAMPS, HIGH MOUNTED STOP LAMP, EXTERIORS PUDDLE/DOOR LAMPS & CARGO LAMP Registration number Plate lamps : Puddle / Door lamps : Cargo Lamp : The cargo lamp is provided in the Puddle / door lamp is provided on the 1.Registration / Number Plate Lamps entire four door trim bottom. -
Page 87: Reflex Reflectors
EXTERIORS REFLEX REFLECTOR & FUEL FLAP OPENING & CLOSING Reflex reflectors : Fuel flap opening / closing : Manual Fuel flap opening : You can open your vehicle’s fuel flap Opening : Two reflex reflectors are provided at the manually, if there is a problem in the “UNLOCK”... -
Page 88: Bonnet Opening / Closing
EXTERIORS BONNET OPENING & CLOSING Opening and closing the bonnet: NOTE Opening: The emergency fuel flap opening cable should be used only in case of 1. Ensure that the vehicle is in neutral emergency / failure of central locking gear with the parking brake applied. system / electrical system, to open 2. -
Page 89: Special Features
SPECIAL FEATURES IMMOBILIZER THEFT DETERRENT SYSTEM: components (E-key, Immobilizer and c.Note down “key Tag no.” EMS). The engine starts only if all information (and keep it safe) Immobilizer system: codes match. In case of a mismatch of which is required while getting Immobilizer system is designed to the codes, system prevents the engine new / spare keys. - Page 90 SPECIAL FEATURES IMMOBILIZER 2. Do not leave electronic key in ares of high temperature. transponder in E-Key will behave abnormally when reused. 3. Do not try to start the car when the Immobiliser indicator lamp on the instrument cluster is glowing. In this condition the car will not start and the car’s battery will also be drained due to frequent cranking.
- Page 91 SPECIAL FEATURES AIRBAG (SRS) Airbag (SRS) : (If fitted) Passenger Airbag (PAB) The vehicle has front airbags for both the driver and front passenger as a supplement to the seat belt restraint systems. The driver’s airbag is mounted in the center of the steering wheel. The front passenger’s airbag is located in front of front passenger seat inside the dashboard,above the glove box.
- Page 92 SPECIAL FEATURES AIRBAG (SRS) Passenger airbag (PAB) switch: WARNING • Seating position plays an important • The airbag is a supplementary role in minimizing the risk of restraint system that provides accidental injury. In addition to ADDITIONAL protection in a severe properly worn seat belts, both driver collision only.
- Page 93 SPECIAL FEATURES AIRBAG (SRS) PAB operational status indicator: Airbag warning label: WARNING When PAB disabling switch is turned ‘OFF’, make sure ‘PAB’ operational status lamp illuminates with ignition ‘ON’, indicating that the passenger airbag is NOT operational. If the airbag SRS warning indicator in the instrument cluster illuminates continuously, it means that there is malfunction in the system.
- Page 94 SPECIAL FEATURES AIRBAG (SRS) Airbag SRS system components: your doctor. Also sometimes the smoke NOTE can cause breathing problems for The airbag ‘SRS’ is not designed to The airbag ‘SRS’ system consists of the people with a history of asthma or other operate as a result of roll - over, rear following: breathing trouble.
-
Page 95: Air Bags (Srs)
SPECIAL FEATURES AIRBAG (SRS) WARNING WARNING Never hang heavy items to the grab handles. This could affect Airbag SRS fitted in your car does Do not fit any bull bars or other after deployment of the side curtain air require regular market accessories at front side of maintenance, however ALWAYS... -
Page 96: Abs (Anti-Lock Braking System)
To avoid the wheels from locking and Brake Distribution (EBD) is provided on ABS and EBD prevent the vehicle from skidding ABS Tata Aria (ABS version). Warning Lights: is provided. It prevents the wheels from During normal braking the Electronic... - Page 97 SPECIAL FEATURES ANTI-LOCK BRAKING SYSTEM (ABS) If the fault persists, your brake system possible which is constrained by may not be working properly, hence the road conditions, vehicle’s tyres it is dangerous to drive the vehicle. and brakes. However if you feel and judge that it •...
-
Page 98: Esp (Electronic Stability Program)
SPECIAL FEATURES ELECTRONIC STABILITY PROGRAM (ESP) Electronic Stability Program (if NOTE • Engine may not respond to equipped): accelerator in the usual way. Durning Engine Cranking ESP The Electronic Stability Program (ESP) warning lamps might glow for a few Cruise Control Setting gets disabled. monitors information from various seconds. -
Page 99: Cruise Control
SPECIAL FEATURES CRUISE CONTROL Cruise Control (if equipped): Cruise Control Master Switch on WARNING Combi-Switch : Cruise Control is a user friendly function If Cruise Control function is not used meant to reduce driver fatigue, properly, it can be dangerous and may cause an accident. - Page 100 SPECIAL FEATURES CRUISE CONTROL Control Mode. Now you can release the Step 4: Canceling the cruise control: NOTE accelerator pedal. • While going up or down on a slope Cruise control can be cancelled in three (e.g. hill), Cruise Control may not be Step 3: Changing the set Cruise ways: able to maintain the SET speed and...
-
Page 101: Tod (Torque On Demand)
SPECIAL FEATURES TORQUE 0N DEMAND (TOD) Torque - On - Demand (TOD) the LED on the switch turns “ON”. At Ignition On , TOD shall attain the mode Transfercase : (If Equipped) this mode, the engine power is supplied (4x4 or 4x2) that it was in when you last to the rear wheels only. -
Page 102: Rain And Light Sensor
SPECIAL FEATURES RAIN & LIGHT SENSOR RAIN & LIGHT SENSORS :(If fitted) Your vehicle is fitted with a Rain & Light sensor, just below the wind screen and above the dash board. P1, P2, P3, P4 & P5 levels Wiper Speed settings (Vehicles having Auto Front wipe will not be fitted with an intermittent wipe speed selector). - Page 103 SPECIAL FEATURES RAIN & LIGHT SENSOR & REVERSE GUIDING SYSTEM Auto Light function : • The light sensor is an optical sensor that automatically switches “ON” or “OFF” the head lamps whenever it senses the surrounding light intensity. (e.g. when the vehicle enters a tunnel or when it is twilight).
- Page 104 SPECIAL FEATURES REVERSE GUIDING SYSTEM Reverse Guiding System : The camera can view 92 vertical view angle and 124 horizontal view angle. Parking Distance Control with Camera (if equipped) : This system consists of a rear view camera mounted below chrome garish on the tailgate and a display monitor on the centre console of the dashboard.
- Page 105 SPECIAL FEATURES REVERSE GUIDING SYSTEM Parking Distance Control with Operating Instructions NOTE Sensors (if equipped): Please note, objects less than one 1. Switch ‘ON’ the ignition, display will metre in height and 20 mm width / show the TATA logo indicating the diameter may not be detected by the system is working fine.
- Page 106 SPECIAL FEATURES CAUTION WARNING c) When the bumper is tilted more 1. In case of bumpers fitted with than the normal position or when 1. This system is strictly a driver ultrasonic sensors (4 Nos), the the vehicle is heavily overloaded. assistance device.
- Page 107 SPECIAL FEATURES indicates an object at dangerous distance not more than 1M from the rear bumper. 6. Never use high pressure water to clean the sensors and also never use hammer on it. 4. Graphics on LCD: Just Detected LCD display graphic representation for the obstacle coming close to the bumper are shown below : Sensor Malfunction...
-
Page 108: Driving
DRIVING SAFETY CHECKS SAFETY CHECKS BEFORE DRIVING: 4. Seat belts are fastened. recommended type of bulbs. Do not use the high beam unless it is inevitable, as 5. All mirrors, windows and outside lights Check : its dazzle may glare the driver of an are clean and unobstructed. -
Page 109: Driving Safety
DRIVING SAFETY CHECKS First Aid Kit: Mobile phones: Parking on slopes: A first aid kit is provided in your vehicle. While parking, if your vehicle facing This is for use in case of minor injuries. uphill, it is advisable to switch off the It should be regularly checked and engine and engage reverse gear. -
Page 110: Fuel Economy
DRIVING FUEL ECONOMY Fuel economy : • Lower your vehicle’s speed when • As far as possible roll up your vehicle’s driving on rough roads. windows when traveling at high Your vehicle’s fuel economy depends speeds. This improves the fuel •... -
Page 111: If The Engine Does Not Start
DRIVING STARTING / STOPPING THE ENGINE Starting the Engine: TATA MOTORS Service Centre Stopping the Engine: • Ensure that the vehicle is in Neutral Starter Protection system: Before switching OFF the engine, run gear for safe starting. the engine in idle condition for atleast This Starter Protection system provides 30 seconds and then switch OFF. - Page 112 DRIVING STARTING / STOPPING THE ENGINE & PARKING Parking : • Park the vehicle in a safe place. • Apply the parking brake. • Ensure that all window glasses are closed and all lamps are turned OFF. • At night, put on the parking lights if required.
- Page 113 DRIVING STARTING / STOPPING THE ENGINE & PARKING Running-in Period: While shifting the gears, it is Gear Shifting Speeds : recommended to shift at the speeds Avoid rapid acceleration and prolonged Gear Vehicle Speeds given in the table. high speed running of the engine while During Upshit using the new vehicle for the first 1500- You can get extra braking from the...
-
Page 114: Brakes & Braking
DRIVING BRAKES & BRAKING Brakes : If you observe any abnormality in brake Check your brakes after driving through system, contact your nearest TATA deep water. Apply the brakes The brake system on your vehicle is an Authorized Service Centre. In case of moderately to feel that they are normal. -
Page 115: Driving In Adverse Condition
DRIVING DRIVING IN ADVERSE CONDITIONS • If water has entered the engine or Driving Through Water : Night Driving : transaxle, the lubricants will have to • Dip the head lamp for oncoming Never venture to drive through water be replaced. traffic during night driving. - Page 116 DRIVING DRIVING IN ADVERSE CONDITIONS • Choose as smooth a slope as make a quick shift to reverse and possible and select the appropriate allow the car to move back with the gear so that gear changing in the control of engine compression. middle of the climb is not required.
-
Page 117: In Case Of Emergency
IN CASE OF EMERGENCY ADVANCE WARNING TRIAGLE, JACK & TOOL Advance Warning Triangle : Tools : The advance warning triangle is kept in Following tools are provided with your the storage area behind the 3rd row seat. vehicle. Jack : 1. -
Page 118: If You Have Flat Tyre
IN CASE OF EMERGENCY IF YOU HAVE FLAT TYRES & REMOVAL OF SPARE WHEEL IF YOU HAVE A FLAT TYRE Removal of Spare wheel: Reduce vehicle speed gradually keeping Spare wheel is located below the rear it is a straight line. Move cautiously off luggage space floor and behind rear the road to safe place away from traffic. - Page 119 IN CASE OF EMERGENCY JACKING THE VEHICLE & CHANGING WHEEL 5. Remove the holding bracket from the Jacking the vehicle and changing While jacking the vehicle, following spare wheel and get the spare wheel wheel: precautions are to be taken : seperated.
- Page 120 IN CASE OF EMERGENCY JACKING THE VEHICLE & CHANGING WHEEL mm ahead of the rear wheel. Slowly lift CAUTION the vehicle with the help of jack handle. Check and correct tyre pressure and nut tightness of the changed wheel as Remove wheel-mounting nuts and take- per recommendation at a nearest out flat tyre.
-
Page 121: Towing The Vehicle
IN CASE OF EMERGENCY TOWING THE VEHICLE Towing the Car : Location of Tow Hooks: For towing a car, the best way is to use a wrecker. Alternatively, use a rigid tow bar. Avoid using a flexible cable or rope as your car may crash into the car towing your car when it stops suddenly. - Page 122 RESETTING INERTIA SWITCH In Case of Emergency : Resetting the Inertia Switch : Your ARIA is fitted with an Inertia Switch, 1. Open the Front Right Door (for LHD which will trigger if the vehicle is brought Models). And reach out in the area...
-
Page 123: Starting The Engine With Jump Leads
IN CASE OF EMERGENCY STARTING THE ENGINE WITH JUMP LEADS Starting the Engine with Jump The voltage and capacity are given on Connect leads in the order as shown Leads: the batteries. in the sketch The engine with a discharged battery can •... -
Page 124: Fuses & Relays
IN CASE OF EMERGENCY FUSE BOX LOCATIONS & DETAILS FUSE AND RELAY BOX DETAILS: Location of the three fuse boxes in your car The fuses & relays are located in three fuse boxes: 1. Battery mounted fuse box is mounted in the battery in the engine compartment. - Page 125 IN CASE OF EMERGENCY FUSE BOX DETAILS RATING POWER CONSUMER 1. ENGINE COMPARTMENT FUSE AND RELAY BOX Accessories Cooling Fan II Cooling Fan I Cooling Fan III Heater Rear Screen Aircon EMS Relay Starter Dip Beam High Beam Horn Front Wiper Glow Plug I Front Fog Lamp Glow Plug II...
- Page 126 IN CASE OF EMERGENCY FUSE BOX LOCATIONS & DETAILS RATING POWER CONSUMER 2. BATTERY MOUNTED FUSE AND RELAY BOX Main Beam RH F19A Main Beam LH Not Used Horn Not Used Rear Wiper Glow Plug I Front Fog Lamp Glow Plug II Tow Bar HAS Batt AMPS...
- Page 127 IN CASE OF EMERGENCY FUSE BOX DETAILS 3. CABIN WIRING HARNESS FUSE & RELAY BOX UNDER THE DASHBOARD ON DRIVER SIDE (RIGHT SIDE) This fuse box is part of main wiring harness.
- Page 128 IN CASE OF EMERGENCY FUSE BOX DETAILS RATING POWER CONSUMER INSTRUMENT CLUSTER IGN SRS IGN. W/W FR RH BATT. STOP/REV LAMP USB,TFT & BT BATT TOD FR AXLE IGN. MASTER LIGHT SW BATT. PDC,INT WIPE HAVC BATT. WATER SEDIMENT VEH SPEED IGN INFOTAINMENT BATT.
-
Page 129: Bulb Specification
IN CASE OF EMERGENCY BULB SPECIFICATION BULB SPECIFICATION : SR.NO DESCRIPTION CAP TYPE SPECIFICATION QUANTITY Head Lamp - High Beam H7 12 V 55W Head Lamp - Low Beam H7 12 V 55W Head Lamp - Turn Indicator PY24W 12V 24W Head Lamp - Position Lamp 12 V 5W Tail Lamp - Stop/Tail... -
Page 130: Head Lamp Bulb Replacement
IN CASE OF EMERGENCY HEAD LAMP BULB REPLACEMENT Head lamp bulb replacement : • Handle the bulb only at metal part and not at glass portion. Procedure: Removal procedure: CAUTION 1. Open the bonnet. • Bulbs can be very hot. You should therefore allow them to cool down 2. - Page 131 IN CASE OF EMERGENCY HEAD LAMP BULB REPLACEMENT 4. Release the bulb retainer spring which 5. Remove the defective headlamp bulb Fitment procedure: is holding the bulb by pressing and carefully. 1. Place the bulb properly by matching moving it upward. the rectangular notch in the bulb housing and the bulb seat.
-
Page 132: Tail Lamp Bulb Replacement
IN CASE OF EMERGENCY TAIL LAMP BULB REPLACEMENT Tail Lamp bulb replacement 3. Disconnect the connecter by pulling 4. You can now replace any of the procedure: it out firmly. damaged / fused lamp bulbs from the tail lamp cluster. CAUTION 5. -
Page 133: Engine Compartment
MAINTENANCE & VEHICLE CARE ENGINE COMPARTMENT ENGINE COMPARTMENT 09. Priming Pump 01. ABS/ESP ECU/HCU 05. Engine Oil Dip Stick 06. Battery 10. Auxiliary Tank 02. Brake / Clutch Fluid Reservoir 03. Turbocharger with heat shield 07. Fuse & Relay Box 11. -
Page 134: Air Filter
MAINTENANCE & VEHICLE CARE AIR FILTER, ENGINE OIL LEVEL & ENGINE COOLANT LEVEL Air Filter: Engine oil level checking: Engine coolant level: Replace the air filter element with a new Warm up the engine to normal operating Check the coolant level in the radiator one when air filter gets too clogged . - Page 135 MAINTENANCE & VEHICLE CARE BRAKE FLUID, POWER STEERING FLUID & WINDSHIELD WASHER Brake / Clutch Fluid Level : Power steering reservoir : Windshield Washer: The level of the brake / clutch fluid must The level of the power steering fluid must Windshield washer fluid container filler be between the MIN.
-
Page 136: Turbocharger
MAINTENANCE & VEHICLE CARE TURBOCHARGER & INTERCOOLER Turbocharger: connections and tighten the connections CAUTION where required. Your vehicle is fitted with a turbocharger. While cleaning, ensure that This is an efficient supercharging device Proper maintenance of air filter, oil filter intercooler fins are not damaged. -
Page 137: Catalytic Converter
MAINTENANCE & VEHICLE CARE CATALYTIC CONVERTER Catalytic Converter : Maintenance of Catalytic Converter CAUTION The catalytic converter is fitted on your Catalytic Converter should be flushed by • Avoid push start or tow-starting the car to reduce exhaust pollution. The giving full throttle (4 to 5 times) in standing vehicle. -
Page 138: Tyres
MAINTENANCE & VEHICLE CARE TYRES Tyres: Check for inflation and condition of your CAUTION car tyres periodically. Every time you check inflation pressure, you should also examine Inflation: tyres for damage, trapping of foreign Check the pressure in the tyres when objects in the treads and wear. - Page 139 MAINTENANCE & VEHICLE CARE TYRE REPAIR & SPECIAL CARE FOR TUBELESS TYRE Repairing a Tyre: Special care for tubeless tyres : 4. Maintain recommended inflation pressure. Over-inflation, in particular, Mark the tyre position suitably (if original 1. While removing tyre from wheel rim may cause puncture or bursting of colour dot mark is not visible) with and mounting it back on wheel rim,...
- Page 140 MAINTENANCE & VEHICLE CARE TYRE ROTATION, WHEEL ALIGNMENT & WHEEL BALANCING Tyre Rotation: Special care for tubeless tyres : Front Rear • Tubeless tyres are coated with To help increase tyre life and distribute Caster 3° + 30’ impermeable layer of rubber from wear more evenly, you should have the Camber 0°+ 30’...
-
Page 141: Battery
MAINTENANCE & VEHICLE CARE BATTERY Battery : Always disconnect the negative (-ve) • Getting electrolyte in your eyes or cable first and reconnect it last. on the skin can cause severe burns. Check the battery for proper electrolyte Wear protective clothing and a face level and corrosion on the terminals. -
Page 142: Window Glasses
MAINTENANCE & VEHICLE CARE WINDOW GLASSES & WIPER Window Glasses : 5. Clean and protect the shiny metal Wiper Care : parts using commercially available Cleaning of Windows, Front and Rear special compounds. FOR CHATTERING and NOISY Glasses: PROBLEMS 6. Sprinkle talcum powder on the rubber Clean the windows inside and outside Windshield windscreen wiper and lift them off the... -
Page 143: Vehicle Care
MAINTENANCE & VEHICLE CARE VEHICLE CARE VEHICLE CARE : 4. To remove stubborn stains and WAXING : contaminants like tar, Waxing and polishing is recommended Your vehicle is subjected to many turpentine or cleaners like ‘Stain to maintain the gloss and wet-look external influences such as climate, road remover’... - Page 144 MAINTENANCE & VEHICLE CARE VEHICLE CARE • PRECAUTIONS: 7. The paint finish is susceptible to Restoration of original gloss damage in case petrol, brake fluid, levels UV protection after gloss is 1. Always wash your vehicle in shade, liquid from vehicle battery, oil, restored.
-
Page 145: Technical Information
TECHNICAL INFORMATION FUEL SPECIFICATIONS GENERAL PRECAUTIONS: Outside Ambient Percentage Fuel : High Speed diesel conforming to IS1460 or EN 590 or temp. upto Winter Supplimentary equivalent is recommended to be used as fuel. Deg.C Grade Diesel Fuel At very low temperature, fluidity of diesel may become Upto -15 insufficient due to paraffin separation. - Page 146 TECHNICAL INFORMATION LUBRICANTS & COOLANT SPECIFICATIONS LUBRICANTS AND COOLANTS: Coolants Lubricants: Presence of dirt in coolant chokes up passages in radiator, cylinder head and crankcase, thereby causing overheating Engine oil : Recommended grade of engine oil confirming to of engine. API-CH4+MB228.3 or higher grade engine oil to be used.
- Page 147 TECHNICAL INFORMATION CO-BRANDED LUBRICANTS & COOLANT LUBRICANTS AND COOLANTS ITEM SPECIFICATION COMPANY BRAND QUANTITY API-CH4+MB228.3 CASTROL GTX Professional Diesel ENGINE OIL (15W40) HPCL Milcy No.1TGO 7.5 Litres EXXON MOBIL Mobil Super 1000 TM S-CCL Golden Cruiser Premium 1400M COOLANT 50:50 ratio premixed HPCL Thanda Raja P TGO Approx.
-
Page 148: Technical Specification
TECHNICAL INFORMATION TECHNICAL SPECIFICATIONS ENGINE GEAR BOX Model GBS-76-5/4.1,MK-II with overdrive Model TATA 2.2 L VARICOR Type Synchromesh on all gears Type Direct injection, Common rail, Turbocharged, Intercooled Diesel No. of gears 5 Forward & 1 Reverse engine Gear Ratios For R/A Ratio 4.1 No. - Page 149 TECHNICAL INFORMATION TECHNICAL SPECIFICATIONS FRONT AXLE Anti-lock Braking 4 channel , 4 sensors (For ABS) System (ABS) For 4 X 4 1) Independently suspended with Electronic Stability 4 Channel, 4 Sensors & Other Axle Disconnect. Program (ESP) Sensors 2) Axle Ratio 4.1 Parking Brake Lever type, Console mounted, Cable For 4 X 2...
- Page 150 TECHNICAL INFORMATION TECHNICAL SPECIFICATIONS WEIGHTS (kg) WHEELS & TYRES Pure LX Pleasure Pride Tyres 1) PSR 235/70 R16 Passenger Gross Vehicle Weight- BS-IV (4X2) Radial Tubeless 2685 2730 2750 2) PSR 235 / 65 R17 Passenger Radial Tubeless Front 1176 1204 1218 Rear...
- Page 151 TECHNICAL INFORMATION TECHNICAL SPECIFICATIONS PASSENGER CAPACITY Passenger Capacity Front Seat : Driver + 1, Middle Seat : 3, Rear Seat : 2 (Front Facing) LUGGAGE SPACE Net inside loading ~ 1000 mm wide x ~ 800 mm long space (with 4 passengers + Driver) MAIN CHASSIS DIMENSION AS PER ISO:612 in MM Wheel Base 2850...
-
Page 152: Vehicle Dimensions
TECHNICAL INFORMATION VEHICLE DIMENSIONS VEHICLE DIMENSIONS (All dimensions are in mm and in unladen condition) -
Page 153: Chassis & Aggregate Numbering Locations
TECHNICAL INFORMATION CHASSIS & AGGREGATE NUMBERING LOCATIONS Chassis No. - Punched on RH Long member VIN Number Plate (Near ABS Unit) Engine Number Plate Rear Axle Number - Punched Gear Box Number - Punched TOD Number Plate... -
Page 154: Vehicle Service
SERVICE INSTRUCTIONS : Servicing of your vehicle can be done To achieve economical and trouble free performance, please follow the instructions oly at TATA MOTORS Authorised as stated. Dealership Workshop. The details of YOUR CAR IS ENTITLED TO FIVE FREE SERVICES (LABOUR ONLY). -
Page 155: Service Schedule
VEHICLE SERVICE SERVICE SCHEDULEE SERVICE SCHEDULE SL. OPERATION FREQUENCY (in KM) GENERAL Wash the vehicle & clean the condenser with compressed air. Every Service Check & Top up Fluids if required: Coolant, Brake / Clutch Fluid, Every 15000 Battery Electrolyte, Power Steering Oil, Gear Box Oil, Transfer Case & Front Axle (4X4)/ Rear Axle Oil Drain water accumulated in Fuel Pre filter cum sedimenter and fuel Every Service... - Page 156 VEHICLE SERVICE SERVICE SCHEDULE SL. OPERATION FREQUENCY (in KM) 2.2L VARICOR ENGINE *Change Engine Oil and Oil filter Every 15000 (Every 15,000 Km OR 1 year, whichever is earlier) Change Main Fuel filter Every 30000 (Every 30,000 Km OR 2 year, whichever is earlier) Change element / cartriage of Pre-filter cum Sedimentor Every 15000 (Every 15,000 Km OR 1 year, whichever is earlier)
- Page 157 VEHICLE SERVICE SERVICE SCHEDULE SL. OPERATION FREQUENCY (in KM) PROPELLER SHAFT Grease propeller shaft with grease gun (at slip joint - splines end) & Every 15000 check Centre bracket mounting bolts for looseness. Tighten if necessary. Check for rubber cracks on Torsional Vibration Damper (TVD), Every 15000 replace if necessary Change TVD...
- Page 158 VEHICLE SERVICE SERVICE SCHEDULE SL. OPERATION FREQUENCY (in KM) BRAKES & CLUTCH Check parking brakes, adjust if necessary Every Service Check front brake & rear brake pads, re-grease DIH liner resting Every 15000 points. Replace if necessary. Replace Brake & Clutch Fluid Every 45000 (Every 45,000 km Or 2 years whichever is earlier) ELECTRICALS...
- Page 159 VEHICLE SERVICE SERVICE SCHEDULE * Under severe driving conditions, additional maintenance is required. Please Refer to “Additional Maintenance Schedule under severe driving conditions”: Precautions to be taken while cleaning engine compartment : It is recommended to use dry low pressure air. Do not use pressurised water.
- Page 160 VEHICLE SERVICE VEHICLE RECORD Km. reading Fuel filled Fuel consumption Remarks / complaints...
- Page 161 VEHICLE SERVICE VEHICLE RECORD Km. reading Fuel filled Fuel consumption Remarks / complaints...
- Page 162 VEHICLE SERVICE RECORD OF WARRANTY REPAIRS CARRIED OUT CHASSIS NO.............. Date Odometer Repair Particulars of Repair Servicing Dealer’s Signature & reading (km) Order No. Stamp...
- Page 163 VEHICLE SERVICE RECORD OF WARRANTY REPAIRS CARRIED OUT CHASSIS NO.............. Date Odometer Repair Particulars of Repair Servicing Dealer’s Signature & reading (km) Order No. Stamp...
- Page 164 VEHICLE SERVICE RECORD OF SERVICES PERFORMED CHASSIS NO.............. Recommended Date Odometer Reading Repair Order No. Servicing Dealer’s Signature and Stamp Service At km. 1,500 5,000 15,000 30,000 45,000 60,000 75,000 90,000 1,05,000 1,20,000 1,35,000...
- Page 165 VEHICLE SERVICE RECORD OF SERVICES PERFORMED CHASSIS NO.............. Recommended Date Odometer Reading Repair Order No. Servicing Dealer’s Signature and Stamp Service At km. 1,50,000 1,65,000 1,80,000 1,95,000 2,10,000 2,25,000 2,40,000 2,55,000 2,70,000 2,85,000 3,00,000...
- Page 166 VEHICLE SERVICE...
- Page 167 Chassis No........At the time of delivery of vehicle, please ensure that Engine No........pre-delivery inspection has been carried out as per details Gear Box No........given in the SERVICE SCHEDULE. FREE FREE At 5,000-5,500 km OR 6 months whichever is earlier Chassis No.
- Page 169 Chassis No........Engine No........FREE At 30,000-30,500 km OR 24 months whichever is earlier LABOUR please bring your vehicle for this service as per details given in the SERVICE SCHEDULE. WORK DONE TO MY SATISFACTION Sign. of Customer ........Speedo Reading ........
Need help?
Do you have a question about the Aria and is the answer not in the manual?
Questions and answers