
Related Manuals for Cobra CDR835


Summary of Contents for Cobra CDR835
- Page 1 CDR835 CDR855BT CDR875G CDR895D USER MANUAL Record your Ride Table of Contents P a g e ©2016 Cobra Electronics Corporation Part No. 480-1061-P Version B...
-
Page 2: Table Of Contents
DRIVE HD DASH CAM FEATURES..................... 3 PRODUCT SERVICE AND SUPPORT ....................4 YOUR DEVICE........................... 5 WHAT’S IN THE BOX ..........................5 OPTIONAL ACCESSORIES – available at www.cobra.com ................. 5 CONTROLS AND CONNECTIONS ....................... 6 INSTALLATION ............................7 CDR895D INSTALLATION .......................... 8 BASIC OPERATION ............................ -
Page 3: Introduction
INTRODUCTION Congratulations! You’ve made a smart choice by purchasing a Drive HD Dash Cam from Cobra. Drive HD Dash Cams provide peace of mind by continuously recording the road ahead of you in beautiful 1080P Full HD video. With cutting edge features, phenomenal video quality, and an industry-leading focus on user experience, Drive HD Dash Cams are the best solution to Record Your Ride. -
Page 4: Product Service And Support
For any questions about operating or installing this new Cobra product, PLEASE CONTACT COBRA FIRST…do not return this product to the retail store. The contact information for Cobra will vary depending on the country in which you purchased and utilize the product. For the latest contact information, please go to www.cobra.com/support. -
Page 5: Your Device
YOUR DEVICE WHAT’S IN THE BOX All Models Dash Cam Micro SD Card (pre-installed in dash cam) – 8GB for CDR835, CDR855BT, CDR875G. 16GB for CDR895D. Suction Cup Windshield Mount Quick Release Mount 12V Vehicle Power Adapter –... -
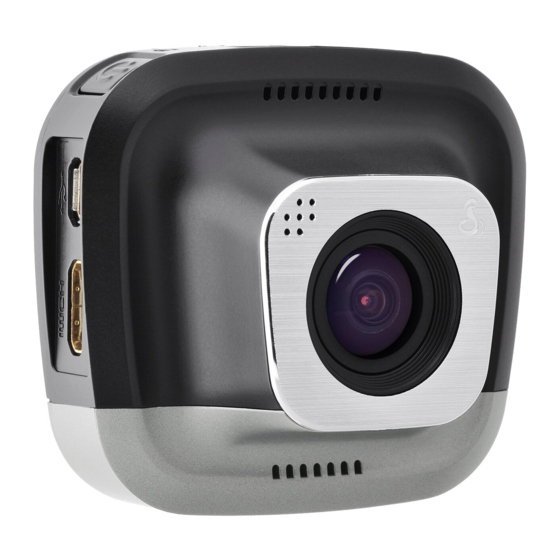
Page 6: Controls And Connections
CONTROLS AND CONNECTIONS Emergency Recording Button Orange for CDR835 Blue for CDR855BT Red for CDR875G Silver for CDR895D (For use with GPS Mount) P a g e... -
Page 7: Installation
When the power button is used to power on the unit recording must be started manually. Note: A Hardwire Kit (CA-MicroUSB-001) is available at www.cobra.com for a more permanent installation that allows for discrete routing of the power cable. DRIVE! Drive HD Dash Cams are designed to set and forget. -
Page 8: Cdr895D Installation
CDR895D INSTALLATION MOUNT CAM 1 - Screw the suction cup into the Quick Release Mount. Slide the mount into CAM 1 and press the lever to secure the unit to your vehicle’s front windshield. CAM 2 – Attach CAM 2 to the windshield using the adhesive tape. -
Page 9: Basic Operation
BASIC OPERATION POWERING ON THE DEVICE The device will power on automatically when plugged in and can also be powered on by PRESSING AND HOLDING the On/Off button until the display activates. THE MICRO SD MEMORY CARD The device comes with a pre-installed micro SD memory card. To remove the SD card, press firmly on the SD card to push it further into the slot. -
Page 10: Initial Setup
INITIAL SETUP When the Dash Cam is powered on for the first time, it will prompt you to enter basic setup information. You will be asked to set the Language, Year, Month, Day, Time Zone, Daylight Saving Time, and Time. This information is needed so that file names will be created correctly and time stamps will be accurate in your videos. -
Page 11: Video Screen
E. Shows if Parking Mode is on. F. Bluetooth indicator shows gray if Bluetooth is turned on and white if Bluetooth is on and connected to the Cobra iRadar app. G. Indicates battery level or charging indicator when power is applied to the camera. - Page 12 BUTTON OPTIONS (While Recording): For the CDR835, CDR855BT, and CDR875G the button simply turns the screen off or on. Turning the screen off does not interrupt video recording. The red LED on the top left of the unit will flash to indicate that the unit is recording.
-
Page 13: Video Settings
VIDEO SETTINGS Video Resolution This setting allows you to set one of three available video recording resolutions. Higher resolutions will give you a sharper image, but take up more memory on the card. The available resolutions are: 1080P Full HD 1920x1080 / 30 Frames per Second 720P HD 60fps 1280x720 / 60 Frames per Second... - Page 14 If you park where there is lots of activity which keeps triggering the motion sensor, then the unit might never time out and enter Parking Mode. Cobra Watermark, Date/Time Stamp, & Time Stamp Format These menu options change the watermark & time stamp that will appear on the saved video files.
-
Page 15: General Settings
This feature is for information purposes only. See the Trademark Acknowledgement, Warnings, and Regulatory Information section below for the full legal disclaimer for using this feature. The part number for the external GPS Mount is CA-Mount-002 and it can be purchased at www.cobra.com. GENERAL SETTINGS Volume Allows you to raise and lower the audio output of the device. -
Page 16: Iradar Settings (Cdr855Bt And Cdr875G Only)
Restore Defaults: Resets the device to factory settings. Note that restoring defaults will NOT erase data on your memory card. Firmware Version: Displays the device firmware version. iRADAR SETTINGS (CDR855BT and CDR875G only) Bluetooth: Turns Bluetooth on/off so the camera can/cannot connect to a smartphone running iRadar. iRadar Alerts: Select whether alerts from the iRadar app will be displayed on the dash cam or not. -
Page 17: Video And Photo Playback Mode
VIDEO AND PHOTO PLAYBACK MODE This device stores video and pictures on its removable SD Card Memory. Playback mode will allow you to review the saved video and photos and play back the video with sound. To select a video or photo for playback, navigate with the arrows and select with Enter key. -
Page 18: Cobra Iradar® App Connection
The dash cam will NOT APPEAR in the iPhone’s Bluetooth Settings Menu. Start the Cobra iRadar App. Press the Menu button in the upper left of the app and select Devices. Follow the onscreen instructions to complete the pairing and connection. -
Page 19: Connecting To A Computer Or Tv
Use the HDMI Port to connect the device to a TV or monitor using a mini HDMI cable (not included). DOWNLOAD DRIVE HD PLAYER Drive HD Player lets you view your dash cam footage along with GPS and G-Sensor data. To download Drive HD Player visit www.cobra.com/support/software-downloads. 19 | P a g e... -
Page 20: Dash Cam Software Update Instructions
DASH CAM SOFTWARE UPDATE INSTRUCTIONS For optimal performance, check www.cobra.com periodically for software updates. Connect the Dash Cam to your computer using the included USB to Micro USB cable. Power on the Dash Cam and select Connect to Computer using the record/select button. -
Page 21: Camera Specifications
CAMERA SPECIFICATIONS 21 | P a g e... -
Page 22: Troubleshooting
Make sure the socket of your vehicle’s cigarette lighter is clean and free of corrosion. Make sure the power cord’s cigarette lighter adapter is firmly seated in your cigarette lighter, and the Status LED is on. For detailed and up-to-date FAQ’s, please visit www.cobra.com/support/faqs. 22 | P a g e... -
Page 23: Trademarks Acknowdlegement, Warnings, And Regulatory Information
United States and other countries. The Bluetooth® word mark is a registered trademark owned by Bluetooth SIG, Inc. and any use of such marks by Cobra Electronics Corporation is under license. Other trademarks and trade names are those of their respective owners.
Need help?
Do you have a question about the CDR835 and is the answer not in the manual?
Questions and answers