
Related Manuals for CharGriller 2121


Summary of Contents for CharGriller 2121
-
Page 1: Owners Manual
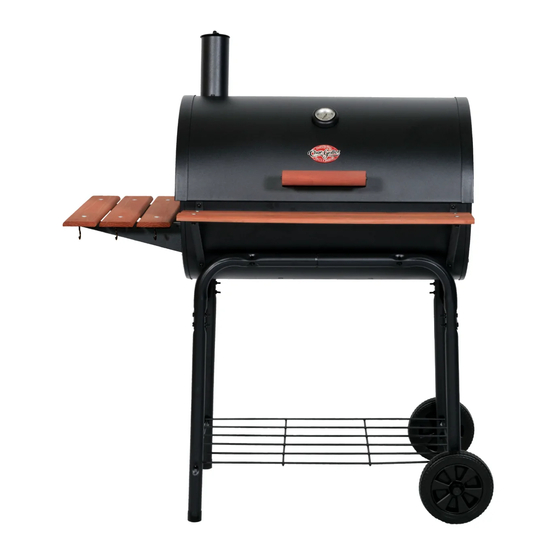
Owners Manual Model #2121 Charcoal Grill Super Pro ™ Keep your receipt with this manual for Warranty. OM2121 C.1 ™ & © Char-Griller / A&J Mfg. - Page 2 No Returns on Used Grills STOP! CALL FIRST! DO NOT RETURN PRODUCT TO STORE. CALL (912) 638-4724 This product has been built to the highest quality standards. Call us should you have any questions not addressed in these instructions, or for service information.
-
Page 3: Table Of Contents
(Tools Not Included) Pliers and 7/16" nut driver ITEM DESCRIPTION PART NO. HOOD 201079 WARMING RACK 301042 COOKING GRATE 100049 ASH PAN HANGERS 200024 ASH PAN 200048 GRILL BODY 900131 FILLER PLATE 100054 DAMPER CIRCLE 100036 LEG BRACE 100051 SHORT LEG 100056 WIRE SHELF 200050... - Page 4 Page Intentionally Left Blank For Notes OM2121 C.1 ™ & © Char-Griller / A&J Mfg.
-
Page 5: Assembly Instructions
ASSEMBLY INSTRUCTIONS Read all safety warnings and instructions carefully before assembling and operating your grill. IMPORTANT HINT: DO NOT TIGHTEN ANY NUTS AND BOLTS UNTIL GRILL IS FULLY ASSEMBLED. Step 1: Assemble Long Legs, Short Legs, and Leg Braces as show below then secure the Leg Braces to one set of Long Leg and Short Leg with 4 Hex Bolts and 4 Hex Nuts. - Page 6 Step 3: Lay the cart assembly down with the Long Legs on the floor then install the Wheels and Wheel Axle. On one end of the Axle insert the Cotter Pin into the hole on the Axle and snap in the Hub Cap.
-
Page 7: Hood
Step 5: Attach Damper Circle to the side of the Grill Body with one Hex Bolts, two Flat Washers, one Lock Washer, and one Hex Nut. Flat Washers Lock Washer Hex Nut Hex Bolt Damper Circle Step 6: Attach the Grill Hood to the Grill Body using the two Hinge Pins and two Cotter Pins provided. - Page 8 Step 7: Insert Thermometer through hole in Bezel and Grill Hood (from outside) and secure with Wing Nut. Then attach Hood Handle to the Grill Hood with two 3/4" hex bolts, two lock washers, and two hex nuts. See below. Hex Bolts Thermometer Grill Hood...
- Page 9 Step 9: Attach Side Shelf to Grill Body with four Hex Bolts and four Hex Nuts. Hex Nuts Grill Body Side Shelf Hex Bolts Step 10: Attach Front Shelf to Grill Body with four Hex Bolts and four Hex Nuts. Hex Nuts Hex Bolts Front Shelf...
-
Page 10: Warming Rack
Step 11: To install the Warming Rack first attach the four 1 3/4” Hex Bolts and four Hex Nuts onto the Grill Body and Grill Hood. Then Position the Warming Rack onto the Hex Bolts and Secure it with two more Hex Nuts. Hex Nuts Hex Bolts Hex Nuts... -
Page 11: Cooking Grate
Step 13: Place Cooking Grates onto Grill Body then Install the Utensil Hooks underneath each Side Shelf Slab at the front of the Grill. Utensil Hooks Cooking Grates OM2121 C.1 ™ & © Char-Griller / A&J Mfg. -
Page 12: Grill Body
GRILL PREPARATION &OPERATING INSTRUCTIONS PLEASE NOTE: NO RETURNS ON USED GRILLS Read all safety warnings and instructions carefully Before assembling and operating your grill. 1. Cure GRILL prior to your initial use to protect the interior and exterior finish and to prevent unnatural flavors to your first meals. - Page 13 GRILLING RECIPES DIRECT METHOD STEAK (& ALL MEATS): Cook food directly above coals/heat. Generally speaking, to grill meats, raise fire grate to high position (hot) and sear for one minute on each side with the lid open to seal in flavor and juices. Then lower fire grate to medium position with lid closed and cook to desire doneness.
- Page 14 KABOBS: Alternating on skewers any combination of meat, onions, tomatoes, green peppers, mushrooms, zucchini, circular slice of corn-on-the-cob, or pineapple. Meat could consist of chunks of shrimp, scallops, lobster, chicken, sausage, pork, beef, etc. Marinate the meat in refrigerator for several hours. Grill each side approximately 7 minutes turning occasionally while basting with marinade.
- Page 15 SMOKIN’ RECIPES: using the Charcoal Grill side of the Duo with a WATER PAN (also called INDIRECT METHOD). Pan not included. Disposable bread pan is recommended. SMOKE BY COOKING SLOWLY (See chart on page 27 for smoking times). 1) Place water/drip pan on left side of fire grate.
- Page 16 SMOKED HOT DOGS STUFFED: Slit hot dogs lengthwise, within 1/4 inch of each end. Stuff hot dogs with cheese and relish and wrap in bacon. Place on cooking grid over drip pan and smoke 15-20 minutes or until bacon is crisp. SMOKED CHICKEN PARTS AND HALVES: Rinse pieces in cold water and pat dry with paper towels.
- Page 17 CHICKEN MARINADE: Combine 1/2 cup soy sauce, 1/4 cup vegetable oil, 1/4 cup red wine vinegar, 1 teaspoon oregano, 1/2 teaspoon sweet basil, 1/2 teaspoon gar- lic powder with parsley, 1/4 teaspoon pepper. Pour over chicken pieces in nonmet- al dish. Cover and refrigerate overnight, turning occasionally. Use marinade to baste chicken while cooking.
- Page 18 IMPORTANT SAFETY WARNINGS READ ALL SAFETY WARNINGS AND INSTRUCTIONS CAREFULLY BEFORE ASSEMBLING AND OPERATING YOUR GRILL Use caution when assembling and operating your grill to avoid scrapes or cuts from sharp edges. Do not use gasoline, kerosene or alcohol for lighting charcoal. Use ...
- Page 19 IMPORTANT SAFETY WARNINGS READ ALL SAFETY WARNINGS AND INSTRUCTIONS CAREFULLY BEFORE ASSEMBLING AND OPERATING YOUR GRILL Do not exceed a temperature of 400 F. Do not allow charcoal and/ or wood to rest on the walls of grill. Doing so will greatly reduce the life of the grill Always wear oven mitts to protect hands from burns.
- Page 20 Page Intentionally Left Blank For Notes OM2121 C.1 ™ & © Char-Griller / A&J Mfg.
-
Page 21: Side Shelf
Professional Accessories™ Deluxe Griller 2121 ACCESSORIES Branded with Char-Griller® Logo ORDER FORM ALL TOOLS: STAINLESS STEEL & HARDWOOD HANDLES COVER #5555 Custom Fit, Weather Resistant Protects grill finish Cover Accommodates Side Shelf or Side Fire Box Grill cover #5555 fits with Side Fire Box or Side Shelves... - Page 22 ACCESSORIES Super Pro 2121 ORDER FORM Warming Rack Increase Grill Area Keeps food warm Charcoal Basket TO ORDER Confines coals to one side for smoking Visit our online store at: www.chargriller.com Indirect cooking CALL: 912-638-4724...
- Page 23 P.O. Box 30864 Sea Island, GA 31561 912-638-4724 www.CharGriller.com Warranty Information — Charcoal Grill Char-Griller® will repair or replace any defective part of its grillers/ smokers for a period of up to one year from the date of purchase. Char- Griller®...
- Page 24 P.O. Box 30864 Sea Island, GA 31561 912-638-4724 www.CharGriller.com OM2121 C.1 ™ & © Char-Griller / A&J Mfg.
Need help?
Do you have a question about the 2121 and is the answer not in the manual?
Questions and answers