Advertisement
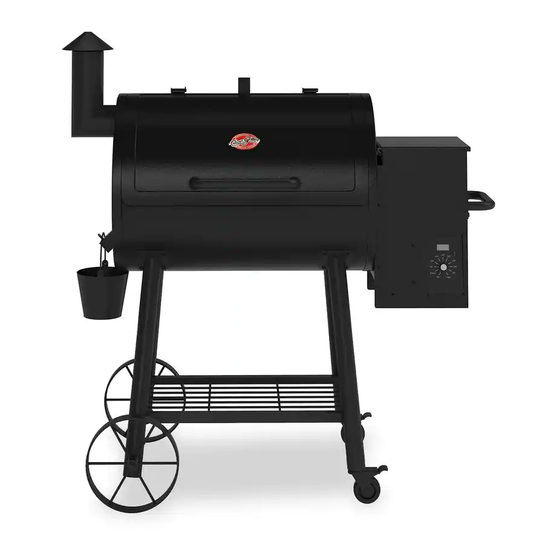
OWNER'S MANUAL
Performance
36,000 BTU's* (Wood Fired)
580 sq. in. Cooking Area
Electronically Controlled Pellet-feeding system for Precision Temperature control for Smoking / Grilling
Multiple Temperature Selection with Digital Thermostat Control for Precision Cooking
Porcelain Coated Cast-Iron Cook Grates
Drip Pan with Collection Bucket for Easy Clean-Up
Please read this entire manual before installation and use of this pellet fuel-burning appliance. Fail-
ure to follow these instructions could result in property damage, bodily injury or even death.
Contact local building or fire officials about restrictions and installation inspection requirements in
your area.
Save these instructions.
A MAJOR CAUSE OF FIRES IF FAILURE TO MAINTAIN RE-
QUIRED CLEARANCES (AIR SPACES) TO COMBUSTIBLE
MATERIALS. IT IS OF UTMOST IMPORTANCE THAT THIS
PRODUCT BE INSTALLED ONLY IN ACCORDANCE WITH
THESE INSTRUCTIONS.
*36,000 BTU's is achieved using an approved pellet fuel having a calorific value of 9000 BTU per
pound. Actual performance of the appliance will vary based on the type of wood pellets used.
Keep your receipt with this manual for Warranty.
OM9020 B.3
Wood Fire Pro
Pellet Grill
™ & © Char-Griller / A&J Mfg.
Model: 9020
™
Advertisement
Table of Contents

Related Manuals for CharGriller Wood Fire Pro 9020


Summary of Contents for CharGriller Wood Fire Pro 9020
- Page 1 OWNER’S MANUAL Model: 9020 ™ Wood Fire Pro Pellet Grill Performance 36,000 BTU’s* (Wood Fired) 580 sq. in. Cooking Area Electronically Controlled Pellet-feeding system for Precision Temperature control for Smoking / Grilling Multiple Temperature Selection with Digital Thermostat Control for Precision Cooking ...
- Page 2 IMPORTANT SAFETY WARNINGS READ ALL SAFETY WARNINGS AND INSTRUCTIONS CAREFULLY BEFORE ASSEMBLING AND OPERATING YOUR GRILL Use caution when assembling and operating your grill to avoid scrapes or cuts from sharp edges. Do not use gasoline, kerosene or alcohol for lighting wood pellets. Use of any of these or similar prod- ...
-
Page 3: Storing Your Grill
WARNING For Safe Use of Your Grill and to Avoid Serous Injury. Keep Children and Pet away from Grill. Supervision is necessary and do not leave grill unattended when in use. Keep grill area clear and free from materials that burn. ... - Page 4 P.O. Box 30864 Sea Island, GA 31561 912-638-4724 www.CharGriller.com Register your Grill online at www.CharGriller.com to insure your satisfaction and for follow-up service. STOP! CALL FIRST! DO NOT RETURN PRODUCT TO STORE. Warranty Information — Wood Pellet Grill Char-Griller® will repair or replace any defective part of its grillers/smokers for a period of up to one year from the date of purchase.
-
Page 5: Parts List
PARTS LIST Item Description Item Description Stopper, Lid Leg, Front Right Logo Plate 3" Caster Wheel Bottom Shelf Handle, Lid Bezel, Lid Handle Leg, Rear Left Leg, Front Left Firebox Welded Assembly Wheel, Metal, Cooking Grate Handle, Trolley Pellet Delivery System*: See Page 25 Bucket, Grease Tray, Grease Base, Chimney... - Page 6 NOTICE: Always have a fire extinguisher near at all times. Maintain and check your fire extinguisher regularly. NO RETURNS ON USED GRILLS HARDWARE LIST AND TOOLS REQUIRED (Tools Not Included) 7/16" nut driver Hardware Pack: 551006 Item Picture Description Hex Bolt—1/4”-20 x 1/2” Hex Nut—1/4”-20 Flat Washer—1.2”...
-
Page 7: Grill Assembly
GRILL ASSEMBLY Step 1: Lay the Grill Body with the Bottom of the grill facing up then Position Legs on Grill Body as shown below and secure them with (4) Hex Bolts per Leg. Front Right Leg Back Left Leg Back Right Leg (16) Hex Bolt --1/4”-20 x 1/2”... - Page 8 Step 3: Attach Caster Wheels onto the sockets at the bottom of the two legs as shown below. Caster Wheels Legs Step 4: Place the Metal Wheel, Flat Washer onto the Axle on the Leg then tighten them with the 7/16-20 Hex Nuts. Metal Wheel (2) Flat Washer Flat Washer...
- Page 9 Step 5: Insert the edge of the Lid Stopper into the rectangular slot on the Grill Body then tighten it with a Hex Bolt through the hole on the other end of the Lid Stopper. Lid Stopper Hex Bolt (1) Hex Bolt --1/4”-20 x 1/2” Step 6: Place the Handle Bezels on each end of the Handle then place them on the Grill Lid then tighten them with (2) Hex Bolts, see below.
- Page 10 Step 7: Attach Chimney to the side of the Grill Body opposite the Hopper Box. Chimney Hex Bolts (2) Hex Bolt --1/4”-20 x 1/2” Hex Nut—1/4”-20 Hopper Box (2) Hex Nut—1/4”-20 Gasket Step 8: Attach Trolley Handle onto the side of Hopper Box. (4) Hex Bolt --1/4”-20 x 1/2”...
-
Page 11: The Grill
Step 9: Place Heat Diffuser Shield Over the Fire Cup Inside Grill Body at the center of the Grill. Heat Diffuser Shield Step 10: Place Grease Tray into Grill Body. The Edge with Cut out on the center should goes into the Grease Channel. Grease Channel Grease Tray OM9020 B.3... - Page 12 Step 11: Place Cooking Grates into Firebox Cooking Grates Step 12: Hang Grease Bucket on hinge of grease tunnel Grease Bucket OM9020 B.3 ™ & © Char-Griller / A&J Mfg.
-
Page 13: Grill Preparation
GRILL PREPARATION Initial Firing Instructions These instructions should be followed the first time the grill is ignited and each time the grill runs out of pellets. 1.) Remove Cooking Grates, Grease Tray, and Heat Diffuser from the interior of Grill. 2.) Open the Pellet Hopper Lid, locate the auger. -
Page 14: Grill Operation
GRILL OPERATION Grill Lighting Instructions 1.) With the Lid open, turn the Temperature Dial to Smoke. 2.) In approximately 2 minutes, the pellets will ignite and white/gray smoke will be coming from the grill. Once the pellets have ignited, close the lid, set the Temperature Dial to HIGH, and run for 45 minutes. If Grill Fails to ignite, perform the following: 1.) Turn the Temperature dial to OFF. -
Page 15: Grill Maintenance
GRILL MAINTENANCE 1.) The Pellet Grill should be frequently checked for Grease Build-up. The following locations are where grease build-up occurs. Change the aluminum foil on the Grease Tray regularly. Periodically, clean the grease out of the Grease Drain and Grease Drain Tube, and off all in- terior ... - Page 16 DIGITAL GRILL CONTROL The Digital Grill Control regulates the desired temperature selection. The following information will provide you the insight to properly using your controller. Overview LCD Screen Displays Grill temperature, smoke settings, idle fuel feed settings, igniter status, low temperature status, and error messages. Temperature Dial Select Off, Smoke, or one of nine Temperatures the Grill will cook at.
- Page 17 DIGITAL GRILL CONTROL Connecting Grill to AC Power 1.) The Temperature Dial must be in the OFF. Plug the power cord into an appropriate, grounded electrical outlet. 3.) If ‘ErP’ is displayed, the Temperature Dial was not set to OFF. This causes an inadvertent start error, which halts the ignition sequence.
- Page 18 Digital Control Wiring Diagram OM9020 B.3 ™ & © Char-Griller / A&J Mfg.
- Page 19 SMOKE / COOK MODES When the Temperature Dial is set to SMOKE, the grill maintains a low temperature and outputs the desired amount of smoke to increase the flavor of the foods. Smoking 1.) Set the Temperature Dial to SMOKE. The LCD screen will display the current Grill Temperature. 2.) Use the Smoke Control Dial to set the Smoke Setting, P0-P7.
- Page 20 UNDERSTANDING SMOKE MODE / IDLE FUEL FEED RATE Smoke Mode and Idle Fuel Feed Rate are both controlled by the Smoke Control Dial. During Smoke Mode and the Idle Stage of Cook Mode, the Auger turns on, delivers fuel for 18 seconds, then turns off.
-
Page 21: Troubleshooting
TROUBLESHOOTING Control Panel Error Modes and Messages Flashing In Smoke Mode, the displayed temperature flashes if the grill temperature is below 110 ̊ F . Temperature In Cook Mode, the displayed temperature flashes if the grill temperature is below 150 ̊ F . This is not an error condition and does not affect the operation of the grill. - Page 22 TROUBLESHOOTING LCD Screen Won’t Light Up Check the Following items: 1.) Verify there is power at the electrical outlet where the grill is plugged in. 2.) If Power Cord is connected to a GFI (Ground Fault Interrupter) outlet, check and reset if necessary. 3.) Make sure Temperature Dial is in the OFF setting.
- Page 23 TROUBLESHOOTING Continued. If Pellets are not dropping from the Auger: 1.) Turn the Temperature Dial to the Off position and unplug unit from wall. 2.) Check auger for objects, obstructions, or swollen pellets. If there are no obstructions: A.) The auger motor could have failed. Contact Char-Griller Customer Service. B.) The Control Board could have failed.
-
Page 24: Manual Lighting Instructions
TROUBLESHOOTING Manual Lighting Instructions If the Fire Rod is not operating, the Grill can still be used to cook and smoke using the Manual Lighting Procedure as outlined below. 1.) Make sure the Temperature Dial is turned to the OFF position and the Fire Rod’s wire is disconnected from the Digital Control. - Page 25 PELLET DELIVERY SYSTEM BREAKDOWN Item Description Fire Pot Hopper/Auger Box Sealer Fire Rod Auger Hopper Box Welded Assy Controller Auger Motor with Support Bracket Auger Driver Support Bracket Air Circulator Fans Auger Box Welded Assy Pellet Box/Grill Body Sealer Bottom Support Plate Heat Sensor OM9020 B.3 ™...
- Page 26 ACCESSORIES TO ENHANCE YOUR GRILLING EXPERIENCE For Pricing or to Order, Visit: www.CharGriller.com CALL: 912-638-4724 FAX: 912-638-2580 or MAIL: P.O. Box 30864 Sea Island, GA 31561 Visit our online store at: www.CharGriller.com for more Char-Griller® GOURMET BBQ WOOD PELLET FUEL #9620 Professional Accessories™...
Need help?
Do you have a question about the Wood Fire Pro 9020 and is the answer not in the manual?
Questions and answers