Graco snugride 35 Instruction Manual
Infant car seat
Hide thumbs
Also See for snugride 35:
- User manual (96 pages) ,
- Owner's manual (89 pages) ,
- Instruction manual (88 pages)
Advertisement
Quick Links
SNUGRIDE
35
®
Do not install or use this
child restraint until you
read and understand
the instructions in this
manual.
FAILURE TO PROPERLY
USE THIS
CHILD RESTRAINT
INCREASES THE
RISK OF SERIOUS
INJURY OR DEATH IN
A SUDDEN STOP OR
CRASH.
KEEP INSTRUCTIONS
FOR FUTURE USE.
www.gracobaby.com
PD284963A 11/14
Advertisement

Related Manuals for Graco snugride 35


Summary of Contents for Graco snugride 35
- Page 1 SNUGRIDE ® Do not install or use this child restraint until you read and understand the instructions in this manual. FAILURE TO PROPERLY USE THIS CHILD RESTRAINT INCREASES THE RISK OF SERIOUS INJURY OR DEATH IN A SUDDEN STOP OR CRASH.
-
Page 2: Rear-Facing Use
Important 4-13 Pages 1-A Quick Guide to Your Manual 1-B Before You Begin 1-C Safety Warnings Features 14-23 Pages 2-A Car Seat Features 2-B Remove Car Seat from Base 2-C Attach Car Seat to Base 2-D Adjusting Carry Handle 2-E Recline the Base 2-F Choosing Vehicle Seat Location 2-G Choosing LATCH or Seat Belt 2-H What Is LATCH... -
Page 3: Securing Child
Securing Child 43-54 Pages 4-A Adjust Harness to Fit Child 4-B Adjust Buckle to Fit Child 4-C Securing Child in Car Seat 4-D Removing Child Carrier Use 55-56 Pages Vehicle Information 57-67 Pages 6-A Additional LATCH Information 6-B How to Remove LATCH 6-C Unsafe Vehicle Seats 6-D Vehicle Seat Belts Accessories... - Page 4 1-A Quick Guide to Your Manual This car seat is for children 4-35 lb (1.8-16 kg) and 32” (81 cm) or less. Get to Know Your Car Seat Review section 2-A to see all of the features of this infant car seat. What Seating Location Should I Use? The best seating location for this infant car seat is one that: •...
- Page 5 When Installing Base LATCH System Vehicle Seat Belt LATCH consists of lower There are two types of anchors, which are built- vehicle seat belts that can in to your vehicle, and be used. Lap/Shoulder Seat connecting hooks that are Belt or Lap Only Seat Belt. built-in your car seat.
- Page 6 Does Your Seat Fit Your Child Correctly? To make sure your child is secured properly, review section 4 to understand all of the actions you need to take to properly adjust the car seat to fit your child. You Need To Adjust: Harness Height Harness straps at or just below the child’s shoulders.
- Page 7 Did You Do Everything Correctly? Base or Car Seat Does Not Move More Than 1” (2.5 cm) At The Belt Path Review section 3. Car Seat Level to Ground Review sections 2-E and 3. Car Seat Is Properly Attached To Base Review section 2-C.
- Page 8 Child restraints could be recalled for safety reasons. You must register this restraint to be reached in a recall. Send your name, address, and the restraint’s model number and manufacturing date to: Graco Children’s Products, Inc. Attn: Customer Service 3 Glenlake Parkway Atlanta, GA 30328 or call 1-800-345-4109 or register online at www.gracobaby.com/carseatregistration...
- Page 9 For future reference or if you change addresses, record the model name, model number, date of manufacture, and purchase date of this car seat below. You can find this information either on the registration card if you still have it or on the date label located on the back of the car seat.
- Page 10 Look for date of manufacture label on back of the car seat. Graco Children’s Products Inc. advises against loaning or passing along a car seat unless you know the complete history of the product. We also advise against purchasing a car seat second hand.
- Page 11 1-C Safety Warnings No car seat can guarantee protection from injury in every situation, but proper use helps reduce the risk of serious injury or death. READ THIS MANUAL CAREFULLY. Failure to follow these instructions and child restraint’s labels can result in child striking the vehicle’s interior during a sudden stop or crash.
- Page 12 If your vehicle does not have a back seat, review your vehicle owner’s manual. The American Academy of Pediatrics (AAP) and National Highway Traffic Safety Administration (NHTSA) recommend that children be rear-facing until age 2 or until they reach the maximum rear- facing height and weight rating for their seat.
- Page 13 DO NOT use accessories or parts other than those provided by Graco. Their use could alter the performance of the car seat. DO NOT remove LATCH system from car seat. If using vehicle seat belt to secure car seat, LATCH connectors must be stored.
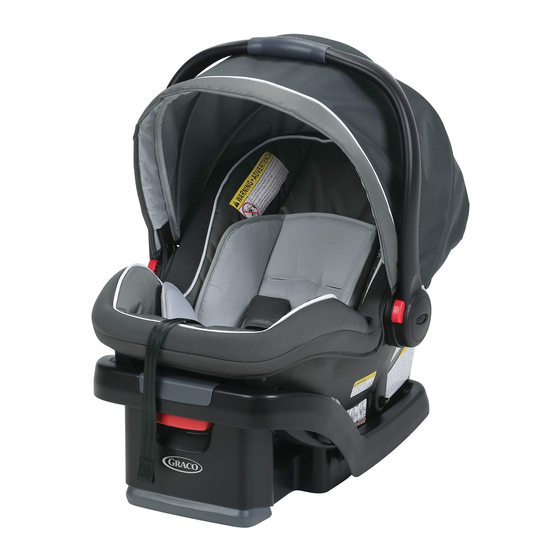
- Page 14 2-A Car Seat Features A Carry Handle F Harness Release B Canopy Lever (Under Pad) C Head Pillow G Harness Adjustment (Select models) D Handle Adjustment Buttons Strap E Rear-Facing Belt Path H Removable Base I Harness Covers (When Used Without Base) (Select Models)
- Page 15 J Base Release Lever K Car Seat L Level to Ground Line M Instruction Manual Storage (Under Base) N Chest Clip O Harness Straps P Buckle Tongues Q Buckle R Buckle Strap...
- Page 16 A Base Release Lever B Harness Strap Slots C Locking Clip D Harness Straps E Buckle Metal Clip F Splitter Plate...
- Page 17 G Car Seat Base Lock H Base Rear-Facing Belt Path I LATCH Strap J Instruction Manual Storage (Under Base) K LATCH Storage L Base Recline Wedge...
- Page 18 2-B Remove Car Seat from Base 1. To Remove Car Seat from Base From the back of the car seat, squeeze the base release handle and lift the car seat out of the base. 2-C Attach Car Seat to Base 2.
- Page 19 2-D Adjusting Carry Handle 1. To Rotate Handle Press the red handle adjustment buttons on both sides of handle. MAKE SURE handle locks into position before lifting the carrier. 2. Handle Has 4 Positions Rotate handle to any of the 4 locked positions.
- Page 20 2-E Recline the Base 1. Base Has 3 Recline Positions Position 1 is the least reclined position. Remove the base wedge. For position 2, attach the base wedge with the label marked 2 facing up.
- Page 21 For position 3, attach the base wedge with the label marked 3 facing up. If needed, rolled towels may be placed under the base, at the vehicle seat crease, until the level line is level with the ground.
- Page 22 2-F Choosing Vehicle Seat Location Review your vehicle owner’s manual for seating locations. Review section 6 for additional information. Some vehicles have specific requirements for where the car seat can be installed. Be sure to check your vehicle owner’s manual for all available seating positions. According to accident statistics, the safest place for your child in any vehicle is the back seat.
- Page 23 2-G Choosing LATCH or Seat Belts This car seat can be installed in your vehicle using either the vehicle seat belt OR the LATCH system. Both systems are equally safe to use. DO NOT USE BOTH AT THE SAME TIME. Review section 6 for additional information.
- Page 24 3-A Rear-Facing Safe Use Checklist Rear-Facing: 4-35 lb (1.8-16 kg) 32” (81 cm) or less • Car seat MUST be rear- facing in the vehicle back seat. • Make sure LATCH strap or vehicle seat belt LATCH Strap is routed through the rear-facing belt path, marked with a blue label.
- Page 25 AAP , these infants may suffer breathing issues if improperly reclined in a car seat. Use the corrected age for preemies. Graco advises that you have your physician or hospital staff evaluate your infant and recommend the proper car seat or car bed before you and Vehicle Lap/Shoulder your infant leave the hospital.
- Page 26 3-B Install With Base Rear-Facing With LATCH Strap Review your vehicle’s owner manual for LATCH location and use. 1. Remove LATCH Hooks from Storage Location Slide each LATCH hook out of the storage location. 2. Make Sure LATCH Strap is in the Rear-Facing Belt Path, Marked With a Blue Label...
- Page 27 3. Extend the LATCH Strap Extend the LATCH strap to its maximum length by pressing the gray button and pulling on the strap. 4. Place Base in Back Seat of the Vehicle Place the base flat on the vehicle seat. Push it back until the front of the base touches the vehicle...
- Page 28 5. Check the Rear Facing Level Line The red level line on the side of the seat MUST BE LEVEL with the ground. To recline, review section 2-E. 6. Connect LATCH Hooks to Vehicle’s Lower LATCH Anchors LATCH strap should lay as flat as possible and not be twisted.
- Page 29 8. Test For Tightness Grab the sides of the base where the LATCH strap is and push and pull the base from side to side and front to back. If the base moves less than 1” (2.5 cm), it is tight enough.
- Page 30 10. Check the Rear Facing Level Line The red level line on the side of the seat MUST BE LEVEL with the ground. Check the level line with child in the child restraint when making sure the line is level with the ground.
- Page 31 Is Everything Correct? Base Does Not Move More Than 1” (2.5 cm) At The Belt Path Car Seat Is Properly Attached To Base Car Seat Level to Ground Cannot Pinch Harness Chest Clip Even With Armpits...
- Page 32 3-C Install With Base Rear-Facing With Vehicle Seat Belt 1. Store LATCH Straps Hook the LATCH hooks into the holes on side of base as shown. Remove the slack. 2. Place Base in Back Seat of the Vehicle Place the base flat on the vehicle seat.
- Page 33 3. Check the Rear Facing Level Line The red level line on the side of the seat MUST BE LEVEL with the ground. To recline, review section 2-E. Review your vehicle’s owner manual for vehicle seat belt use 4. Route the Vehicle Seat Belt Thread vehicle seat belt through the...
- Page 34 5. Lock the Vehicle Seat Belt In most vehicles today, slowly pull the shoulder belt all the way out and then let it go back in. You will hear a “clicking” sound. Slowly pull out on the belt and it should be locked.
- Page 35 7. Test For Tightness Grab the sides of the base where the seat belt is and push and pull the base from side to side and front to back. If the base moves less than 1” (2.5 cm), it is tight enough.
- Page 36 9. Check the Rear Facing Level Line The red level line on the side of the seat MUST BE LEVEL with the ground. Check the level line with child in the child restraint when making sure the line is level with the ground.
- Page 37 Is Everything Correct? Base Does Not Move More Than 1” (2.5 cm) At The Belt Path Car Seat Is Properly Attached To Base Car Seat Level to Ground Cannot Pinch Harness Chest Clip Even With Armpits...
- Page 38 3-D Install Without Base Rear-Facing With Vehicle Seat Belt 1. Place Car Seat in Back Seat of the Vehicle Place the car seat on the vehicle seat. Push it back until the front of the car seat touches the vehicle seat back.
- Page 39 2. Route the Vehicle Seat Belt Thread vehicle seat belt through the rear-facing belt path (marked with a blue label) and buckle it. The seat belt should not be twisted. 3. Lock the Vehicle Seat Belt In most vehicles today, slowly pull the shoulder belt all the way out and then let it go back in.
- Page 40 4. Tighten the Vehicle Seat Belt Lay your forearm across the car seat at the belt path and push down. Pull on the shoulder belt to tighten while feeding the slack back in the retractor. 5. Test For Tightness Grab the sides of the car seat where the seat belt is and push and pull the car seat...
- Page 41 6. Check the Rear Facing Level Line The red level line on the side of the seat MUST BE LEVEL with the ground. Check the level line with child in the child restraint when making sure the line is level with the ground.
- Page 42 Is Everything Correct? Car Seat Does Not Move More Than 1” (2.5 cm) At The Belt Path Car Seat Level to Ground Cannot Pinch Harness Chest Clip Even With Armpits...
- Page 43 4-A Adjust Harness to Fit Child 1. Loosen Harness Straps Push down on the harness release lever while pulling out on the harness straps at the chest clip. 2. Release the Chest Clip Squeeze the chest clip release buttons and pull apart.
- Page 44 3. Unbuckle the Buckle Press the red button and pull buckle tongues out. Place harness straps off to the sides. 4. Place Your Child in the Seat Make sure their back is flat against the car seat back. Avoid bulky or heavy clothing when it is cold out. Doing so will prevent the harness straps from tightening properly.
- Page 45 6. Check Harness Height Harness Straps MUST BE AT OR JUST BELOW the Child’s Shoulders 7. Top of Head MUST BE AT LEAST 1” 1” (2.5 cm) (2.5 cm) BELOW the Top of the Car Seat...
-
Page 46: Harness Height
8. To Change Harness Height Positions With harness straps loose, from the back of the car seat, remove the harness straps loops from the splitter plate. 9. Pull Harness Straps Out From the Front of Car Seat 10. Insert Harness Strap Into the New Location Make sure harness... - Page 47 11. For Smaller Baby If the child’s shoulders are even with or just below the lowest 2 slots, use the upper loops on the harness straps. Thread the upper harness straps loops onto the splitter plate. Make sure the straps are on top of the splitter plate and are completely on.
- Page 48 12. For Larger Baby If the child’s shoulders are even with or just below the upper 2 slots, use the lower loops on the harness straps. Thread the lower harness straps loops onto the splitter plate. Make sure the straps are completely on the splitter plate.
- Page 49 4-B Adjust Buckle to Fit Child 1. Check the Buckle Position The correct slot is the one that is closest to your child without being underneath them. 2. To Change Buckle Position Remove child from the seat. From the bottom of car seat, insert the buckle’s metal clip up through shell and pad.
- Page 50 3. Insert Metal Clip Into New Location Push metal clip down through the pad and shell. Make sure the buckle’s red button is facing out. 4. Pull Up On Buckle To Check It Is Secured Make sure buckle’s metal clip is completely through pad and shell.
- Page 51 4-C Securing Child in Car Seat 1. Place Harness Straps Over Child’s Shoulders 2. Buckle You will hear a “click” when buckle tongues are securely attached. Pull up on each buckle tongue to make sure it is securely attached. 3. Buckle the Chest Clip You will hear a “click”...
- Page 52 4. Pull All the Slack Out From Around the Waist Pull up on the harness strap while pushing the chest clip down. Do this to both sides. 5. Tighten the Harness by Pulling the Harness Adjustment Strap When you are not able to pinch any of the harness webbing at your child’s...
- Page 53 6. Raise the Chest Clip to Child’s Armpit Level 7. Check Tightness Tighten more if needed.
- Page 54 4-D Removing Child 1. Loosen Harness Straps Push down on the harness release lever while pulling out on the harness straps at the chest clip. 2. Release the Chest Clip Squeeze the chest clip release buttons and pull apart. 3. Unbuckle Your Child Press in on the red button and remove...
- Page 55 5-A Carrier Use Read all instructions before use of the infant carrier. Keep instructions for future use. Do not use the infant carrier if it is damaged or broken. NEVER leave child unattended. Always stay within arms reach of carrier. SUFFOCATION HAZARD: Infant carrier can roll over on soft surfaces and suffocate child.
- Page 56 If you do not have an owner’s manual, please visit our website at www.gracobaby.com to download the manual or call toll-free at 800-345-4109. NEVER use a Graco infant carrier with any other manufacturer’s strollers. This can result in serious injury or death.
- Page 57 6-A Additional LATCH Information This car seat can be installed in your vehicle using either the vehicle seat belt OR the LATCH system. Both systems are equally safe to use. DO NOT USE BOTH AT THE SAME TIME. The LATCH system allows you to securely attach your car seat in your car without using the vehicle seat belt and possibly to get a better fit.
- Page 58 6-B How to Remove LATCH 1. Push Gray Button In While Pulling on LATCH Strap to Loosen 2. Press and Hold LATCH Release Hinge 3. Push Hook In, Lift Hook Up and Pull Out Away From Anchor Point...
- Page 59 6-C Unsafe Vehicle Seats Never install this car seat in side-facing or rear-facing vehicle seats. 6-D Vehicle Seat Belts Review your vehicle owner’s manual for vehicle seat belt use This car seat can be installed using a vehicle seat belt. To do this, you will need to change the seat belt to a locked mode for use with car seats.
- Page 60 Vehicle Seat Belt Terms Retractor A device that winds up the unused vehicle seat belt. It is often hidden inside the panels on the walls of the vehicle or in the vehicle seat back. Latch Plate The male end of the Seat Crease seat belt with the The crease where the vehicle...
- Page 61 The following types of vehicle seat belts CANNOT be used safely with this car seat: Lap Belt with Motorized Belts Forward of the Shoulder Belt Seat Crease Lap Belt or Shoulder Belt Mounted on Door...
- Page 62 Note: Most vehicles manufactured after 1996 will have Switchable retractors in the back seat. If you have any questions about your retractor type, consult your vehicle owner’s manual or call Graco for assistance.
- Page 63 How to Lock Your Lap/Shoulder Vehicle Seat Belt Sliding Latch Plate and Switchable Retractor A latch plate that slides freely on the belt webbing and cannot, by itself, hold the belt snug around a car seat. When installing the car seat, route the vehicle seat belt through the proper belt path and buckle it in.
- Page 64 Locking Latch Plate and ELR Retractor A latch plate that holds the lap belt snug after it has been adjusted; contains a metal bar on the underside of the hardware that “locks” the belt in position. When installing the car seat, route the vehicle seat belt through the proper belt path and...
- Page 65 Sliding Latch Plate and ALR Retractor A latch plate that slides freely on the belt webbing and cannot, by itself, hold the belt snug around a car seat. Slowly pull the shoulder belt all the way out. Route the vehicle seat belt through the proper belt path and buckle it in.
- Page 66 Sliding Latch Plate and ELR Retractor A latch plate that slides freely on the belt webbing and cannot, by itself, hold the belt snug around a car seat. With this retractor, you will need to use the locking clip to lock the vehicle seat belt. Route the vehicle seat belt through the proper belt path and buckle it in.
- Page 67 Lap Belt Installation Always review your vehicle owner’s manual for specific information about your vehicle seat belts. Locking Latch Plate and No Retractor When installing the car seat, route the lap seat belt through the proper path and buckle it in. Then, pull upwards on Grab the sides of the seat at the belt the tail of the belt so that...
- Page 68 7-A Accessories (on select models) To prevent ejection in sudden stop or crash: Use body support with bottom 2 sets of harness slots only. Body Pillow To remove, pull the body pillow out from behind the harness straps. Harness Covers Make sure that harness covers do not interfere with...
- Page 69 8-A Cleaning Seat Pad 1. Loosen Harness Straps Push down on the harness release lever while pulling out on the harness straps at the chest clip. 2. Remove Harness Straps from Splitter Plate 3. Pull Harness Straps Out From the Front of Car Seat...
- Page 70 4. Pull Out the 4 Plastic Flaps from Sides of Seat...
- Page 71 5. Pull Pad Off Shell 6. Remove Canopy from Canopy Hoop Slide the canopy to one side of the canopy hoop. From the center, pull the canopy hoop apart and remove canopy. Machine wash pad and canopy in cold water on delicate cycle and drip-dry.
- Page 72 8-B Cleaning Buckle Remove Buckle to Clean From the bottom of car seat, insert the buckle’s metal clip up through shell and pad. From the front, pull buckle out of the pad and shell. To clean, place in a cup of warm water and gently agitate the buckle.
- Page 73 Shake out excess water and allow to air dry. Repeat steps as needed until it fastens with a click. Re-insert the buckle into the same slot it was removed. Pull up on crotch buckle to make sure it is secured. WARNING! Inspect and clean buckle from time to time to remove any...
- Page 74 NOTES...
- Page 75 NOTES...
-
Page 76: Replacement Parts
Replacement Parts To purchase parts or accessories in the United States, please contact us at the following: www.gracobaby.com 1-800-345-4109 Store instruction manual in the slots on the bottom of the base where the instruction book icon is shown. - Page 77 • Owners’ Manual • Manual del propietario ©2014 Graco PD286025C 9/14...
- Page 78 (other latched before allowing your child than approved Graco stroller near the stroller. bags) on the handle. Never place • CHILD MAY SLIP INTO LEG anything on the canopy.
- Page 79 Graco® SnugRide® infant to toys. car seats with Click Connect™. Only use with Graco® infant car seats that have the Click Connect™ logo. Improper use of this stroller with other manufac- turers’ carseats may result in seri- ous injury or death.
- Page 80 (que no sean las manos y rodillas o salir bolsas para cochecito aprobadas gateando. NUNCA lo use en la por Graco) en la manija. No posición totalmente reclinada a ponga nunca nada sobre la menos que el apoyapié esté en capota.
- Page 81 • PARA PREVENIR UNA USO DEL TRANSPORTADOR PARA BEBÉ GRACO ® CON SITUACIÓN PELIGROSA E INESTABLE, no ponga más de EL COCHECITO: 10 libras (4.5 kg) en la canasta de almacenamiento y no • PARA EVITAR ponga más de 2 libras (0.9 kg)
- Page 82 Parts list • Lista de piezas This model may not include some Este modelo podría no incluir features shown below. Check algunas de las características que se that you have all the parts for this indican a continuación. Verifique model BEFORE assembling your que tiene todas las piezas de product.
- Page 83 To Open Stroller • Cómo abrir el cochecito Before assembly be sure to place stroller on top of a piece of cardboard or other protective cover to prevent damage to floor surface. Antes de armarlo, tenga la seguridad de poner el cochecito arriba de un pedazo de cartón u otro tipo de protección para prevenir el daño a la superficie del piso.
- Page 84 Front Wheels • Ruedas delanteras SNAP! ¡RUIDO! CHECK that wheels are securely attached by pulling on wheel assemblies. VERIFIQUE que las ruedas estén instaladas correctamente tirando de los ensamblajes de la rueda. To remove. Para sacarla. ...
- Page 85 Rear Wheels • Ruedas traseras The rear wheels can only go on one way. Brake lever points SNAP! toward rear of stroller. ¡RUIDO! Las ruedas traseras solamente se pueden montar de una manera. La palanca del freno apunta hacia la parte trasera del cochecito.
- Page 86 Canopy • Capota To open. To close. Para abrir la capota. Para cerrarla.
- Page 87 Cupholder • Apoyavaso To remove. Para sacarla.
- Page 88 To Use Brake • Cómo usar el freno WARNING Always apply brake. Check that brake is on by trying to push stroller. ADVERTENCIA Use siempre el freno. Verifique que el freno esté activado tratando de empujar el cochecito. Swivel Wheels • Ruedas giratorias Front swivel wheels lock for use on uneven surfaces such as grass, stones or gravel.
- Page 89 To Recline Seat • Para reclinar el asiento WARNING Fabric caught in the latches may prevent them from locking. When returning seat to upright position, do not allow fabric to be pinched in the latch. When making adjustments to the stroller seat, make sure child’s head, arms, and legs are clear of moving seat parts and stroller frame.
- Page 90 To Adjust Leg Rest • Para ajustar el descanso de la pierna To lower leg rest, press buttons on side of seat as shown. Para bajar el descanso de la pierna, oprima los botones del costado del asiento como se indica.
- Page 91 Reclined Carriage Position • Posición reclinada del cochecito WARNING • Child may slip into leg openings and strangle. NEVER use in full recline position unless footrest is in the reclined carriage position. • Do not use in reclined carriage position with an older child that can lift up on hands and knees or crawl out.
- Page 92 Reline seat to lowest position. Recline el asiento hasta la posición más baja. Raise the legrest to fully upright position as shown. Levante el soporte de las piernas hasta la posición completamente vertical como se indica. Remove flaps from bottom of legrest.
- Page 93 Unfasten straps and thread straps through button holes on each side of seat cover. Desabroche las correas y páselas a través de los agujeros en cada costado de la funda del asiento. Fasten hook and loop tape on both sides of the stroller to secure.
- Page 94 To Secure Child • Cómo asegurar al niño 5 Point Harness • Arnés de 5 puntos Use slide adjuster at shoulder and waist for tighter adjustment. To change Use slide adjuster at shoulder and shoulder harness slots, see page 20. waist for further adjustment.
- Page 95 3 Point Buckle • Hebilla de 3 puntos To convert to 3-pt harness. Para convertirlo en un arnés de 3 puntos. Use slide adjuster at waist for tighter adjustment. Use el ajuste deslizable a la cintura para hacer ajustes más apretado.
- Page 96 To Change Shoulder Harness Slots • Cómo cambiar las ranuras del arnés del hombro Shoulder harness anchor—larger child Anclajes del arnés del hombro-niño grande Shoulder harness anchor—smaller child Anclajes del arnés del hombro-niño pequeño Slide adjuster Ajustador deslizable Use either shoulder harness anchor in the slots that are closest to child’s shoulder height.
- Page 97 To Fold • Cómo plegarlo Before folding stroller, fold canopy and apply brake. Antes de plegar el cochecito, pliegue la capota y aplique el freno. Storage latch will engage automatically. La traba de almacenamiento se activará automáticamente. SNAP! ¡RUIDO!
- Page 98 Click Connect™ logo. Improper use of this stroller with other manufacturers’ carseats may result in serious injury or death.Read the manual provided with your Graco car seat before using it with your stroller . Always secure your child with the car seat harness when using the •...
- Page 99 Raise the legrest to fully upright position as shown. Levante el soporte de las piernas hasta la posición completamente vertical como se indica. Remove flaps from bottom of legrest. Para las aletas de abajo del descanso para las piernas.
- Page 100 Thread straps through button holes on each side of seat cover. Pase las correas a través de los agujeros del botón en cada costado de la funda del asiento. Fasten hook and loop tape on each side to secure. Sujete la cinta de nudo y gancho en cada costado para asegurarlo.
- Page 101 Mounts Soportes Recline the stroller seat back to its lowest position. Locate the 2 Click Connect™ mounts. Recline el respaldo del asien- to del cochecito hasta la posición más baja. Ubique los 2 montantes Click Connect™. Insert carseat into stroller and push down on car seat until the latches snap into the Click Connect™...
- Page 102 To remove car seat: squeeze release handle at back of car seat, and lift car seat out of the stroller. Para sacar el asiento de automóvil: apriete la manija de liberación de atrás del asiento de automóvil y levante el asiento de automóvil fuera del cochecito.
-
Page 103: Harness Covers (On Certain Models)
Harness Covers (on certain models) • Fundas del arnés (en ciertos modelos) Only use these harness covers on this stroller. Never use these harness covers on any other product. Slide harness covers onto shoulder straps. Use las fundas del arnés solamente en este cochecito. -
Page 104: Care And Maintenance
• FROM TIME TO TIME CHECK YOUR STROLLER for loose screws, worn parts, torn material or stitching. Replace or repair the parts as needed. Use only Graco replacement parts. • EXCESSIVE EXPOSURE TO SUN OR HEAT could cause fading or warping of parts. -
Page 105: Atención Y Mantenimiento
Cambie o repare las piezas según sea necesario. Use solamente piezas de repuesto Graco. • EL CONTACTO EXCESIVO CON EL SOL O EL CALOR podría causar descoloramiento o torcedura de las piezas. - Page 106 Notes • Notas...
- Page 107 Notes • Notas...
- Page 108 1-800-345-4109 Product Registration (USA) Registro del producto (EE.UU.) To register your Graco product from within the U.S.A. visit us online at www.gracobaby.com/productregistration or return registration card provided with your product. We currently do not accept product registrations from those living outside the United States of America.
Need help?
Do you have a question about the snugride 35 and is the answer not in the manual?
Questions and answers