Table of Contents
Advertisement
Quick Links
Download this manual
See also:
User Manual
Advertisement
Table of Contents

Summary of Contents for Nokia PT-3
- Page 1 Nokia Fun Camera PT-3 User’s Guide 9356921 Issue 1...
- Page 2 Under no circumstances shall Nokia be responsible for any loss of data or income or any special, incidental, consequential or indirect damages howsoever caused. The contents of this document are provided "as is". Except as required by applicable law, no...
-
Page 3: Table Of Contents
C o n t e n t s Contents Introduction ... 4 1. Getting started ... 5 Overview... 5 Optical viewfinder and strap ... 5 Inserting batteries... 6 Display... 6 Battery and LED... 7 2. Using the camera... 8 Taking a picture... 8 Using the flash... -
Page 4: Introduction
I n t r o d u c t i o n Introduction The stand-alone Nokia Fun Camera PT-3 enables you to take pictures while on the move. To view pictures taken with the Nokia Fun Camera PT-3, you need a compatible mobile phone with a Pop-Port connector, such as the Nokia 3100, Nokia 6100, Nokia 6610, Nokia 6800 or Nokia 7210. -
Page 5: Getting Started
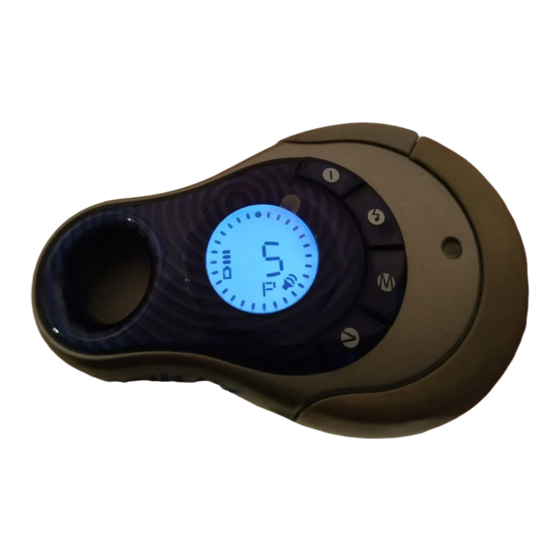
G e t t i n g s t a r t e d 1. Getting started ■ Overview The Nokia Fun Camera PT-3 consists of the following parts: 1. Viewfinder hole 2. Trigger 3. Power key 4. Flash key 5. -
Page 6: Inserting Batteries
To use the strap, thread the strap through the holes as in the picture and tighten it. ■ Inserting batteries The Nokia Fun Camera PT-3 uses 2 AAA batteries as its power source. See also Battery information on page 13. 1. Rotate the lid open. -
Page 7: Battery And Led
G e t t i n g s t a r t e d ■ Battery and LED The battery capacity icon indicates the level of battery power remaining. Note that you are able to take pictures when the battery capacity icon has dropped to one block, but you cannot use the flash. -
Page 8: Using The Camera
Note that when taking pictures, the camera must not be connected to a compatible phone. ■ Using the flash The Nokia Fun Camera PT-3 has a key for its flash, the power on, the flash is switched on by default. The letter A is shown next to the flash icon . -
Page 9: Transferring Pictures To A Compatible Phone
You can transfer pictures to a compatible Nokia phone just by connecting the Nokia Fun Camera PT- 3 to the Pop-Port connector of the phone. The transfer starts automatically. -
Page 10: Using The Keys And Display Settings
After picture transfer, disconnect the camera from your phone and close the connector lid. ■ Using the keys and display settings The Nokia Fun Camera PT-3 has the following keys: • menu key to view and scroll through the menu settings. The different settings are indicated by icons on the display. - Page 11 U s i n g t h e c a m e r a • Image type The pictures are compressed into 3 different file sizes: Photo , Higher and Lower compressed and the Photo quality the least. The image quality is better when the compression is low.
-
Page 12: Care And Maintenance
Care and maintenance Your camera is a product of superior design and craftsmanship and should be treated with care. The suggestions below will help you to fulfil any warranty obligations and to enjoy this product for many years. • Keep the device dry. Precipitation, humidity and all types of liquids or moisture can contain minerals that will corrode electronic circuits. -
Page 13: Battery Information
B a t t e r y i n f o r m a t i o n Battery information This device is intended for use when supplied with power from Alkaline 1.5V 8003 Micro LR03 AM4 MN2400 Ministilo AAA batteries. The use of any other types may invalidate any approval or warranty, and may be dangerous.


Need help?
Do you have a question about the PT-3 and is the answer not in the manual?
Questions and answers