Advertisement
2.1 CHANNEL WIRELESS
2.1 CHANNEL WIRELESS
HOME THEATER SYSTEM
HOME THEATER SYSTEM
with 37 Inch Soundbar and Bluetooth
with 37 Inch Soundbar and Bluetooth
PLEASE READ BEFORE OPERATING THIS EQUIPMENT.
Model: CHT978
Wireless Technology
®
Wireless Technology
®
Owner's Manual
Size: 148.5(W) x 210(H)mm (A5)
Advertisement
Table of Contents

Related Manuals for Craig CHT978


Summary of Contents for Craig CHT978
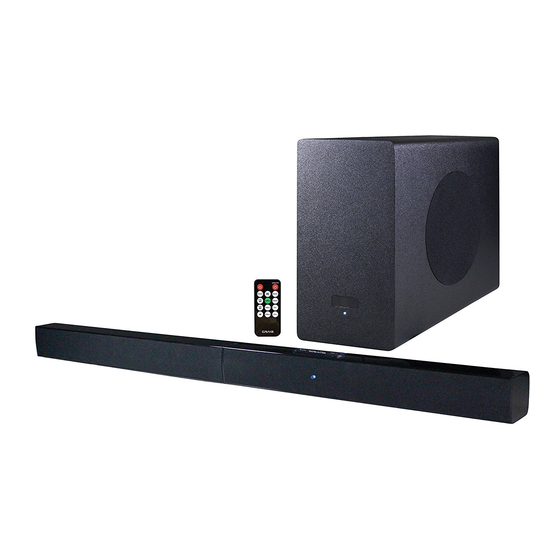
- Page 1 2.1 CHANNEL WIRELESS HOME THEATER SYSTEM HOME THEATER SYSTEM with 37 Inch Soundbar and Bluetooth Wireless Technology ® with 37 Inch Soundbar and Bluetooth Wireless Technology ® Owner's Manual PLEASE READ BEFORE OPERATING THIS EQUIPMENT. Model: CHT978 Size: 148.5(W) x 210(H)mm (A5)
-
Page 2: Important Safety Instructions
IMPORTANT SAFETY INSTRUCTIONS FCC Warnings WARNING:Changes or modifications to this unit not expressly approved by the party responsible for compliance could void the user’s authority to operate the equipment. NOTE: This equipment has been tested and found to comply with the limits for a Class B digital device, pursuant to Part 15 of the FCC Rules. -
Page 4: Installation
INSTALLATION Loud Speakers: When take out the Loud Speakers from packing, install it together as the figure below: Notes: Make sure the speakers net are in same side before insert the left speaker into right speaker. Otherwise, both speakers may damage. Make sure the left speaker was completely inserted into the right speaker. - Page 5 MOUNTING We recommend having this speaker professionally mounted. By using the included wall mounting accessories, the Main Unit can be mounted onto a wall. Distance Between Two Brackets 23.0 inches AUX IN1 AUX IN2 DC IN FM ANT 12V, 2A OPTICAL IN Mounting on the wooden wall You may use...
-
Page 6: Location Of Controls
LOCATION OF CONTROLS Main Unit Front View Top View Standby VOL - FM Scan VOL + /Source Rear View AUX IN 1 AUX IN 2 DC IN FM ANT 12V, 2A OPTICAL IN 7. VOL + (Volume Up) Button 1. Indicators 8. - Page 7 Subwoofer Front View Side View Rear View DC IN 2 V, 2.5A 15. Woofer 13. Indicators 16. DC IN Jack 14. Remote Sensor...
-
Page 8: Remote Control
LOCATION OF CONTROLS Remote Control SUBWOOFER ( Power On/Off ) Button ( For Main Unit ) 2. MO/ST ( Mono/Stereo ) Button 3. TUNE -/ ( Skip Backward ) Button TUNE +/ ( Skip Forward ) Button 4. TREBLE -/+ Buttons ( Play/Pause ) Button 6. -
Page 9: Power Source
POWER SOURCE Main Unit: Insert the DC Plug from the supplied small size AC/DC Adapter to the DC IN Jack on the rear of Main Unit. Insert the AC/DC Adapter to the wall outlet having AC 100-240V~, 50/60Hz as the figure below: To the wall outlet To the DC IN jack on the top of the Main Unit... - Page 10 POWER SOURCE Remote Control ● First time using: Remove and discard the insulation film as the figure on right. ● If the battery is consumed, replace it as below: 1. Push and slide out the battery tray as the figure below and the markings on the rear of the Remote Control.
- Page 11 EFFECTIVE DISTANCE OF REMOTE TRANSMITTER Main Unit: Remote Sensor ° ° Subwoofer: Remote Sensor ° ° Notes: ● When there is an obstacle between the Main Unit/Subwoofer and the transmitter may not operate. ● When direct sunlight, an incandescent lamp, fluorescent lamp or any other strong light shines on the REMOTE SENSOR of the unit, the remote operation may be unstable.
-
Page 12: Operation
OPERATION Auto pairing of Loud Speakers and Subwoofer: 1. Connected the AC/DC Adapters to the Main Unit and Subwoofer as previous procedures. The Red Indicators on the Main unit and Subwoofer will illuminate. 2. Press the SUBWOOFER Button on the right-top of Remote Control to turn on the Subwoofer from standby mode. - Page 13 ( For details pairing procedures, please refer to the user's manual of your BT Device.) Notes: 1. When the external BT Device searched the Main Unit, our model number " CHT978 " will appear on display of external BT Device.
- Page 14 Listen to FM Radio: 1. Power on the Main Unit/Subwoofer and paired together as previous procedures. 2. Press the Standby/Source Button on the Main Unit or press the SOURCE Button on the Remote Control repeatedly until the the color of the Indicator on the Main Unit turns to Green.
- Page 15 AUX IN 1 : LISTEN TO TV/DVD/VCR/DVR 1. Connect the Aux out jacks from the external audio/video player (such like TV, DVD player, VCR …etc.) to the AUX IN 1 Jacks on the rear of the Main Unit by the RCA Connection Cable as the figure below: white To Audio Out Jacks...
- Page 16 CONNECTION THROUGH OPTICAL 1. Connect the Optical out jack from the external audio/video player (such like TV, DVD player …etc.) to the OPTICAL IN Jack on the rear of the Main Unit by the Optical Connection Cable as the figure below: Rear view of the unit AUX IN 1 AUX IN 2...
-
Page 17: Troubleshooting Guide
TROUBLESHOOTING GUIDE SYMPTOM POSSIBLE CAUSE POSSIBLE SOULTION No power AC/DC adapter not ● Connect the small size AC/DC Adapter to the DC IN Jack on connected the rear of Main Unit and AC wall outlet. ● Connect the big size AC/DC Adapter to the DC IN Jack on the rear of Main Unit and AC wall outlet. -
Page 18: General Specifications
GENERAL SPECIFICATIONS Power Source of the Main Unit............DC 12V, 2A Power Source of the Subwoofer............ DC 24V, 2.5A Power Source of the Remote Control..DC 3V, 1 x CR 2025 Button Cell (included) Radio Coverage.....................87.5-108 MHz Audio Power: Loud Speakers: ..................10 W ( RMS ) x 2 Subwoofer: .....................45 W ( RMS ) Total:..........................65 W Bluetooth Effective Range in Open Area............Up to 32 feet... - Page 19 Under no circumstance shall Craig be liable for any loss or consequential damage arising out of the use of this product. This warranty gives specific legal rights. However, you may have other rights which may vary from state to state.
Need help?
Do you have a question about the CHT978 and is the answer not in the manual?
Questions and answers
Need IR code to work with my Firestick remote