Table of Contents
Advertisement
Quick Links
Advertisement
Table of Contents

Subscribe to Our Youtube Channel
Related Manuals for Camec 042307 (19")


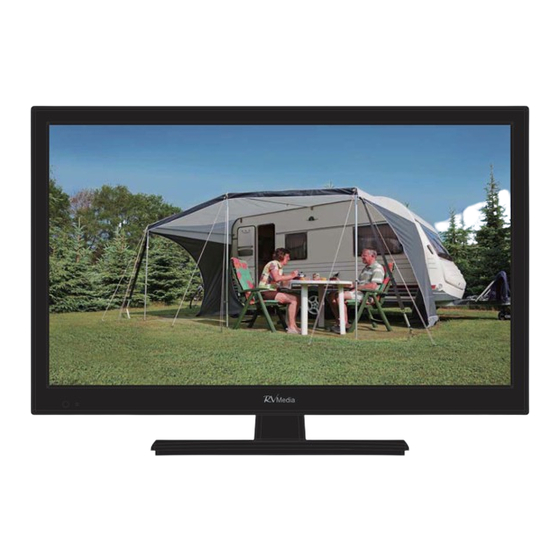
Summary of Contents for Camec 042307 (19")
- Page 4 Date: April 2014...
- Page 9 facing down, and attach the You can adjust the title angle of the TV between -3° and 10°. Adjust angle...
- Page 21 repeatedly SOURCE SOURCE turn...
-
Page 22: Picture Mode
Press the MENU button to display the main menu. Press Press button to select the option that you want to adjust in the PICTURE menu. Press button to adjust. previous menu. Picture Mode Press button to select Picture Mode, then press the OK button to enter sub-menu. Press button to select. -
Page 23: Colour Temp
Sharpness Press button to select Sharpness, then press button to adjust. Saturation Press button to select Saturation, then press button to adjust. Use to compensate for colour variations for NTSC (US colour system) playback. Colour Temp Press button to select Color Temperature, then press button to select. - Page 24 Advanced Settings Noise Reduction can be used to reduce film grain, compression artefacts, pixellation etc. Dynamic Contrast increases the ratio of blacks & whites in the picture. These three functions do not normally need to be adjusted regularly but can be adjusted to suit user tastes.
-
Page 25: Sound Mode
Press the MENU button to display the main menu. Press Press button to select the option that you want to adjust in the SOUND menu. Press button to adjust. previous menu. Sound Mode Press button to select Sound Mode, then press the OK button to enter sub-menu. Press button to select. - Page 26 Balance Press button to select Balance, then press the OK button to enter sub-menu. Press Press button to adjust. Surround Sound Press button to select Surround Sound, then press EQ Setting Press button to select EQ Setting, then press the OK button to enter sub-menu. AVL (Auto Volume Level) Press button to select AVL, then press Press...
- Page 27 Audio Description (Closed Captions) Press button to select Audio Description, then press button to select. Sound Type Press button to select Sound Type, then press button to select sound type options (Available sound types: Stereo, Dual I, Dual II, Mixed).
- Page 28 Press the MENU button to display the main menu. Press Press button to select the option that you want to adjust in the CHANNEL menu. Press button to adjust. previous menu. Auto Scan Press button to select Auto Scan, then press the OK button to enter sub-menu. (The default password is 0000)
-
Page 29: Manual Scan
Manual Scan Press button to select Manual Scan, then press the OK button to enter submenu. Digital Digital Manual Scan Press / button to select Digital Manual Scan, then press the OK button to enter submenu. - Page 30 Analog Manual Scan Press button to select Analog Manual Scan, then press the OK button to enter submenu.
-
Page 31: Channel Edit
Channel Edit Press button to select Channel Edit, then press the OK button to enter submenu. The three colored keys are the shortcut keys for programming the channel list. First press to highlight the channel you want to delete or move or skip, then: Press the button to delete the channel. -
Page 32: Signal Information
Signal Information Press button to select Signal Information, then press the OK button to select the detailed information about the signal. Only available when there is a DTVsignal. -
Page 33: Enable Password
Press the MENU button to display the main menu. Press Press button to select the option that you want to adjust in the LOCK menu. (Default Password: 0000) Press button to adjust. previous menu. Enter Password Press button to select Enter Password, then press the OK button to make the following 4 Enable (Password) Press... -
Page 34: Hotel Mode
Hotel Mode Hotel Mode is a handy feature for use in shop displays or in situations where you want to lock certain functions - for instance lock the TV to a default source (for example USB). Press button to select Hotel Mode, then press the OK button to enter submenu. New Password Press button to select New Password, then enter a 4 digit number you want to set as... -
Page 35: Osd Language
Press the MENU button to display the main menu. Press button to select SETUP in the main menu, the first option will be highlighted. Setup OSD Language Press button to select OSD Language, then press the OK button to enter the submenu. Press button to select OSD language. -
Page 36: Time Setting
Subtitle Press button to select Subtitle, then press the OK button to enter submenu. Teletext Adjust Teletext settings. Only available in DTV and ATV sources. button to select Teletext, then press the OK button to enter submenu. Press In DTV source, press button to select Digital Teletext Language. - Page 37 HDMI CEC Control Press button to select HDMI CEC Control, then press the OK button to enter submenu. HDMI CEC Control Press button to select HDMI CEC Control, then press button to select ON to make the following 3 options valid. ARC (Audio Return Channel) Press button to select ARC, then press...
-
Page 38: Software Update (Usb)
PVR Setting Press button to select PVR SETTING, then press the OK button to enter submenu. It will check the USB. First Time Setup Press button to select First Time Setup, then press OK button to enter. (Default Password is 0000). Reset Press button to select Reset,... - Page 39 The EPG lets you access information on the broadcast programs on screen (eg schedules, programmes, content descriptions etc.) as well as schedule recordings and reminders. Press the EPG button on the remote control to display the following interface. Press the BLUE button to schedule a reminder for the selected programme on the programme list.
- Page 40 USB Device Setup Before you use the Recording and Timeshift functions, please insert a USB device in to the port at the rear of the TV and format it as per below. IMPORTANT: The setup will format the USB device, therefore all the data stored in the device will be lost.
- Page 41 Timeshift Using Timeshift function you will be able to pause a live broadcast and move backwards and forwards in the TV transmission. To start the Timeshift function press the PLAY/PAUSE button on the remote control. The depend on the quality of the broadcasting and the free space on the USB device. Press the PLAY button to start viewing the programme from the point it was paused, and use the remote keys assigned to the playback mode to perform play functions such as fast forward, rewind, pause, etc.
- Page 42 Instant Recording By using the Recording function, you can record programmes from the DTV (Digital TV) input source. To start the Recording function press REC button on the remote control and the unit will start recording the current programme. The following information will be displayed at the left upper side of the screen: In this interface, the time already recorded and the total recording time available on the USB disk are displayed.
- Page 43 Playlist Press the MENU button to access the PVR SETTINGS menu in the SETUP submenu, from this menu you may play the recorded TV programs, as well as access the scheduled recordings list. Press buttons to choose the File Manager and press OK to access. Follow the on-screen instructions to play the TV programs stored.
-
Page 44: Atv / Hdmi / Av / Ypbpr / Pc
ATV / HDMI / AV / YPbPr / PC PC Settings in the PICTURE menu can be adjusted when the PC Source is selected. The Screen Mode in the PICTURE menu and HDMI CEC Control section of the Setup menu is available when the HDMI Source is selected only. Audio Description and Sound Type settings in the Audio Menu are available only when the DTV source is selected. - Page 45 Before selecting the USB menu, plug in the USB device, then press the SOURCE button to set the input source to USB. Press button to select the USB in the Source menu, then press the OK button to enter. Press button to select the option you want to adjust in the main USB menu, then press the OK button to enter.
- Page 46 Music Press button to select MUSIC in the main menu, then press the OK button to enter. Press button to select drive disk you want to watch, then press the OK button to enter. Press Press the Exit button to go back to the previous menu. When highlighting the option you select, the file information will appear on the right.
- Page 47 Text Press button to select TEXT in the main menu, then press OK button to enter. Press button to select drive disk you want to watch, then press OK button to enter. Press When highlighting the option you select, the file information will appear on the right.
Need help?
Do you have a question about the 042307 (19") and is the answer not in the manual?
Questions and answers